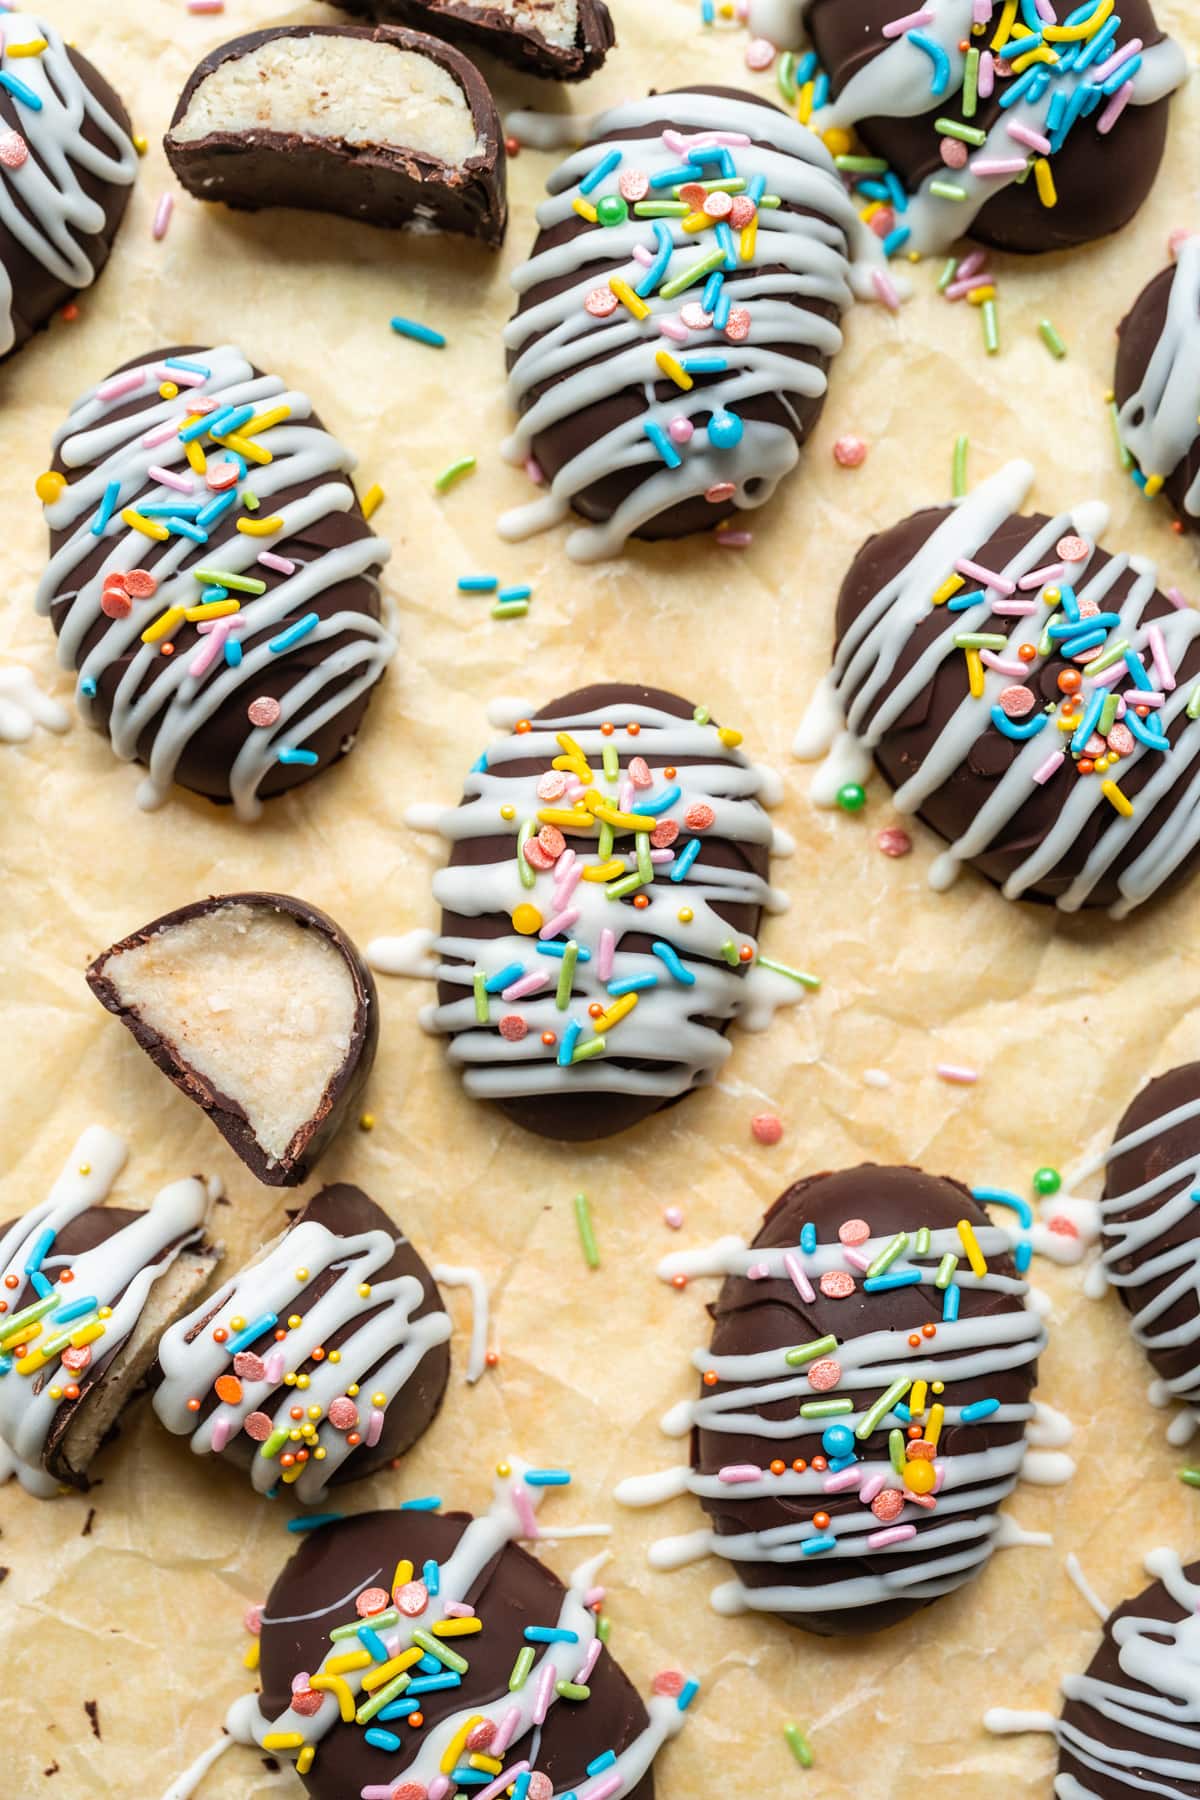
You'll definitely want to add these festive, delicious Vegan Coconut Easter Eggs to your menu this year. The soft, coco-nutty filling is made with just a few simple ingredients and coated in dark chocolate, so they're the perfect mix of kid and adult friendly!
Why We Love This Recipe
- Coconut + chocolate: Theses vegan Easter eggs are perfectly coco-nutty, rich, sweet and coated in luscious dark chocolate for the perfect bite. They're absolutely delicious (and totally better than anything store-bought!).
- Easy to make: These vegan coconut Easter eggs come together in just a few steps. Plus, you don't need a special mold to make them (even though that's what we used) – it's easy to form the mixture with just your hands!
- Fun and festive: These make an adorable addition to your vegan Easter menu, alongside other favorites like carrot cake, homemade carrot "lox", these pretty pastel-colored hummus variations, asparagus tart and so much more.
- Better-for-you candy option: While these coconut Easter eggs taste 100% decadent, they're actually pretty dang nutritious. Key ingredients include cashews and coconut flakes, along with coconut oil and dark chocolate for a homemade candy that's lower in sugar without sacrificing taste.
Ingredients
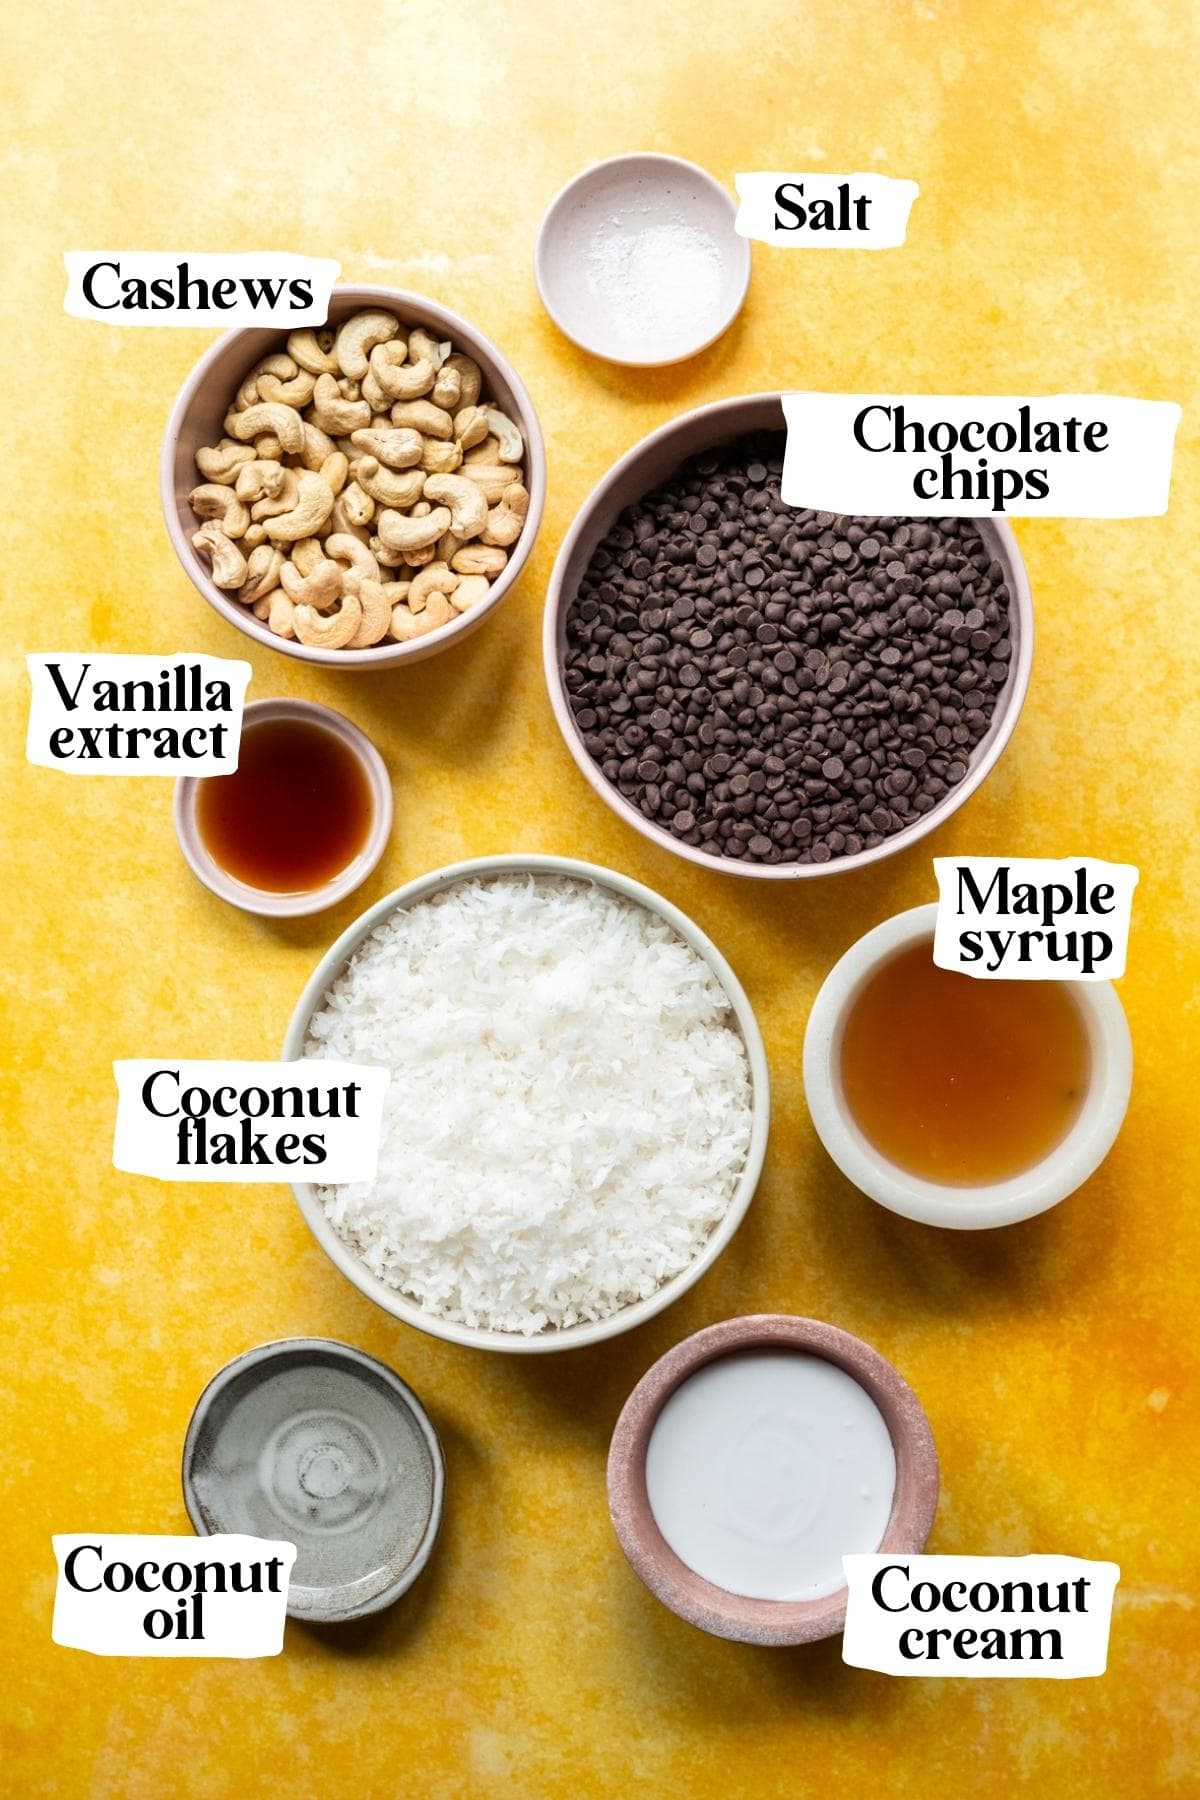
Here are the key ingredients you'll need for these Vegan Coconut Easter Eggs:
Ingredient Notes
- Coconut flakes: We've made this recipe both with sweetened and unsweetened coconut flakes. We personally prefer the sweetened option (especially since this is an Easter treat!), but they still taste perfectly delicious with unsweetened coconut. Be sure to look for shredded or desiccated coconut, not coconut flakes, which are much larger and won't blend as well.
- Coconut cream: This is the stuff that comes in a can, not a carton. You can typically find it near Asian grocery ingredients. We use the full fat version.
- Cashews: Be sure to use raw, unsalted cashews in this recipe.
- Maple syrup: You can also use agave syrup.
- Chocolate: We used semisweet chocolate chips, but dark chocolate is also great. You can also use chopped chocolate bar instead of chocolate chips.
How to make Coconut Easter Eggs
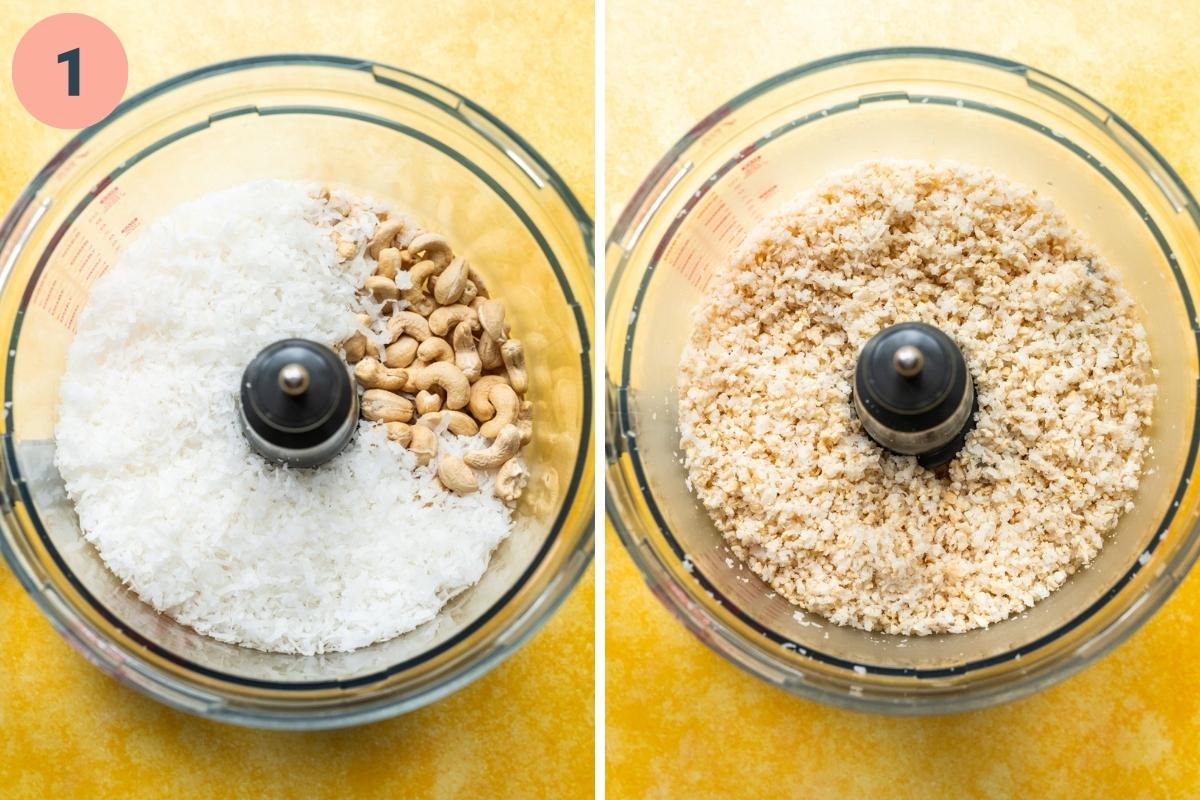
(1) In a food processor, pulse cashews and coconut for 10 seconds.
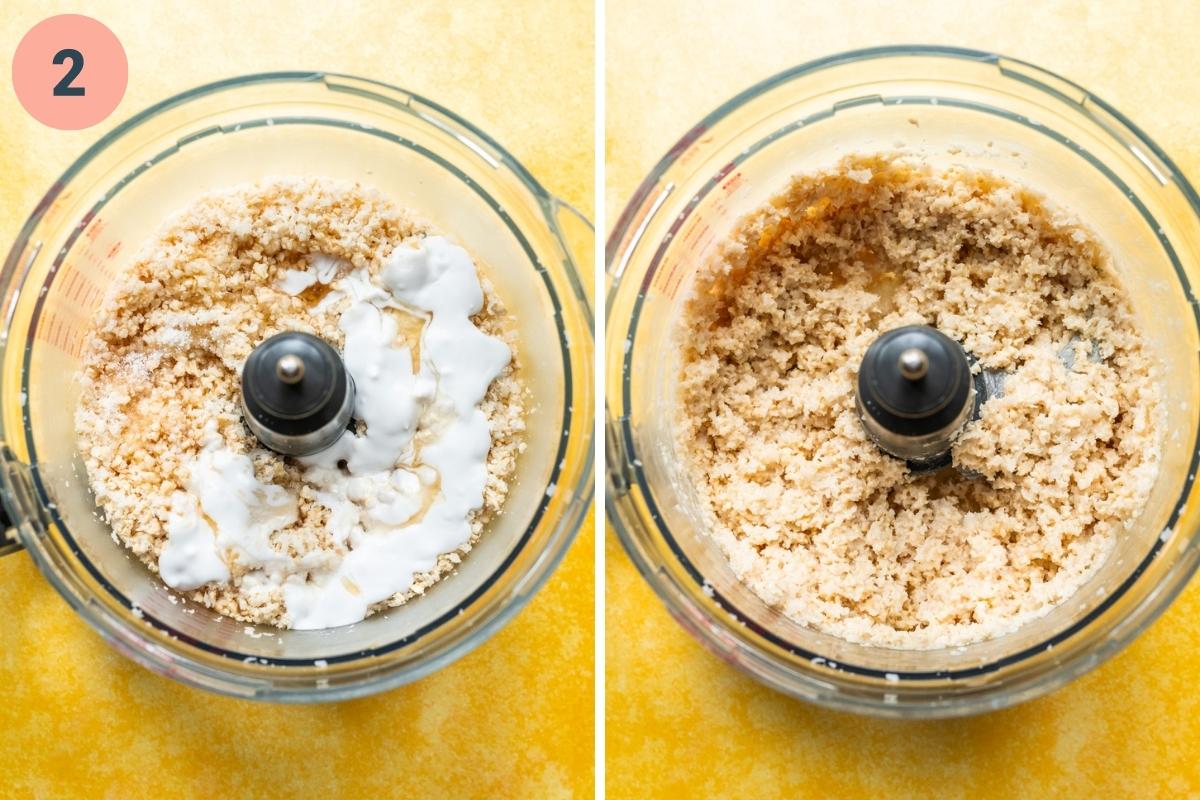
(2) Add coconut cream, agave, coconut oil, vanilla and salt and continue processing until a dough forms. You should be able to pinch between your fingers without it crumbling.
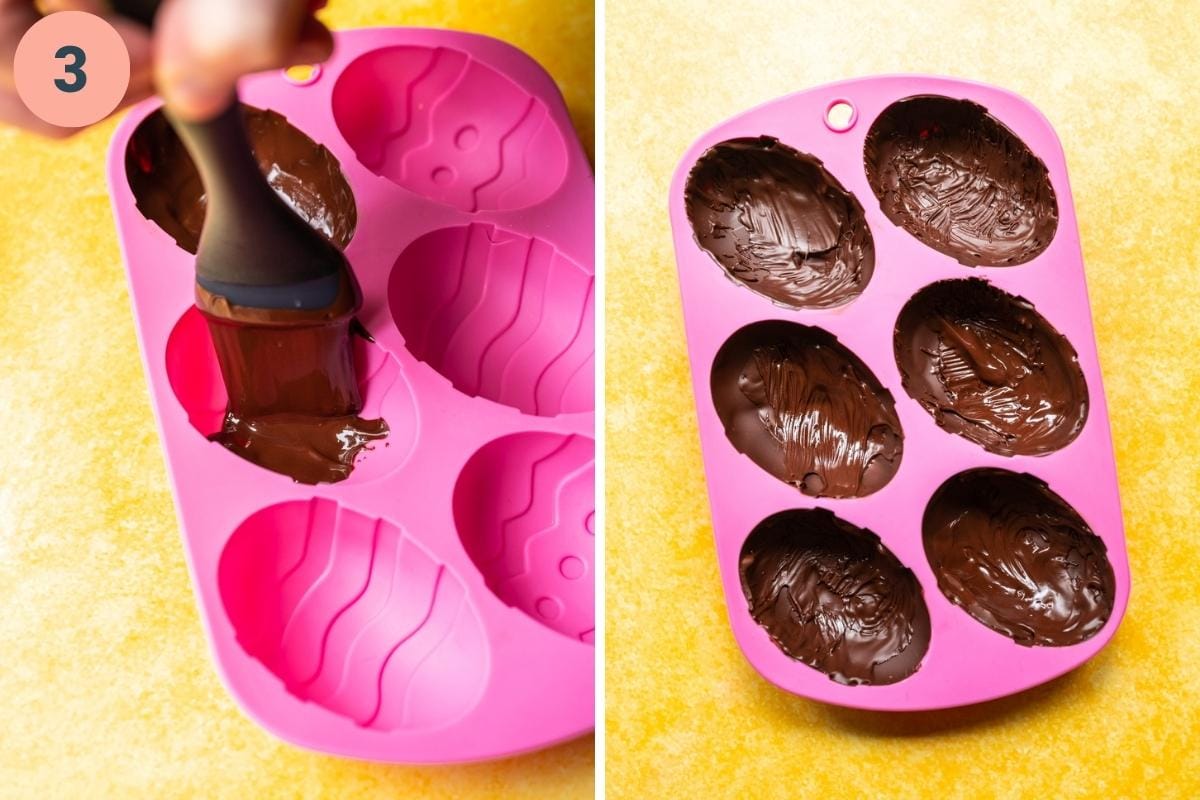
(3) If using egg-shaped mold: Brush the mold with an even layer of melted chocolate. Refrigerate for 5 minutes (until set).
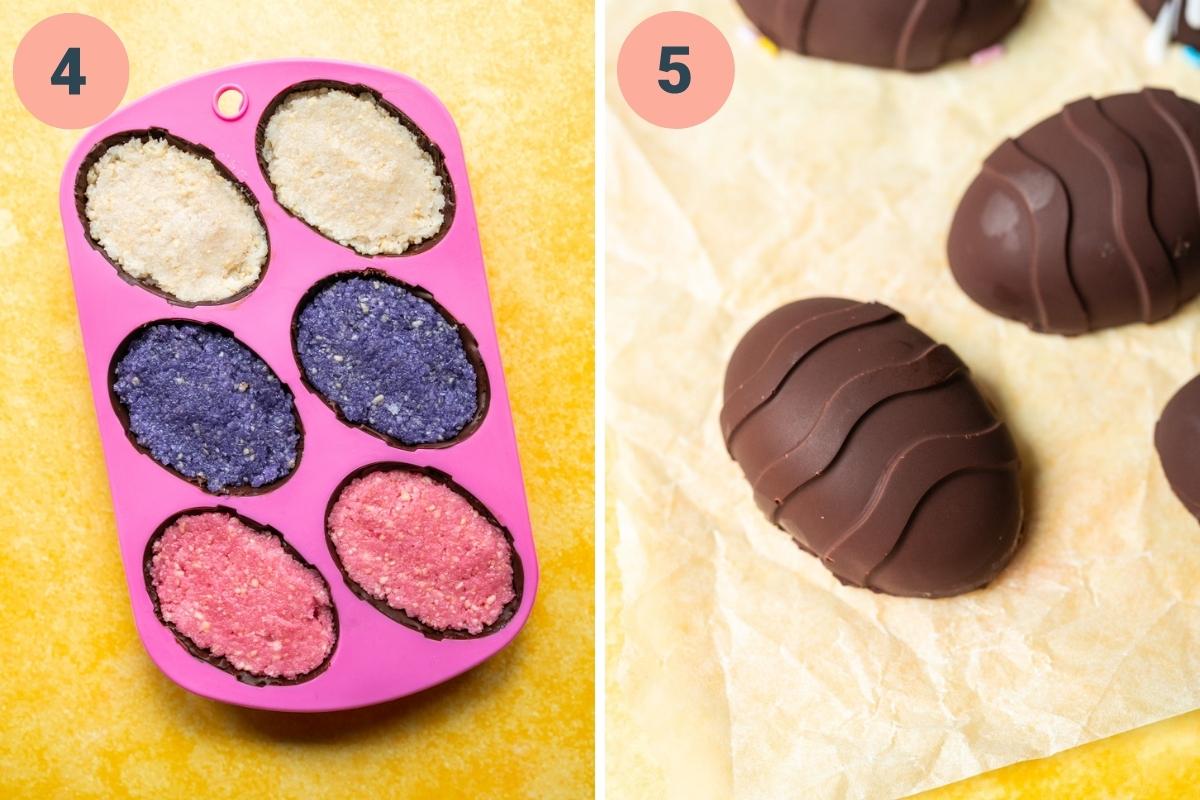
(4) Add in coconut filling almost to the top. Cover with more chocolate and refrigerate for at least 15 minutes, until completely set, then remove from mold and enjoy.
If not using mold: Refrigerate filling for about 20 minutes (or freeze for 10). Using a cookie scoop, portion out filling into evenly-sized balls (about 2 tablespoon each). Using your hands, form the filling into oval egg shape. Place on parchment paper-lined baking sheet and refrigerate or freeze for 15-20 minutes.
Meanwhile, melt the chocolate. Microwave in 30 second intervals, stirring well between each interval. Stir in coconut oil.
Using a fork, dip each egg in chocolate. Let excess chocolate drip off, then transfer back to parchment paper.
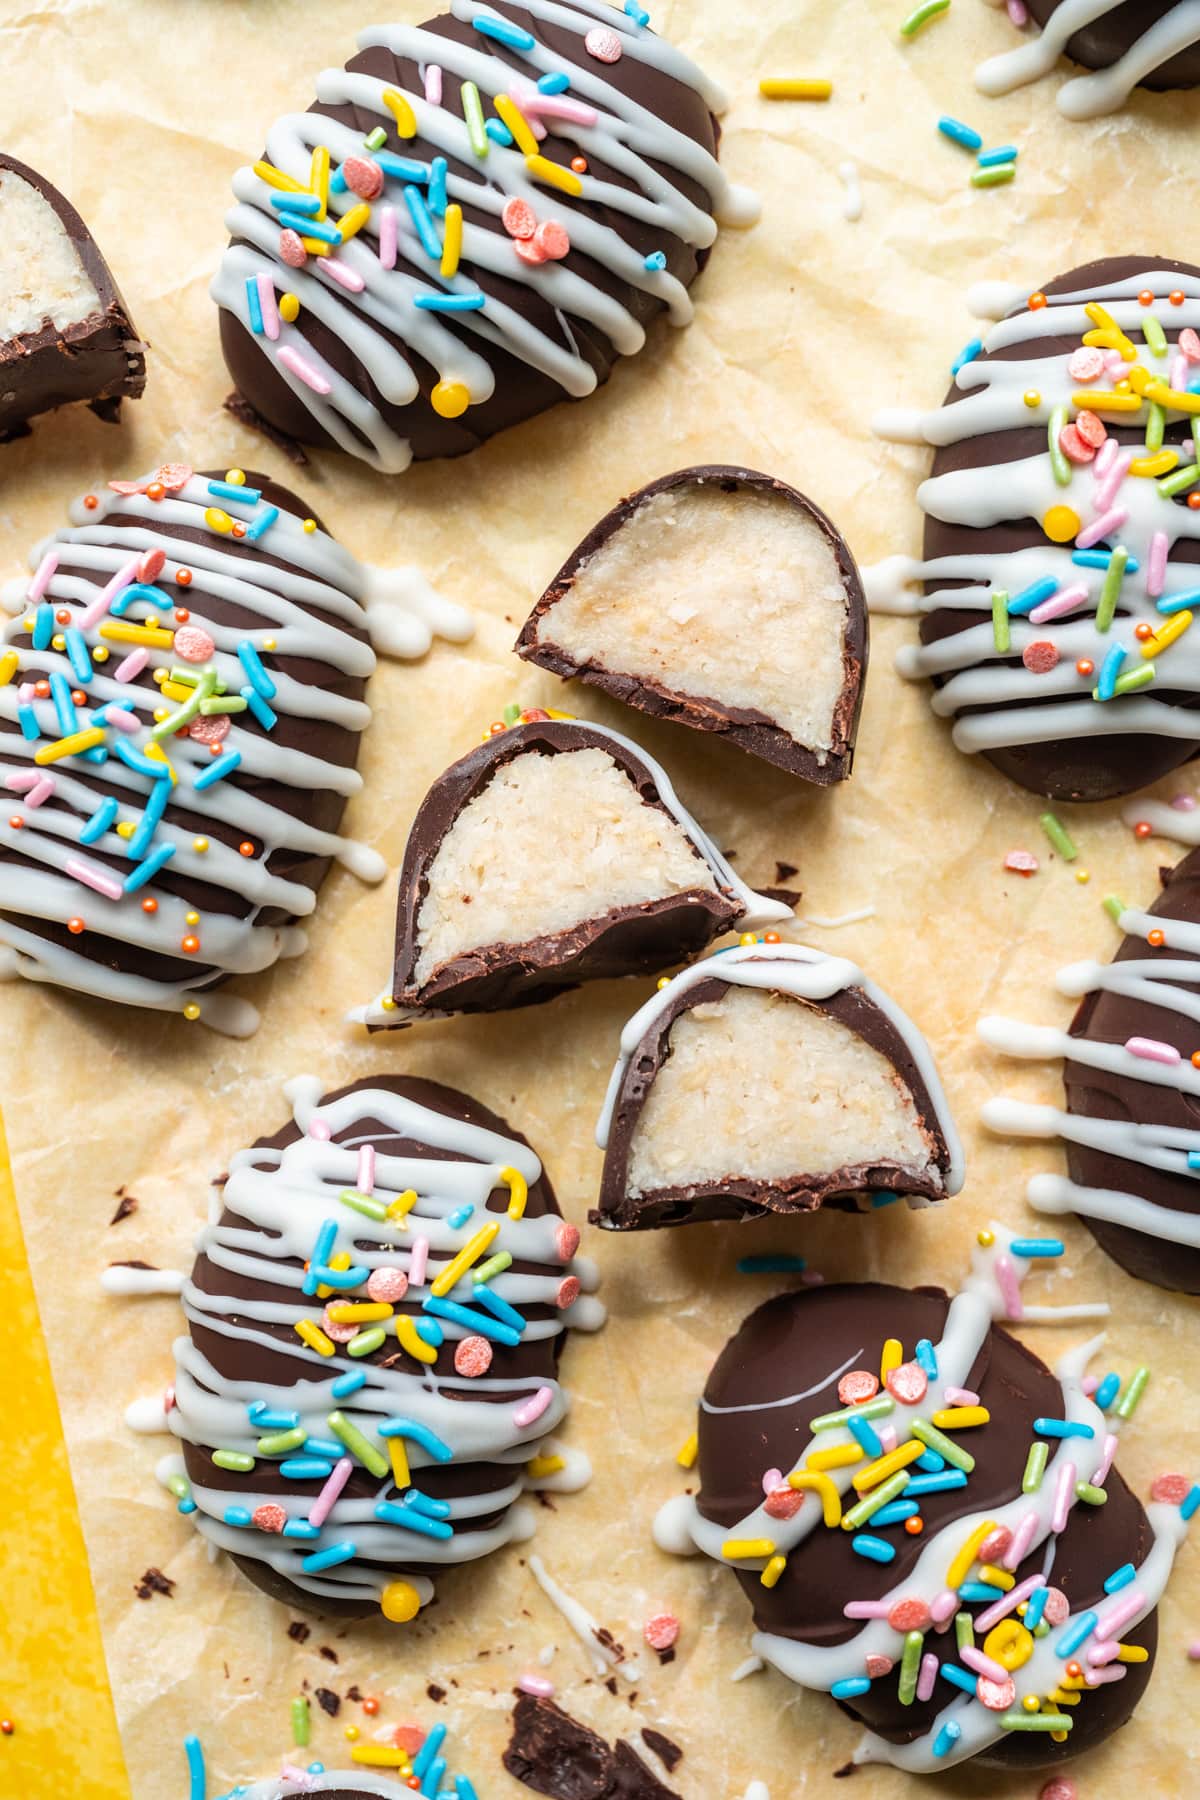
Optional: top each egg with melted white chocolate and sprinkles.
Expert Tips and FAQs
- You don't need a special mold to make this recipe! Yes, it's certainly easier (and much neater) with one, but it's not too much extra work to make them by hand.
- Chocolate mold: That being said, we used this fun Easter egg mold. Any oval chocolate mold will work. You can even use another shape if preferred – it will still taste delicious!
- Let the filling chill before shaping: If you're not using a chocolate mold, it's best to let the coconut filling chill for about 15 minutes before shaping. It's pretty soft at room temperature, so it's difficult to form into an egg shape. After shaping, you can even pop them in the freezer for a few minutes to make it easier to coat them in chocolate.
- Natural food coloring for the filling: To make these vegan coconut easter eggs extra fun and festive, we love adding some natural food coloring to some of the filling. To do so, divide the filling in half (or third) and add a few drops of natural food coloring before pulsing again in the food processor. We love using pitaya powder for pink – it's all natural and tastes amazing! Matcha would be perfect for a springy green.
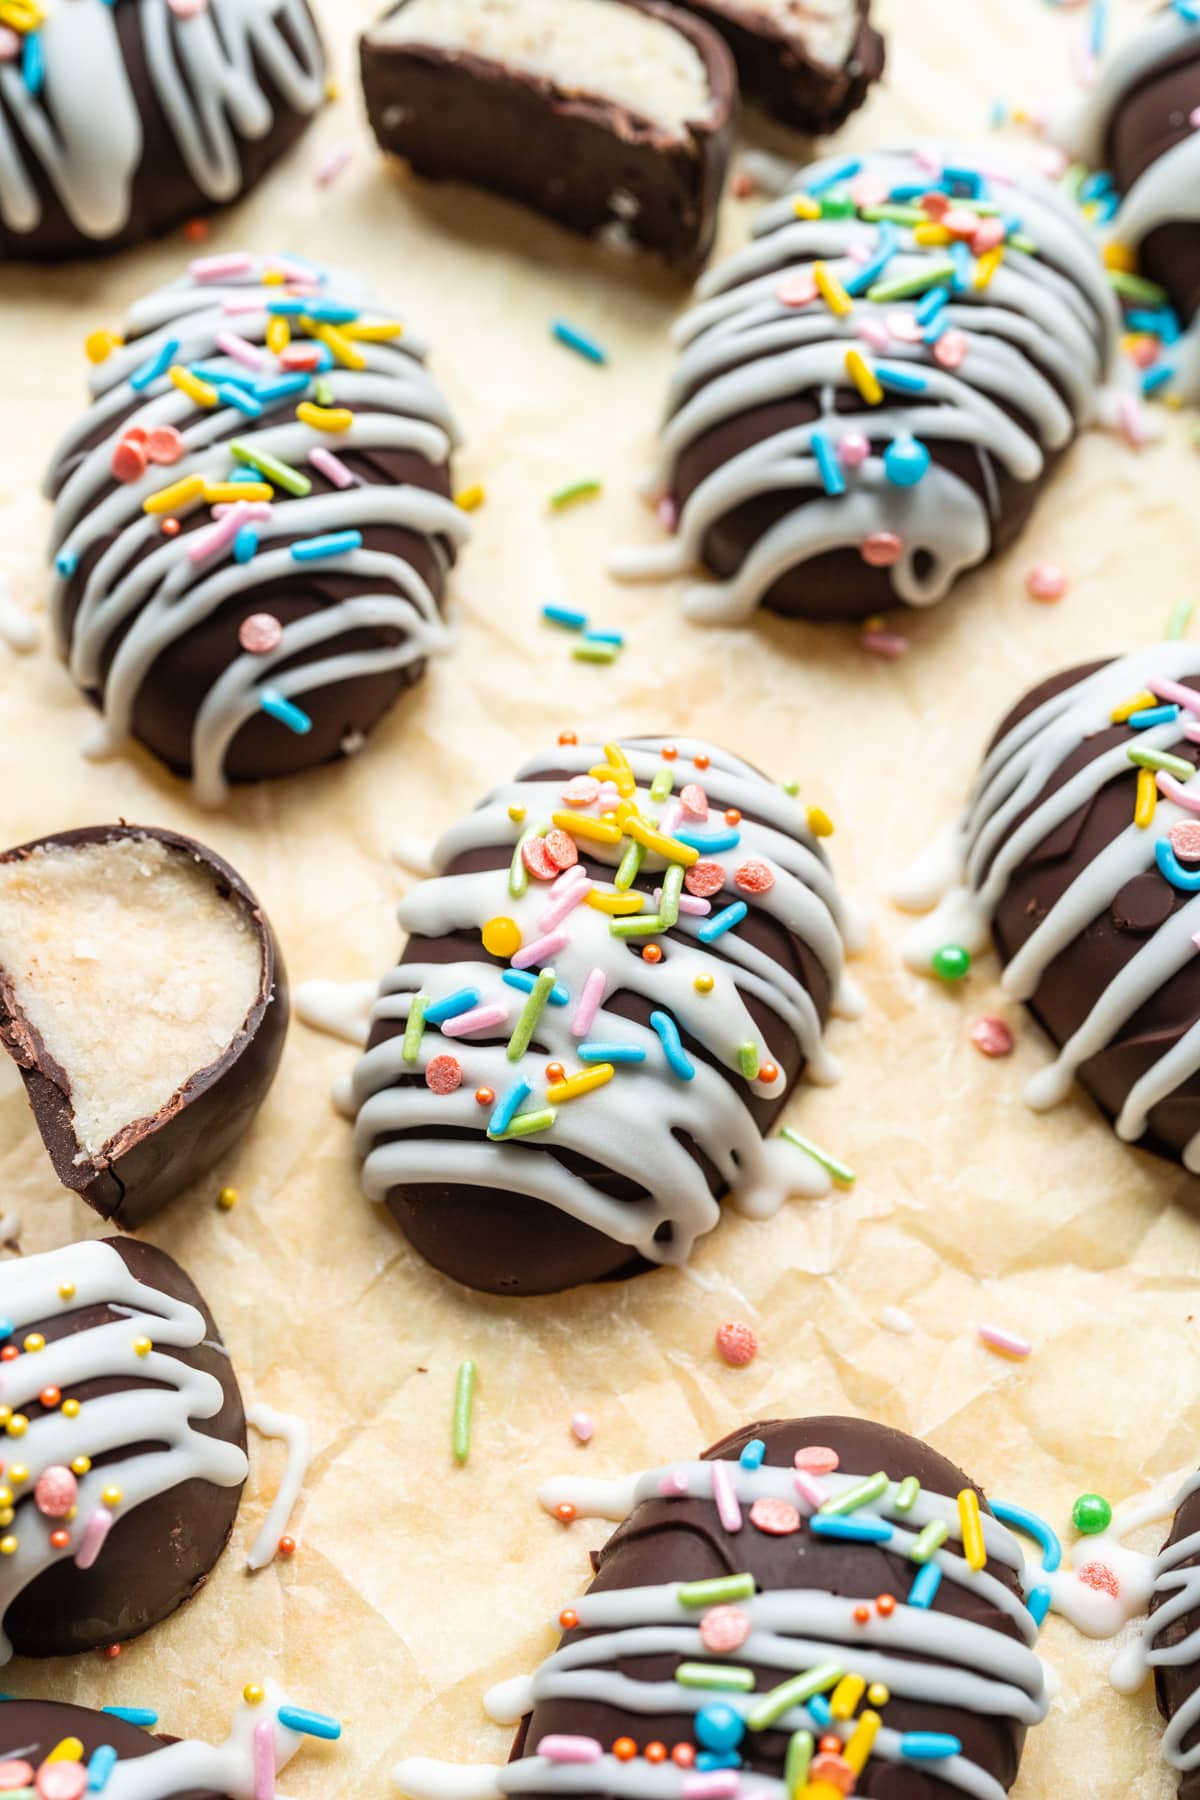
- Toppings: For color contrast, we like to drizzle the eggs with vegan white chocolate, then top off with pastel sprinkles. Love these spring-themed ones from Fancy Sprinkles (the best sprinkles out there, IMO!).
- Storage: Store in an airtight container in the fridge with each layer separated by parchment paper. They keep very well in the refrigerator for up to a week. You can keep them at room temperature for a few hours, but any longer and they will get pretty messy.
- Freezer storage: Alternatively, you can store in the freezer for up 2-3 months. Just be sure to separate each layer with parchment paper so they don't stick!
Related Recipes
Tried this recipe? Please leave a star ⭐️⭐️⭐️⭐️⭐️ rating below and/or a review in the comments section further down the page. You can also stay in touch with us through social media by following us on Instagram, Pinterest, and Facebook or by subscribing to our newsletter.
Print📖 Recipe

Vegan Coconut Easter Eggs
- Total Time: 40 minutes
- Yield: 12-15 eggs 1x
- Diet: Vegan
Description
You'll definitely want to add these festive, delicious Vegan Coconut Easter Eggs to your menu this year. The soft, coco-nutty filling is made with just a few simple ingredients and coated in dark chocolate, so they're the perfect mix of kid and adult friendly!
Ingredients
- 2 ½ cups sweetened coconut flakes
- 1 cup raw, unsalted cashews
- ¼ cup coconut cream (from a can)
- ¼ cup agave nectar or maple syrup
- 2 tablespoons melted coconut oil
- 1 tablespoon vanilla extract
- ¼ teaspoon salt
- 12 ounces semisweet or dark chocolate, melted
- 1 teaspoon coconut oil
- Optional: vegan white chocolate + sprinkles for topping
Instructions
- In a food processor, pulse cashews and coconut for 10 seconds. Add coconut cream, agave, coconut oil, vanilla and salt and continue processing until a dough forms. You should be able to pinch between your fingers without it crumbling.
- If using egg-shaped mold: Brush the mold with an even layer of melted chocolate. Refrigerate for 5 minutes (until set), then add in coconut filling almost to the top. Cover with more chocolate and refrigerate for at least 15 minutes, until completely set, then remove from mold and enjoy.
- If not using mold: Refrigerate filling for about 20 minutes (or freeze for 10). Using a cookie scoop, portion out filling into evenly-sized balls (about 2 tablespoon each). Using your hands, form the filling into oval egg shape. Place on parchment paper-lined baking sheet and refrigerate or freeze for 15-20 minutes.
- Meanwhile, melt the chocolate. Microwave in 30 second intervals, stirring well between each interval. Stir in coconut oil.
- Using a fork, dip each egg in chocolate. Let excess chocolate drip off, then transfer back to parchment paper.
- Optional: top each egg with melted white chocolate and sprinkles.
Notes
Coconut flakes: We've made this recipe both with sweetened and unsweetened coconut flakes. We personally prefer the sweetened option, but they still taste perfectly delicious with unsweetened coconut. Be sure to look for shredded or desiccated coconut, not coconut flakes, which are much larger and won't blend as well.
You don't need a special mold to make this recipe! Yes, it's certainly easier (and much neater) with one, but it's not too much extra work to make them by hand.
Let the filling chill before shaping: If you're not using a chocolate mold, it's best to let the coconut filling chill for about 15 minutes before shaping. It's pretty soft at room temperature, so it's difficult to form into an egg shape. After shaping, you can even pop them in the freezer for a few minutes to make it easier to coat them in chocolate.
Storage: Store in an airtight container in the fridge with each layer separated by parchment paper. They keep very well in the refrigerator for up to a week. You can keep them at room temperature for a few hours, but any longer and they will get pretty messy.
Freezer storage: Alternatively, you can store in the freezer for up 2-3 months. Just be sure to separate each layer with parchment paper so they don't stick!
- Prep Time: 20 minutes
- Cook Time: 20 minutes
- Category: Dessert
- Method: Freezer
- Cuisine: American
Nutrition
- Serving Size:
- Calories: 378
- Sugar: 22.7 g
- Sodium: 105.4 mg
- Fat: 25.7 g
- Carbohydrates: 31.5 g
- Fiber: 3.5 g
- Protein: 4.1 g




Comments
No Comments