
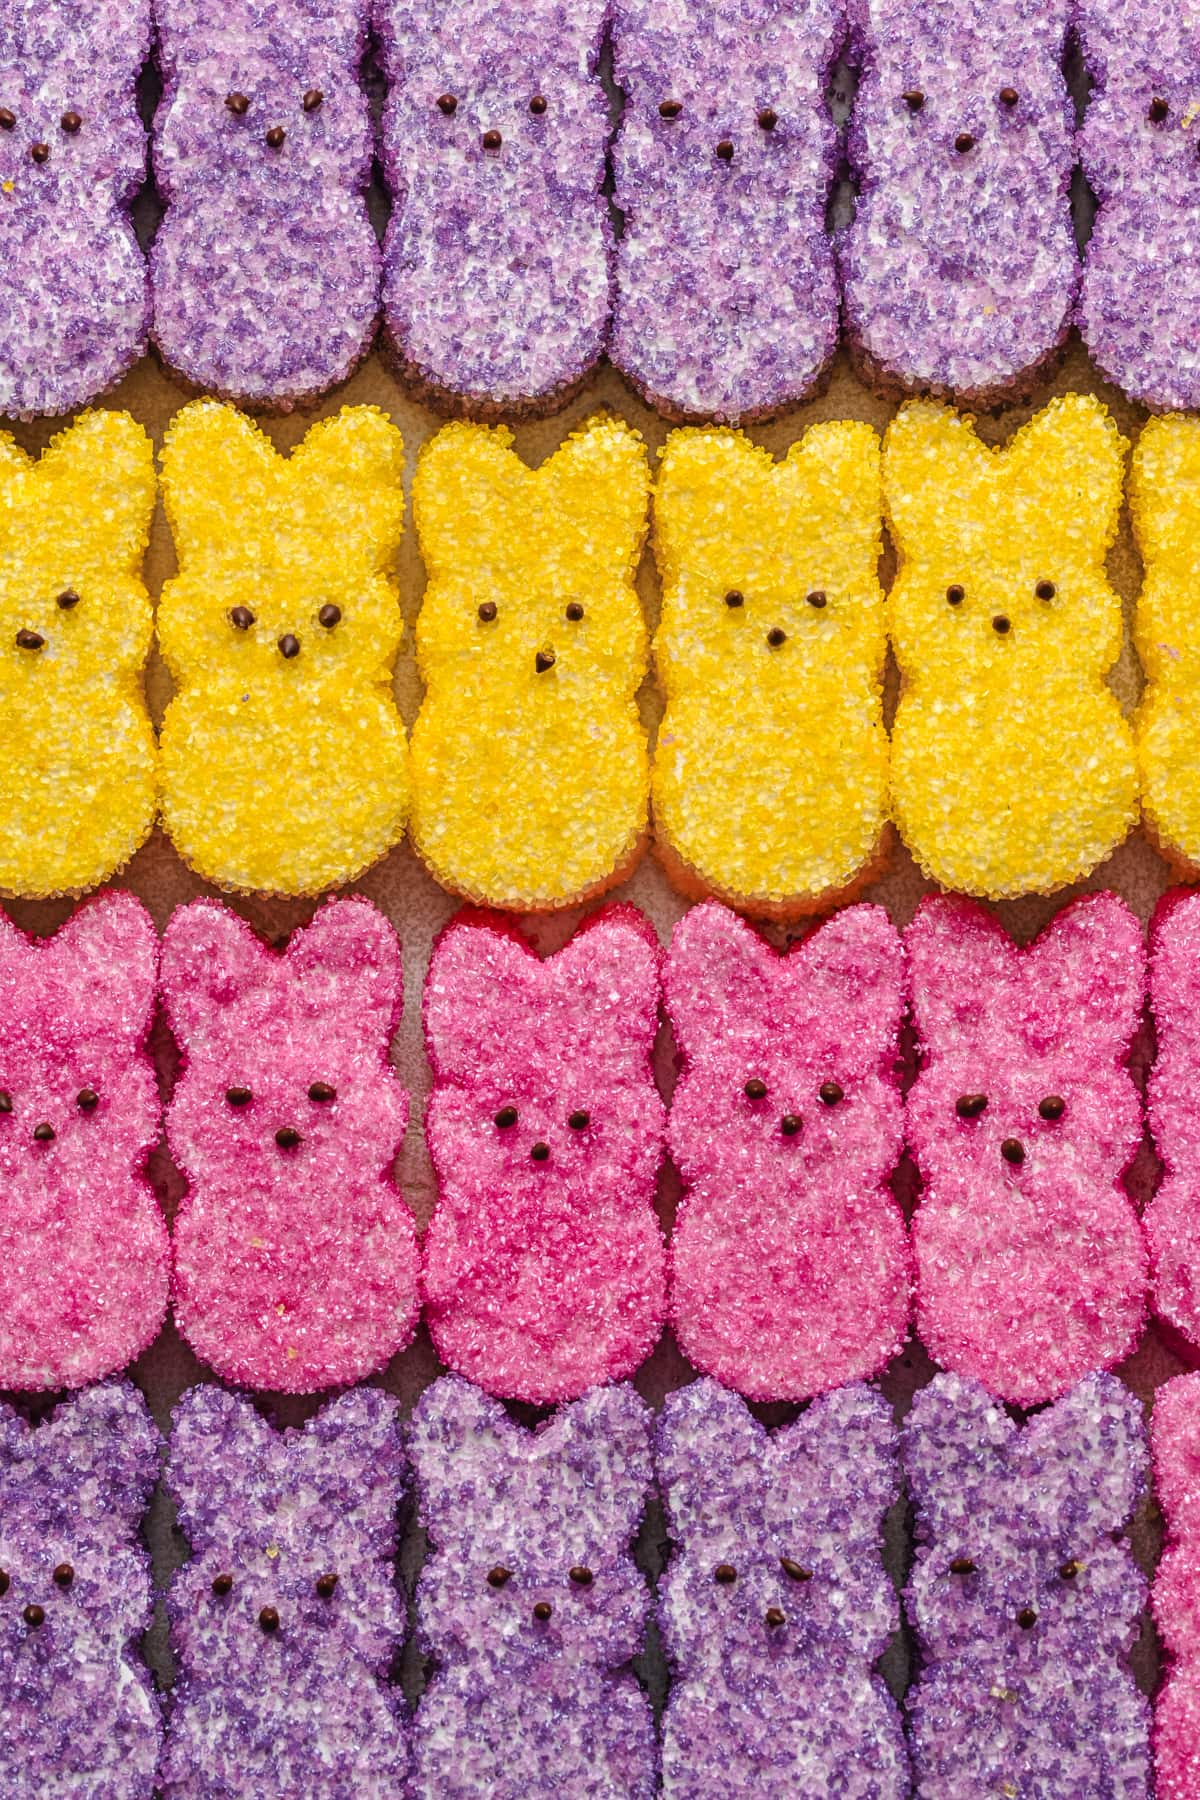
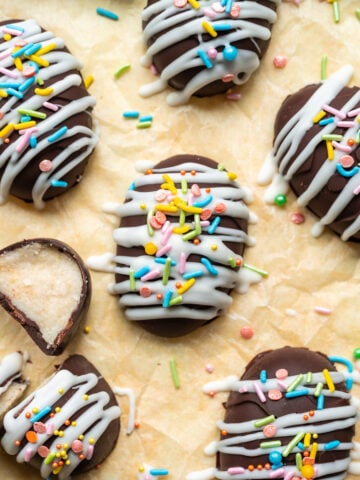
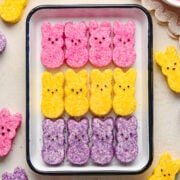
These homemade marshmallow bunny peeps are so cute, perfect for Easter, and taste SO much better than store bought! They're easy to make and 100% free from corn syrup and artificial dyes.
Disclosure: Some of the links below are affiliate links. This means that, at zero cost to you, I may earn an affiliate commission if you click through the link and finalize a purchase. Read our full affiliate disclosure here.
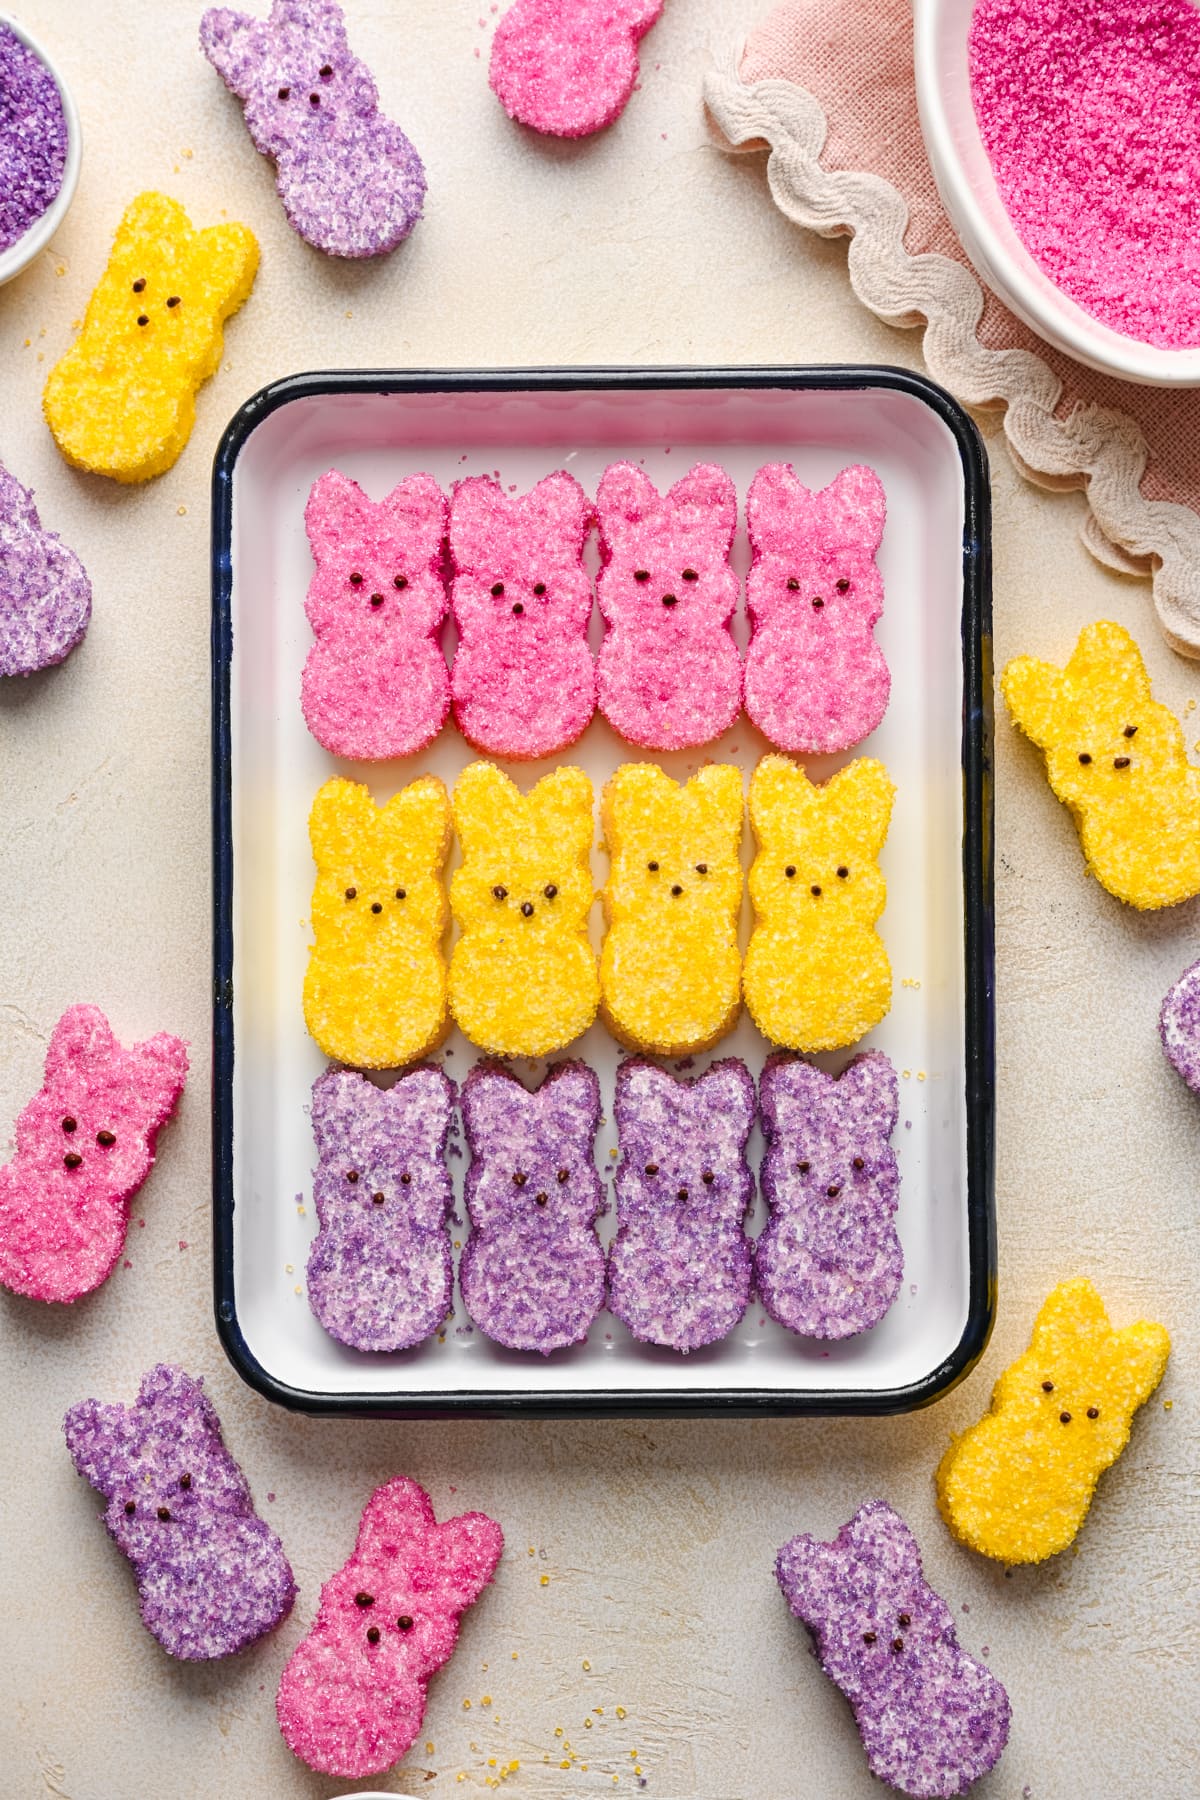
Peeps are an Easter staple, but they can be a bit lacking in the flavor and texture departments. With a little bit of effort and technique, you can make these homemade peeps that are incredibly cute and a perfect addition to any Easter basket.
Jump to:
Why We Love This Recipe
- Better than store bought: Making these at home results in a much better flavor and texture, so they're definitely better than store bought!
- Cute and colorful: These look adorable, and make the perfect DIY gift for Easter. Who wouldn't want a few of these in their Easter basket?
- No corn syrup or dyes: We used naturally colored sugar and honey, so these homemade peeps have no corn syrup or artificial dyes/flavors.
- Easy recipe: You only need 7 ingredients to make these homemade peeps, and as long as you closely follow the instructions, they're super easy to make! The only hard part is waiting a few hours for them to set. 😉
Ingredients
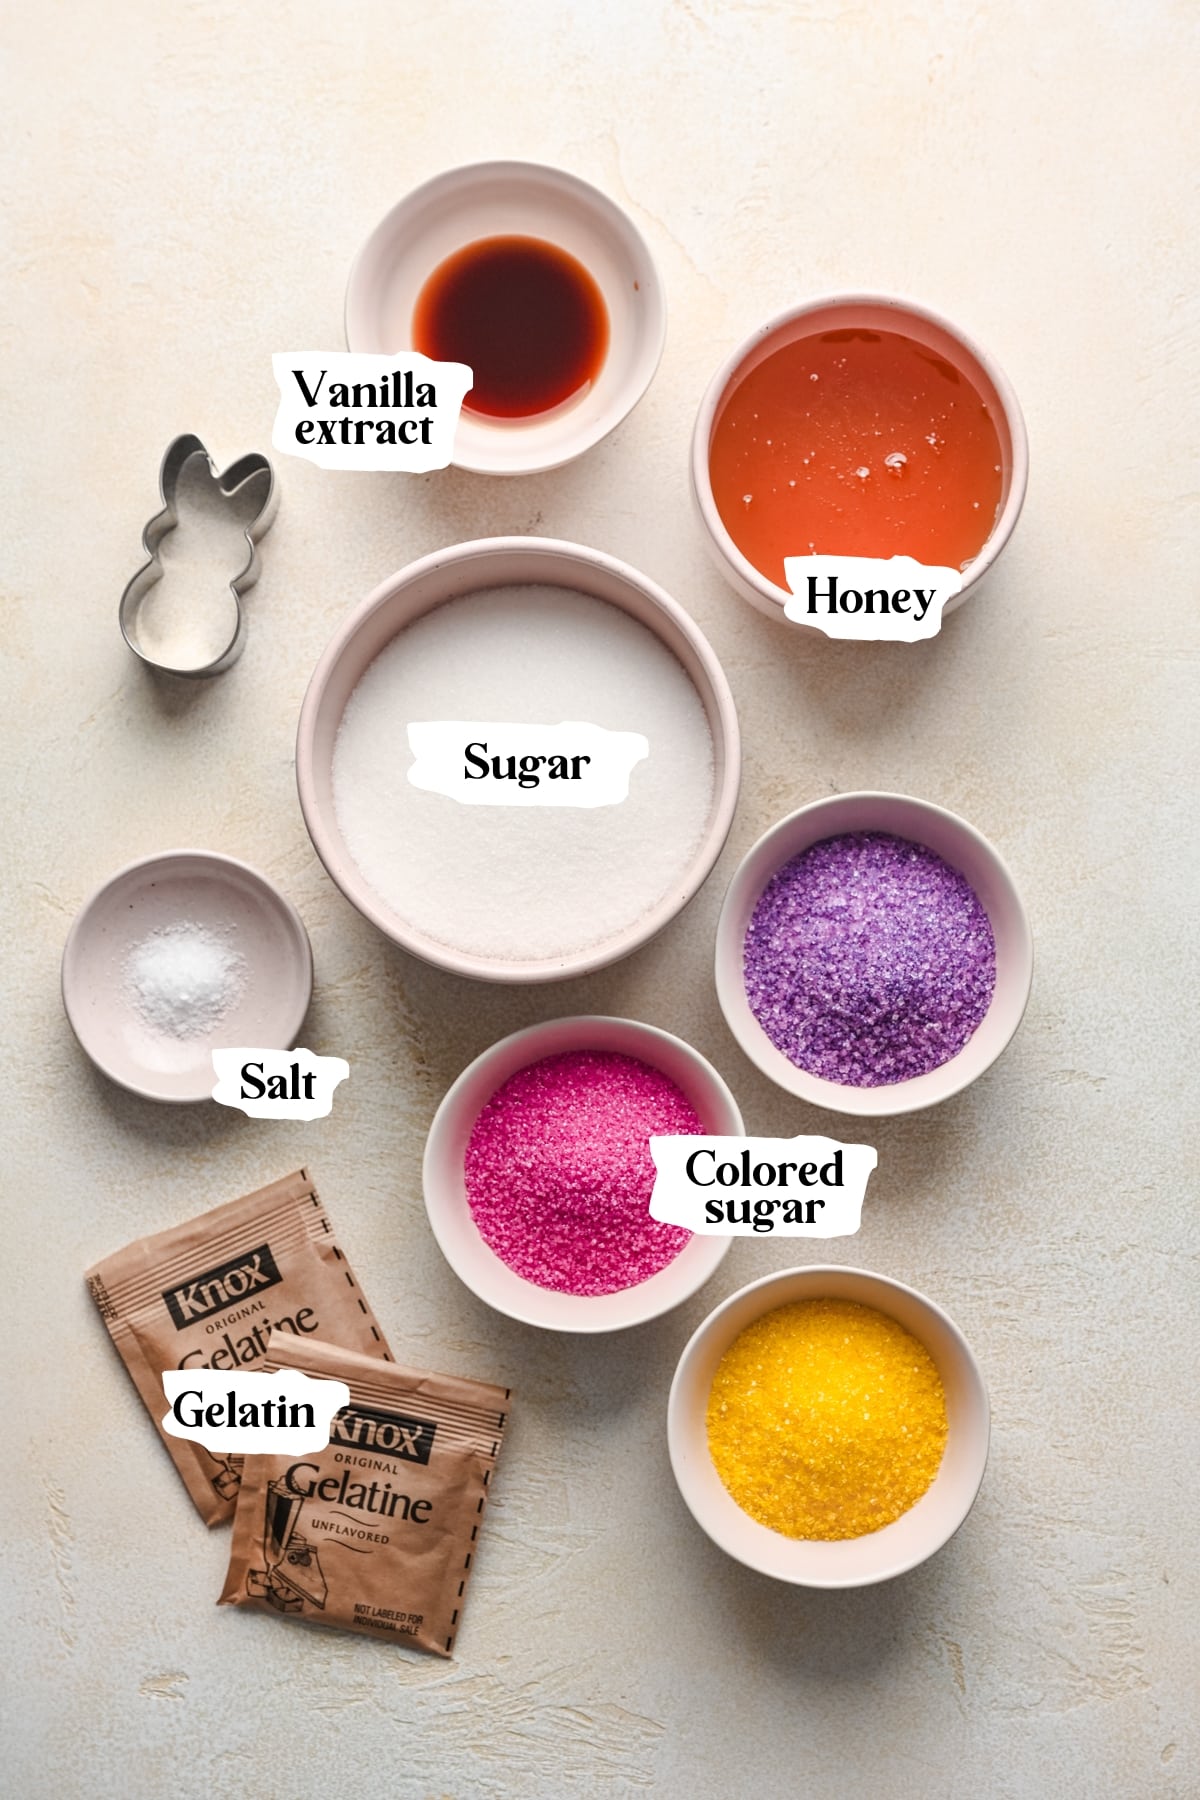
Here's what you'll need to make these homemade peeps:
Ingredient Notes
- Honey: We used honey in place of corn syrup, but this recipe also works with agave nectar. Note that if you use honey, these do have a strong honey flavor! We love the taste, but if you're not a huge fan of honey, agave will provide a much more neutral flavor.
- Gelatin: We tested this recipe with gelatin and agar agar, and we had a lot of trouble achieving the correct texture with the agar agar. Just note that gelatin is not a vegetarian ingredient. If you want to make these vegan, we suggest using a fully vegan marshmallow recipe.
- Colored sugar: These colored sugars we used are colored with natural ingredients, so these bunny peeps have no artificial dyes. If you can't find any naturally colored sugar, you can also use regular sugar and combine it with a few drops of natural food coloring.
Equipment
To make these cute homemade bunny peeps, you'll need the following equipment:
- Bunny cookie cutter: To get that perfect bunny shape, you'll need a cookie cutter.
- Candy thermometer: Since we need to heat the honey syrup to 240˚F, you'll need a thermometer to make sure your syrup hits the correct temperature.
- Stand mixer: It takes about 10 minutes of whipping to achieve the perfect marshmallow texture, a feat which would be really hard to pull off with a hand mixer or a whisk.
- Offset spatula: The flat edge will help you get a super smooth, even layer so your marshmallows look perfect!
Step-by-step Instructions
PREP: Spray a quarter baking sheet (~9x13 inch pan) with cooking spray, then line with parchment paper and lightly spray the parchment paper. Dust with 1 teaspoon powdered sugar and set aside. Grease a regular spatula and an offset spatula and set aside.
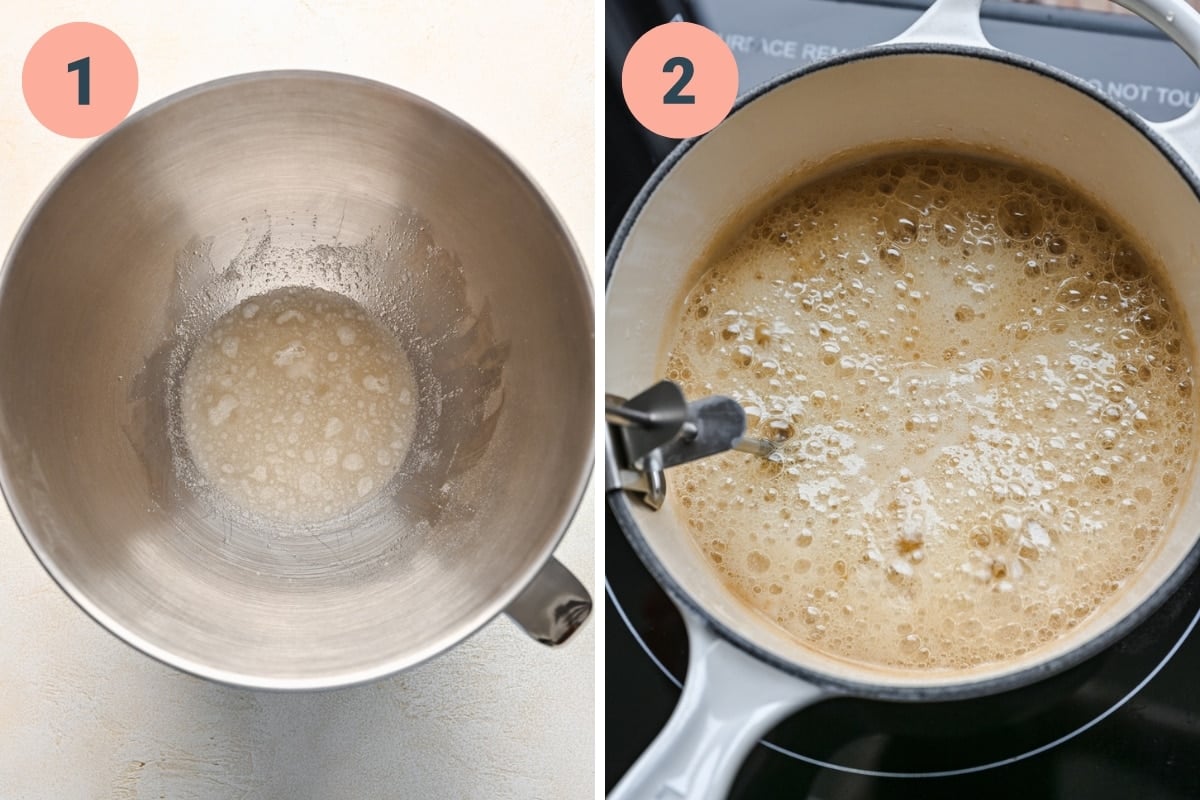
STEP 1: Add the gelatin to a stand mixer with ½ cup of cold water, stir gently and let sit to bloom for 10 minutes while you make the simple syrup.
STEP 2: Add the remaining ¼ cup of water, the sugar, and the honey to a small saucepan over medium heat. Stir the mixture constantly until the sugar dissolves, then stop stirring and clip a candy thermometer to the side of the pan. Cook without stirring until the thermometer reads 240°F.
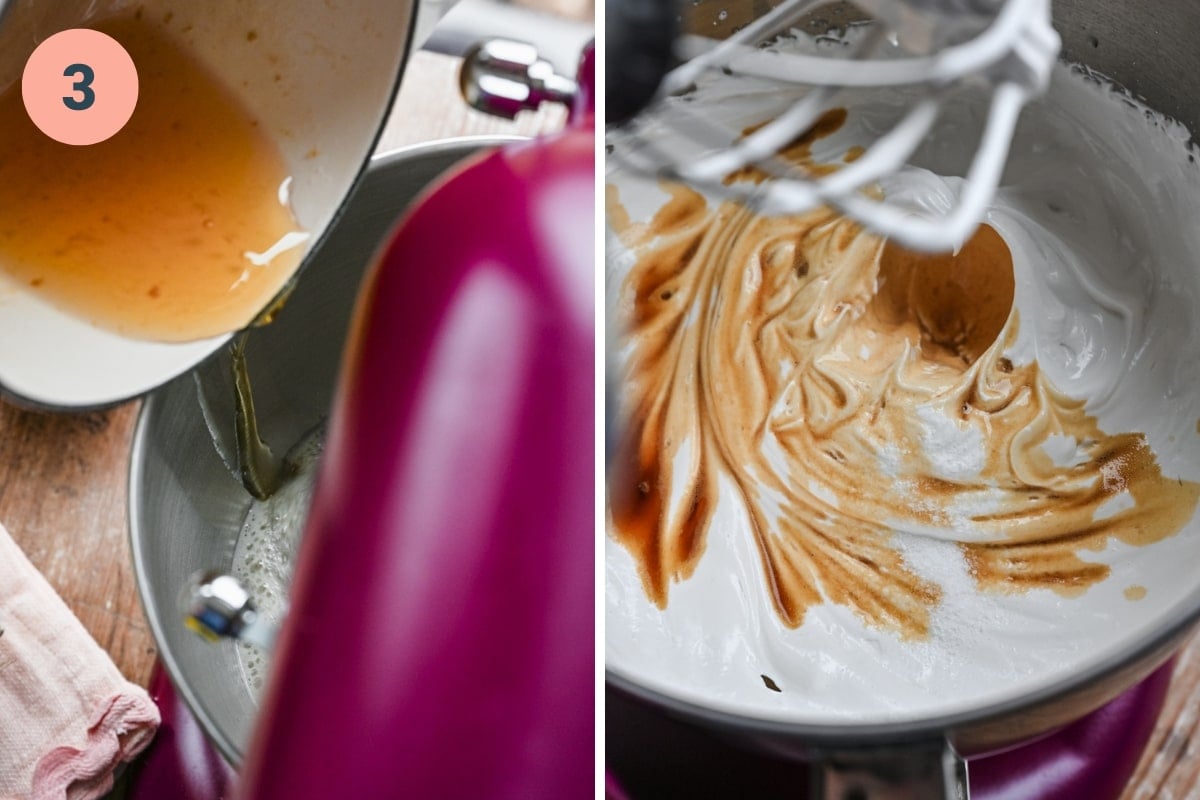
STEP 3: Remove from heat, let the bubbling subside for a few seconds, then turn the mixer on low speed while you carefully pour the sugar syrup into the gelatin, pouring the hot syrup down the side of the bowl to prevent scorching the gelatin. Beat on low for 1 minute, then increase speed to high and beat for ~10-12 minutes, until thick and fluffy. It should increase 3x in volume. Add in vanilla and salt and continue mixing for 2 minutes.
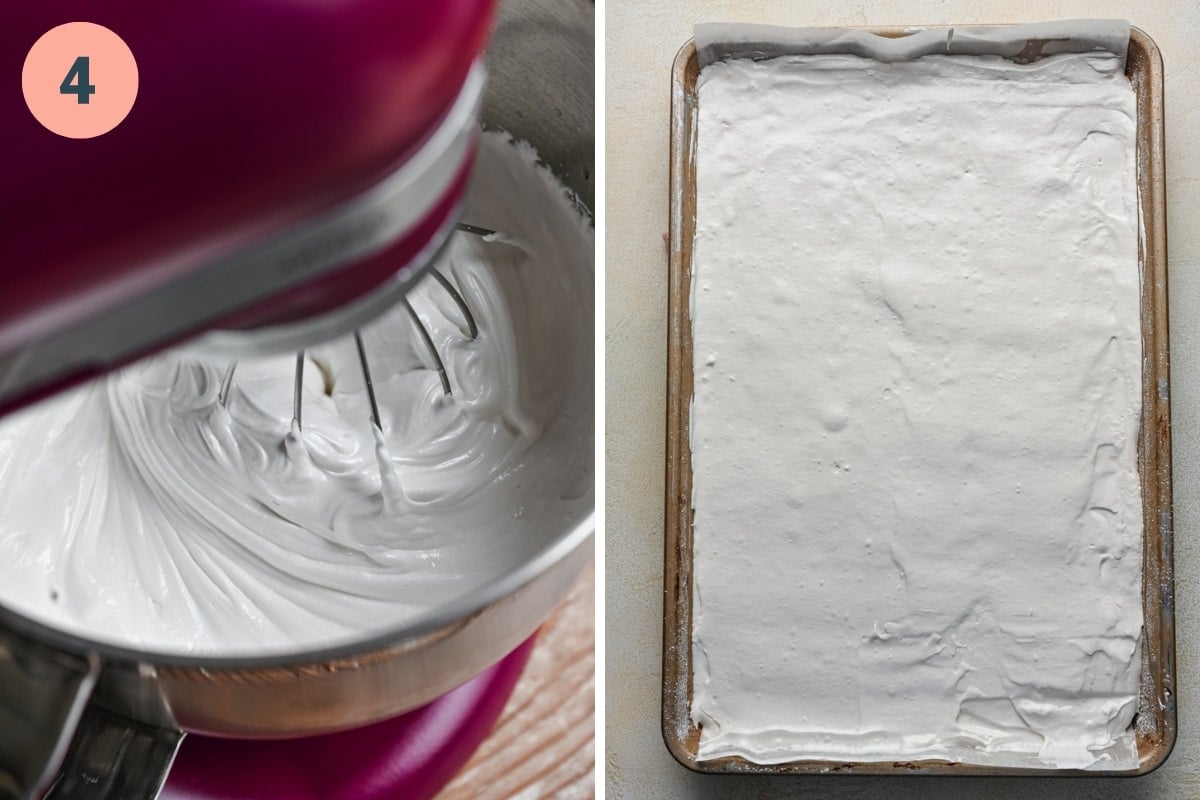
STEP 4: Immediately transfer marshmallow mixture to prepared pan and spread into a smooth, even layer. Let sit at room temperature for 6-12 hours to set.
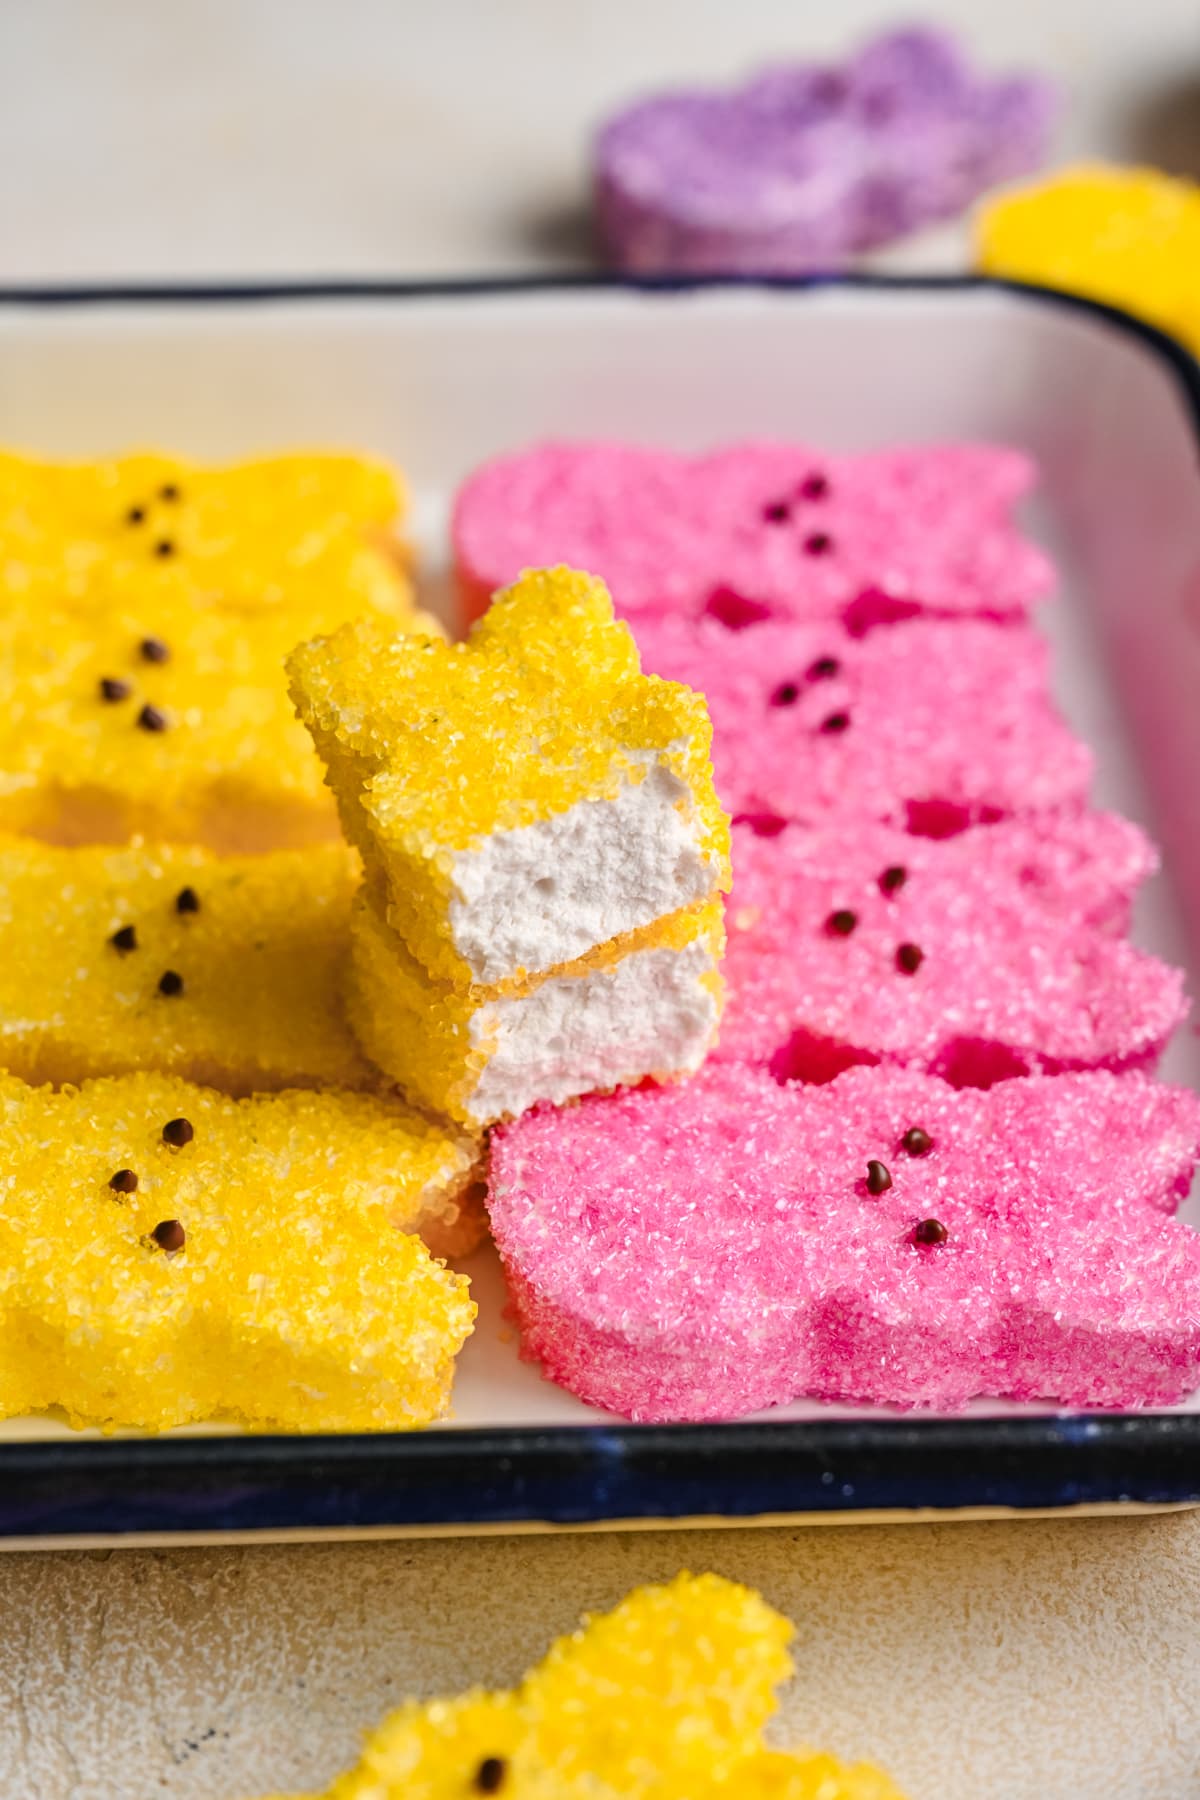
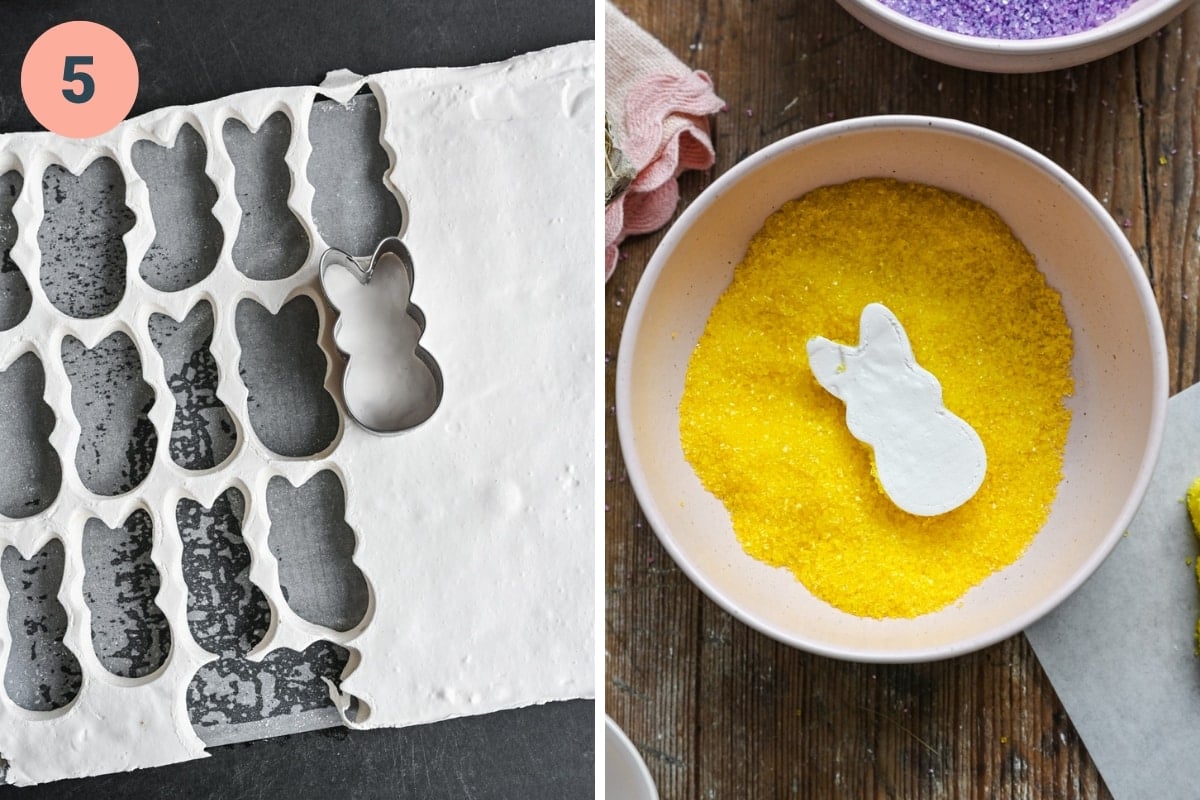
STEP 5: Grease the cookie cutter before cutting into bunny shapes. You should be able to get ~36-40 marshmallows. Coat in colored sugar and (optional) pipe melted dark chocolate for the eyes and nose.
Expert Tips and FAQs
- Storage: Store these homemade peeps in an airtight container at room temperature for up to several weeks. You can also freeze them for long term storage.
- Be sure to heat the honey syrup to 240˚F / 116˚C. This is the "soft ball" stage of candy making, and it will help you create the perfect marshmallow texture.
- Let the marshmallows set: Give them at least 6 hours, or let them set overnight before trying to cut them out. If they're not quite set, they won't cut well.
- Bunny eyes and nose: We melted chocolate, then added it to a plastic bag and snipped off a corner. We then piped little drops for the bunny eyes and nose. This is totally optional!
This stuff is sticky. To prevent sticking, you should spray a 9 x 13" rimmed baking sheet with cooking spray, then place a layer of parchment paper on top, then lightly spray the parchment paper. The parchment paper should then be dusted with powdered sugar.
Related Recipes
Tried this recipe? Please leave a star ⭐️⭐️⭐️⭐️⭐️ rating below and/or a review in the comments section further down the page.
Recipe
Print📖 Recipe
Homemade Peeps
- Total Time: 6 hours
- Yield: 3 dozen 1x
- Diet: Gluten Free
Description
These homemade marshmallow bunny peeps are so cute, perfect for Easter, and taste SO much better than store bought! They're easy to make and 100% free from corn syrup and artificial dyes.
Ingredients
- 2 packets of unflavored gelatin (4 ½ teaspoons)
- ¾ cup cold water, divided
- ¾ cup granulated sugar
- ⅓ cup honey or agave
- 2 teaspoons vanilla extract (or vanilla bean paste)
- ⅛ teaspoon salt
- 1 teaspoon powdered sugar for dusting pan
- Naturally colored sanding sugar for coating
- Optional: melted dark chocolate for eyes and nose
- Bunny cookie cutter
Instructions
- Spray a quarter baking sheet (~9x13 inch pan) with cooking spray, then line with parchment paper and lightly spray the parchment paper. Dust with 1 teaspoon powdered sugar and set aside. Grease a regular spatula and an offset spatula and set aside.
- Add the gelatin to a stand mixer with ½ cup of cold water, stir gently and let sit to bloom for 10 minutes while you make the simple syrup.
- Add the remaining ¼ cup of water, the sugar, and the honey to a small saucepan over medium heat. Stir the mixture constantly until the sugar dissolves, then stop stirring and clip a candy thermometer to the side of the pan. Cook without stirring until the thermometer reads 240°F.
- Remove from heat, let the bubbling subside for a few seconds, then turn the mixer on low speed while you carefully pour the sugar syrup into the gelatin, pouring the hot syrup down the side of the bowl to prevent scorching the gelatin. Beat on low for 1 minute, then increase speed to high and beat for ~10-12 minutes, until thick and fluffy. It should increase 3x in volume. Add in vanilla and salt and continue mixing for 2 minutes.
- Immediately transfer marshmallow mixture to prepared pan and spread into a smooth, even layer. Let sit at room temperature for 6-12 hours to set.
- Grease the cookie cutter before cutting into bunny shapes. You should be able to get ~36-40 marshmallows. Coat in colored sugar and (optional) pipe melted dark chocolate for the eyes and nose.
Notes
Honey: We used honey in place of corn syrup, but this recipe also works with agave nectar. Note that if you use honey, these do have a strong honey flavor! We love the taste, but if you're not a huge fan of honey, agave will provide a much more neutral flavor.
Storage: Store these homemade peeps in an airtight container at room temperature for up to several weeks. You can also freeze them for long term storage.
Be sure to heat the honey syrup to 240˚F / 116˚C. This is the "soft ball" stage of candy making, and it will help you create the perfect marshmallow texture.
Let the marshmallows set: Give them at least 6 hours, or let them set overnight before trying to cut them out. If they're not quite set, they won't cut well.
Peeps is a registered trademark of Just Born, Inc. This recipe is an inspired version created for educational purposes for home cooks. This recipe is not associated with, endorsed by, or officially related to Just Born, Inc.
- Prep Time: 6 hours
- Cook Time: 0 hours
- Category: Snacks
- Method: Mixer
- Cuisine: American
Nutrition
- Serving Size: 3 marshmallows
- Calories: 85
- Sugar: 20.8 g
- Sodium: 27.7 mg
- Fat: 0 g
- Carbohydrates: 20.9 g
- Fiber: 0 g
- Protein: 1 g
Lorette says
I made these with a grass-fed beef gelatin powder and subbed maple syrup for the honey and they were so good! I’m planning on making more for Easter this weekend.
Lexi says
So glad you enjoyed!
Pa says
The marshmallow did not spread well for me. I really wanted to make bunny peeps out of this. I'll have to use this for something else instead... like rice crispy.
Ana says
I made these for Easter and they turned out great!! Even family members who don't like peeps loved them. It was a really fun project too. I attempted once before without a candy thermometer (I tried using a regular meat thermometer) but you really just need to invest in the candy thermometer. It was very easy after that!
Allison says
Just made these and I can already tell they’re going to taste fantastic! I followed the ingredients/times, but when I went to spread them, they were stiff, difficult to spread and super stiff. Did altitude affect this? Did I overmix? Even though this batch is ugly, I know they’ll taste good! (: I’d love to try them again and get them smooth like the picture. Thanks for the great recipe!
Lexi says
Hi Allison! I don't have any experience with high altitude baking, but I did a quick search online and it looks like that may be the issue. Some people said that they had to heat the mixture to about 10 degrees lower than regular altitude for the same fluffiness. Let me know if you try it again!
Amy says
instead honey could I use corn syrup
Brent Harrison says
yes
Bella says
My grandchildren loved this recipe and it was so easy to make. Thank you for sharing!
Crystal Perez says
I’m using those recipe for your s’more recipe. What’s the best way and how long can we store the marshmallows for?