
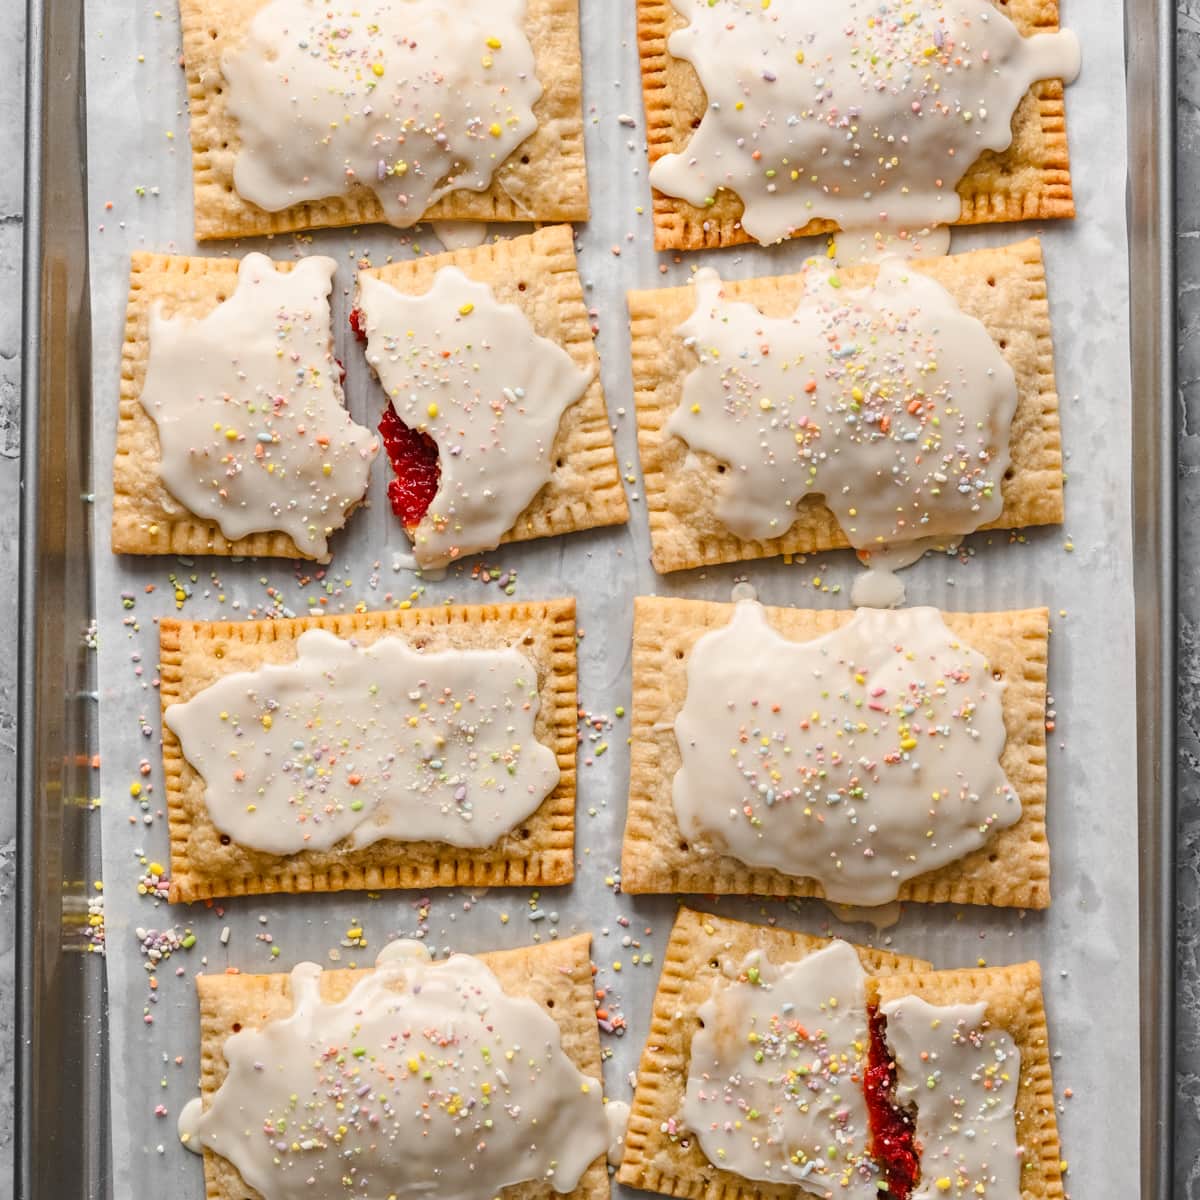
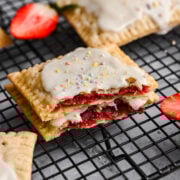
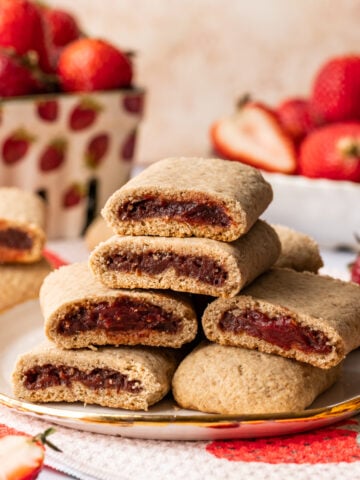
These homemade strawberry pop tarts are SO much better than store bought. They're made with a real fruit filling and have a delicious buttery and crispy crust.
Disclosure: Some of the links below are affiliate links. This means that, at zero cost to you, I may earn an affiliate commission if you click through the link and finalize a purchase. Read our full affiliate disclosure here.
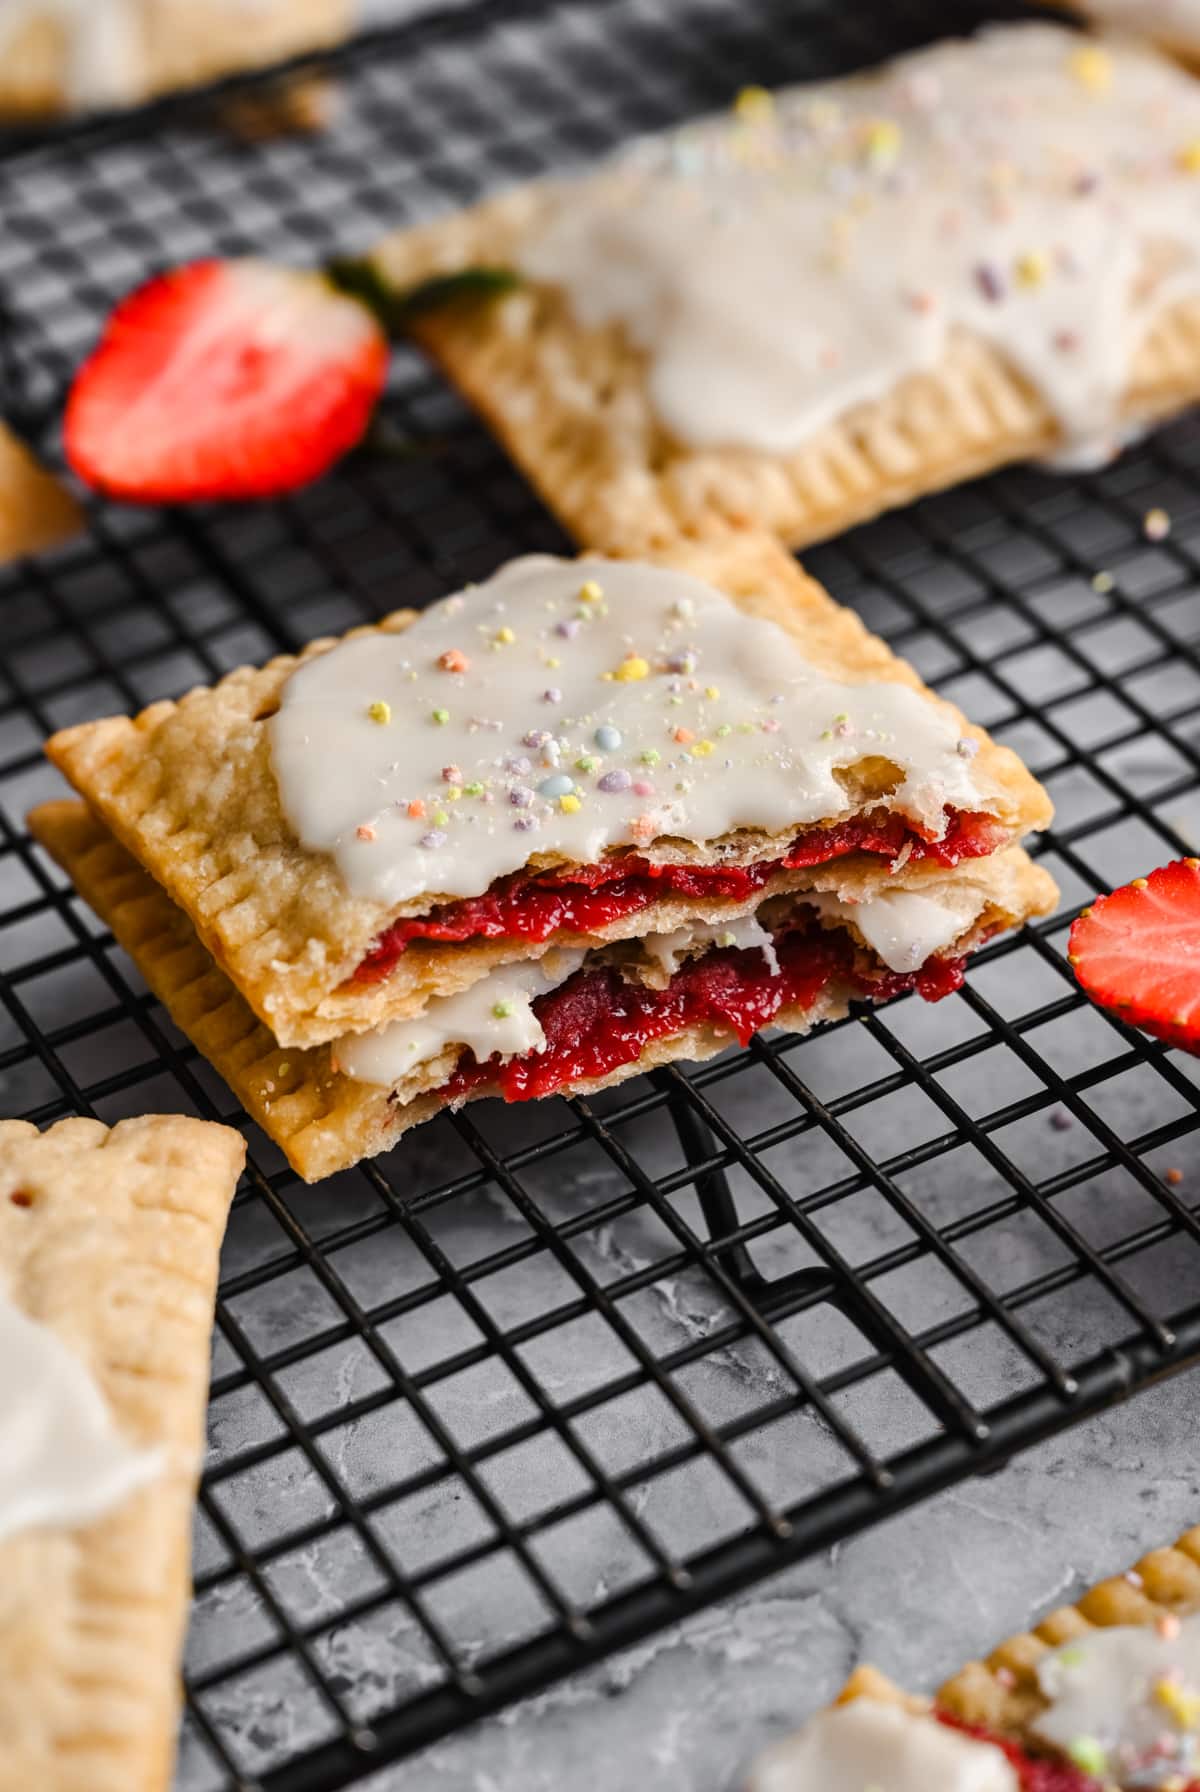
Store-bought pop tarts just don't have much flavor at all - they're surprisingly bland, with a cardboard-like crust and a filling that only tastes vaguely of strawberry. We remedied these problems with a buttery pie crust that's filled with a thick and fresh strawberry jam.
Jump to:
Why We Love This Recipe
- Tastes amazing: In contrast to what you get from the box, these are just so much better. Buttery crust, fresh strawberries - they're a delicious treat.
- No ultra processed ingredients: Look, no one's here to claim these are the healthiest snack ever. But every ingredient is something you probably already have in your pantry or refrigerator. There are no artificial colors, additives, or preservatives.
- Looks like the real thing: These look unmistakably like the original, they just taste a lot better!
Ingredients
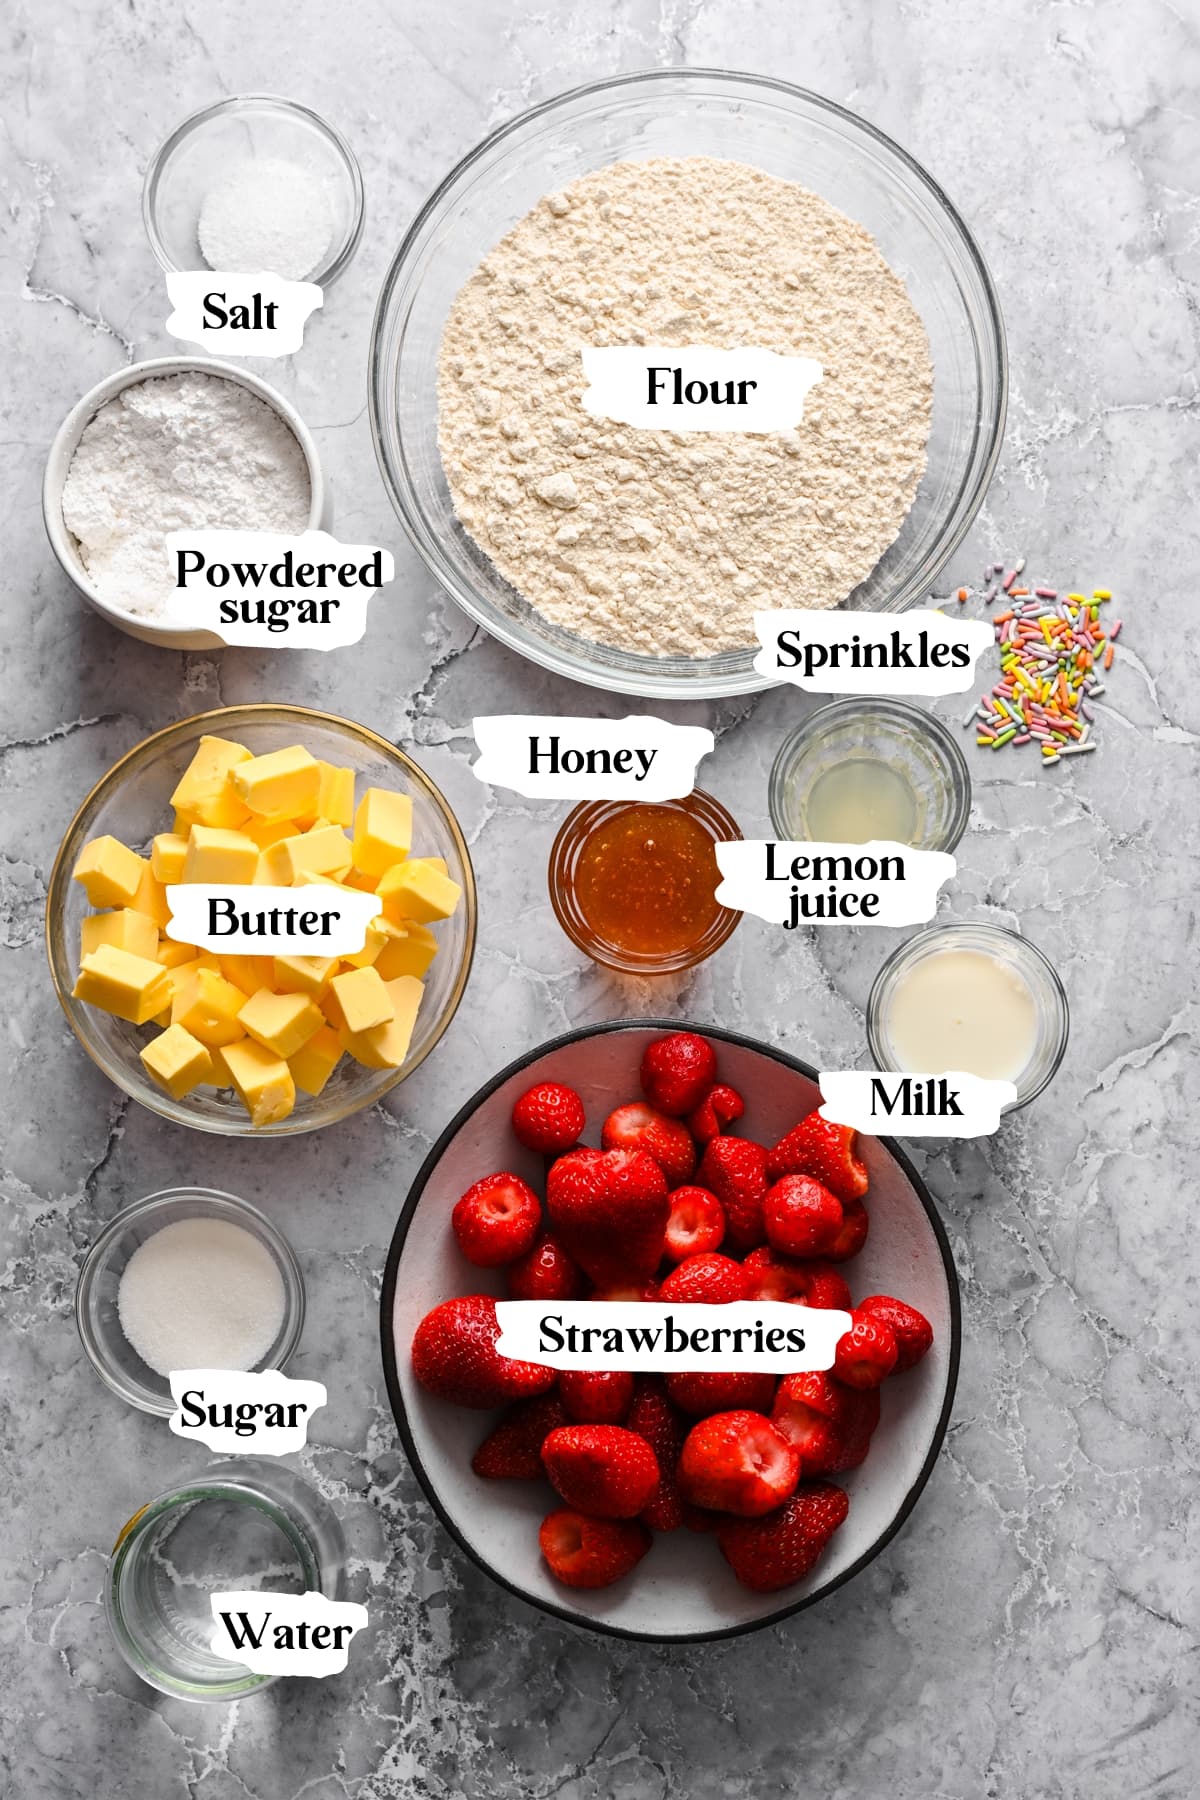
Here's what you'll need to make these homemade strawberry pop tarts:
Ingredient Notes
- Flour: We used regular all purpose flour. We have not tried this recipe with gluten free flour, but it should work perfectly fine as a 1:1 alternative. This is the gluten free flour we recommend.
- Butter: Make sure your butter is chilled before processing – you want to have some pieces of butter in the dough to make it flaky and not tough.
- Sugar: We use a small amount of sugar in the dough just to add a touch of sweetness. You can leave this out or sub with a sugar alternative like stevia or coconut sugar.
- Honey: This is optional, so if you want to cut out some sugar you can feel free to leave this out.
- Strawberries: Fresh or frozen both work here, but if using frozen, you may need to cook the mixture down for a bit longer. We haven't tested this with other fruit, but we think pretty much any kind will work with the same process. Try it with cherries, blueberries, peaches, etc to customize your pop tarts!
- Icing and sprinkles: These are also optional. To get that pop tart look, we crushed the sprinkles up a bit to make them smaller before sprinkling.
Step-by-step Instructions
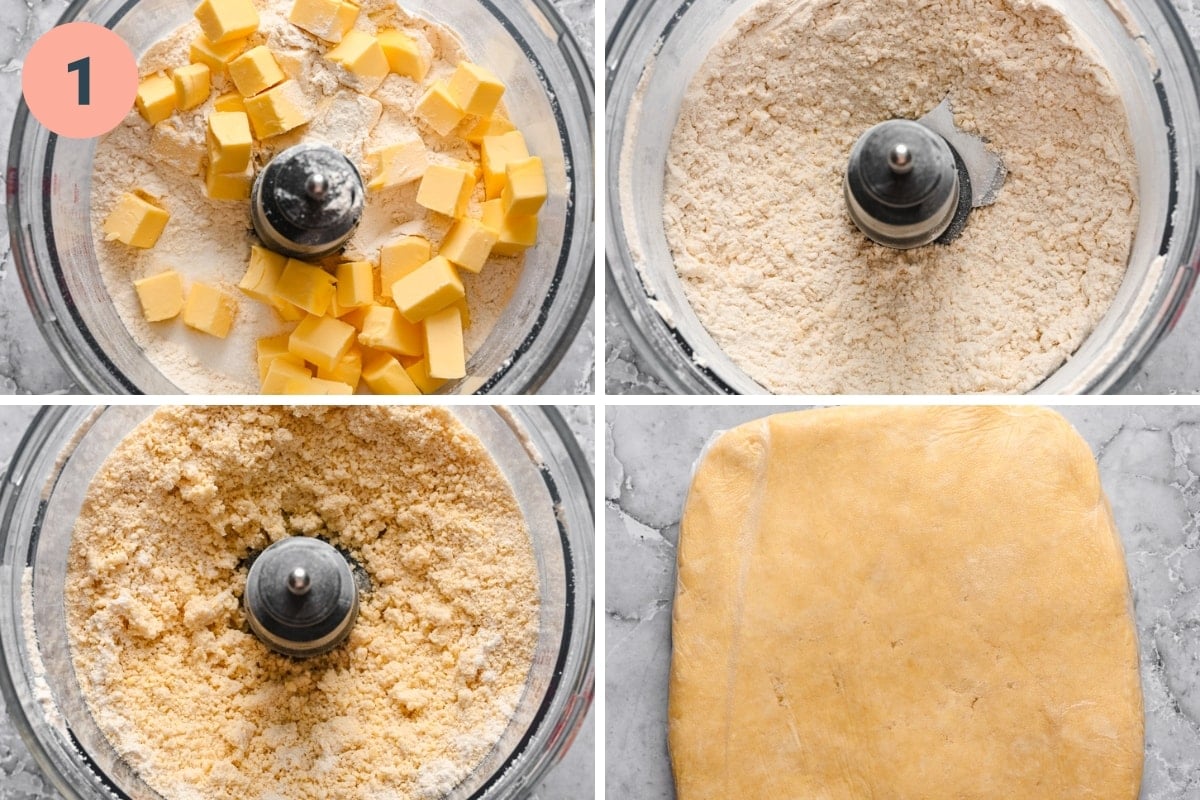
STEP 1: In a food processor, pulse together flour, salt, sugar, and butter a few times, until the butter pieces are about the size of peas. Stream in the water, pulsing as you go.
Move the dough to a bowl or lightly floured surface and gently knead into a ball – be careful not to overwork the dough. Wrap in plastic wrap and shape it into a rectangle that's about ½" thick. Place the dough in the refrigerator to chill for 2 hours.
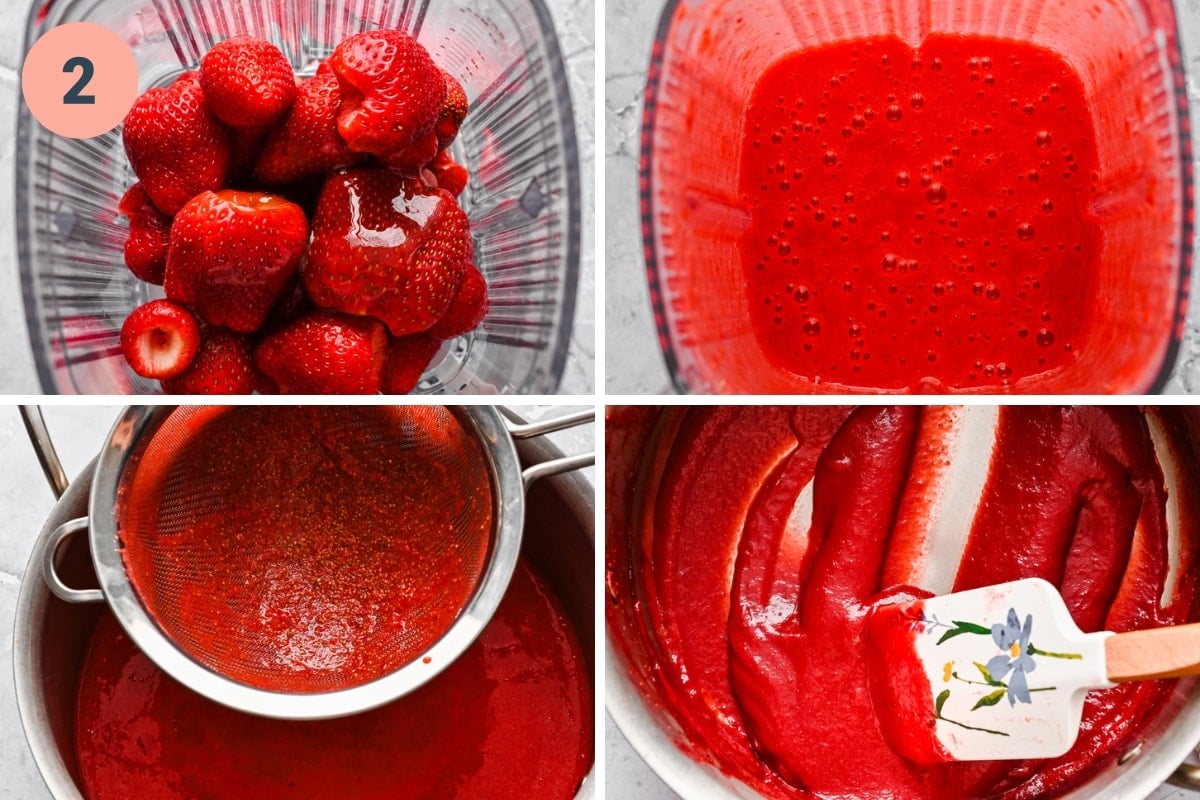
STEP 2: While the dough chills, blend your strawberries, honey, and lemon and strain through a fine mesh sieve directly into a saucepan to remove the seeds.
Cook over medium heat for 20-25 minutes, until the strawberry mixture is reduced to the point where you can scrape the bottom of the pan and the jam takes a little while to run back together again. Move to a bowl to cool.
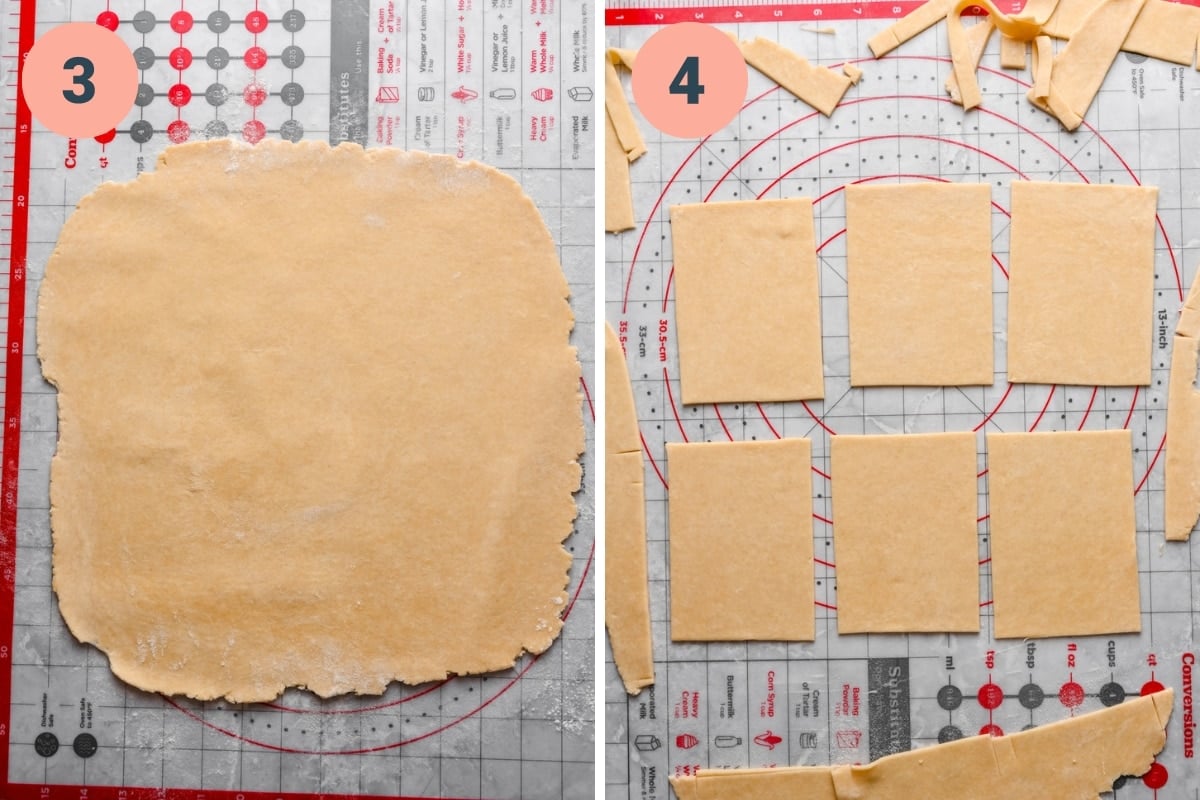
STEP 3: Divide your dough in half and roll into a roughly 14 x 14" square on a floured surface. You should just barely be able to see the lines of your silpat or work surface through your dough, which should be about ⅛" thick. Make sure your surface is well floured, and sprinkle some flour on the dough before rolling.
STEP 4: Cut the dough into roughly 3.5 x 4.75" rectangles. You'll need to two for each pop tart. Combine your scrap dough and roll out again to minimize waste.
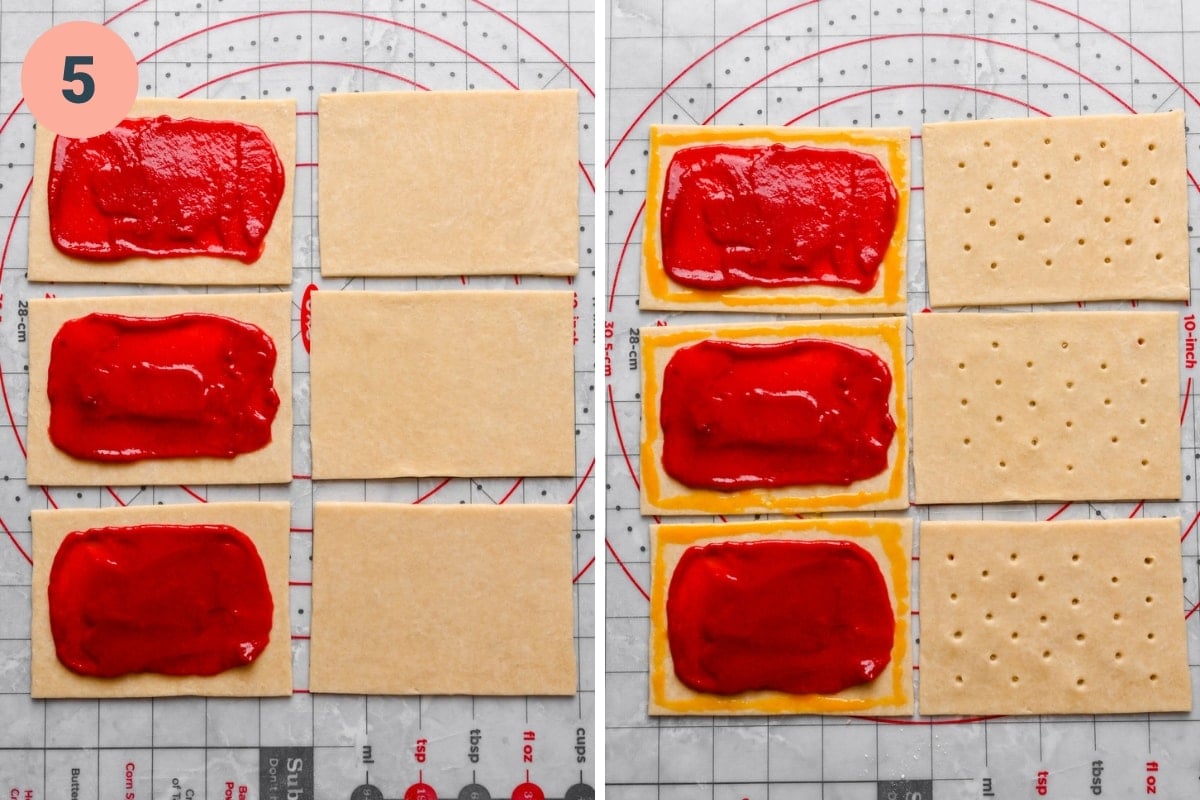
STEP 5: Spoon about a tablespoon of filling into each pop tart, then spread into a thin layer, leaving about ⅓" around the border. Beat an egg yolk and brush around the border of the jam. Dock the tops of your pop tarts with a skewer or a fork, then place over the bottom, and press down and then crimp the sides.
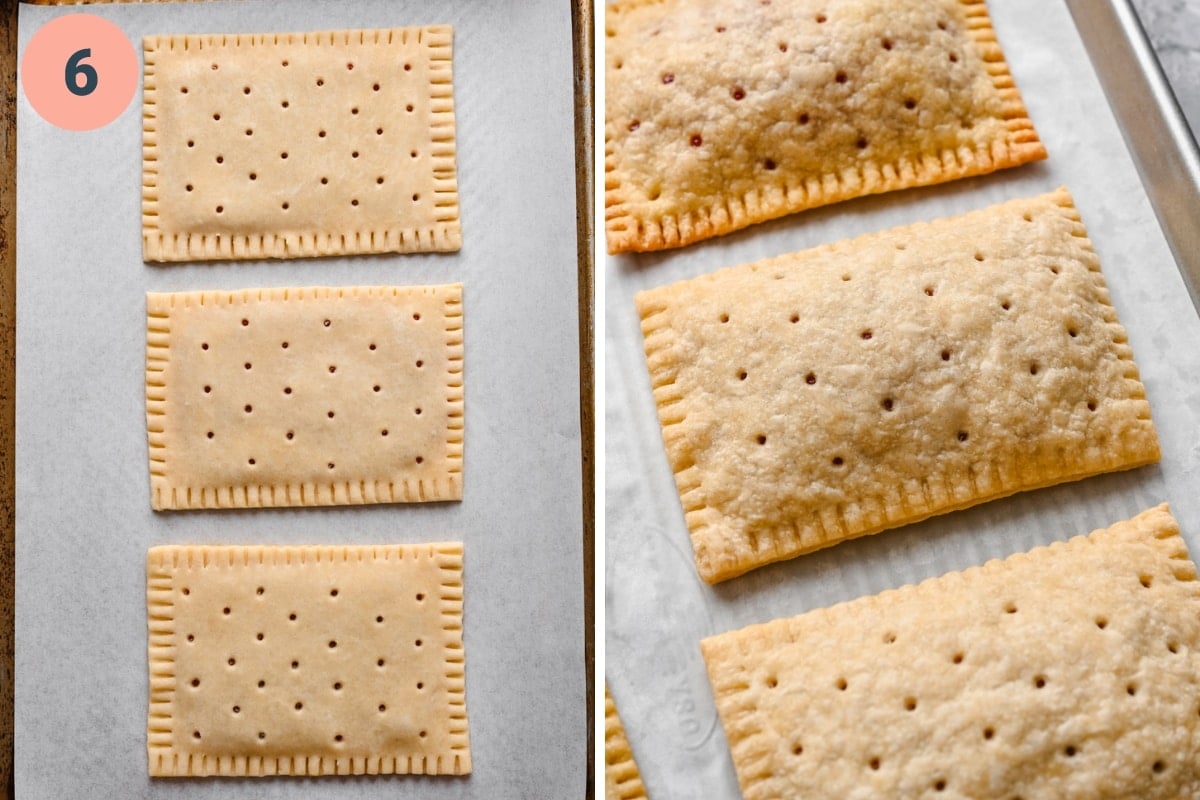
STEP 6: Bake on parchment paper for 30-35 minutes at 300˚F. They should be very lightly browned when you take them out, and the bottoms browned slightly.
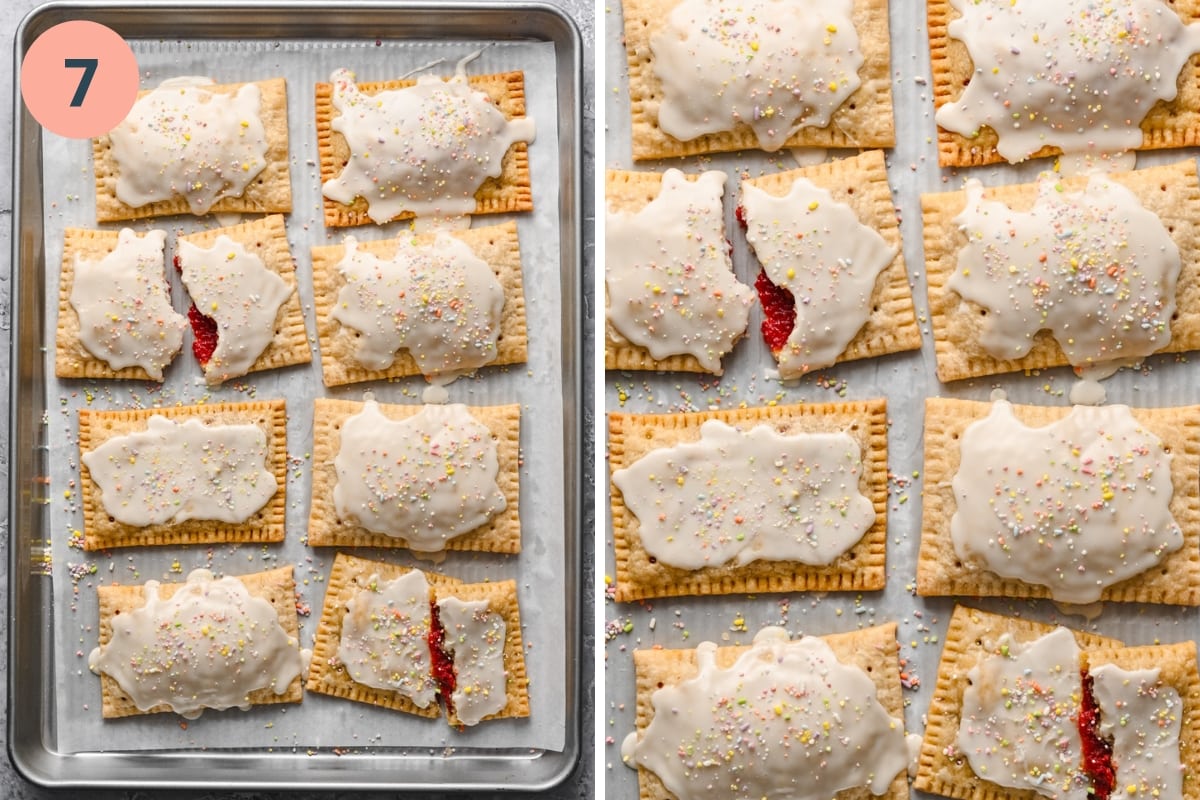
STEP 7: To ice them, mix together ½ cup confectioner's sugar with a small amount of milk, adding in small increments and whisking until it forms a thick icing. Add a tablespoon to each pop tart and spread. Top with crushed sprinkles.
Tips and FAQs
- Use chilled butter to ensure it doesn't melt during processing. Cutting it into even pieces will also help make sure it gets evenly incorporated.
- Spoon the flour into your measuring cup and then level with a knife to make sure you're using the right amount.
- The strawberry jam should come to a foamy simmer, and when it's done, it will look a lot like ketchup, with a slightly darker hue. You need to remove as much moisture as possible to ensure the filling doesn't bubble up through the holes on the top of the pop tart.
- When you're rolling out the dough, be sure to flour both the surface and the pop tart dough. It can get sticky, so be sure to flour liberally.
- To get evenly shaped pop tarts, you can use a stencil. Just measure out 3.5 x 4.75" on a sheet of computer paper and cut it out, then set that over the dough and use a bench scraper or a pizza cutter to cut out your pop tarts.
- Your pop tarts will puff up a little in the oven, which is a deviation from the flat originals. If you want to cut down on the puffing, poke some holes in the sides of your pop tarts.
- For even neater pop tarts, cut off about ⅛" of the outside after crimping, as crimping will make the sides slightly uneven.
- The freezer is your friend: If the dough ever seems unworkable (it's too stretchy and buttery), pop it in the freezer for 10 minutes to solidify the butter.
If you don't have a food processor, you can stir the dry ingredients together, and then grate in the butter, or chop it into the dough with a bench scraper, then just work the butter into the flour with your fingers.
Stored in an airtight container at room temperature, they should keep for 3 days. You can store them for up to 6 days in the refrigerator.
Absolutely. If you want to freeze these homemade pop tarts, don't add icing to them, and put them in an airtight container. They should keep for about 3 months. To reheat, pop back in the toaster for a few minutes, and then add icing.
You can, just make sure they're completely thawed before blending, or you'll make a smoothie that will not be strainable.
Related Recipes


Tried this recipe? Please leave a star ⭐️⭐️⭐️⭐️⭐️ rating below and/or a review in the comments section further down the page. You can also stay in touch with us through social media by following us on Instagram, Pinterest, and Facebook or by subscribing to our newsletter.
Recipe
Print📖 Recipe
Homemade Strawberry Pop Tarts
- Total Time: 3 hours
- Yield: ~8 pop tarts
- Diet: Vegetarian
Description
These homemade strawberry pop tarts are SO much better than store bought. They're made with a real fruit filling and have a delicious buttery and crispy crust.
Ingredients
Crust:
- 2 ½ cups all-purpose flour*
- 4 teaspoons sugar
- 2 teaspoons kosher salt
- 1 cup unsalted butter (2 sticks), chilled and cubed
- ½ cup cold water
Filling:
- 16 0z (~450g) strawberries (fresh or frozen – thaw if frozen)
- 3 tablespoons honey
- 2 teaspoons lemon juice
Assembly:
- 1 egg yolk
- ½-1 cup powdered sugar
- 1-2 tablespoon milk
Instructions
- In a food processor, pulse together flour, salt, sugar, and butter a few times, until the butter pieces are about the size of peas. Stream in the water, pulsing as you go.
- Move the dough to a bowl or lightly floured surface and gently knead into a ball – be careful not to overwork the dough. Wrap in plastic wrap and shape it into a rectangle that's about ½" thick. Place the dough in the refrigerator to chill for 2 hours.
- While the dough chills, blend your strawberries, honey, and lemon and strain through a fine mesh sieve directly into a saucepan to remove the seeds.
- Cook over medium heat for 20-25 minutes, until the strawberry mixture is reduced to the point where you can scrape the bottom of the pan and the jam takes a little while to run back together again. Move to a bowl to cool.
- Preheat oven to 300˚F and line a sheet pan with parchment paper.
- Divide your dough in half and roll into a roughly 14 x 14" square on a floured surface. You should just barely be able to see the lines of your silpat or work surface through your dough, which should be about ⅛" thick. Make sure your surface is well floured, and sprinkle some flour on the dough before rolling.
- Cut the dough into roughly 3.5 x 4.75" rectangles. You'll need to two for each pop tart. Combine your scrap dough and roll out again to minimize waste.
- Spoon about a tablespoon of filling into each pop tart, then spread into a thin layer, leaving about ⅓" around the border. Beat an egg yolk and brush around the border of the jam. Dock the tops of your pop tarts with a skewer or a fork, then place over the bottom, and press down and then crimp the sides.
- Bake for 30-35 minutes. They should be very lightly browned when you take them out, and the bottoms browned slightly.
- Whisk together powdered sugar and milk until a thick glaze forms. Let pop tarts cool, then spread ~1 tablespoon glaze on each pop tart and top with sprinkles.
Notes
*Gluten free: We have not tested this recipe with gluten free flour, but it should work fine. The texture just may not be quite as flaky.
Storage: Store in an airtight container at room temperature for up to 3 days or in the fridge for up to 6 days. You can also leave them unfrosted and freeze for longer term storage.
The strawberry jam should come to a foamy simmer, and when it's done, it will look a lot like ketchup, with a slightly darker hue.
When you're rolling out the dough, be sure to flour both the surface and the pop tart dough. It can get sticky, so be sure to flour liberally.
To get evenly shaped pop tarts, you can use a stencil. Just measure out 3.5 x 4.75" on a sheet of computer paper and cut it out, then set that over the dough and use a bench scraper or a pizza cutter to cut out your pop tarts.
Your pop tarts will puff up a little in the oven, which is a deviation from the flat originals. If you want to cut down on the puffing, poke some holes in the sides of your pop tarts.
The freezer is your friend: If the dough ever seems unworkable (it's too stretchy and buttery), pop it in the freezer for 10 minutes to solidify the butter.
- Prep Time: 2 hours 30 minutes
- Cook Time: 30 minutes
- Category: Snacks
- Method: Oven
- Cuisine: American
Nutrition
- Serving Size: 1 pop tart
- Calories: 575
- Sugar: 20 g
- Sodium: 294.7 mg
- Fat: 41.3 g
- Carbohydrates: 48 g
- Fiber: 2 g
- Protein: 5.3 g
Taylor Griffith says
Is there anything you can use other than egg yolk to bind them? Have a kid with an egg allergy. Thank you!
Lexi says
A little milk or water should do the trick!