
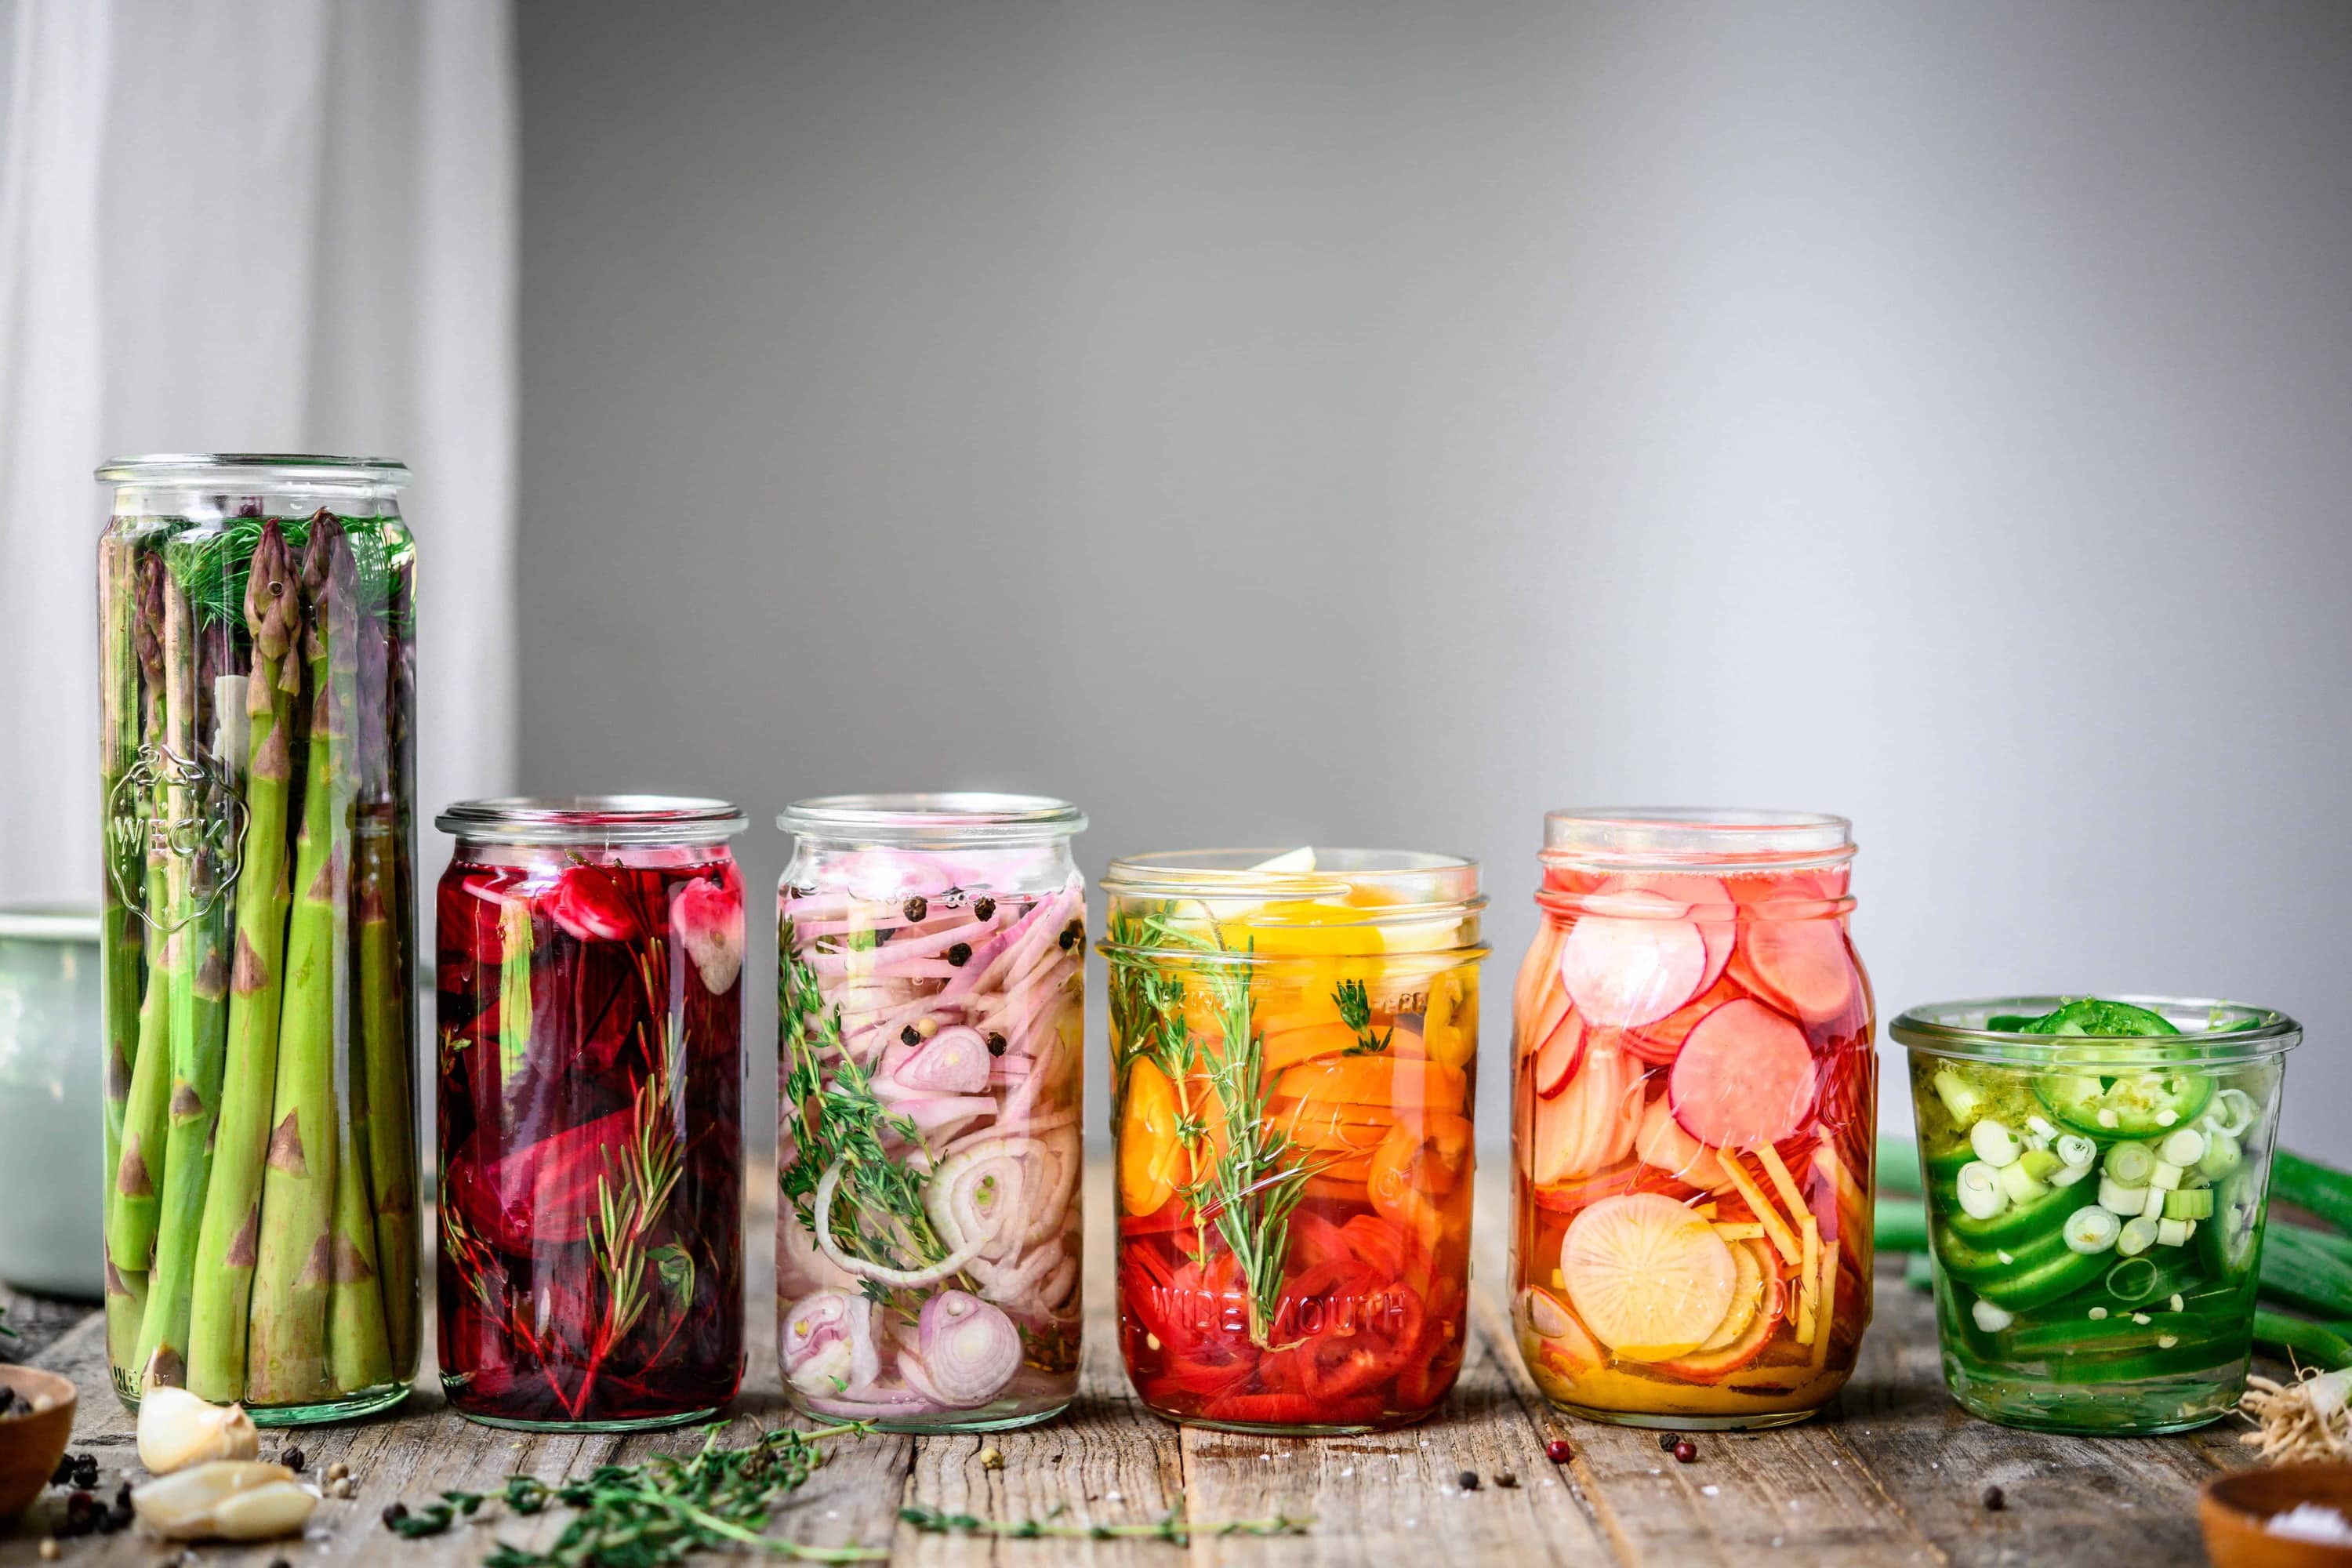
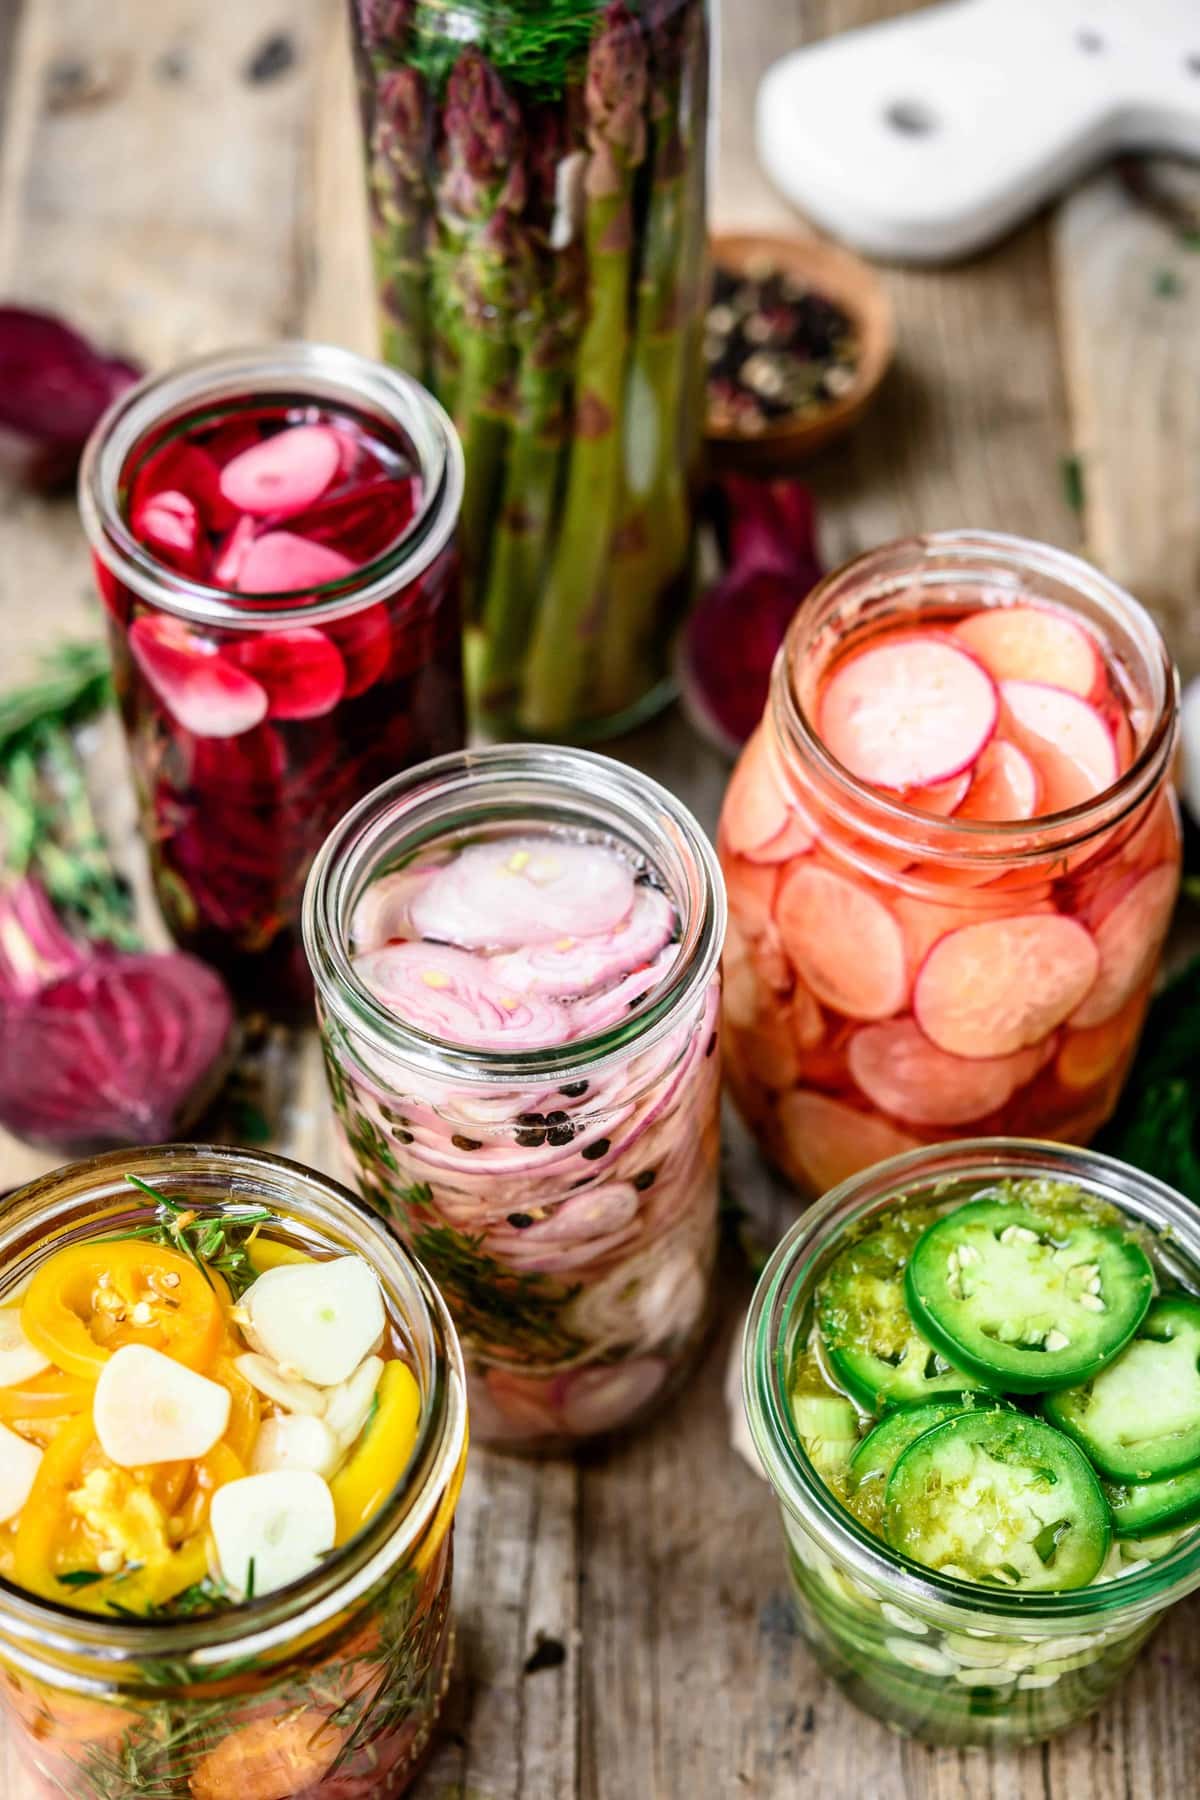
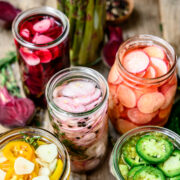
Homemade quick pickles are easier than you think - and oh so versatile! We have everything you need to know to make your favorite vegetables into snappy brined quick pickles in just 24 hours. In addition to sharing recipes for how to pickle radishes, asparagus, beets, onions, peppers and jalapeños, we're sharing our tricks and tips for quick pickling just about anything.
Welcome to the world of quick pickling! We're glad you're here.
Here at Crowded Kitchen, we've been doing quite a bit of quick pickling ourselves. Quick pickles are surprisingly easy and incredibly versatile. Some quick pickled veggies, like peppers, beets and asparagus, are delicious on their own. Others (like pickled onions and jalapeños) are best suited as a condiment.
No matter how you're using your quick pickles, this guide will take you through the process step-by-step so you can improvise your own quick pickles.
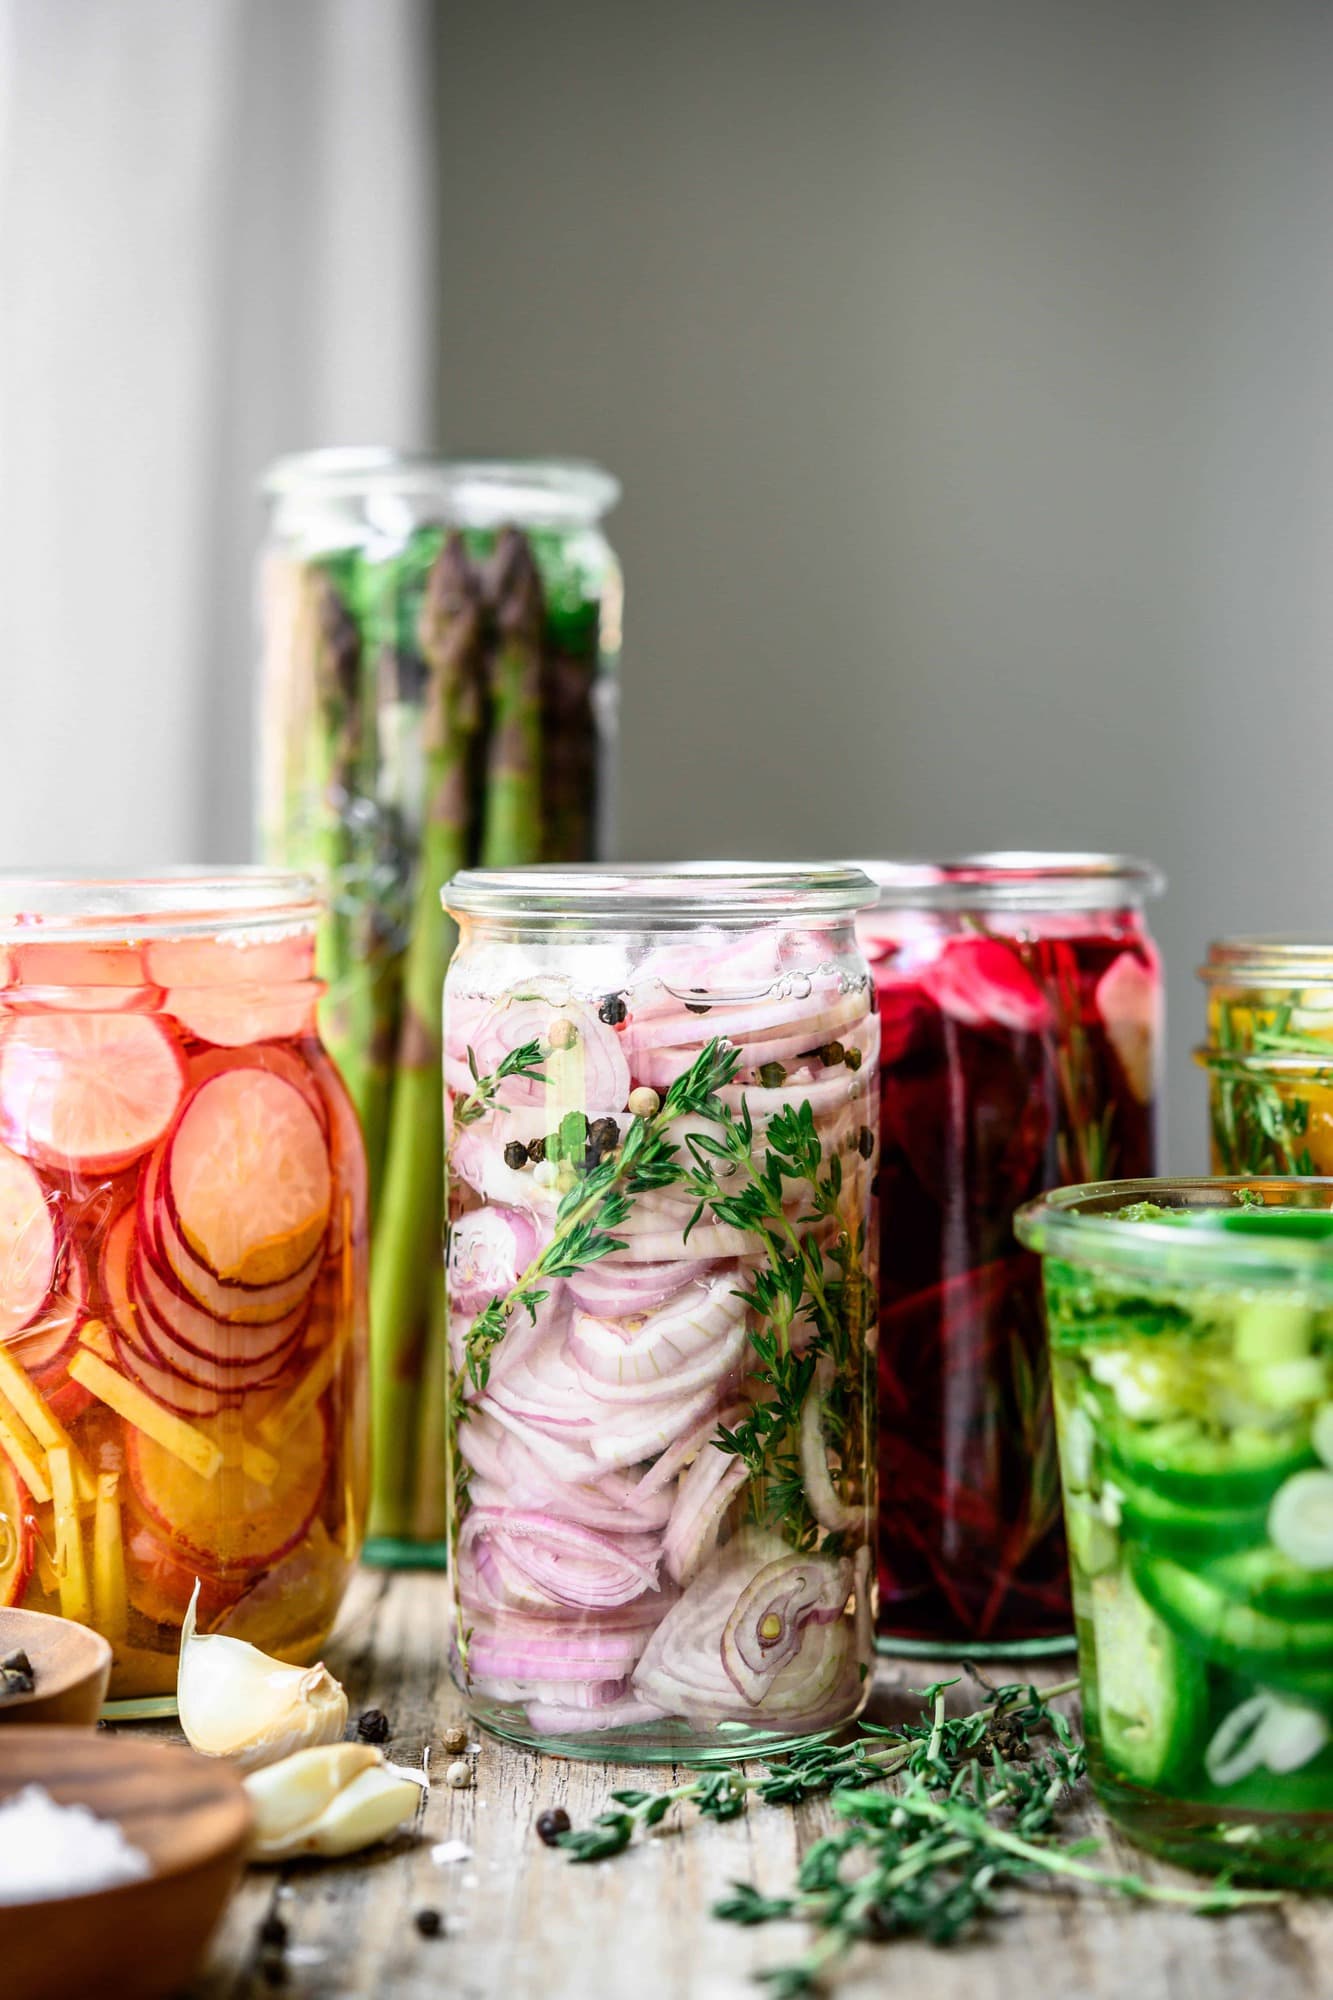
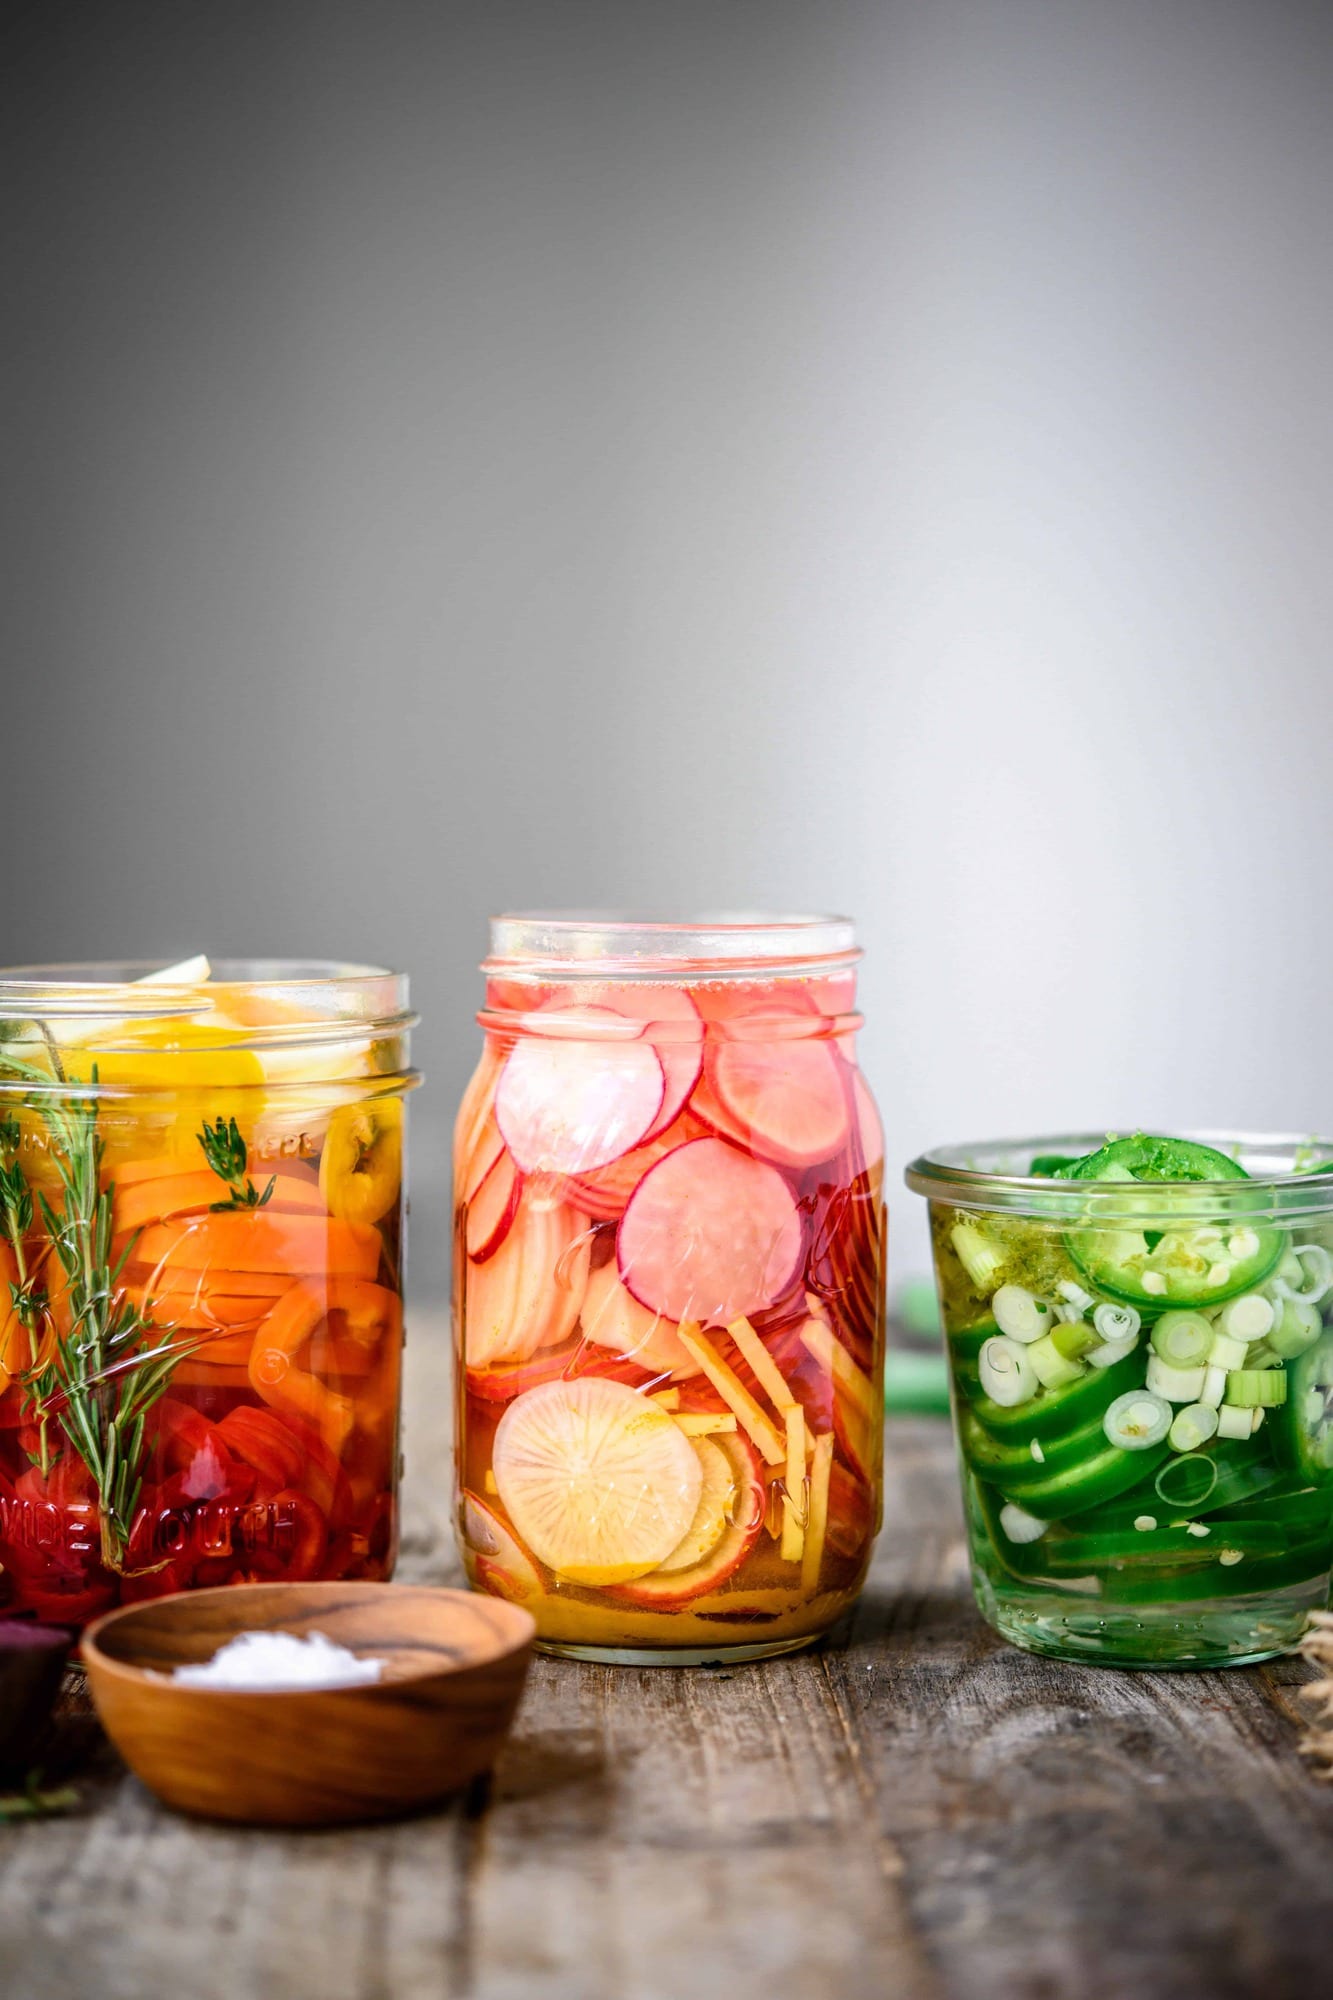
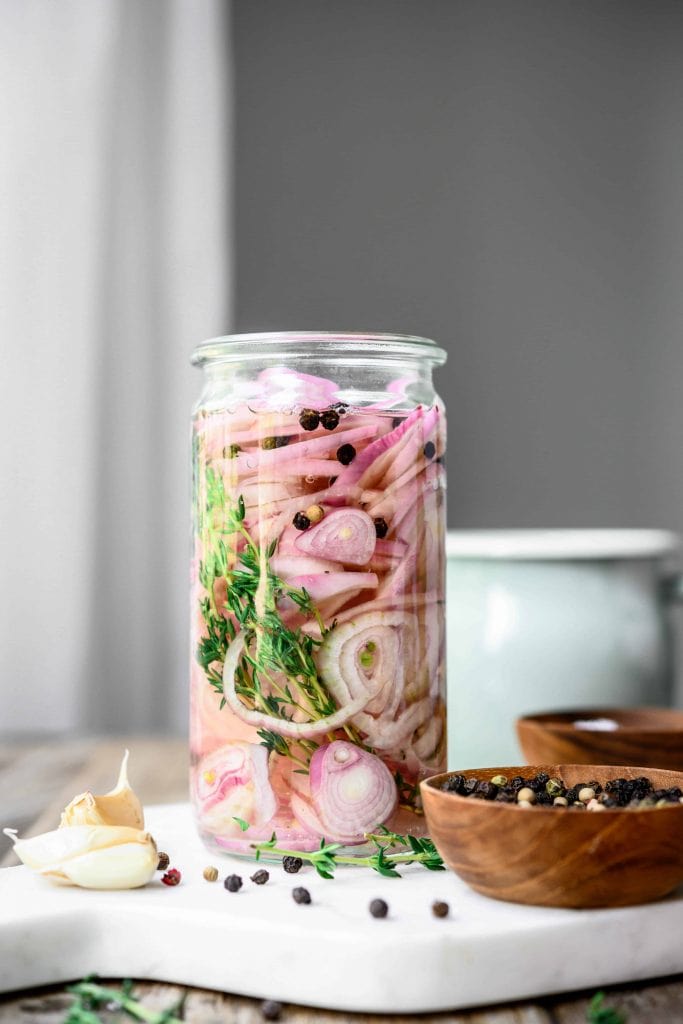
All you'll need to do is whip up a simple brine and add your veggies and flavorings of choice. We made Scallion Jalapeño Pickles, Turmeric-Ginger Radish Pickles, Herbed Rainbow Pepper Pickles, Asparagus Garlic Pickles and Thyme Shallot Pickles, but the possibilities are endless! We hope these quick pickle recipes inspire you to create your own.
First things first...
What is a quick pickle?
Quick pickles are easy-to-make refrigerator pickles that don't involve a complex canning process.
While quick pickles don't quite have the depth of flavor as a traditionally fermented pickle, they're still delicious and can be used in a wide range of applications.
Essentially, a quick pickle is a vegetable (truly any vegetable!) brined in a solution of vinegar, water, salt and sugar.
Note that it's important to store quick pickles in the refrigerator if they are not canned. Quick pickled vegetables will not last nearly as long as properly canned produce, so it's best to make small batches.
If you're following another person's recipe, be sure to take notice of whether or not the process requires canning or if you can follow a quick-pickling process.
Choose vinegar
Just as there are countless vegetables to pickle, there are also unending options when it comes to vinegar for your brine. You can use your favorite vinegar and experiment with different kinds for different vegetables.
White vinegar is the most basic, all-purpose option for quick pickles. (It's also the most cost-effective, often going for less than $3 for a gallon.)
However, we also love using rice vinegar, apple cider, champagne vinegar or even sweeter varieties like balsamic.
If you're using a more syrupy vinegar (like balsamic), we recommend using a mixture that includes a lighter white or apple cider vinegar to thin it out a bit. And remember, darker vinegar will color your pickles, so if you're concerned about aesthetics, stick to a lighter- or clear-colored brine.
Make the brine
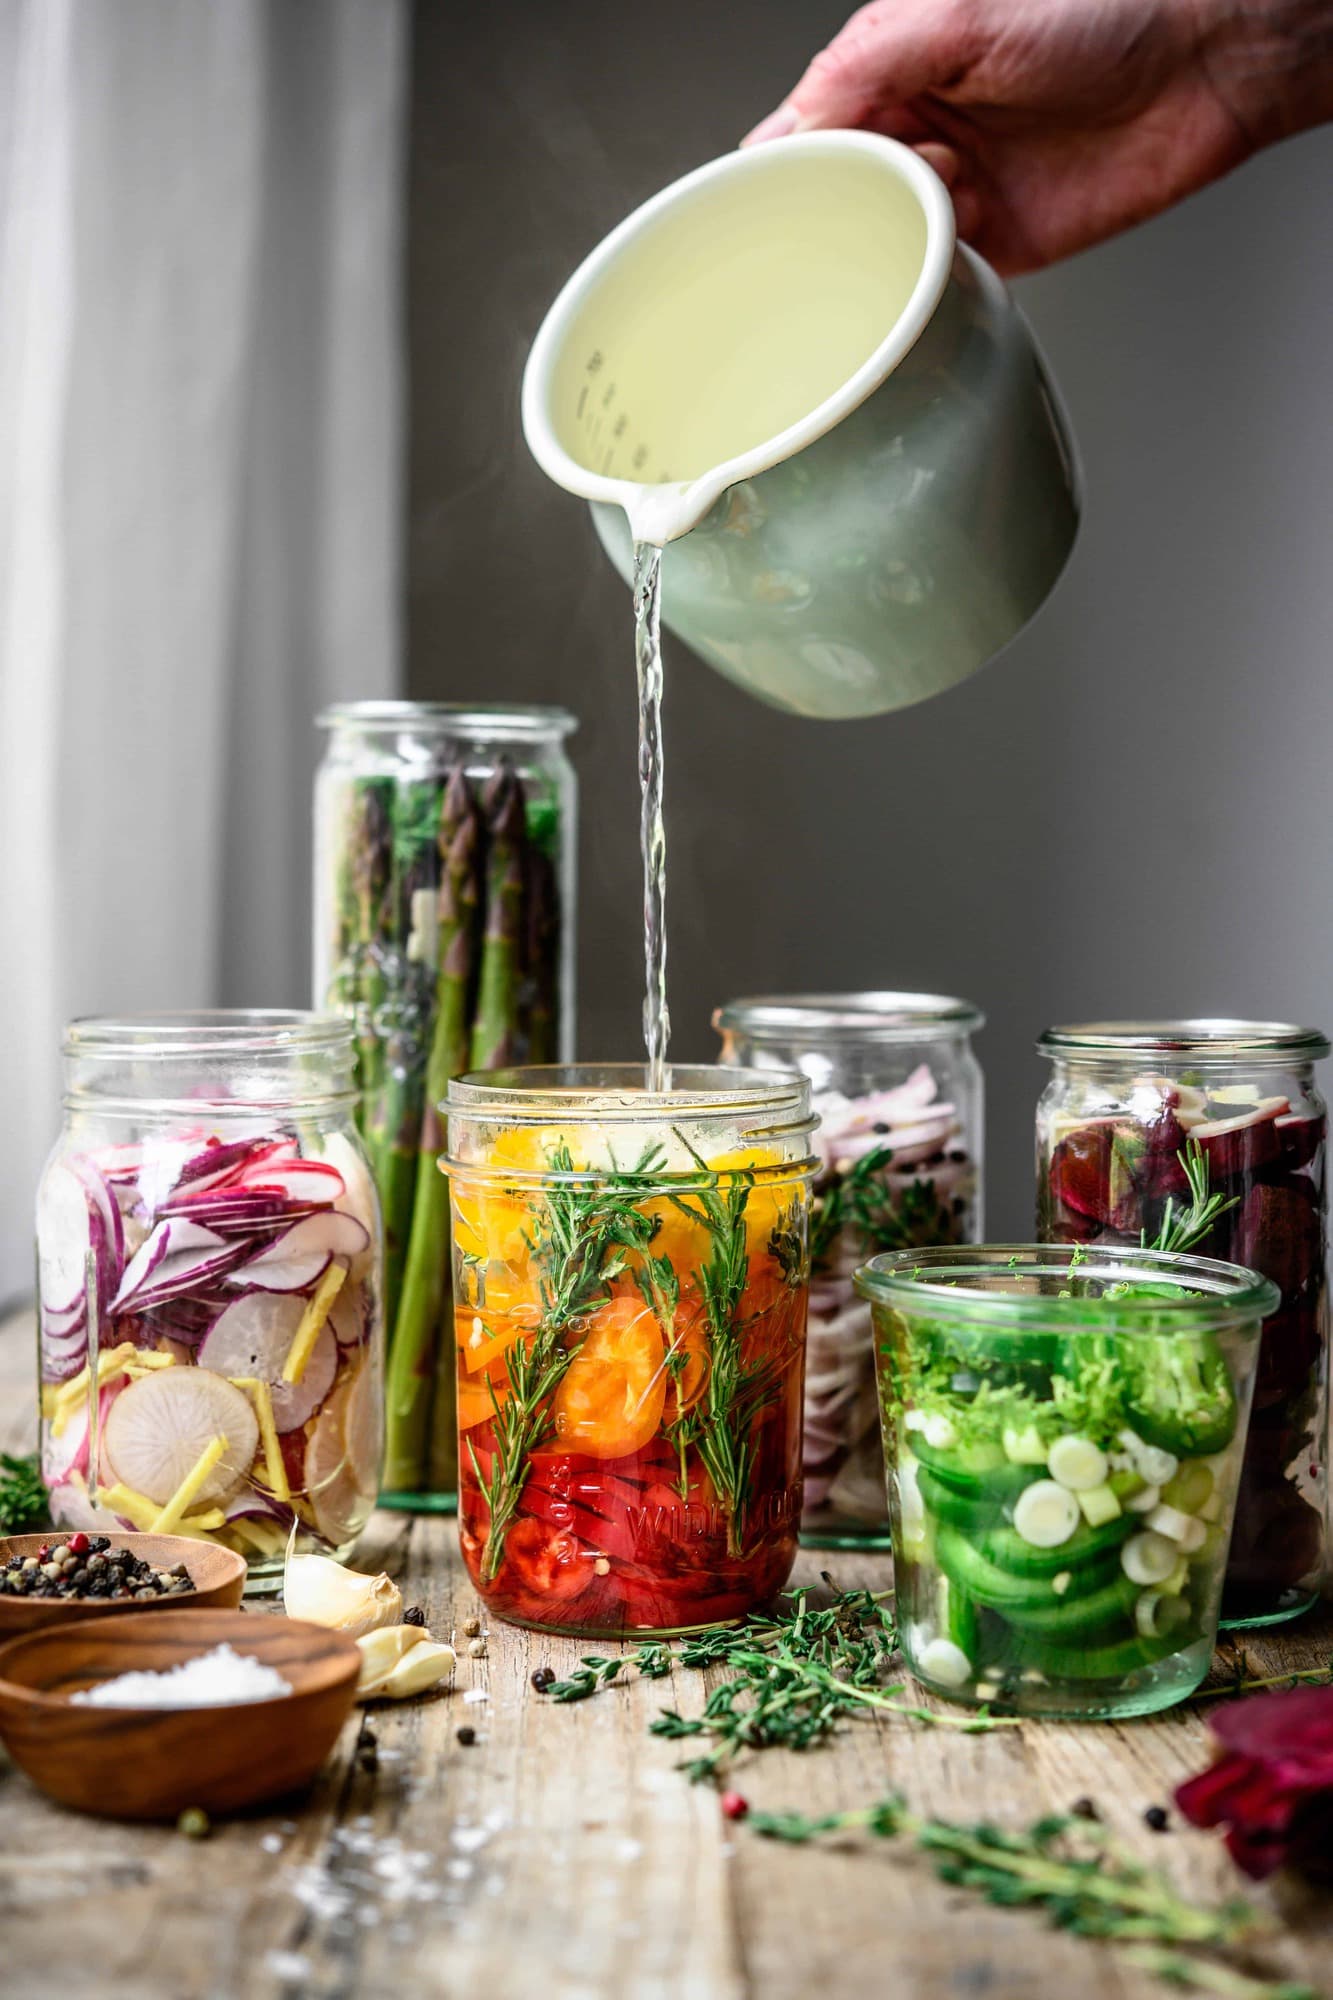
Now it's time to make the brine! For simplicity, we stick with a simple brine recipe of equal parts water and vinegar, plus a bit of sugar and salt to cut the acid. You'll need to heat the brine in a saucepan to dissolve the sugar and salt.
Once you have your basic brine, it's time to add various spices, herbs and other flavorings. You can always stick with a simple, spice-free brine, but we like to add a little extra flavor. A little spice goes a long way, and the flavor possibilities are truly endless!
Flavorings
Spices, herbs and other flavorings are the key to a great quick pickled vegetable. You can get as creative as you'd like, or you can stick to the basics. Once you have a basic understanding of flavor combinations, you can come up with your own quick pickle recipes!
Herbs:
- Use fresh or dried herbs like thyme, rosemary, dill, oregano, etc. to add flavor to your pickle. Dill pairs perfectly with fresh cucumbers, while thyme complements tomatoes. (Yes, pickled cherry tomatoes are a thing - they're delicious!)
Spices:
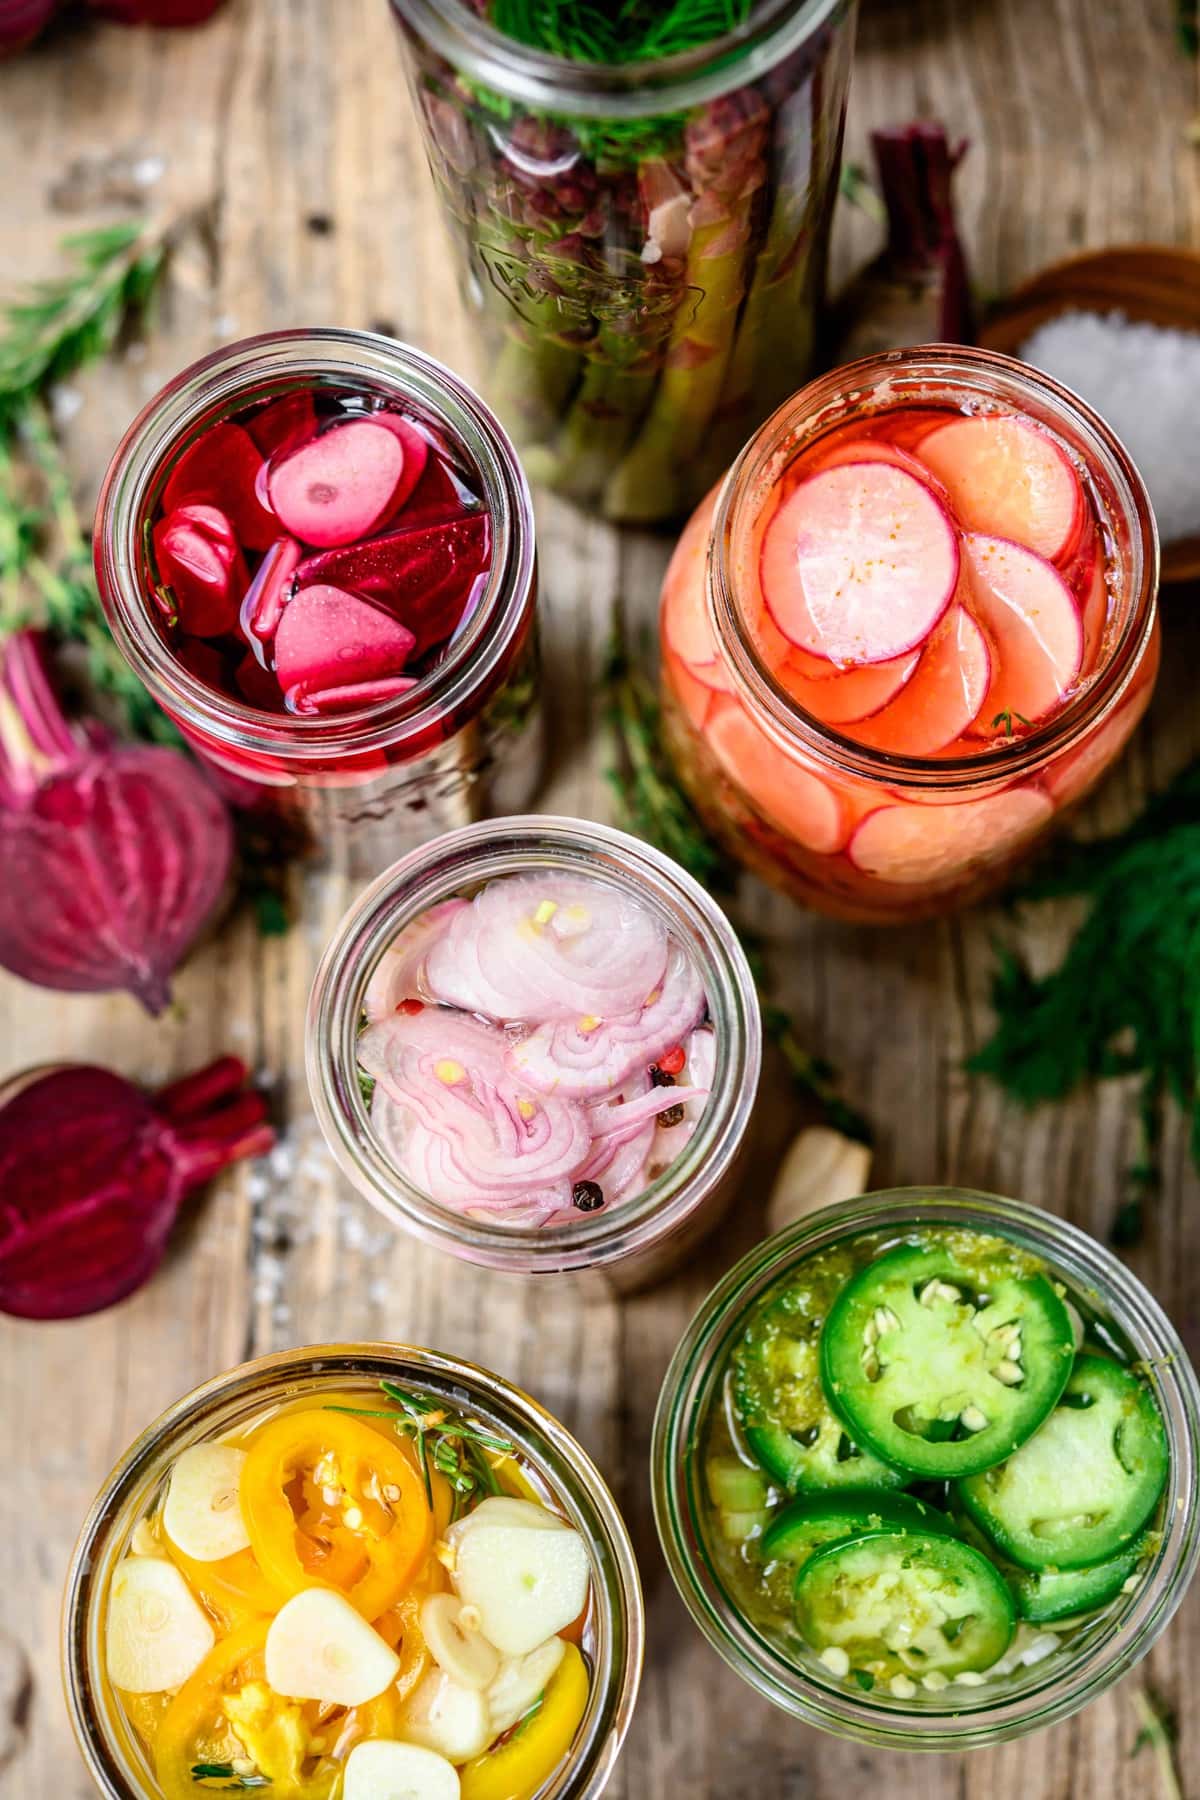
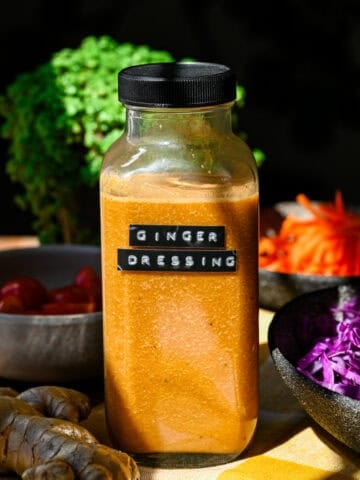
- Whole spices like peppercorns, red pepper flakes, dill seed, mustard seed and star anise are excellent additions. You can also use some ground spices like turmeric, which blends well. We added turmeric to the Ginger Turmeric Radish Quick Pickles pictured below.

Other ingredients:
- Fresh ginger and fresh garlic are two of our favorite additions to add an extra punch of flavor. Ginger is an essential addition to these quick pickled radishes!
- In addition to traditional ingredients like ginger and garlic, you can also try using various types of fresh, hot peppers to add a fiery kick. Thai chili peppers add a fantastic kick to these Spicy Pickled Dilly Beans. (Note: these are traditionally pickled using a canning process!)
Vegetables
While the brine is heating, prepare your jars with the sliced vegetables of your choice and any flavorings you'd like to add.
For crunchy, tough vegetables like carrots and radishes, you'll want to slice thinly to allow maximum absorbance of the pickling liquid. We like to use a mandoline to ensure even sizing.
There are a ton of fancy options out there for mandolines, but I prefer an easy-to-use Japanese mandoline with stainless steel blades. We've had the same one for 10+ years and I've never had an issue! Just be sure to use the safety hand guard, or invest in a pair of cut-resistant gloves. (A mandoline injury will almost definitely land you in the E.R.!)
Mandolines are one of our favorite kitchen tools. They make salad prep incredibly easy (and even kind of fun!). We always use one when prepping something like this Shaved Carrot Salad or this Asian Cucumber Salad. It's well worth the $30 investment for reduced prep time and evenly-cut vegetables!
If you don't have a mandoline, just be sure to slice your vegetables as evenly as possible so the pickles all taste the same. Tip: a high-quality chef's knife goes a long way!
How to prep tough vegetables
If you're going to try pickling a tough, starchy vegetable like beets, you'll likely need to pre-roast or boil the vegetable before pickling. I actually like to slice raw beets very thinly for pickling so they still have a bit of crunch, but if you'll be pickling wedges or whole beets, they'll definitely need to be cooked ahead of time.
To prep beets for quick pickling, roast whole (with skin on) at 400 F for about 45 minutes. Remove from the oven, let cool slightly, then use a paper towel to easily remove the skin. If they are properly cooked, the skin should come right off. You'll know they're fully cooked if you can easily pierce with a fork.
Next, slice the beet into rounds or wedges, then continue the quick pickling process as usual.
Fill jars
Once your vegetables and brine are prepped, the last hands-on step is to fill up your jars of choice.
16 oz. ball jars are our favorite. They have an easy-to-use airtight seal, and the wide mouth makes it easier to add all of the ingredients to the jar.
Remember that you'll need about an inch of headroom at the top of the jar, and you will need to completely cover the vegetables in the brine. It's best to really stuff the jars full with veggies while they're dry. Once you add the hot brine, the contents will move around a bit.
The last step is to simply cover your soon-to-be pickles in the brine straight from the saucepan, and wait! Just 24 hours later you'll have an array of sweet, salty pickled vegetables to share.
Once we fill the jars with the brine, we seal the jars, let them cool for an hour or two on the counter, then transfer to the refrigerator. Most quick pickles will last up to 2 months in the fridge. (NOTE: quick-pickled onions/shallots will not last as long. At most, up to 2 weeks.)
Recipes using quick pickles
We love eating homemade quick pickled vegetables straight from the jar, but here are a few other ideas and recipes for making the most of them:
- Homemade quick pickles are the perfect condiment for any burger (veggie or regular). We're partial to pickled red onion and jalapeño on our veggie burgers!
- Top your next homemade ramen with quick pickled radishes
- Pickled red onions are my go-to topping for pretty much any taco recipe. They're delicious on these spicy black bean and cauliflower tacos and these vegan taco lettuce wraps! (On the same note, they're also perfect for homemade nachos.)
- Add a few jars of homemade pickles to your next crudité platter.
- Use as a tangy salad topping or mix-in. I added some of our quick pickled asparagus to a salad the other day and it was delicious!
- Add to a sandwich. This vegan chickpea melt really benefits from the crunch and tang of pickled onions!
Don't let these basic ideas limit your creativity - the possibilities are endless!


Now that you're armed with all of the tools for making delicious, briny quick pickles, we'd love to hear what you're making! Comment below with your favorite quick-pickle flavor, or tag us on Instagram so we can see your pickling creations. We LOVE hearing from you!
Print📖 Recipe
A Guide to Quick Pickles
- Total Time: 20 minutes
- Yield: 1 16-oz. jar 1x
Description
The quick pickle recipes here include Ginger Turmeric Pickled Radishes, Thyme Pickled Shallots, Scallion Pickled Jalapeño, Pickled Rainbow Peppers, Garlic Rosemary Pickled Beets and Dill Pickled Asparagus.
Ingredients
Brine for all recipes:
- 1 cup water
- 1 cup white vinegar
- 2 tsp salt
- 1 tsp sugar
Ginger Turmeric Pickled Radishes:
- (Optional: sub white vinegar with half rice vinegar, half apple cider vinegar)
- 1 large bunch radishes, sliced thinly
- 1 inch piece fresh ginger, peeled and sliced into thin planks
- 1 tsp ground turmeric
Herbed Rainbow Pepper Pickles:
- 4 sweet mini peppers, sliced into rounds
- 2 cloves garlic, crushed
- 4 sprigs fresh rosemary
- 4 sprigs fresh thyme
Thyme Pickled Shallots (or red onion):
- 1 large shallot or red onion
- 5-6 sprigs fresh thyme
- 1 tbsp black peppercorns
Dill Pickled Asparagus:
- 1 large bunch asparagus, ends trimmed
- ¼ cup fresh dill
Rosemary Garlic Pickled Beets:
- 3 small beets, quartered*
- 2 cloves garlic, sliced thinly
- 4 sprigs rosemary
Scallion Jalapeño Pickles:
- 2 cloves garlic, thinly sliced
- 2 scallion whites, chopped into 1 inch pieces
- 2 jalapeños, thinly sliced into rounds
Instructions
For all recipes, prepare ingredients and place in a clean glass jar.
Prepare brine by combining all brine ingredients in saucepan over medium-high heat. Heat to a simmer until sugar and salt are dissolved.
Remove from heat and pour brine directly into glass jar with other ingredients. Make sure to cover produce completely. Seal jars and refrigerate.
Notes
*Roast or steam your beets before pickling. Alternatively, you can slice raw beets very thinly and pickle - I prefer them this way as it retains the crunch!
- Prep Time: 15 minutes
- Cook Time: 5 minutes
- Category: Snacks
- Method: Preserving


Matthew Dale says
What size weck jar are you using for the asparagus
Sophie says
Do these have to be in an air-tight jar? How long do they keep after being opened
Lexi says
Any regular container is fine as long as it's sealed! Most vegetables will keep for up to 2 months, but some (like onions) only last about 2 weeks.
gley says
How long do I have to wait to eat them, ideally? Also, how long will they keep?
Brent Harrison says
They'll keep for a few weeks in the fridge if tightly sealed in a mason jar. Once they've pickled for 24 hours, they're ready to eat.
Elli says
Hi!
How long do I have to wait to eat them, ideally? Also, how long will they keep?
Thanks so much!
Tina B says
I love these recipes!
Could these be canned? I water bath can my other pickles, and I would love to be able to make these ahead of time and have them ready to go!
Lexi says
Absolutely!
Julia says
I absolutely love your pickled veggie recipe! Especially the asparagus, I have never thought of turning it into pickles too. A lovely idea, thank you for sharing the recipe,
Julia
Lexi says
Thank you so much!
Sherri says
Where did you get the jars you show the rosemary garlic pickled beets in?
Lexi says
Hi! The brand is called Weck.
Jason says
Just tossed some in the fridge about 5 minutes ago. Standard recipe with a Good Seasons dressing packet. 🙂
We'll let you know how it goes...
Lexi says
Hope you enjoy! 🙂
Judy says
Can you comment on how you do your onions? Red, yellow or sweet?
Thank you!
Lexi says
I prefer using red onions!
Ariel Turner says
Do you put the lid on the jars after pouring the hot liquid in and then seal?
Making now. Lol. 😬 *worried face*
Lexi says
Let the jars cool first, then seal!
Tami says
I just made 6 jars of various veggies-cukes, pepper, red onions and radishes. I've been bringing them out when people have stopped by and also brought to work and keep getting rave reviews!
Thanks!
Lexi says
Love to hear that!!
Michelle says
Can you post a link to the jars?
Lexi says
https://weckjars.com/
Eden | Sweet Tea and Thyme says
My grandma is the pickling queen! But thanks to this, I don't have to steal her pickled veggies anymore, lol. I can just do it myself without the whole long process. Thanks!
Nicole says
I am just now starting to pickle things I definitely appreciate your post. Your photos are so pretty!
Lexi says
Thank you so much, Nicole!
Sara says
Perfect timing for me to discover this post! We are about to move, and have a TON of jalapenos growing on our plant that is not able to come with us. I want to pickle all of them with garlic and scallions, and move the pickled jalapenos instead!
Lexi says
Perfect timing!! You should definitely pickle them - they're SO good on tacos or mixed into homemade guacamole!