
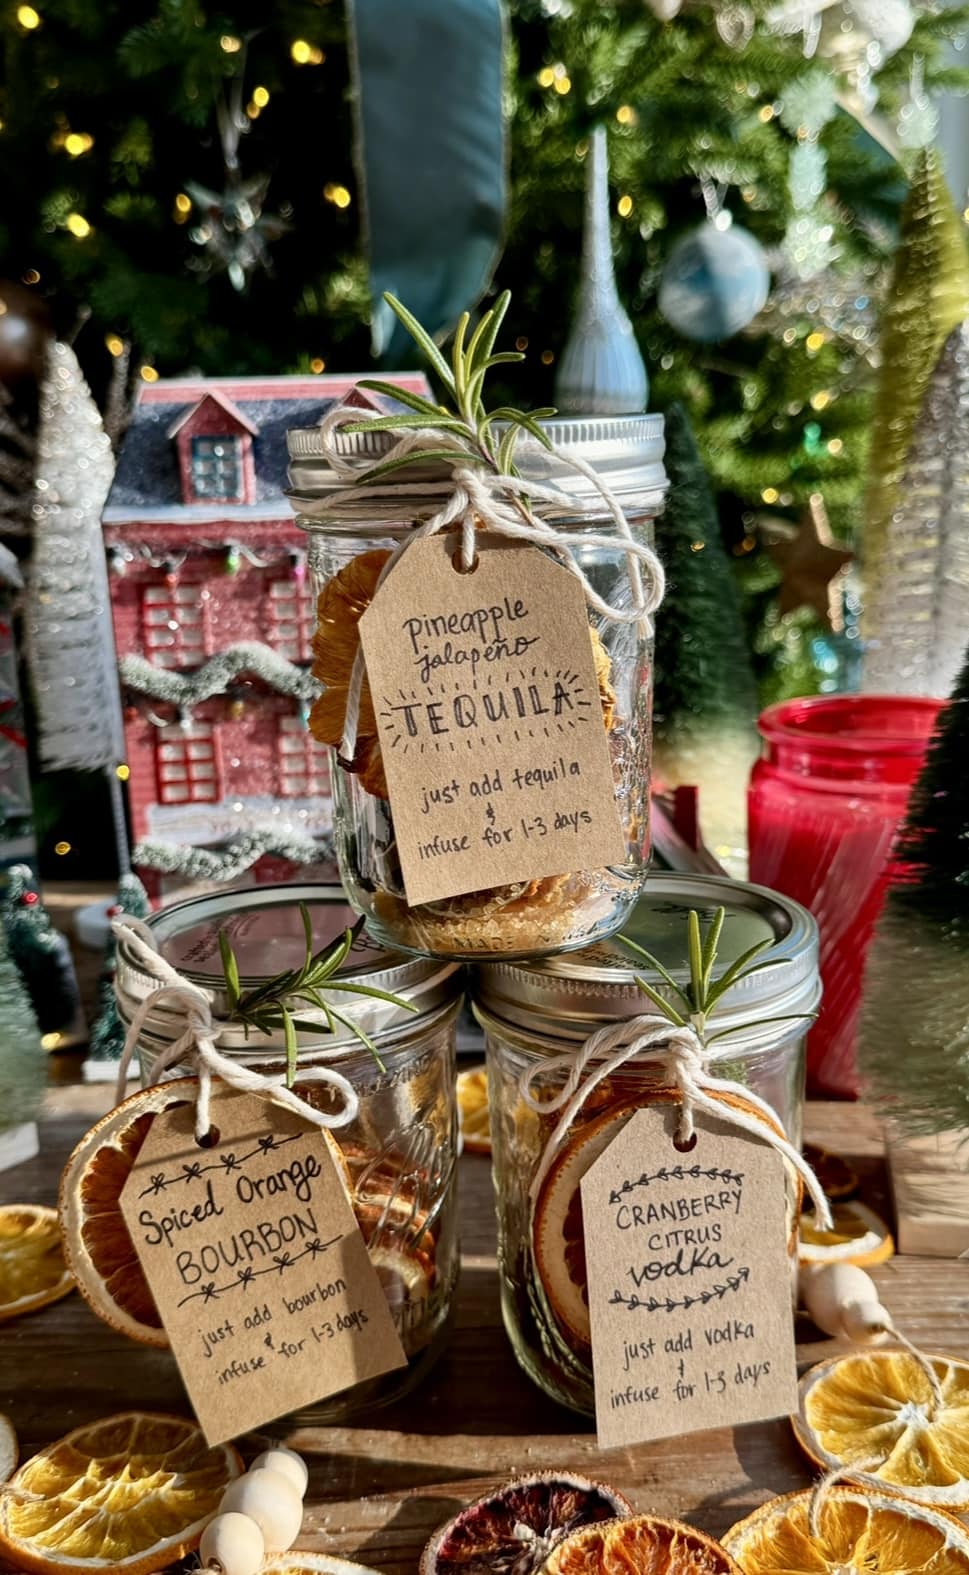
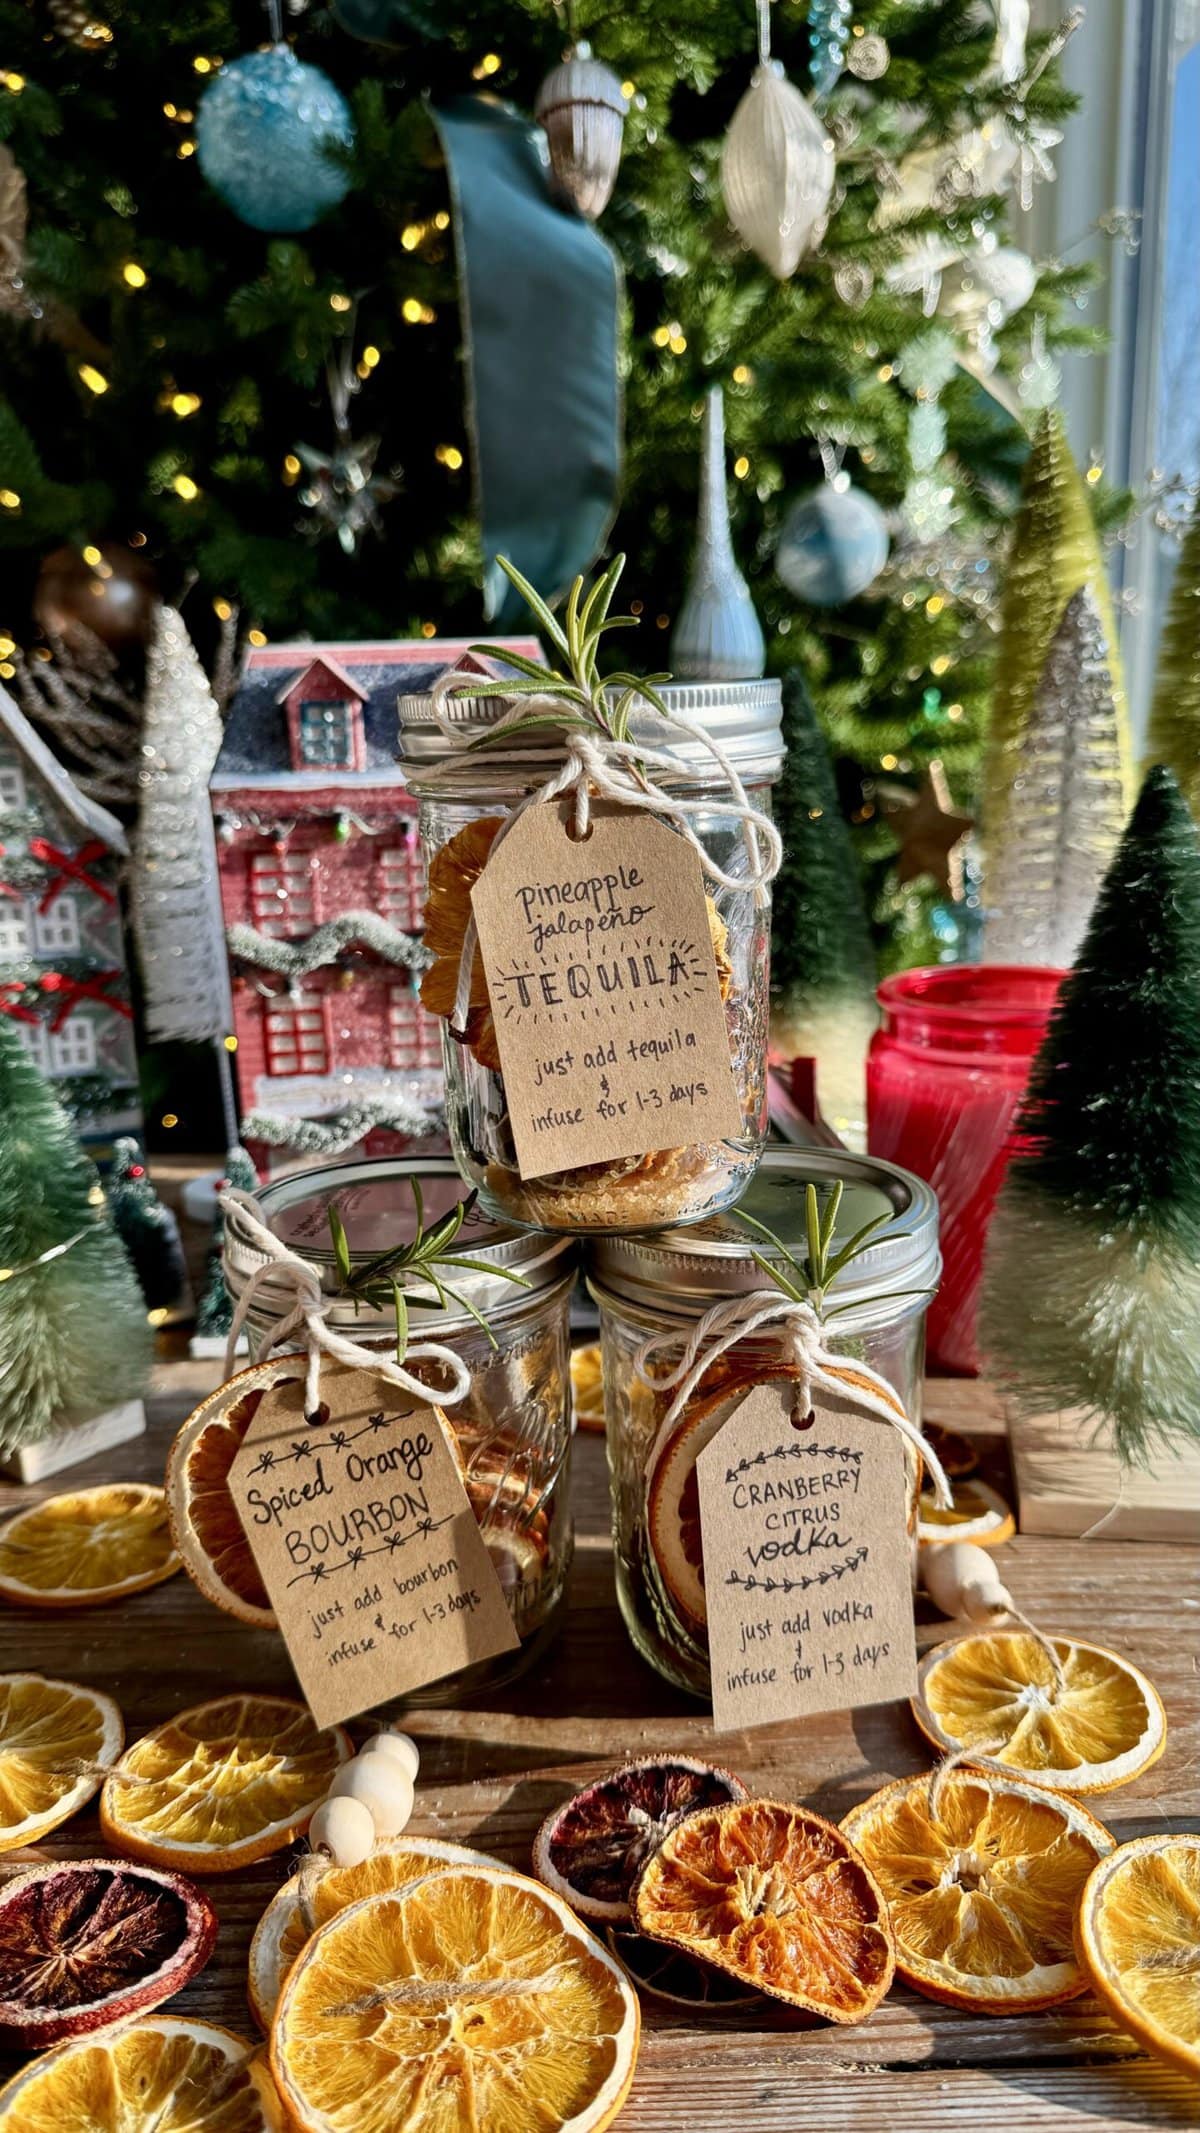
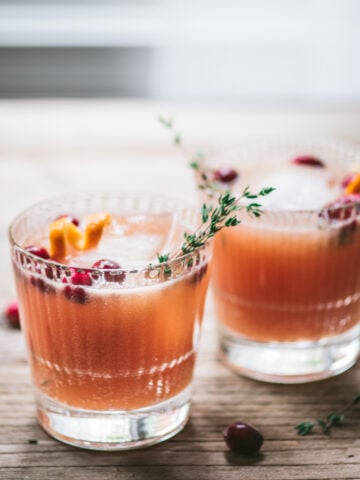
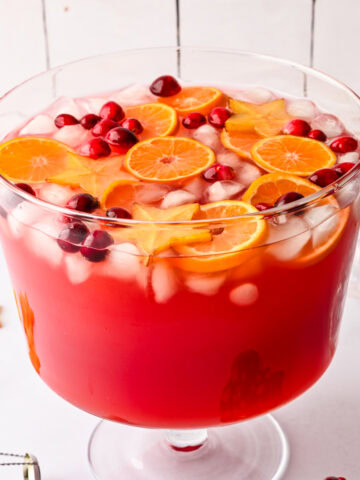
These DIY Cocktail Infusion Kits are the perfect easy homemade holiday gift! They're also super affordable and easy to customize with different add-ins and liquors. We included 3 different options below: Spiced Orange Bourbon, Pineapple Jalapeño Tequila and Cranberry Citrus Vodka.
Every year around the holidays, I see these cocktail kits at local stores (and even some big box stores, too!). As cute as they are, I'm always a bit surprised at the price tag – they usually run around $25+ for a basic glass jar filled with some dried fruit and spices.
This year, we thought why not DIY them? As it turns out, it's super easy to do AND it's significantly more affordable!
These DIY cocktail kits are a thoughtful, crowd-pleasing gift for just about anyone in your life, including family, friends, coworkers, hosts/hostesses, teachers and more!
Jump to:
Why We Love This Recipe
- Affordable: Those store-bought cocktail kits are not cheap! 😅 It's far less expensive to make these on your own, especially if you have a few mason jars laying around. All you need is some fruit, a few spices and a little bit of patience!
- Excellent holiday gift for anyone on your list: truly...who wouldn't want to receive one of these?! They're adorable, useful and extra thoughtful when you DIY.
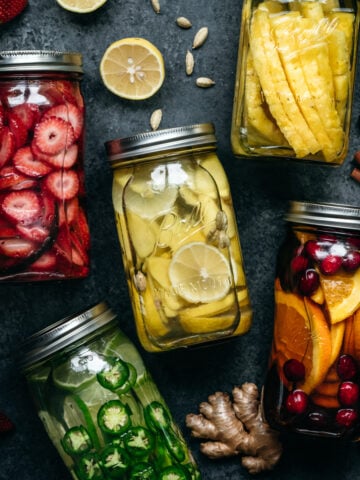
- Versatile: You can use this basic tutorial as a starting point for so many different flavor combinations! We've included a few more flavor ideas in the notes section below.
- Easy: Although you'll need a bit of time to dry the fruit, these DIY cocktail kits are mostly hands off. If you make a big batch, you can easily assemble 10+ of these in less than an hour!
Equipment
Disclosure: Some of the links below are affiliate links. This means that, at zero cost to you, I will earn an affiliate commission if you click through the link and finalize a purchase.
Here are a few helpful tools to make these DIY cocktail kits an absolute breeze to assemble:
- Jars: No need to get fancy here! We use these basic 16oz wide mouth mason jars with lids.
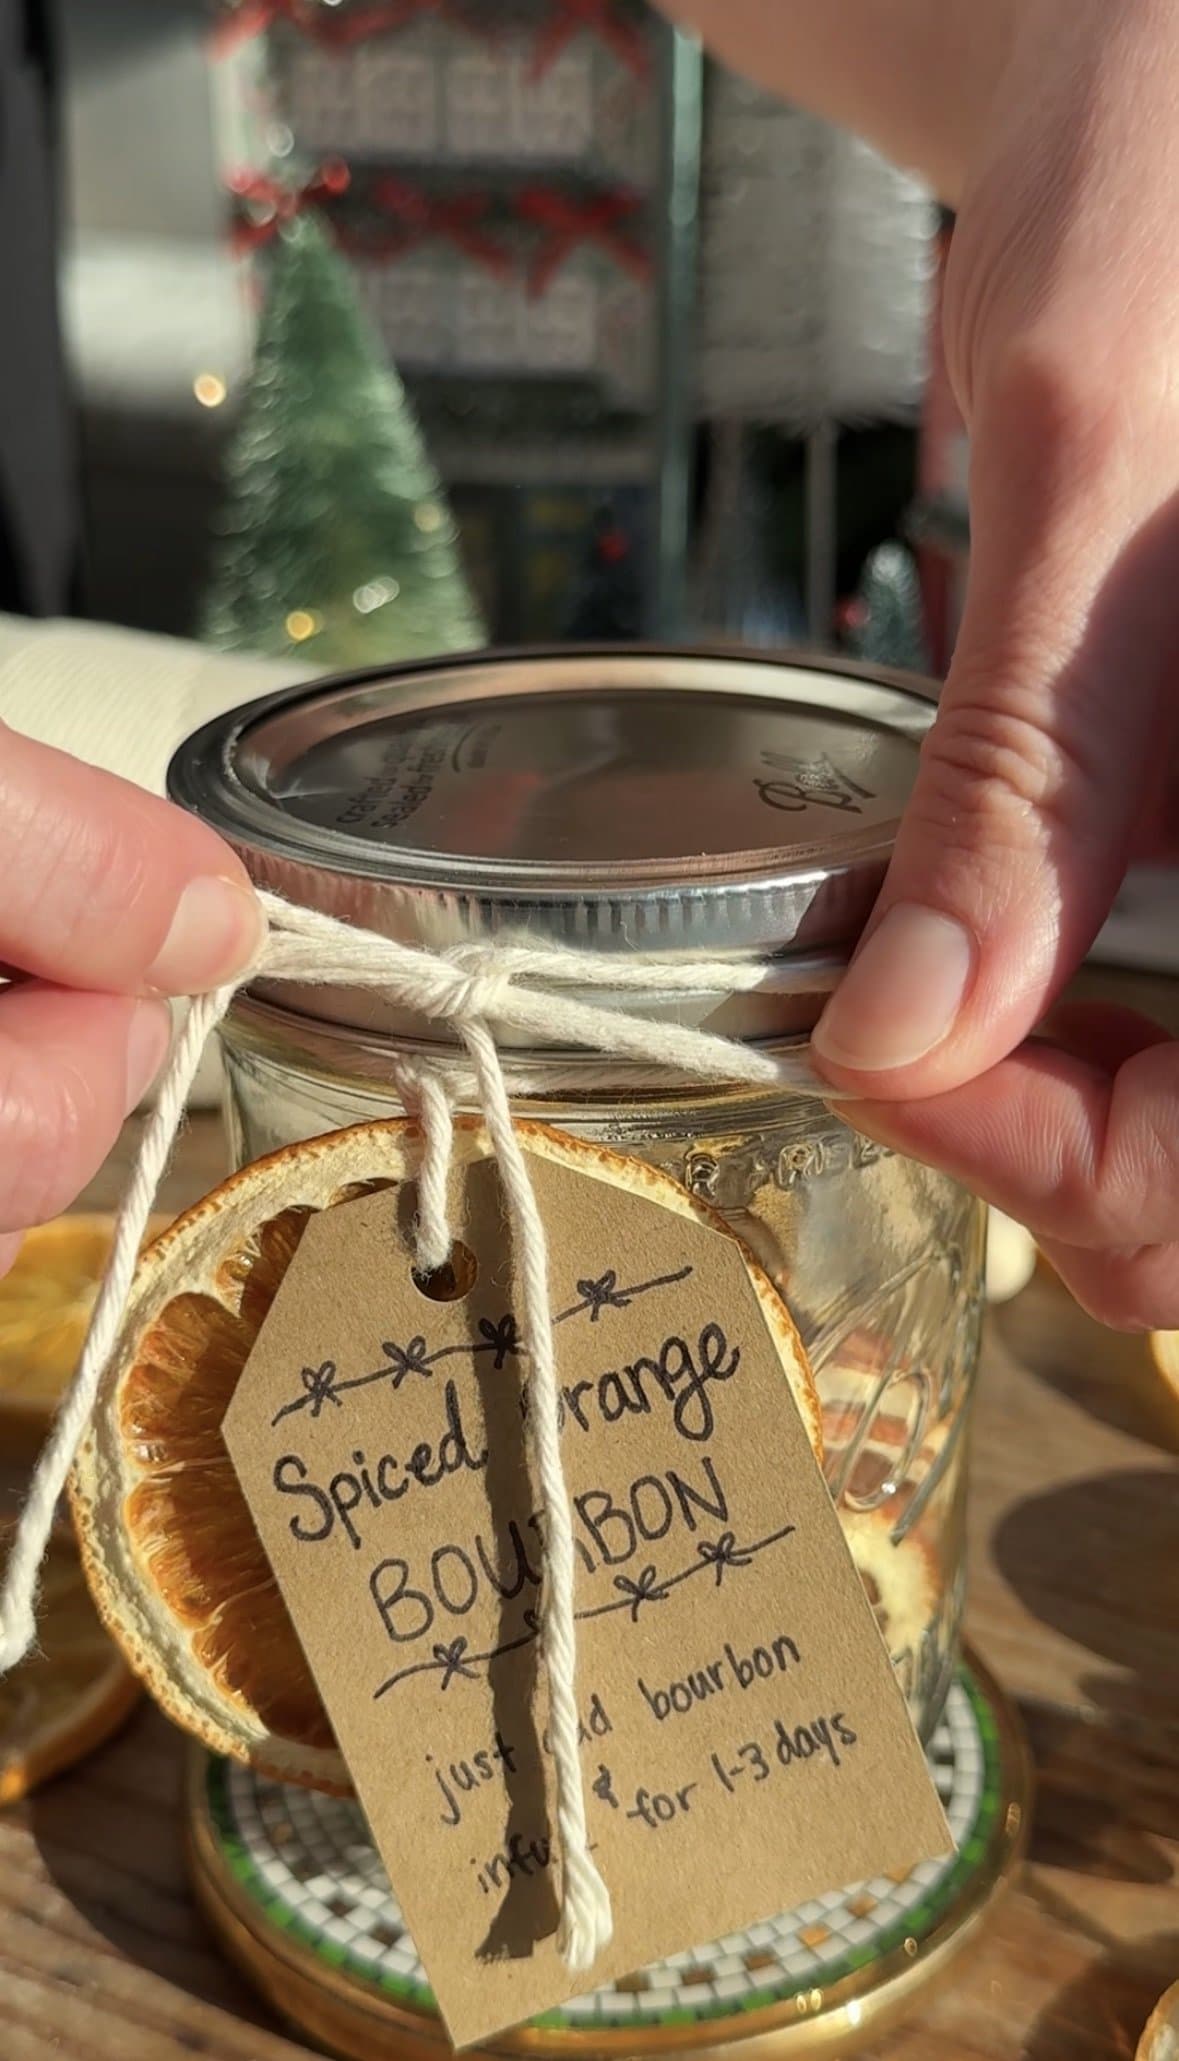
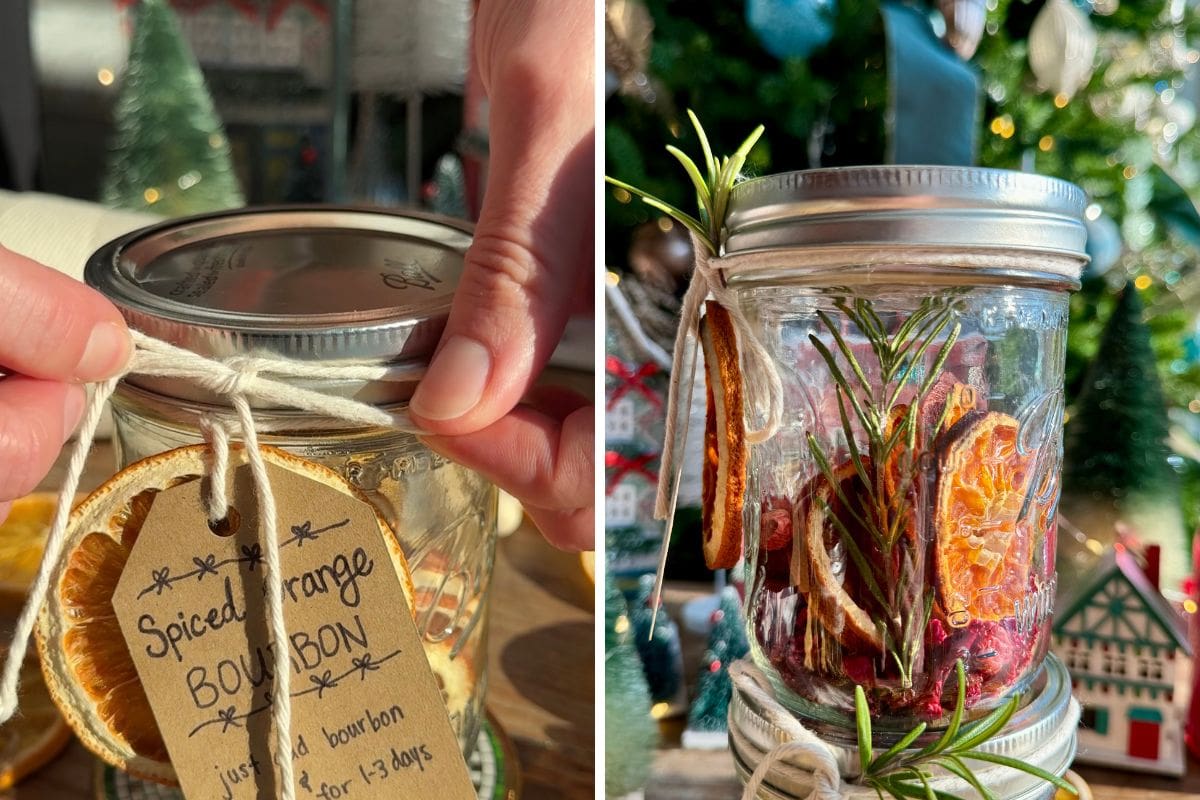
- Tags/labels: You can use just about any tags for these jars! I cut some tags out on thick paper, cut a hole punch, and used kitchen twine to affix it to the jar, along with an extra dried orange slice. You can also design and print your own tags on a website like Canva.
- This red and white twine is extra festive for the holidays!
- Countertop oven: This is the oven we use in all of our videos and we absolutely love it. It's especially great for drying/dehydrating since the temperature can go super low. We also use it as an air fryer! We use it almost every day – it heats up so much faster than our regular oven, so it's great to have on hand when you're short on time.
- Mandoline: This mandoline will help you slice the fruit into perfectly even-sized slices! We use ours several times a week. It's also great for salads, gratins, pickled vegetables, homemade chips and more.
Ingredient Notes
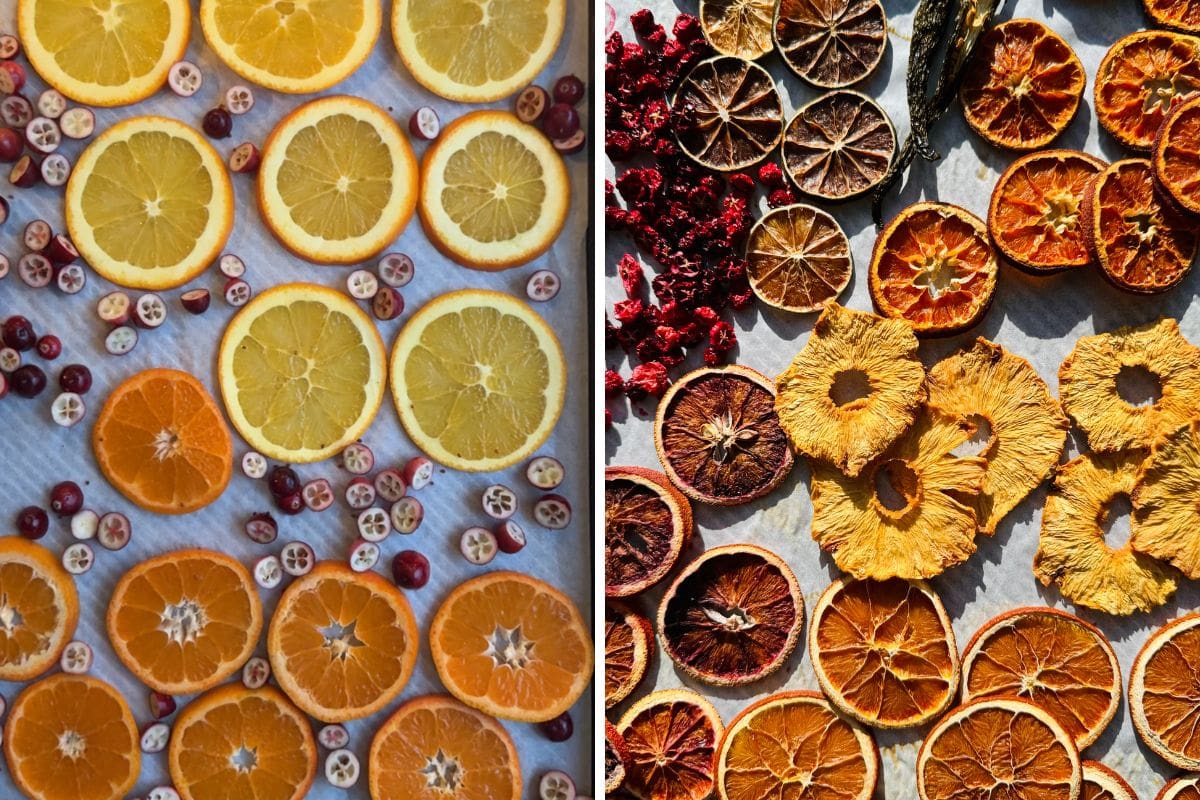
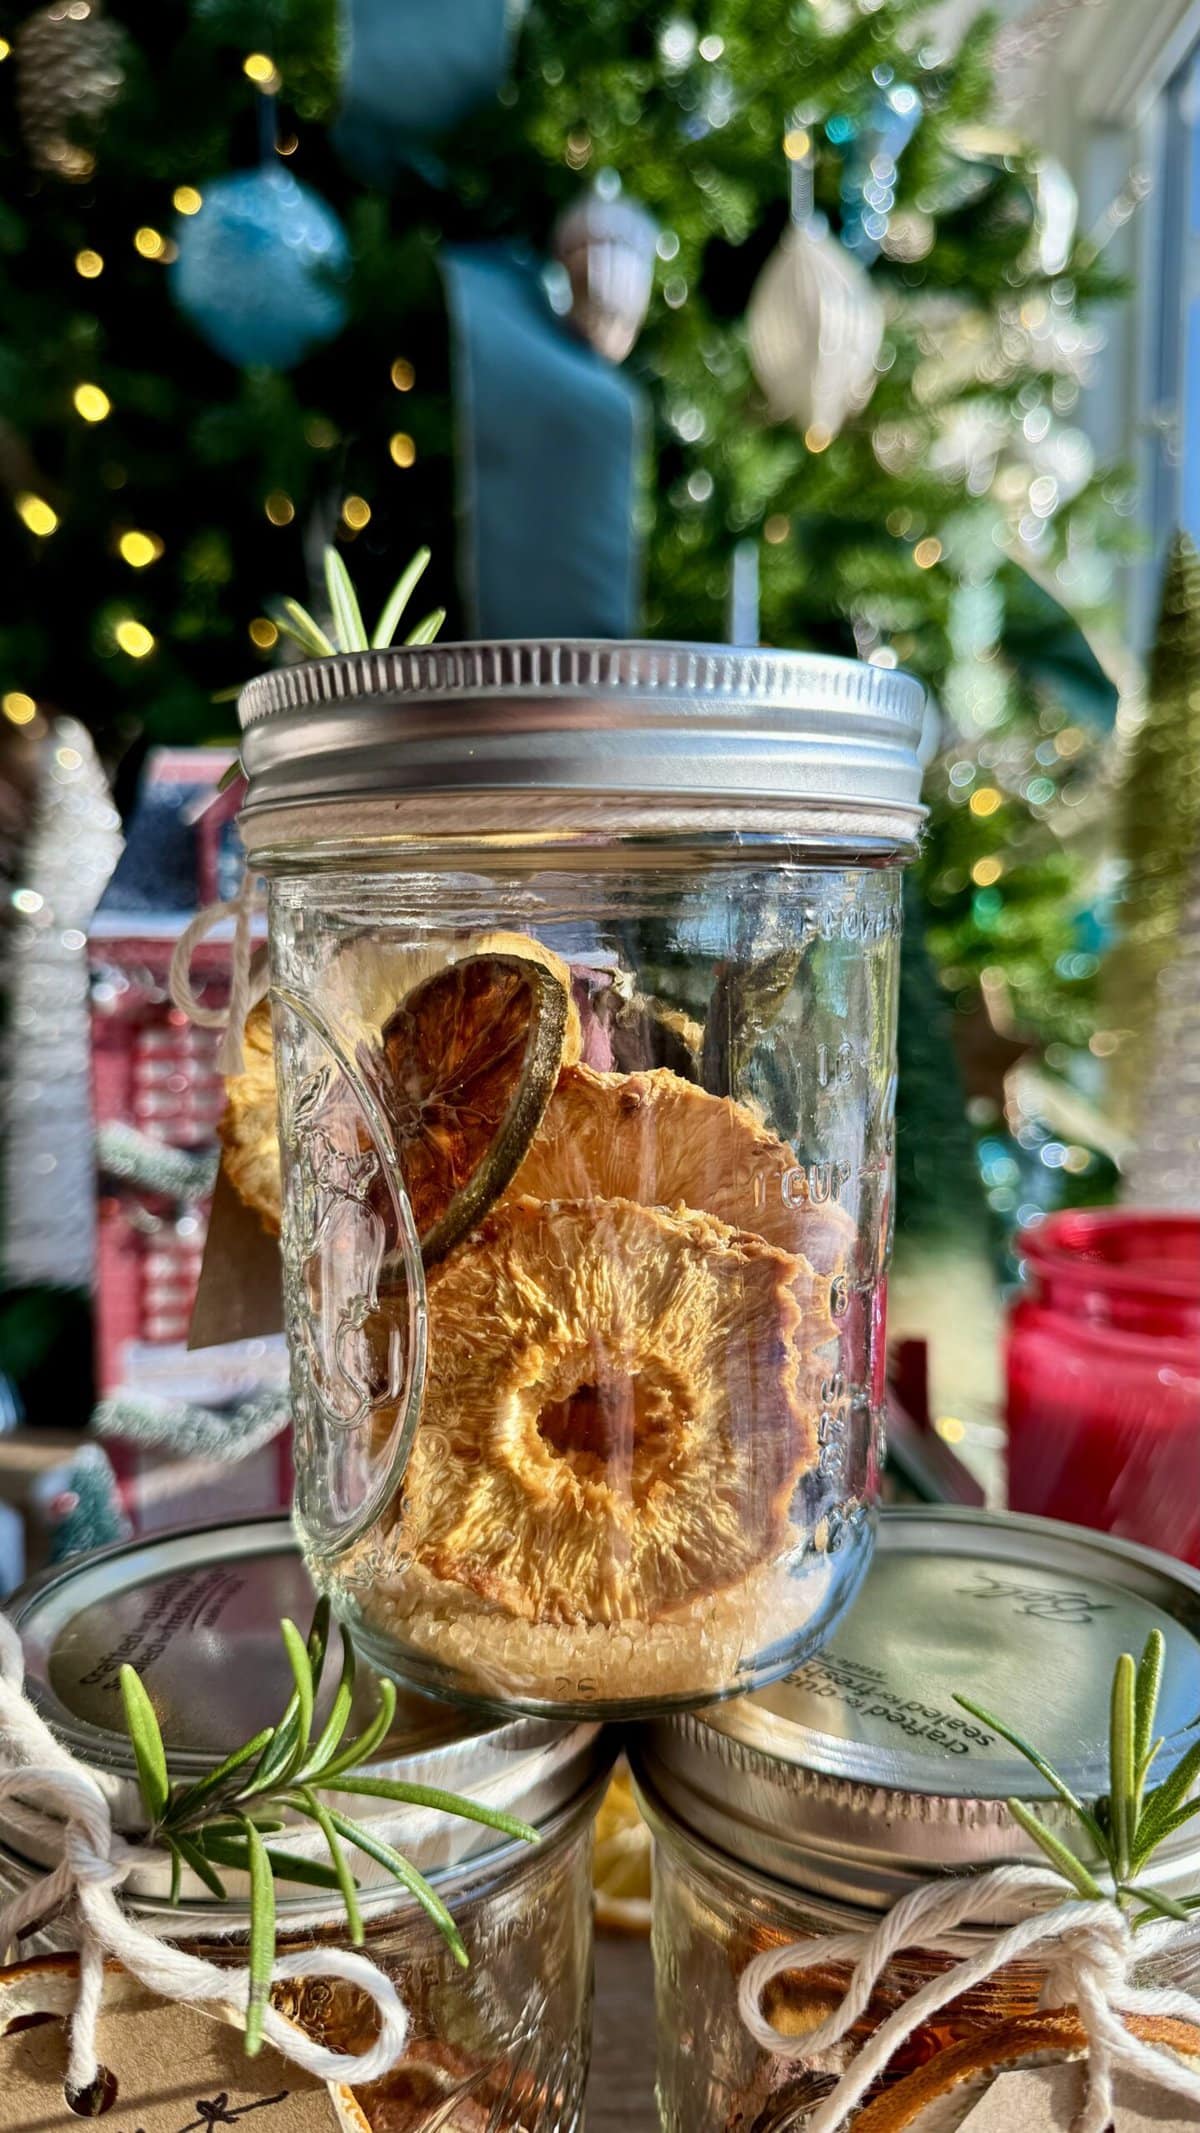
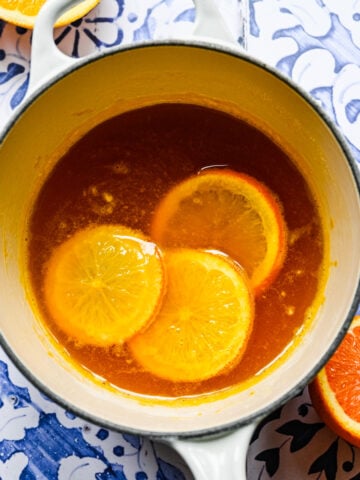
- Fruit: You can use so many different types of fruit in these DIY cocktail infusion kits. We take fresh fruit, slice it thinly, and dry it overnight at the lowest heat possible in our oven. The easiest options are any kind of citrus (lemon, lime, orange, grapefruit, etc), pineapple, apple and cranberries.
- You can also use store-bought dried fruit, like cranberries, cherries, apricots, figs, raisins and more.
- It's important to slice all fruit to an even thickness: about ⅛ inch works best. You can use a mandoline to keep the slices even.
- Spices: Whole spices are best here, including cinnamon sticks, cloves, cardamom, star anise, dried or crystallized ginger, etc. Vanilla beans are also a fantastic addition (although a bit more expensive).
- Sugar: Sugar is technically optional, but we like to add just a little bit to each infusion. For the spiced orange, we use candied ginger, which is a source of sugar. For the other two infusions, we just add in 1 tablespoon of sugar. We like using turbinado sugar, but any kind will do.
- Herbs & vegetables: Think dried jalapeño, dried herb sprigs like rosemary or thyme, etc. We add these in with the fruit to dry in the oven overnight!
Step-by-step Instructions
PREP: Preheat oven to the lowest temperature – we did 170˚F (75˚C). Line 2-3 baking sheets with parchment paper.
STEP 1: Prepare all of the fruit. We recommend drying out extra than what's listed above so you have back ups in case anything burns. Make sure to slice everything to the same thickness (about ⅛-inch), otherwise they will not dry at an even rate. Place all of the fruit on the sheet pans, grouping it by type (some fruits will take longer than others).

STEP 2: Place in the oven. The rosemary will take 1-2 hours, the limes and cranberries will take 3-4 hours, the oranges will take 4-6 hours, and the pineapples and jalapeño will take 6-8 hours. The fruits are done when they are completely dry to the touch on both sides. They may still be slightly pliable when you remove from the oven, but will harden as they cool.
STEP 3: Assemble the jars! Simply add all ingredients to a glass mason jar, screw on the lid and add a label. Write on the label, instructing the user to fill the jar with the alcohol of their choice and infuse for 1-3 days before straining.
More flavor combinations to try
- Tropical Rum: Dried pineapple, dried mango, dried papaya, coconut flakes and sugar.
- Chocolate Espresso Martini: Cacao nibs, coffee beans, 1-2 dried orange peels, vanilla bean.
- Spiced Apple Whiskey: Dried apples, dried orange, cinnamon, dried or crystallized ginger, whole cloves, whole cardamom, brown sugar.
- Sangria Infusion (for red or white wine): Dried apple, orange, strawberry, peach, lemon and sugar.
- Chocolate Orange Bourbon: Dried oranges, cacao nibs, sugar.
- Fruitcake Brandy: Raisins or dried cherries, dried oranges, candied pineapple, dates, pecans, cinnamon stick, whole spices, sugar.
Tips and FAQs
- Start drying the fruit the night/day before: Although this recipe is super easy and mostly hands off, you will need at least 4-6 hours for the fruit to dry out in the oven, so make sure to give yourself enough time.
- Nonalcoholic/mocktail version: If you want to gift these to someone who doesn't drink alcohol, they can actually use it as a DIY tea kit! Simply instruct them to pour in hot water and steep for several minutes before straining. You can also use a nonalcoholic spirit – we love these ones.
Here's how long it takes for us to dry out these common fruits at 170˚F. Note that every oven is different, so it's best to start checking after 2 hours. Flip the citrus halfway through if needed. If your oven only goes down to 200˚F, these times will be 1-2 hours shorter.
Rosemary (or other herbs): 1-2 hours (more delicate herbs may be shorter)
Oranges (any variety): 4-6 hours
Lemons and limes: 3-4 hours
Cranberries: 3-4 hours
Pineapple slices: 6-8 hours
Jalapeño halves: 6-8 hours (shorter if you slice into rounds)
Apples: 3-4 hours
Grapefruit: 5-7 hours
It should be dry to the touch on both sides. The fruit may still feel a little pliable right when you remove it from the oven, but will harden up as it cools.
When you give these as a gift, the user can add alcohol to the kit and infuse anywhere from 1-5 days before straining and enjoying. The longer it sits, the stronger the flavor.
These kits will last for 1 year in a cool, dark place. If stored in 80˚F, they will last 6 months.
Related Recipes
Tried this recipe? Please leave a star ⭐️⭐️⭐️⭐️⭐️ rating below and/or a review in the comments section further down the page. You can also stay in touch with us through social media by following us on Instagram, Pinterest, and Facebook or by subscribing to our newsletter.
📖 Recipe

DIY Cocktail Kits
- Total Time: 6 hours 15 minutes
- Yield: 3 16 oz jars
- Diet: Vegetarian
Description
These DIY Cocktail Infusion Kits are the perfect easy homemade holiday gift! They're also super affordable and easy to customize with different add-ins and liquors.
Ingredients
Spiced Orange Bourbon Kit:
- 5-6 navel or cara cara orange slices, sliced into ⅛-inch rounds
- 3 1-inch pieces crystallized (candied) ginger
- 1 cinnamon stick
- 2-3 whole cloves
- 1 cardamom pod (optional)
- 1 star anise pod (optional)
Pineapple Jalapeño Tequila Kit:
- 6 pineapple slices, cut into ⅛-inch rounds (or use store-bought dried pineapple)
- 1 small jalapeño, halved lengthwise (remove seeds for less spicy option)
- 4 lime slices, cut into ⅛-inch rounds
- 1 tablespoon sugar (we used turbinado) or 3 small sugar cubes
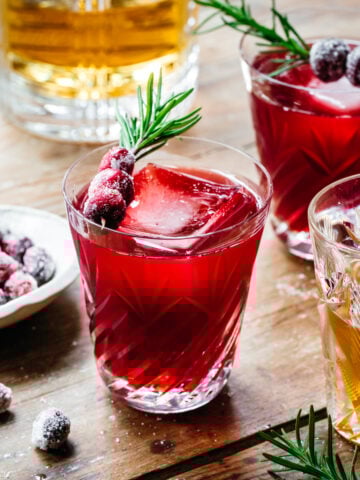
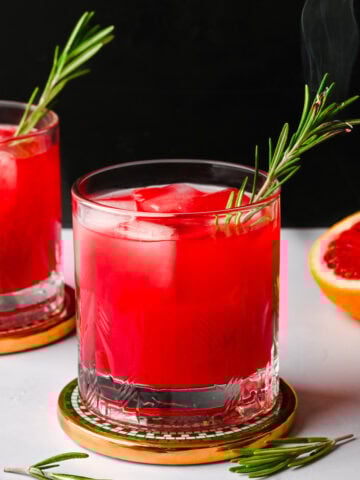
Cranberry Citrus Vodka:
- ½ cup fresh cranberries, halved
- 4-5 slices blood orange, cut into ⅛-inch rounds
- 4-5 slices tangerine, cut into ⅛-inch rounds
- 1 sprig dried rosemary
- 1 tablespoon sugar (we used turbinado) or 3 small sugar cubes
Instructions
- Preheat oven to the lowest temperature* – we did 170˚F (75˚C). Line 2-3 baking sheets with parchment paper.
- Prepare all of the fruit. We recommend drying out extra than what's listed above so you have back ups in case anything burns. Make sure to slice everything to the same thickness (about ⅛-inch), otherwise they will not dry at an even rate. Place all of the fruit on the sheet pans, grouping it by type (some fruits will take longer than others).
- Place in the oven. The rosemary will take 1-2 hours, the limes and cranberries will take 3-4 hours, the oranges will take 4-6 hours, and the pineapples and jalapeño will take 6-8 hours**. The fruits are done when they are completely dry to the touch on both sides. They may still be slightly pliable when you remove from the oven, but will harden as they cool.
- Assemble the jars! Simply add all ingredients to a glass mason jar, screw on the lid and add a label. Write on the label, instructing the user to fill the jar with the alcohol of their choice and infuse for 1-3 days before straining.
Notes
*If your oven only goes down to 200˚F, subtract 1-2 hours from the times listed in the instructions. Make sure to check them often, as there is a chance they will burn. Flip them every 30-60 minutes to prevent burning.
**Note that every oven is different, and these times may be shorter or longer than listed based on your oven. We recommend that you start to check each ingredient early and often to prevent burning. If needed, flip the fruit every hour or so to prevent burning.
Shelf life: These DIY cocktail kits will last for 1 year in a cool, dark place. If stored in 80˚F, they will last 6 months.
Find more flavor combination ideas in the blog post above!
Equipment used is listed in the "equipment" section of this blog post.
Nutrition information provided is an estimate. It may vary based on cooking method and specific ingredients used.
- Prep Time: 15 minutes
- Cook Time: 6 hours
- Category: Cocktails
- Method: Oven
- Cuisine: American
Nutrition
- Serving Size: 1 jar (without alcohol)
- Calories: 117
- Sugar: 24.5 g
- Sodium: 1.5 mg
- Fat: 0.2 g
- Carbohydrates: 30.2 g
- Fiber: 3.1 g
- Protein: 1.3 g
Erin says
Hi! I submitted a question but hadn't seen a reply. As my local stores don't carry blood oranges, I was wondering if a regular navel orange would work for the vodka kit? Thanks!
Erin says
Hi! None of my stores carry blood oranges. Would another type work for the vodka version? Thanks!
Jordan Lindeke says
These are incredible!! I’m making these again this year for a group of friends and wanted to try additional recipes to mix it up. For the other suggested recipes, should I try to mirror the listed recipes for the ratios of fruit and spices?
Lexi says
Yes exactly! So glad you enjoyed.
Betsy says
This is my second year making these kits, and I’m so glad to give them as gifts! I even bought a dehydrator so I could dry things! People love them, and I’m grateful to you for sharing the idea.
Lexi says
Thank you so much, Betsy! I'm so happy to hear that!
Brooks says
what is your recipe for the espresso martini? making these as I type this!
Lexi says
I haven't tested that one, but you could try this: Chocolate espresso: 1/4 cup lightly crushed espresso beans, 2-4 tbsp cacao nibs, 1 tbsp sugar. Optional other ingredients would be 1 cinnamon stick and a vanilla bean cut in half. You can recommend infusing with vodka, bourbon or rum.