
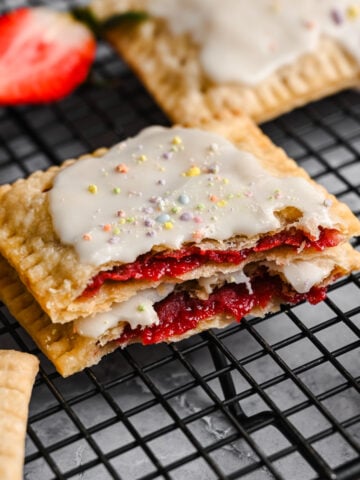
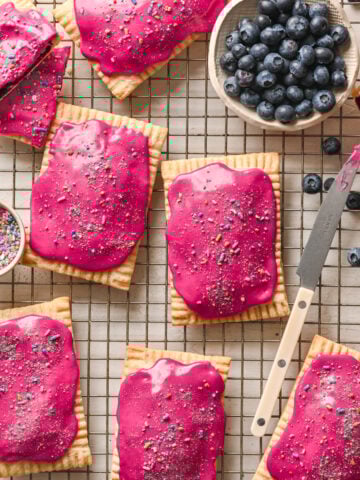
Fruit on the bottom yogurt is one of our favorite breakfasts: tangy yogurt swirled with fresh fruit is a great way to start your day. So why not make it at home? This Homemade Fruit on the Bottom yogurt is easier than you think, and tastier and cheaper than store-bought.
Disclosure: Some of the links below are affiliate links. This means that, at zero cost to you, I may earn an affiliate commission if you click through the link and finalize a purchase. Read our full affiliate disclosure here.

Whether it's back-to-school or meal prepping for work, it's nice to have breakfast already made. That's why we love easy meal prep breakfasts like overnight oats to stash in the fridge and enjoy all week. This homemade fruit on the bottom yogurt also fits into that category, since a gallon of milk will make about 2 weeks worth of yogurt!
The average fruit on the bottom yogurt at the grocery store is about $2-3, while half a gallon of whole milk costs about the same (for the whole gallon!), so even after the cost of fruit, this yogurt is significantly cheaper to make at home!
You'll need good quality store-bought yogurt with live cultures to get this batch started, but after you make the first batch, you can keep it going by using this batch as your next starter.
This is the latest installment of our Better than Store Bought series. You can check out some of our other homemade versions of your favorite store bought goodies, like these Homemade Goldfish or Homemade Cheez-its.
Jump to:
Homemade Fruit on the Bottom Yogurt Ingredients
For the Yogurt
- Milk: We used whole milk to make a full fat yogurt. You can also use a lower fat milk. Make sure you use homogenized milk (not "cream top" milk), or you will struggle to get the right consistency. You can also use a non-dairy milk, but your yogurt will not be vegan since we're using a dairy-based starter yogurt. For a fully vegan yogurt, you'll need to purchase vegan starter cultures!
- Yogurt with live cultures: To get your yogurt started, you will need to buy a small amount of store bought yogurt that has live cultures. If you buy organic yogurt, you should be good. Look for cultures like L. bulgaricus and S. thermophilus. Be sure to use a plain, unflavored yogurt. If your yogurt does not have live cultures, this recipe will not work.
- Maple syrup: Your unsweetened yogurt will be very tangy, so we added maple syrup to balance out the flavor. Make sure to use pure maple syrup, NOT pancake syrup! You can also use honey or agave instead. Or, if you prefer it sugar free, you don't have to add anything!
- Vanilla bean paste: We opted to make our yogurt slightly vanilla flavored. You can omit this or use a bit of vanilla extract instead.
For the Fruit on the Bottom
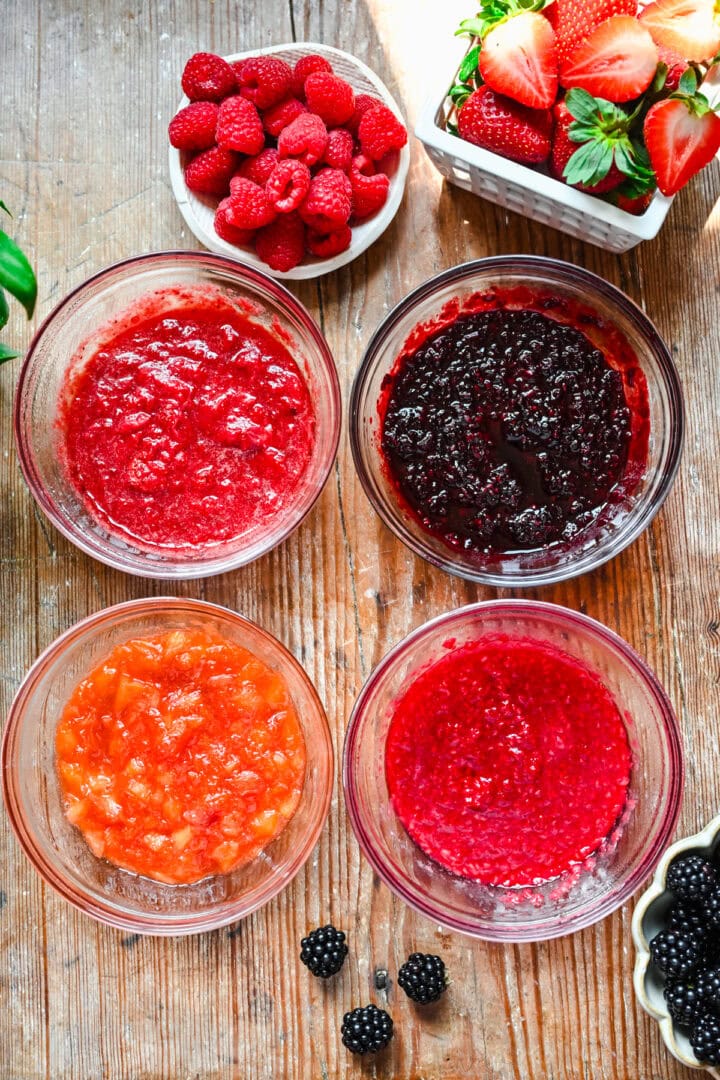
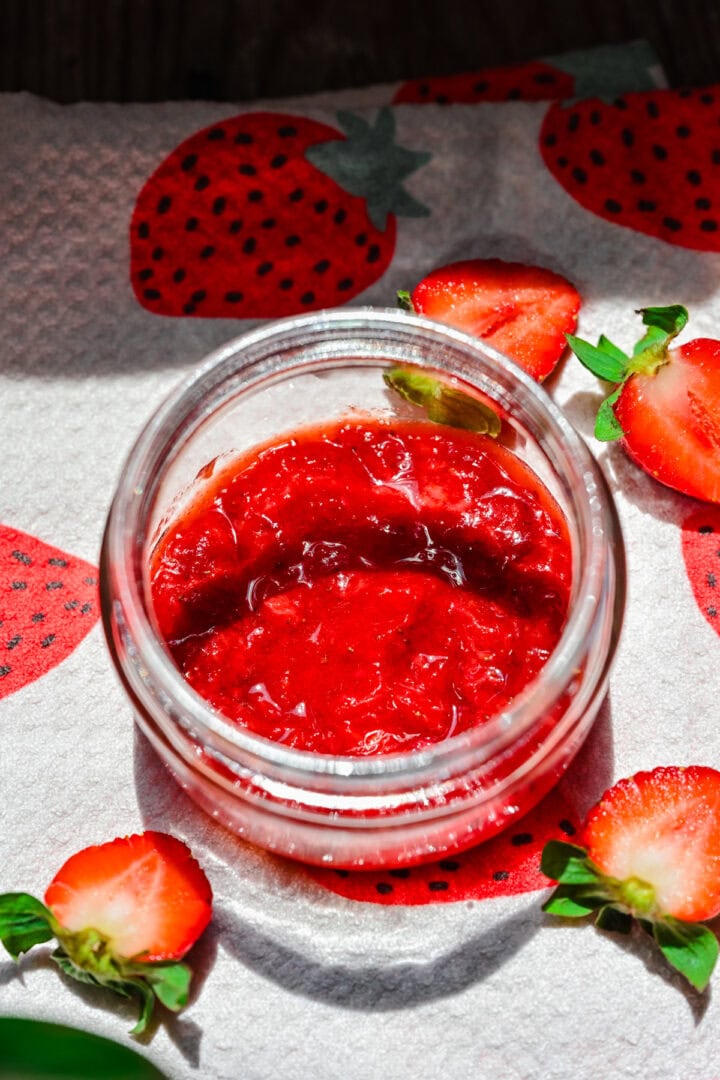
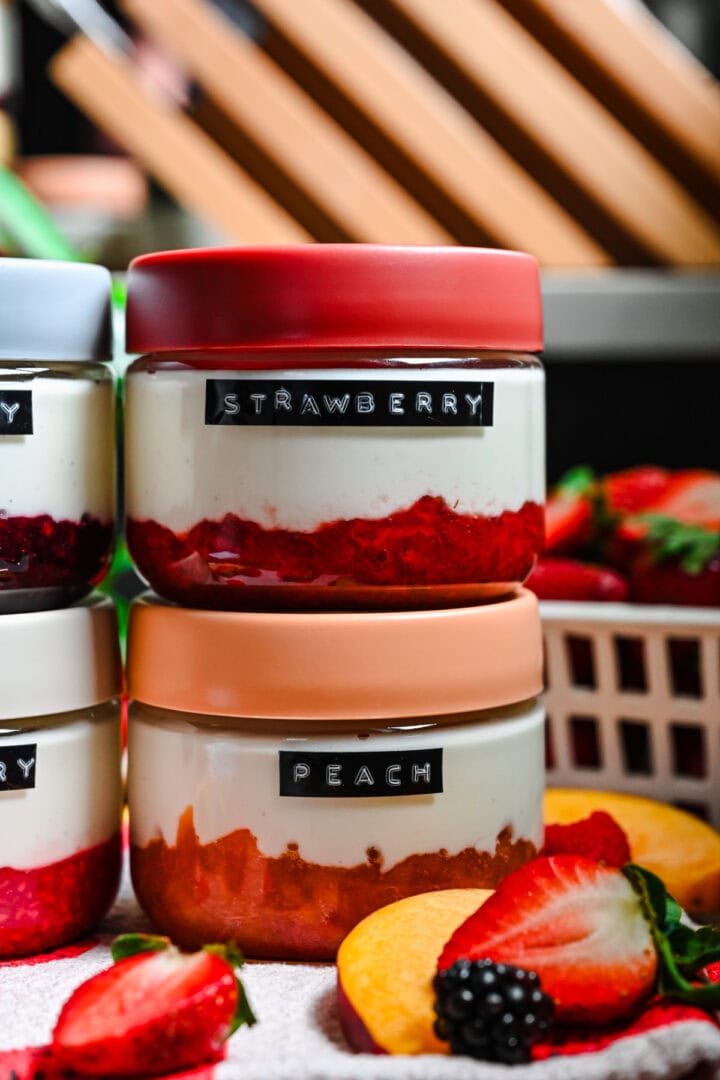
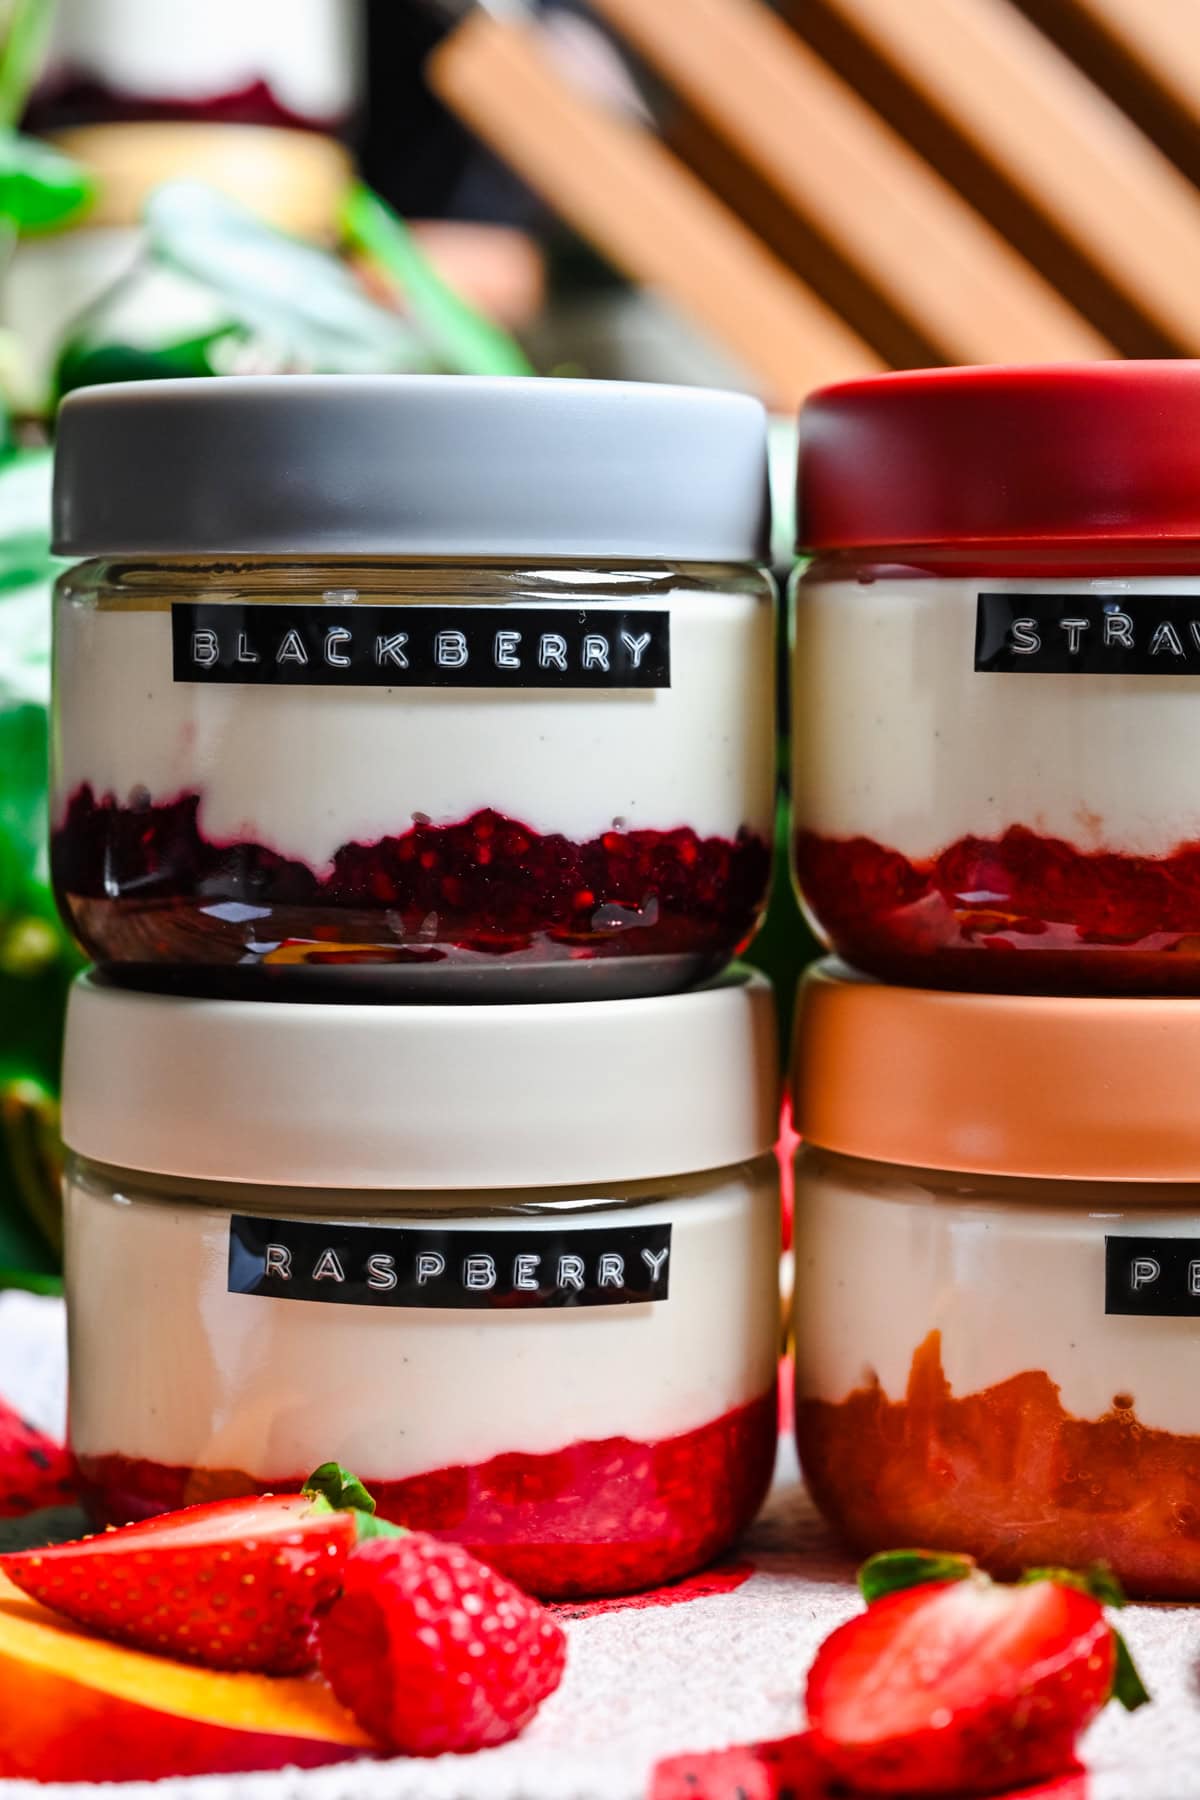
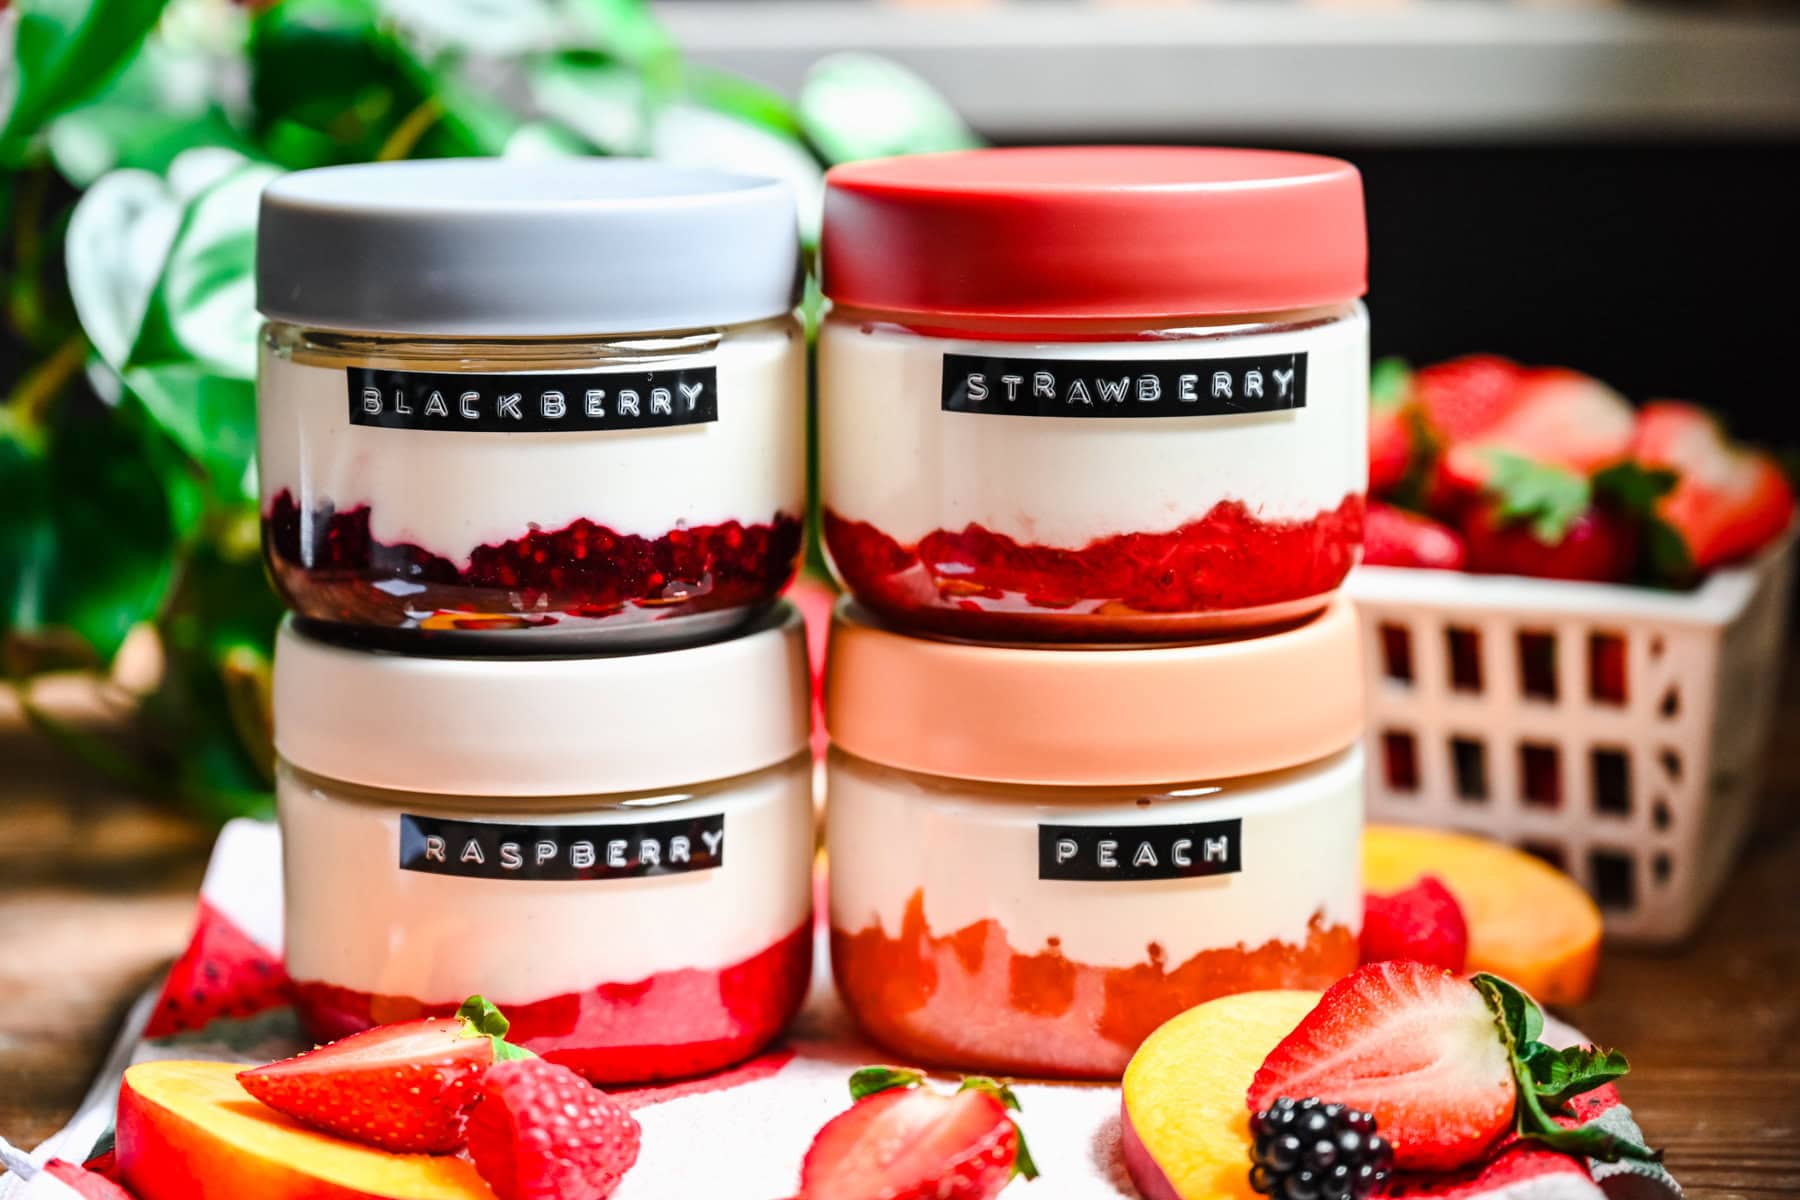
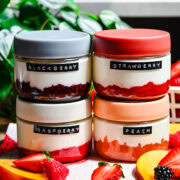
- Fruit: Use your favorite! We used peach, raspberry, strawberry, and blackberry, but mango or other berries would be great.
- Lemon juice: This really helps bring out the fruit's flavor.
- Maple syrup: adds a touch of sweetness to the fruit. Feel free to leave this out if preferred.
How to Make this Homemade Fruit on the Bottom Yogurt Recipe
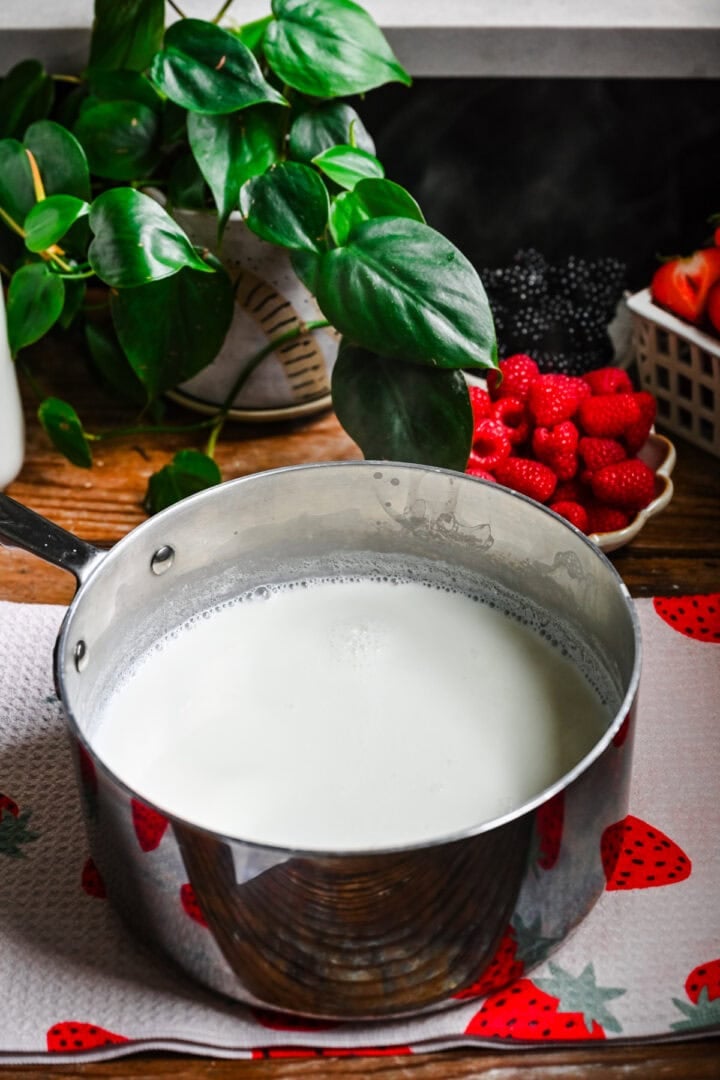
STEP 1: Heat your milk. You'll need to heat your milk to 180-185˚F (~83˚C) to kill off any bacteria that might compete with your starter cultures. Let your milk cool down before proceeding to step 2.
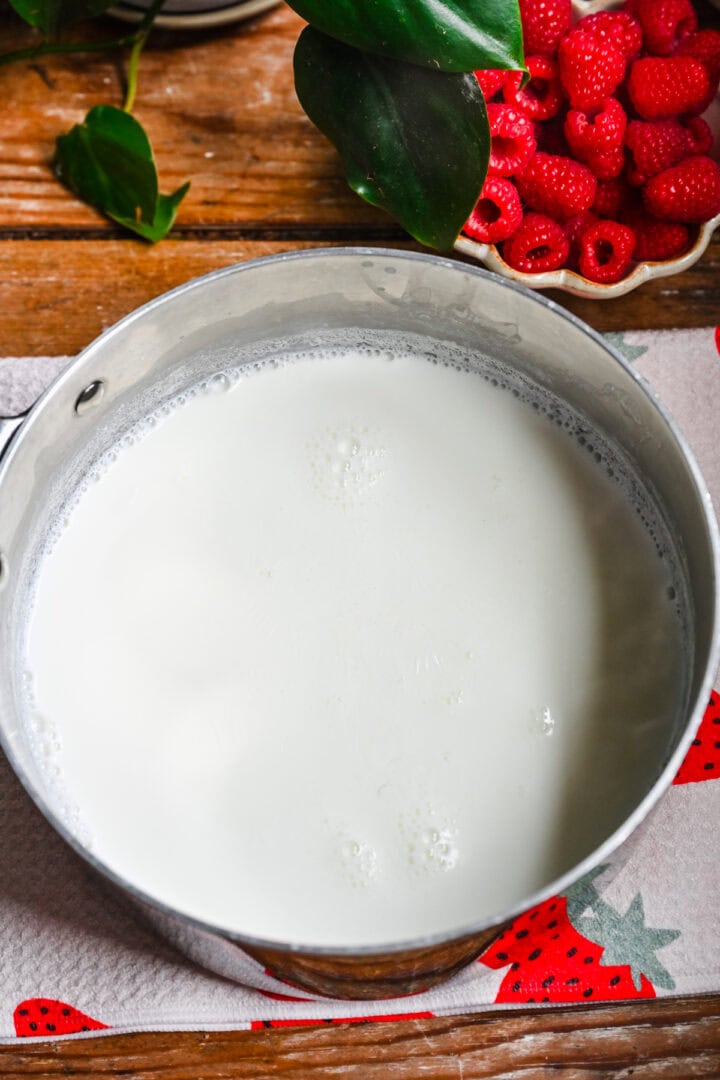
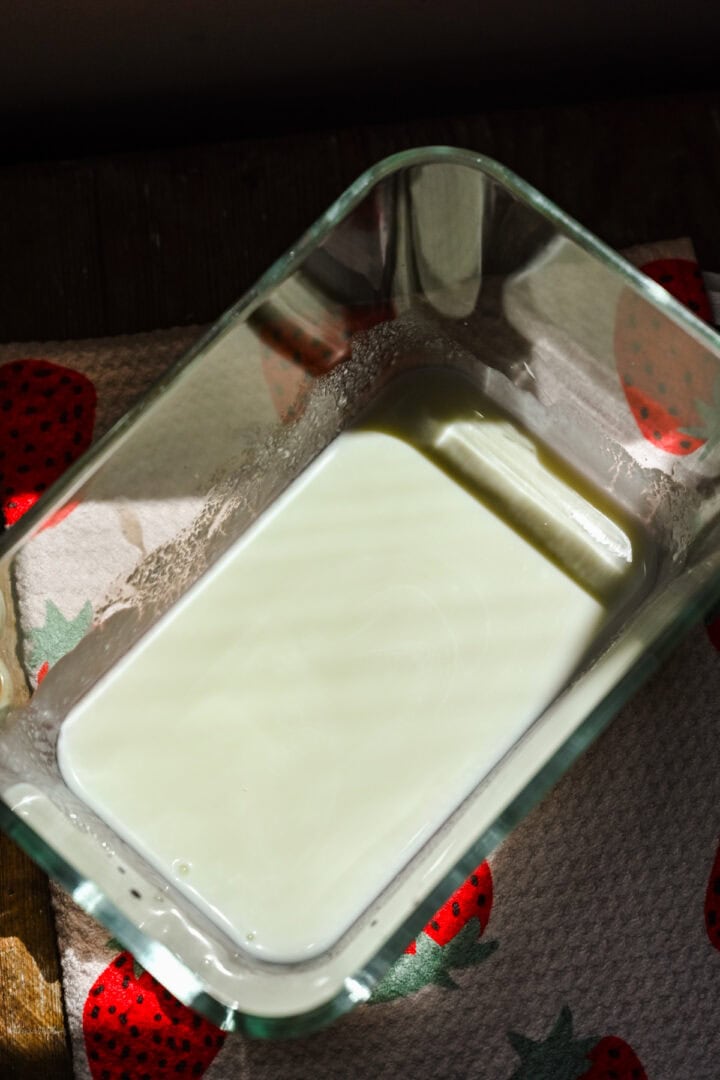
STEP 2: Combine your milk and active starter culture. For every 1 cup of milk you're using, add 1 tablespoon of starter yogurt to a large container. Then whisk in a little bit of the cooled milk, then pour in the rest.
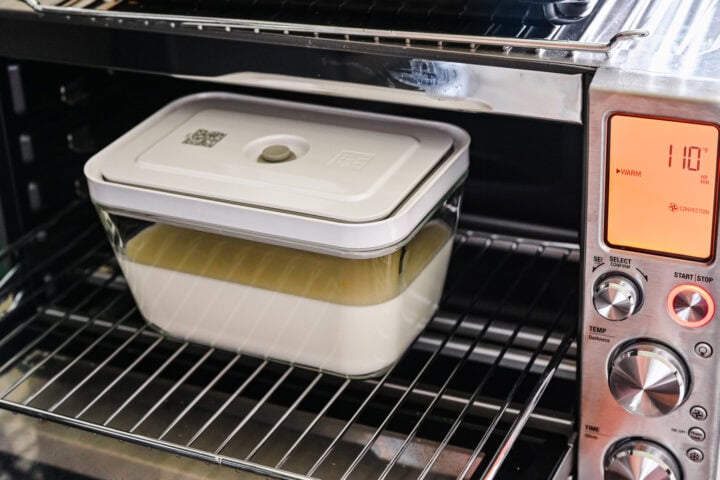
STEP 3: Heat your yogurt at ~110˚F for 6 hours. You have some options here on how to accomplish this. We have a countertop oven that has a "warm" feature. We covered the yogurt and let it sit in the warmed oven. Alternatively, you can put your mixture in a sealed, airtight container and place it in a crockpot filled with water and set it to "warm". You can also place it in the oven with the oven light on, which can heat your oven to around the correct temperature. This is the least reliable method and you might get mixed results with it.
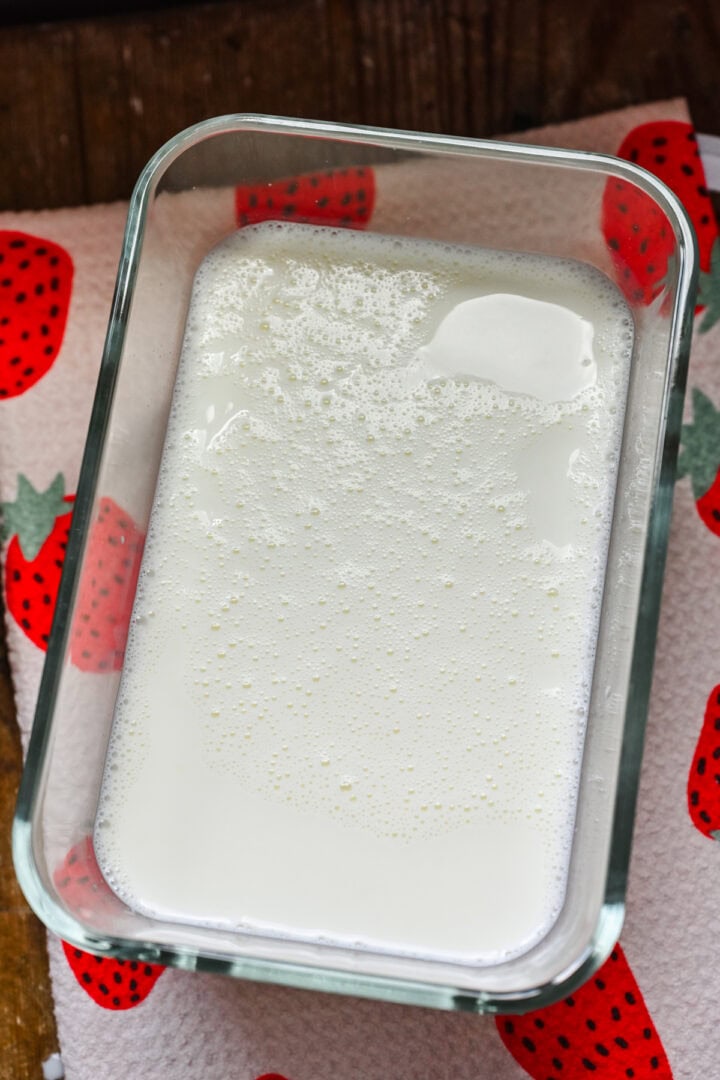
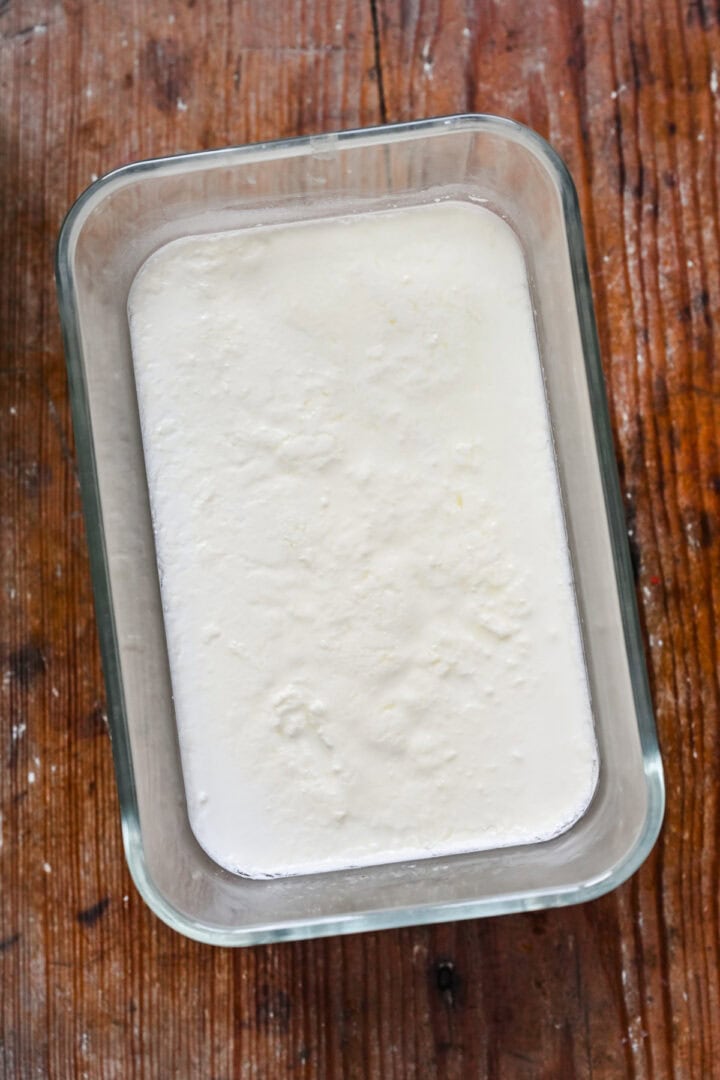
After six hours, your milk will have turned into yogurt! Place it into the fridge to cool off and thicken up even more.
STEP 4: Optional: Strain your yogurt, then mix in sweetener/vanilla bean paste. Your yogurt will be pretty thick out of the fridge, but keep in mind it will thin out once you add in the maple syrup. If you prefer a thicker or even a greek-style yogurt. You can place the yogurt in a cheese cloth, tie a rubber band around the cloth, and let it sit in a colander to drain. You can squeeze it every once in a while to speed up the process. We did not strain our yogurt and we liked the texture.
Mix in the maple syrup and vanilla bean paste.
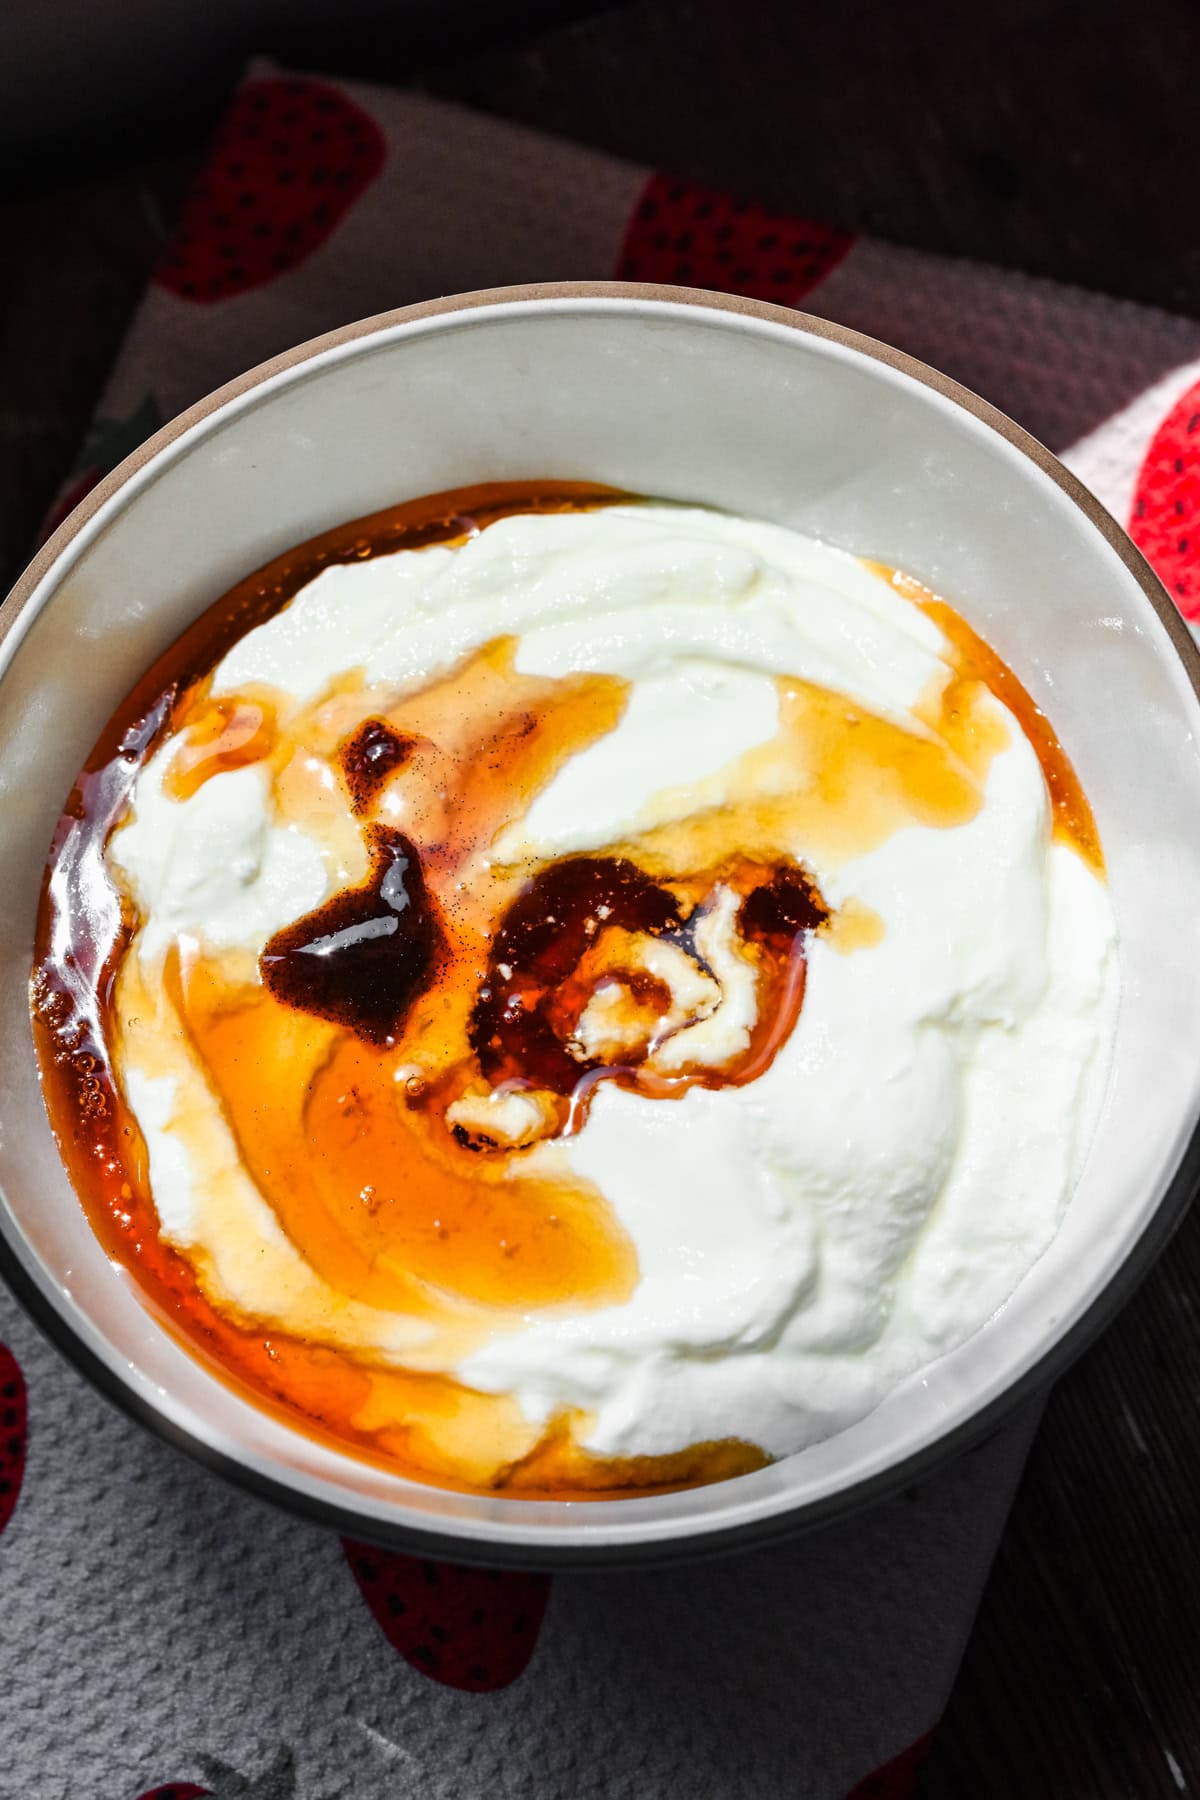
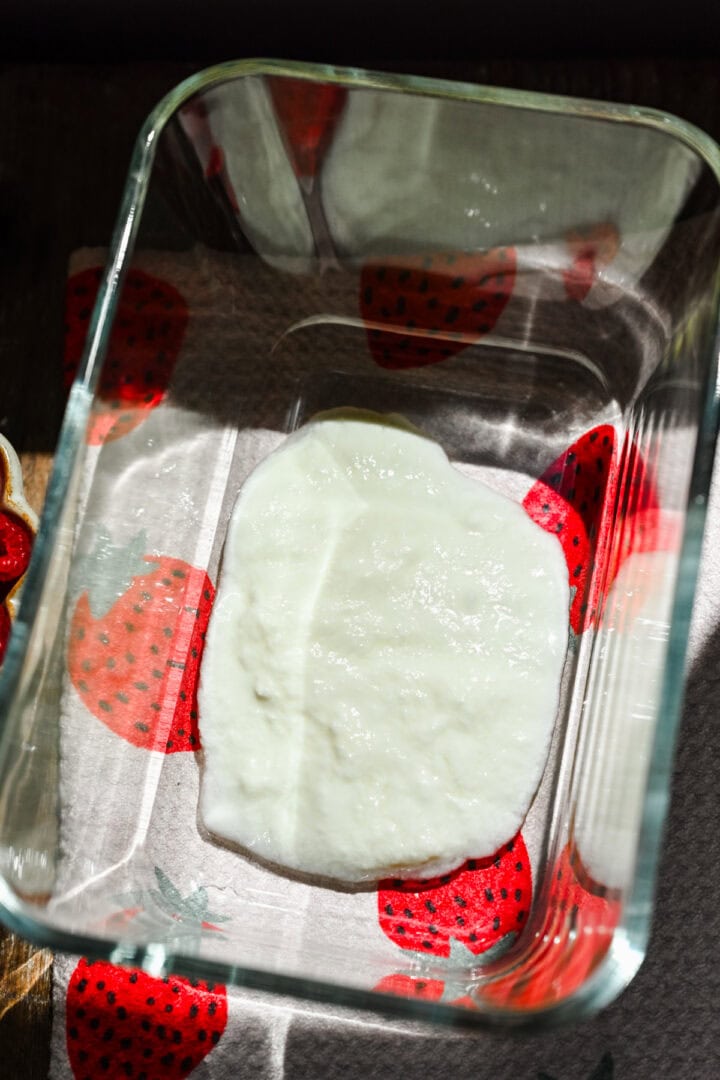
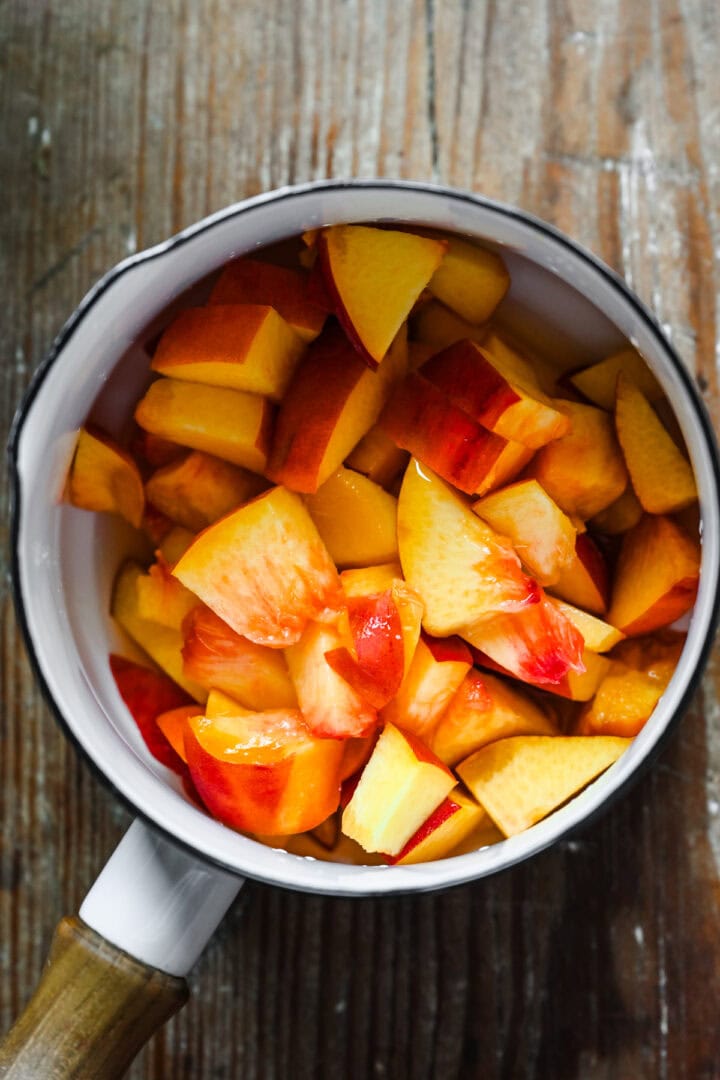
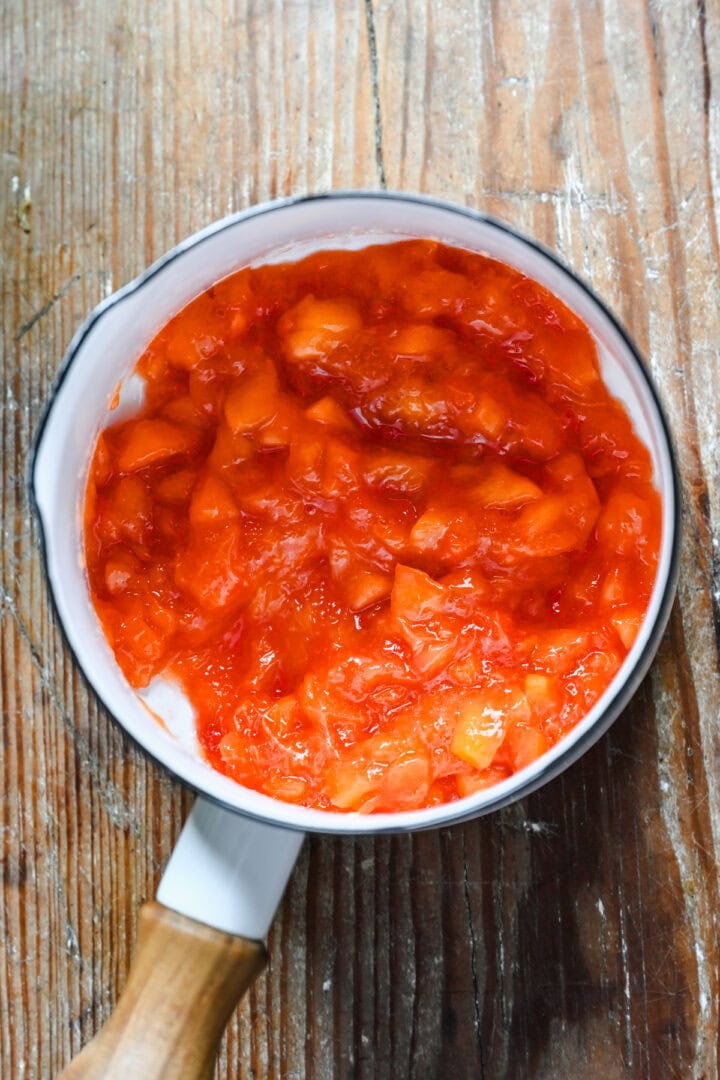
STEP 5: Make your fruit on the bottom mixtures. Combine 1 cup of fresh fruit, 1 tablespoon of lemon juice, and 1 tablespoon of maple syrup in a saucepan over medium heat. Once the fruit starts to bubble and soften, mash gently with a masher or a wooden spoon. Continue cooking over medium-low heat, stirring often, until the mixture is jammy (about 10 minutes total). Remove from heat and let cool completely.
STEP 6: Assemble your yogurts. Spoon about 1.5-2 tablespoons of the fruit mixture in to the bottom of a jar, then pour yogurt over the top. Seal, store in the refrigerator and enjoy within two weeks!
Substitutions and Variations
- Vegan: to make this recipe vegan, you'll need to buy vegan starter cultures and use a non-dairy milk. The same exact process should yield delicious vegan yogurt!
- Choice of fruit: feel free to use whatever fruit you want, or even to just premix the fruit into the yogurt when filling your jars. You can also use store-bought jam in place of homemade fruit compotes. We love this brand (no cane sugar!).
- Here are a few other compotes/jams you could try with this homemade yogurt:
- Unsweetened: leave out the maple syrup to make your yogurt unsweetened and super low in sugar. Just note, it will be very tangy! If you want to use some of your homemade yogurt in savory recipes like tzatziki, definitely leave out the maple and vanilla.
- Greek yogurt: To turn your yogurt into Greek yogurt, place your yogurt in a cheese cloth, tie off the top, then place in a colander and put a relatively heavy object on top. This will squeeze out the excess water, leaving you with a super thick Greek-style yogurt.
- Low fat: Use a 2% milk if you want your yogurt to have less fat.
What to Serve with Homemade Fruit on the Bottom Yogurt
This homemade yogurt is perfect with a sprinkle of granola, even more sliced fresh fruit, or a drizzle of honey. Here are a few of our favorite homemade granola recipes to pair with your homemade yogurt!
Equipment
- You'll need a large jar or airtight, heat safe tupperware to make this recipe. These are the containers we use.
- You'll need small jars to store your yogurt. We used these glass jars from Amazon and they are the perfect size. You can also use mason jars or small tupperware containers. Look for a jar that fits around 8 oz (or smaller) for a serving that's similar to what you would get with store-bought.
- A thermometer will allow you to bring your milk to the correct temperature.
- Vanilla bean paste is totally optional, but adds the best vanilla flavor to your homemade yogurt!
- If you're interested, this is the countertop oven we use, which we can heat specifically to 110˚F, which makes this homemade yogurt an absolute breeze.
Storage
Stored in clean, airtight containers, these homemade yogurts will keep for about 2 weeks in the refrigerator.
Tips and FAQ
Top tip
Make sure you use a yogurt as your "starter" that has live or active cultures. If you use organic yogurt, it should work. Look on the packaging to see if it specifically states that is has live and active cultures like L. bulgaricus and S. thermophilus.
More tips
- Be sure to not skip the step where you pasteurize your milk. The point is to kill off any non-beneficial bacteria that may compete with your starter cultures.
- Cool off the milk to at least 110˚F before mixing it with your starter yogurt.
- Heating your yogurt: To heat your yogurt for a long period of time, the easiest option is to fill a crockpot with water, heat to the "warm" or "keep warm" setting, place your yogurt (in a sealed airtight container) into the water for 6 hours.
- Don't touch your yogurt while it's culturing, it will result in a watery consistency if you're sloshing it around repeatedly. It will begin to start thickening significantly around the 4 hour mark.
- To make greek-style yogurt, you'll need to strain the yogurt with a cheesecloth to remove excess moisture.
- For every 1 cup of milk you use, use 1 tablespoon of your starter yogurt.
- Use a plain, unflavored yogurt with active/live cultures as your starter yogurt.
- Make another batch: Once you get this first batch going, you'll never need to buy store-bought yogurt again! Just reserve ¼-1/2 cup of this batch of yogurt to use as your new starter for the next batch of homemade yogurt.
You can use 2% or whole milk to make super creamy, full fat yogurt (this is our suggestion), but skim milk will also work.
More homemade versions of your favorite foods
Looking for other recipes like this? Try these:


Tried this recipe?
Please leave a star ⭐️⭐️⭐️⭐️⭐️ rating below and/or a review in the comments section further down the page. You can also stay in touch with us through social media by following us on Instagram, Pinterest, TikTok, Facebook or by subscribing to our newsletter.
📖 Recipe
Homemade Fruit on the Bottom Yogurt
- Total Time: 10 hours 15 minutes
- Yield: 4 cups (8 servings) 1x
- Diet: Gluten Free
Description
Fruit on the bottom yogurt is one of our favorite breakfasts: tangy yogurt swirled with fresh fruit is a great way to start your day. So why not make it at home? This Homemade Fruit on the Bottom yogurt is easier than you think, and tastier and cheaper than store-bought.
Ingredients
Yogurt:
- 4 cups whole or 2% milk
- 4 tablespoons plain, unflavored yogurt with live cultures*
- ¼ cup pure maple syrup or another sweetener of choice
- 1-2 teaspoons vanilla bean paste (optional)
Fruit on the bottom:
- 1 cup fresh fruit
- 1 tablespoon lemon juice (juice of ½ lemon)
- ½-1 tablespoon maple syrup
Instructions
- Heat your milk. You'll need to heat your milk to 180-185˚F (~83˚C) to kill off any bacteria that might compete with your starter cultures. Let your milk cool down before proceeding to step 2.
- Combine your milk and active starter culture. Add the starter yogurt to a large heat-safe container or bowl. Add in about ½ cup of the cooled milk and whisk until smooth, then add in the remaining milk and whisk well.
- Heat your yogurt at ~110˚F for 6 hours. There are a few ways to do this: we have a countertop oven that has a "warming" feature, which we can set to exactly 110˚F. We covered the yogurt and let it sit in the warmed oven. Alternatively, you can put your mixture in a sealed, airtight container and place it in a crockpot filled with water and set it to "warm". You can also place it in the oven with the oven light on, which can heat your oven to around the correct temperature. This is the least reliable method and you might get mixed results with this method.
- After six hours, your milk will have turned into yogurt! Let cool, slightly, then place it into the fridge to cool off and thicken up even more.
- Optional: Strain your yogurt. Your yogurt will be pretty thick out of the fridge, but keep in mind it will thin out once you add in the maple syrup. If you prefer a thicker or even a greek-style yogurt, you can place the yogurt in a cheese cloth, tie a rubber band around the cloth, and let it sit in a colander to drain. You can squeeze it every once in a while to speed up the process. We did not strain our yogurt and we liked the texture.
- Whisk in the maple syrup and vanilla bean paste. Taste and adjust as desired.
- Make your fruit on the bottom mixtures while the yogurt is chilling. Combine 1 cup of fresh fruit of choice, 1 tablespoon of lemon juice, and ~1 tablespoon of maple syrup in a saucepan over medium heat. Once the fruit starts to bubble and soften, mash gently with a masher or a wooden spoon. Continue cooking over medium-low heat, stirring often, until the mixture is jammy (about 10 minutes total). Remove from heat and let cool completely.
- Assemble your yogurts. Spoon about 1.5-2 tablespoons of the fruit mixture in to the bottom of a jar (these are the ones we use), then pour yogurt over the top. Seal, store in the refrigerator and enjoy within two weeks!
Notes
*Make sure your starter yogurt has live or active cultures. If you use organic yogurt, it should work. Look on the packaging to see if it specifically states that is has live and active cultures like L. bulgaricus and S. thermophilus.
Make another batch: Once you get this first batch going, you'll never need to buy store-bought yogurt again! Just reserve ¼-1/2 cup of this batch of yogurt to use as your new starter for the next batch of homemade yogurt.
Be sure to not skip the step where you pasteurize your milk. The point is to kill off any non-beneficial bacteria that may compete with your starter cultures.
Cool off the milk to at least 110˚F before mixing it with your starter yogurt.
To heat your yogurt for a long period of time, the easiest option is to fill a crockpot with water, heat to the "warm" or "keep warm" setting, place your yogurt (in a sealed airtight container) into the water for 6 hours.
Don't touch your yogurt while it's culturing, it will result in a watery consistency if you're sloshing it around repeatedly. It will begin to start thickening significantly around the 4 hour mark.
To make greek-style yogurt, you'll need to strain the yogurt with a cheesecloth to remove excess moisture.
For every 1 cup of milk you use, use 1 tablespoon of your starter yogurt.
Keep this homemade yogurt stored in the refrigerator for up to 2 weeks. Reserve ¼-1/2 cup of this yogurt to make another batch!
- Prep Time: 15 minutes
- Rest Time: 4 hours
- Cook Time: 6 hours
- Category: Breakfast
- Method: Slow Cook
- Cuisine: American
Nutrition
- Serving Size: ½ cup
- Calories: 106
- Sugar: 14.8 g
- Sodium: 64.3 mg
- Fat: 2.9 g
- Carbohydrates: 15.3 g
- Fiber: 0 g
- Protein: 4.9 g
Jo Thrasher says
Inquiring minds would like to know where this label maker comes from . Thanks
Lexi says
Amazon! It's a DYMO embossed label maker.
Susan says
All you really have to do is use a crockpot. Heat 1 gallon raw milk to 180 degrees then pull crock out of heating unit. Let cool to 110 degrees or a little below ( do not add cultures or yogurt until under 110 or it will kill good bacteria to and you will not get yogurt). take a cup of the warm milk and add a 1/2 cup good yogurt and stir well then pour this into the warm milk and stir well. Put link on crockpot and then wrap in towel and put in oven with oven light on. This sits for at least 12 hours depending on how tart you like your yogurt. Then strain. I purchased a yogurt strainer from Amazon to make it easier. Save the whey and you can Google to see what all you can make out of it. I strain mine for sometimes two days depending how thick it is getting.