
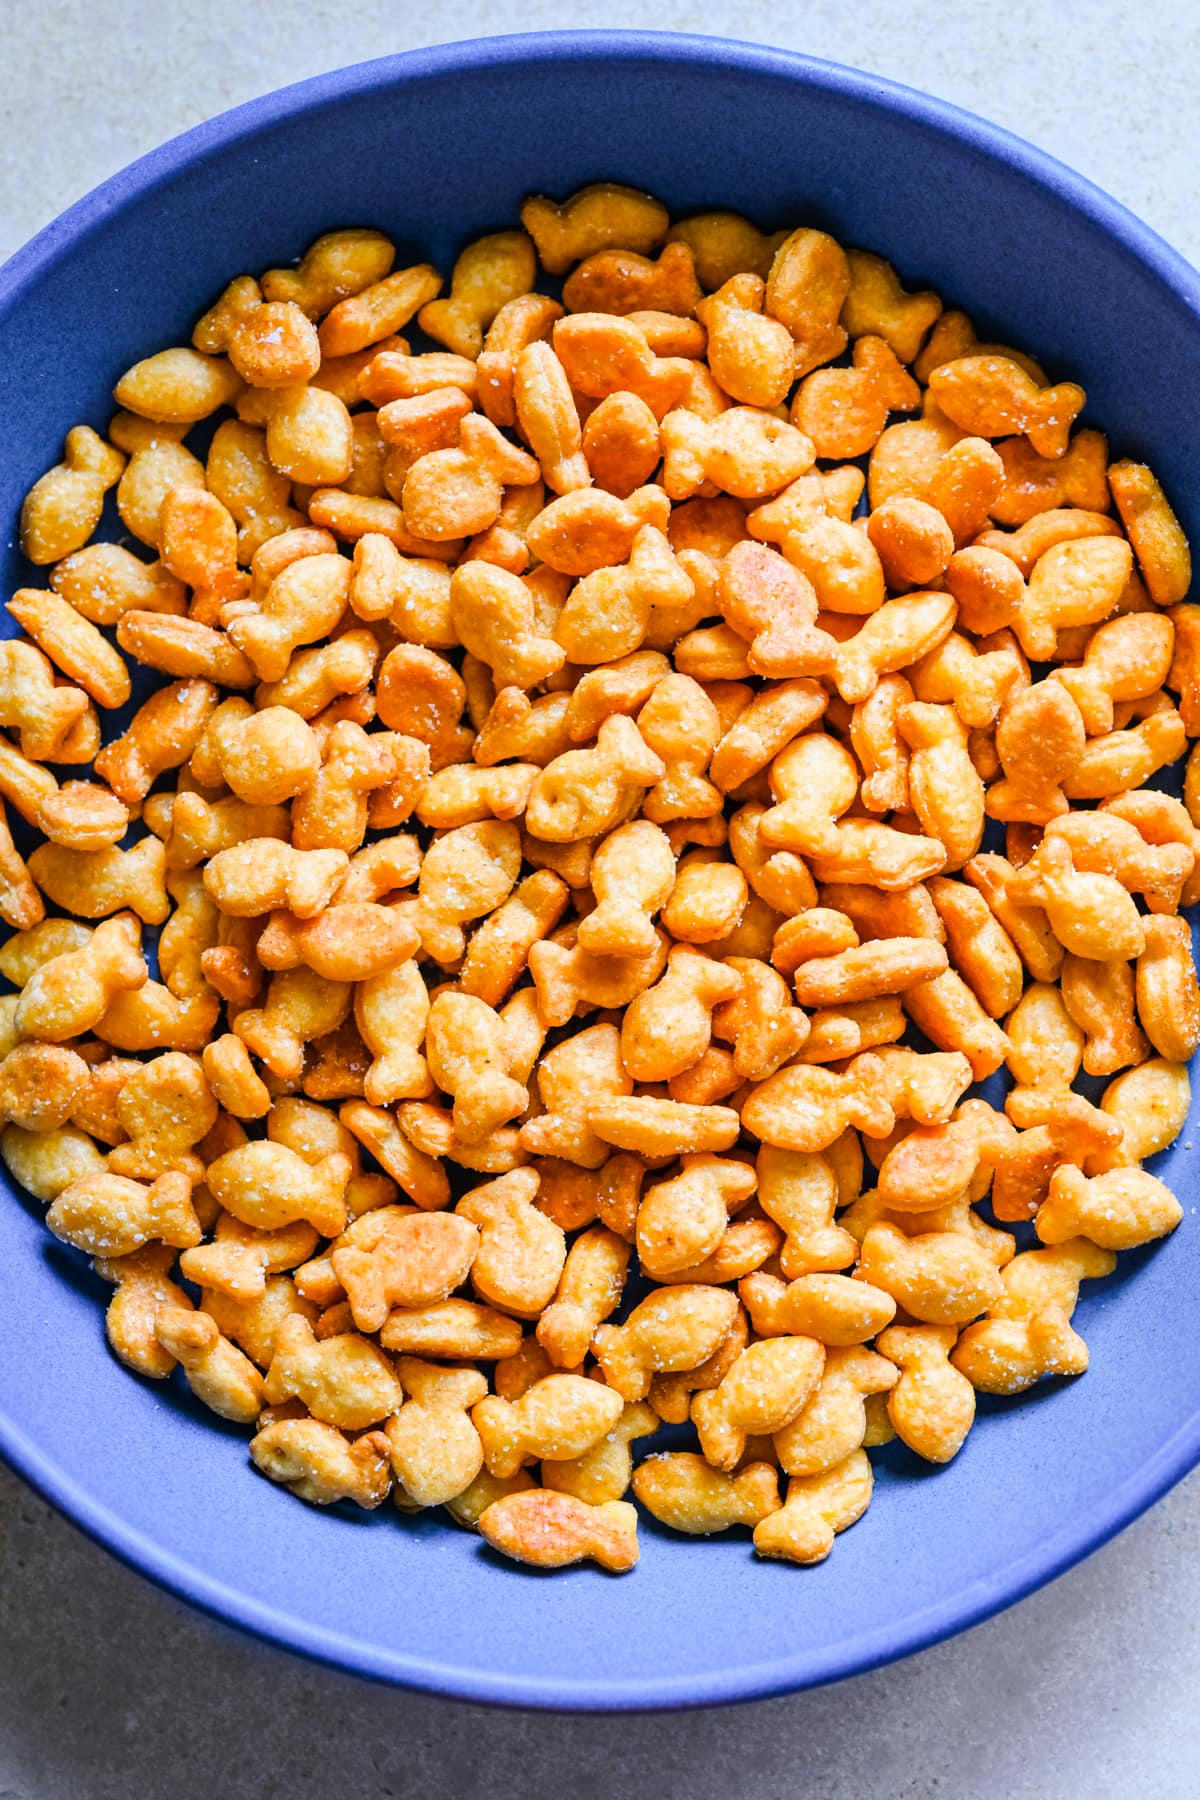
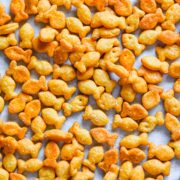
These homemade goldfish crackers are cheesy, crunchy, and amazingly addictive. They're also pretty simple and fun to make, so it's a fun activity to do with kids. You only need a few basic pantry ingredients, and you can cut them into any shape you'd like!
Disclosure: Some of the links below are affiliate links. This means that, at zero cost to you, I may earn an affiliate commission if you click through the link and finalize a purchase. Read our full affiliate disclosure here.
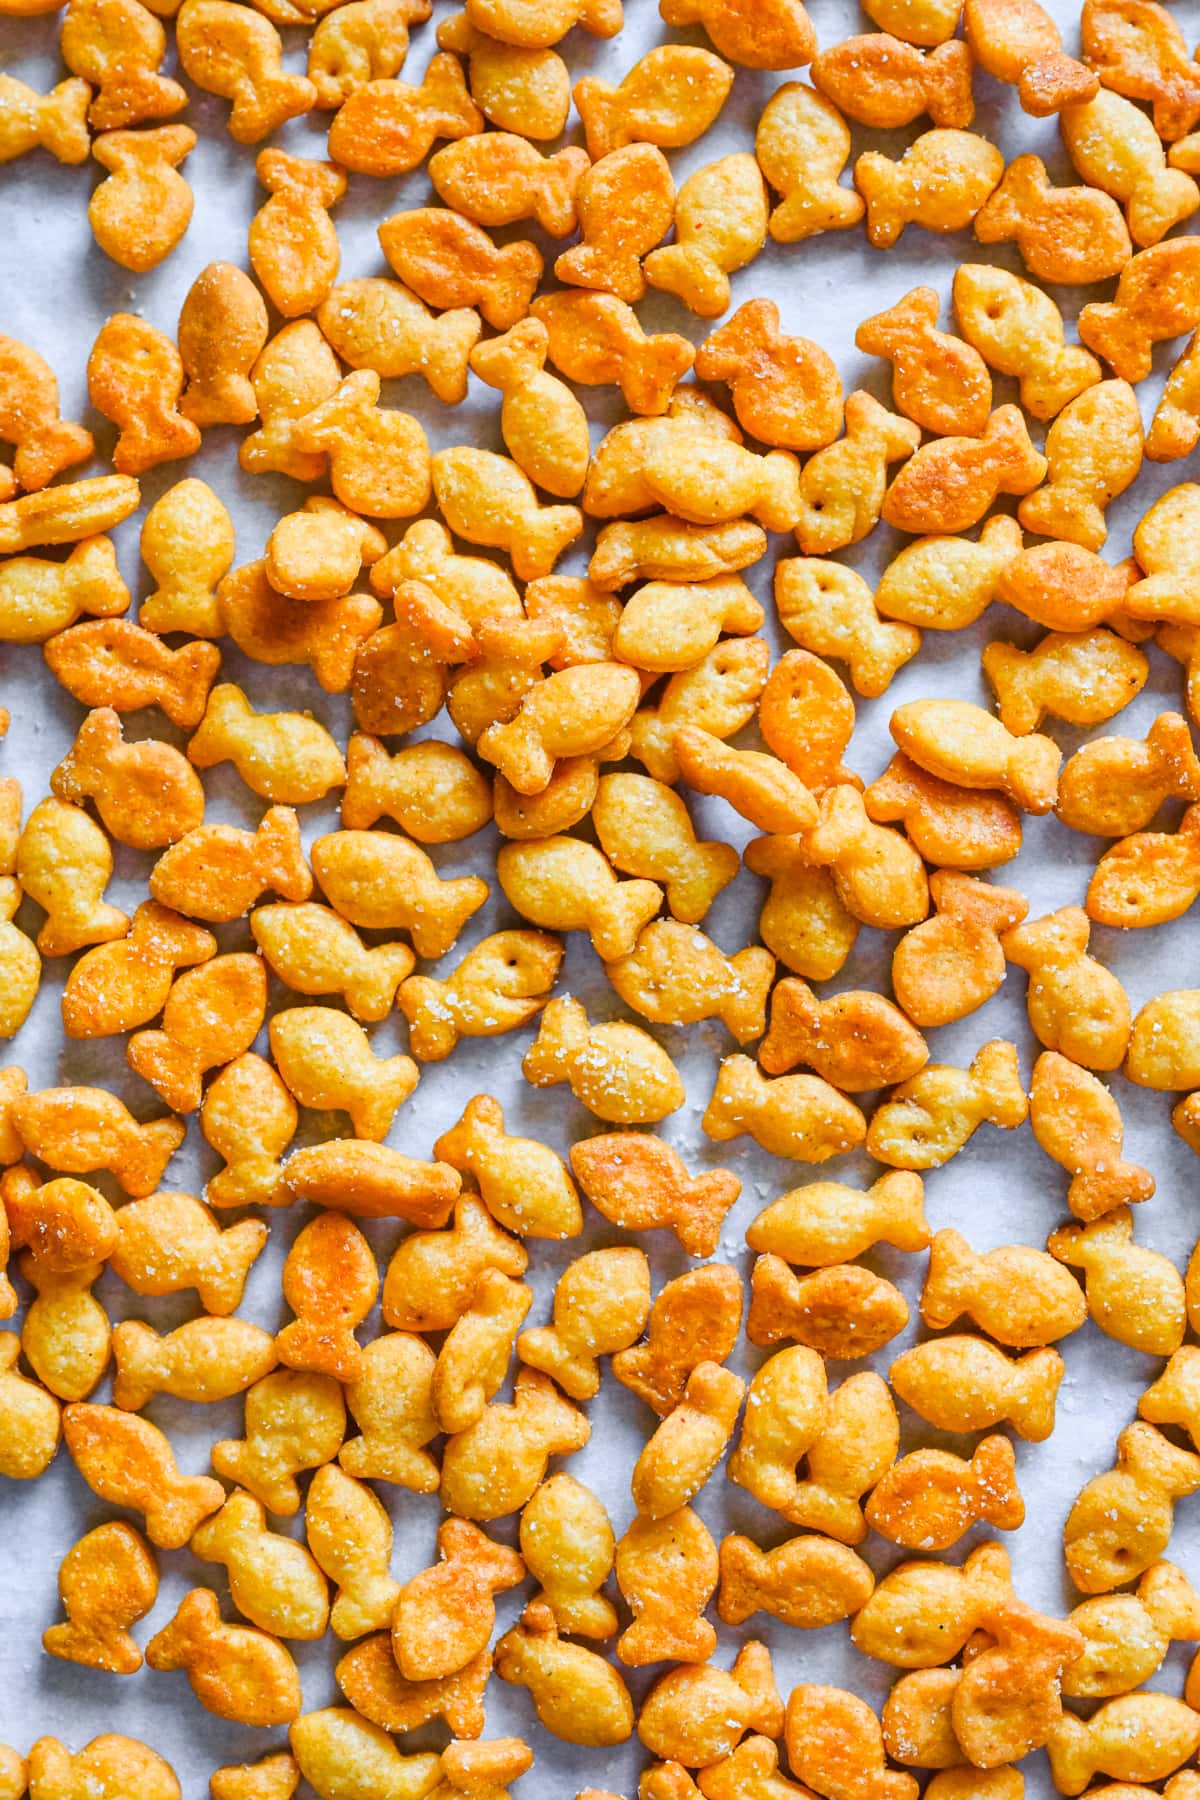
These goldfish really taste like the real thing, and they're pretty easy to make: just mix together all of the ingredients, roll into a sheet, cut out your crackers and bake. The whole process takes an hour, and you'll probably eat them all in about 5 minutes. They're that good!
Jump to:
Why We Love This Recipe
- Better than store bought: Store-bought goldfish are pretty great, but imagine being able to eat them fresh out of the oven and still warm. These homemade goldfish deliver the same flavor and texture as the store bought version, except you'll know everything that goes into them.
- They look amazing: With a goldfish cookie cutter, these really look like the real thing. You can also use a skewer and a teaspoon to create that characteristic eye and smile, but that's totally optional.
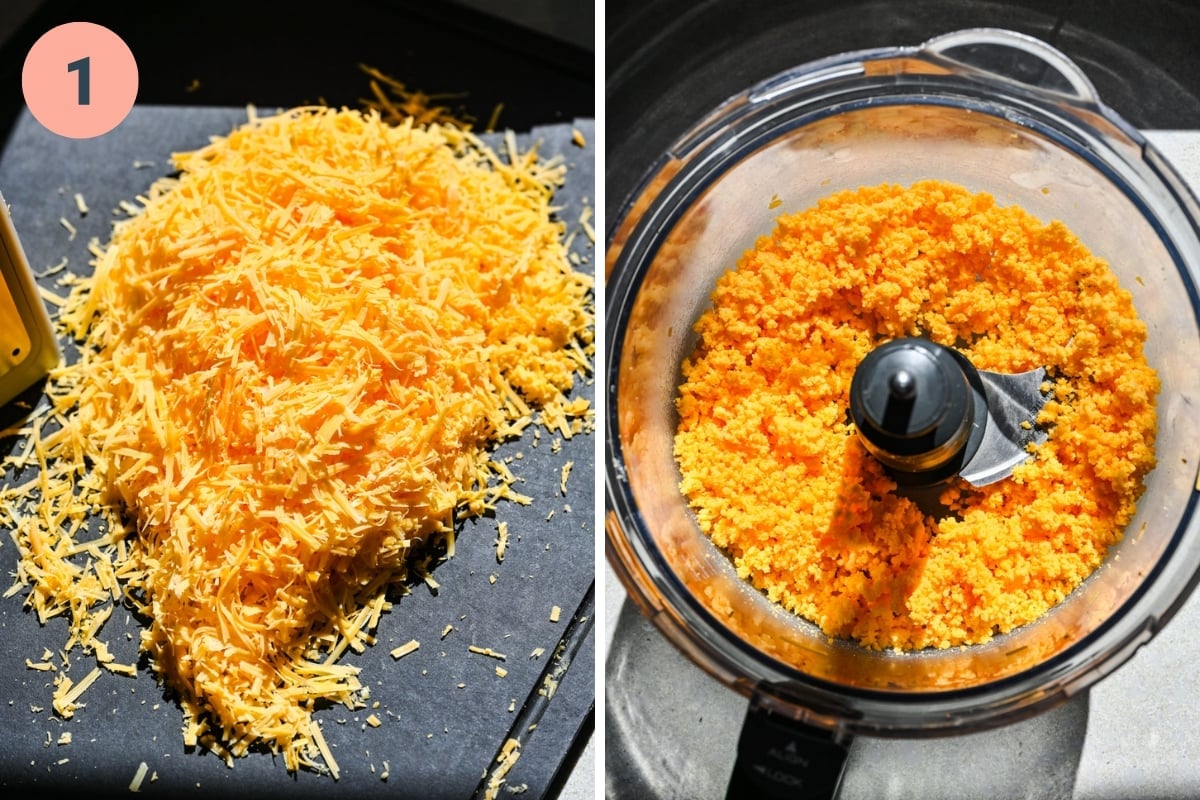
- Pretty easy process: The hardest part is probably grating the cheese, which takes about 5 minutes. After that, all it takes is a food processor, a little kneading, some rolling, cutting out the crackers, and baking.
Ingredients
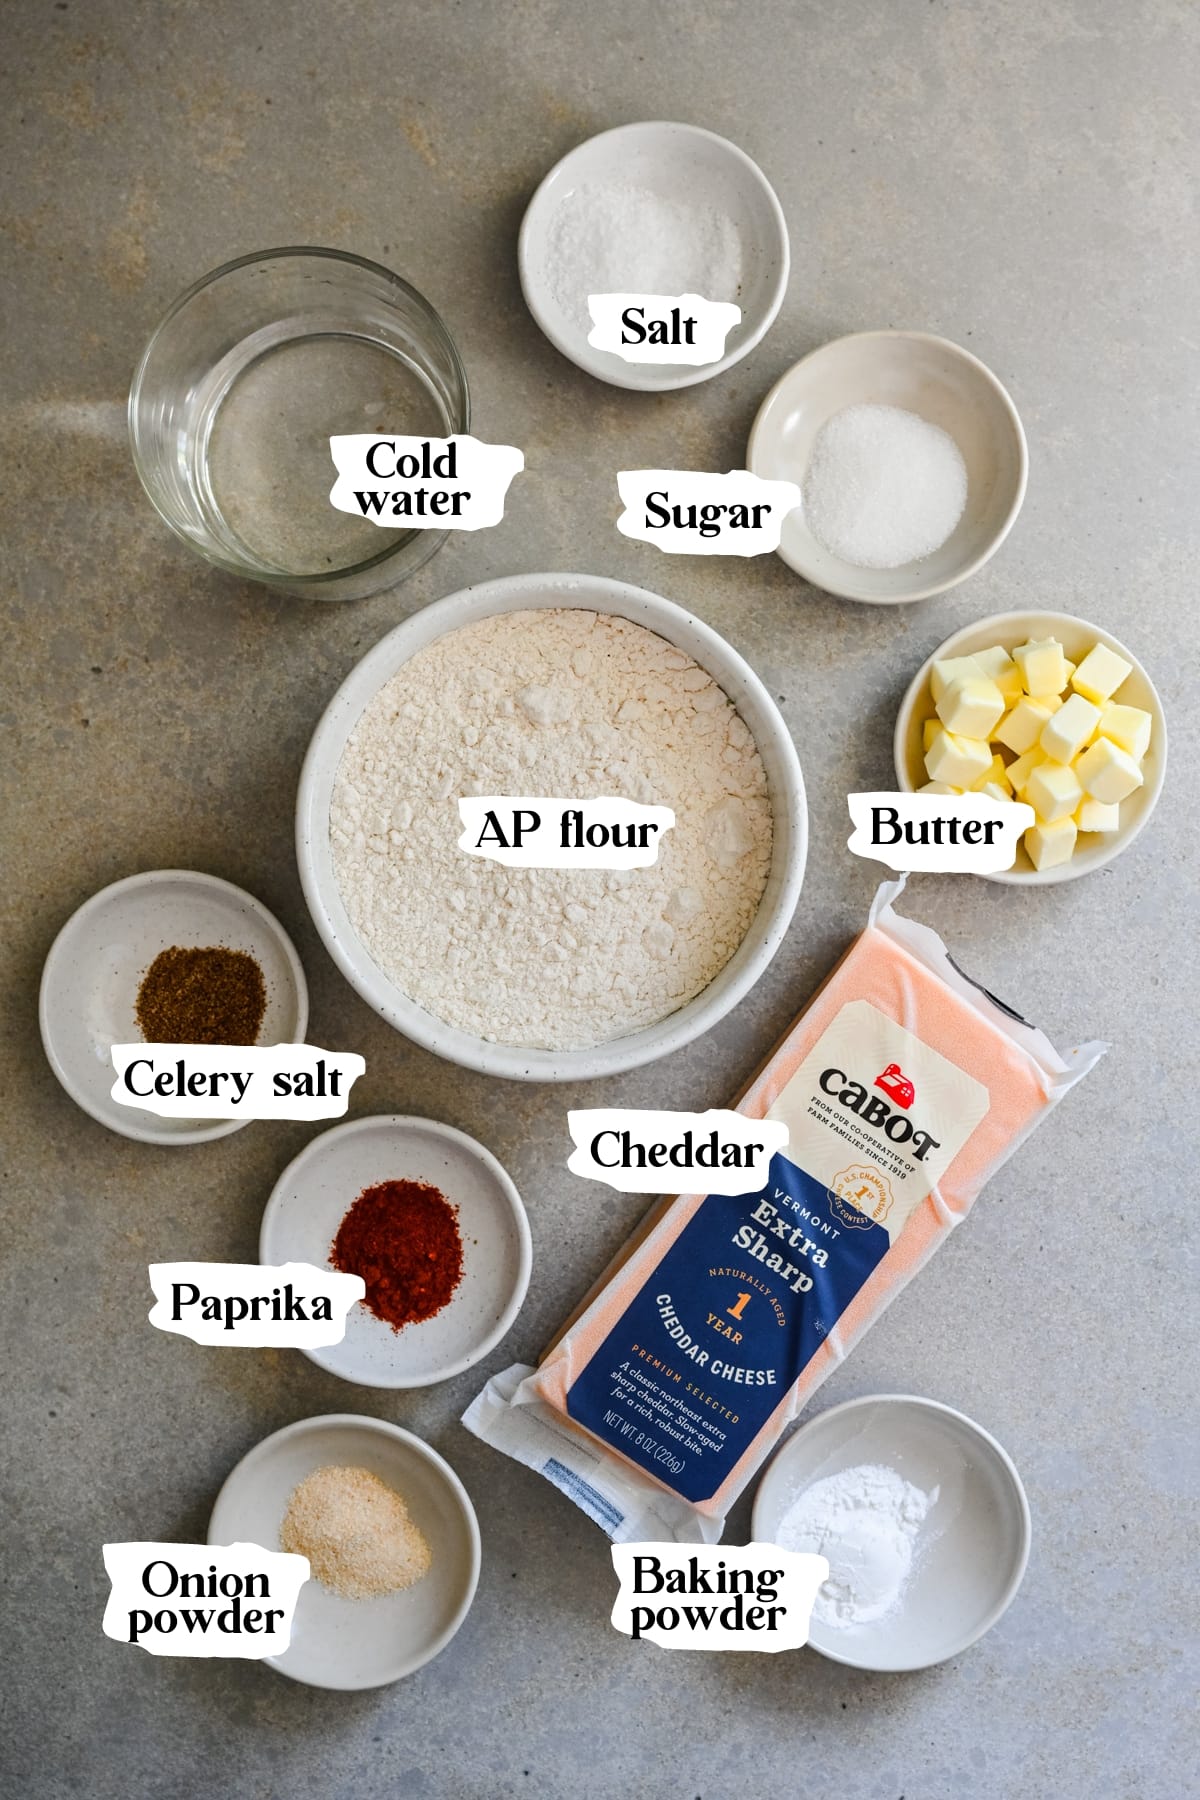
Here's what you'll need to make these homemade goldfish:
Ingredient Notes
- Cheddar cheese: The sharper the cheese you use, the more cheese flavor you'll have in your finished crackers. We used an extra sharp cheddar that was aged for a year.
- Salt: Be sure to use kosher salt in this recipe to ensure accurate salt levels.
- Baking powder: Baking powder provides a bit of extra puff and rise for these crackers, so don't leave it out.
- Spices: We used celery salt, paprika, and onion powder, which are the spices used in the official product. You can leave these out if you want a more neutral, cheesy cracker.
- Flour: We used regular all purpose flour. We have not tried this recipe with gluten free flour.
- Goldfish cookie cutter: This is the one we use.
Step-by-step Instructions
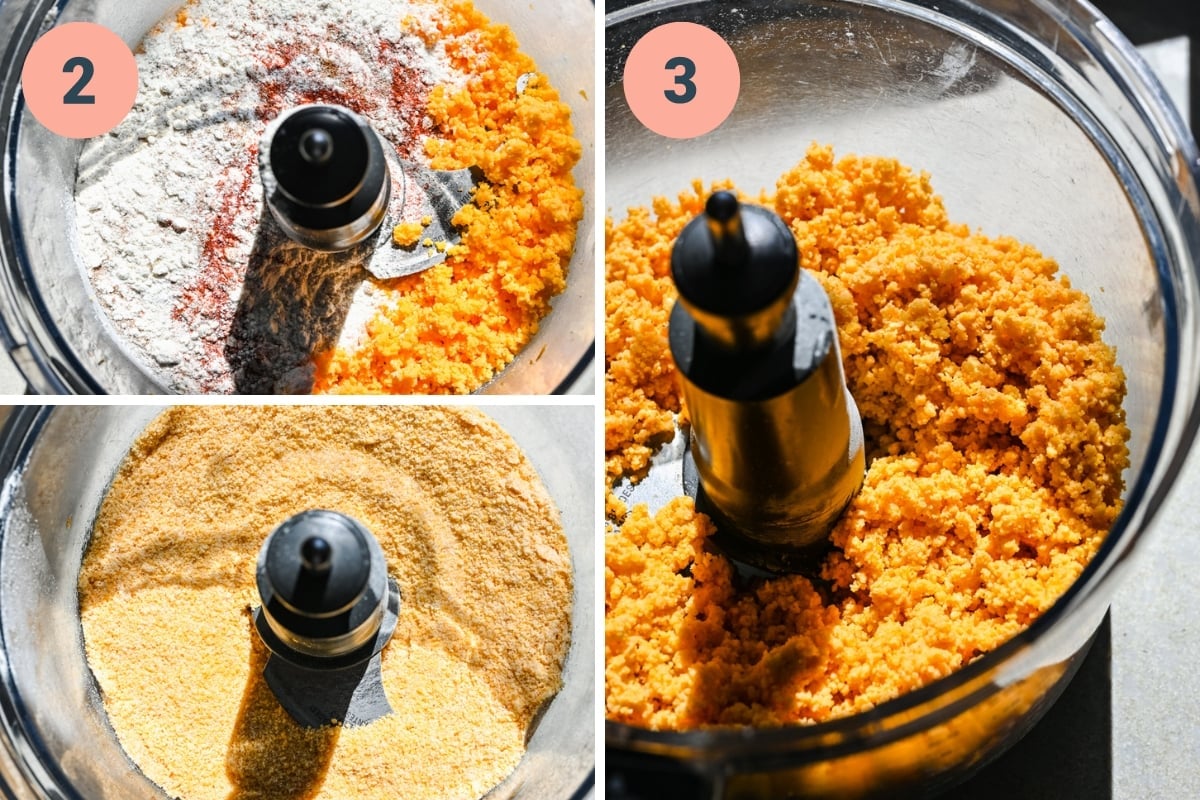
STEP 1: Preheat oven to 350˚F, then shred your cheese with a cheese grater and add to a food processor. Process until cheese becomes small, round pieces.
STEP 2: Add in flour, salt, sugar, baking powder, paprika, celery salt, and onion powder and pulse until evenly incorporated.
STEP 3: Add in butter and pulse until butter chunks become roughly the same size as the cheese pieces. Pulse in the cold water.
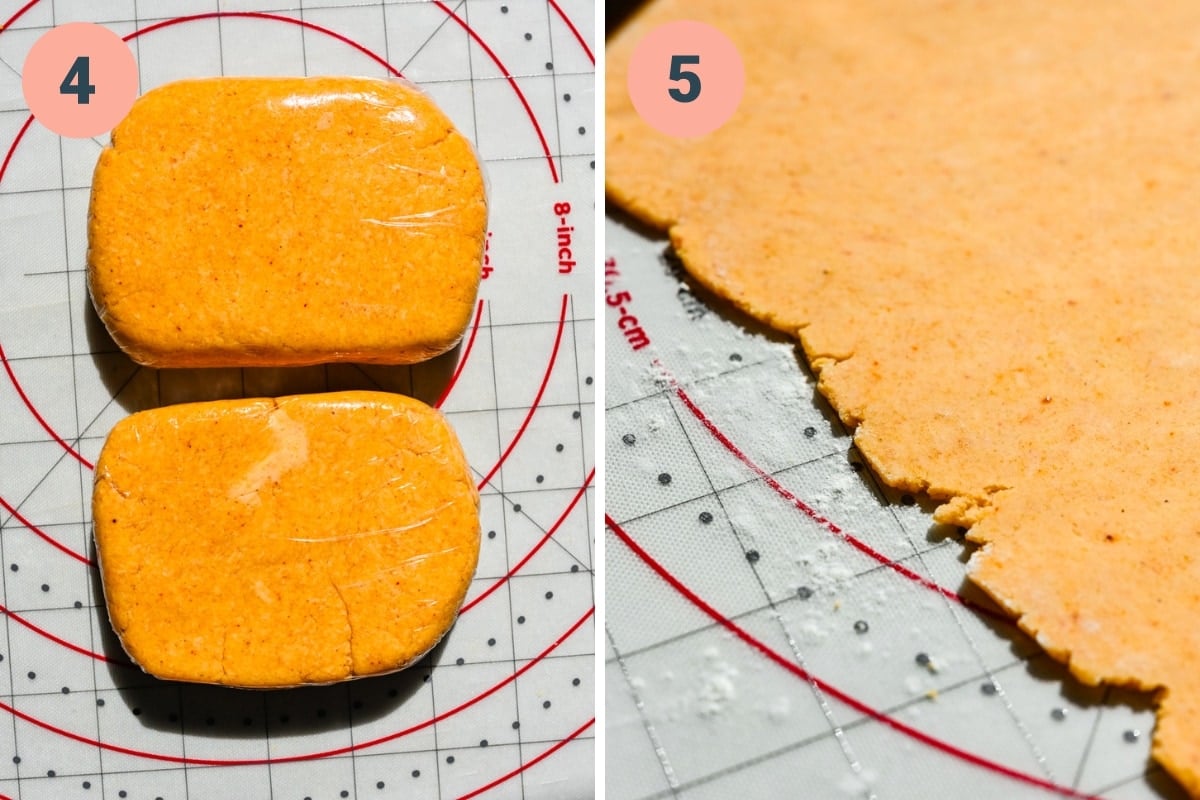
STEP 4: Move dough to a work surface and knead until it forms a dough that sticks together. If it's still crumbly, add water in small increments until it comes together. Divide dough in half and shape into two 1" thick discs. Move to the fridge and chill for 30 minutes to an hour.
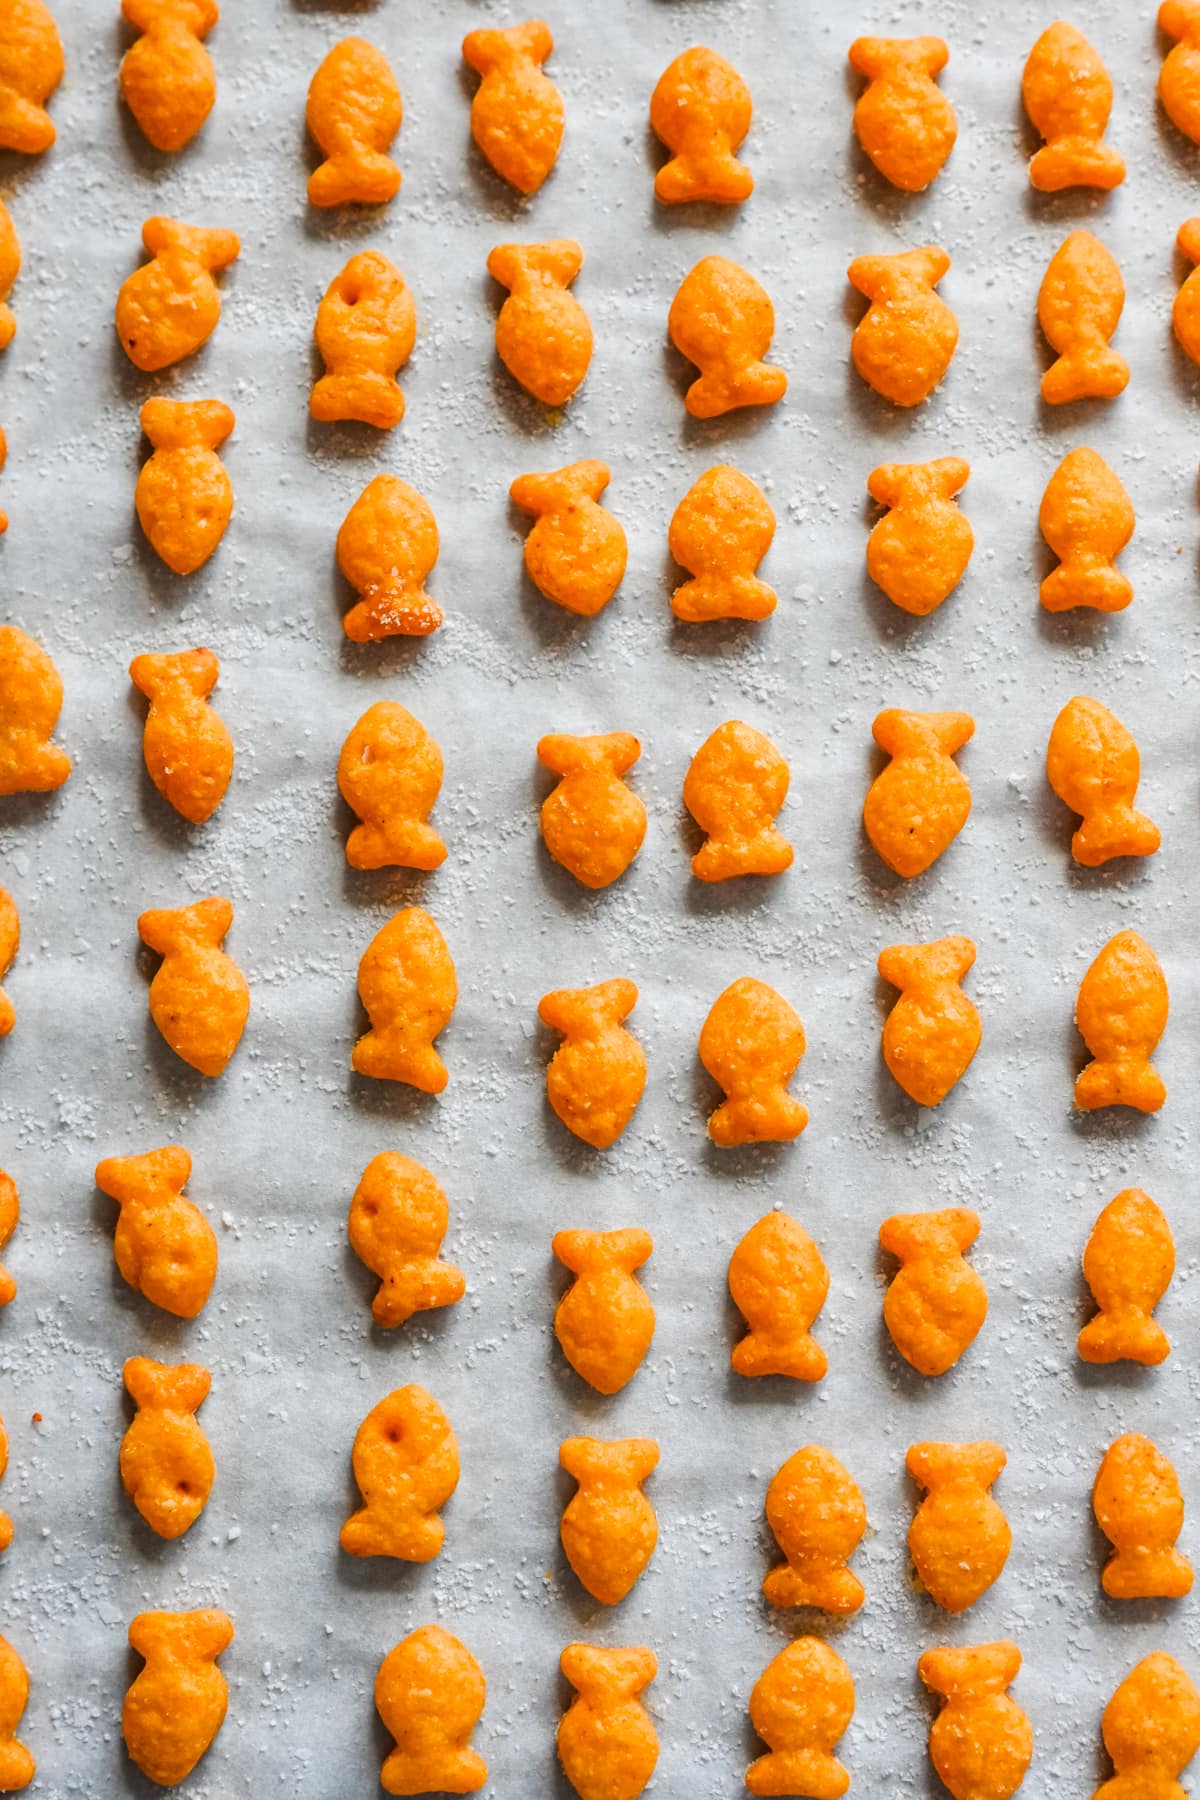
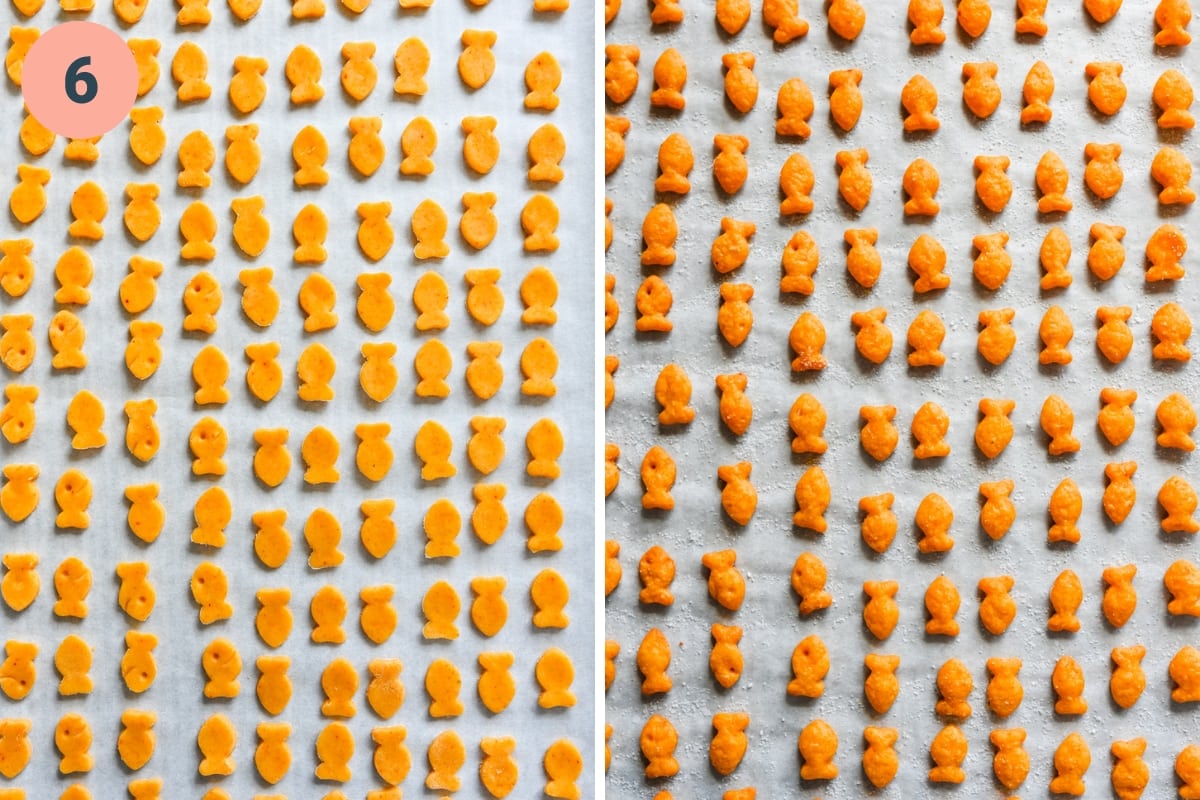
STEP 5: On a floured work surface, roll out each dough disc into a roughly 9-10" by 11" rectangle. It should be about ⅛" thick. Use your cookie cutter to cut the goldfish, and move to a parchment-lined baking sheet and sprinkle with salt.
STEP 6: Bake for 14-16 minutes, until bottoms are slightly browned.
Tips and FAQs
- Add the goldfish face: For the eye, just stick a skewer or fork tine all the way through the cracker. To make the famous smile, press the edge of a teaspoon-sized measuring spoon (or a small regular spoon) into the cracker. It'll take a few tries to get it right, but once you get the hang of it, you'll have a bunch of smiling goldfish.
- Baking time: Ours took about 16 minutes to bake. They'll be done when the bottoms are slightly browned. You want to make sure you don't take them out when the bottoms are still pale, because they just won't be crunchy.
- Sprinkle with salt before baking: This step is easy to forget, but it adds a lot of flavor. Don't forget it!
- No goldfish cookie cutter? No problem. Use a bottle cap to cut these into round oyster-style crackers. Alternatively, you can cut them into squares (like our cheez-its) or any other shape.
- Chill the dough: This makes it easier to work with, roll out, and cut out your crackers.
- Flour your work surface: This will prevent the dough from sticking to your work surface and your rolling pin.
You can re-roll the dough and cut it into crackers, but just be aware that the dough will essentially be laminated (layered) and it will puff up a lot more than the original batch.
There are several options on both Amazon and Etsy. These are the ones we used.
Sure, you can make the dough and store in the fridge for a day or so until you're ready to bake. Just roll out the dough and cut out your crackers when you'r ready.
Keep these stored in an airtight container for about a week. If they start to lose their crispness, pop them back in the oven for a few minutes.
Related Recipes
Tried this recipe? Please leave a star ⭐️⭐️⭐️⭐️⭐️ rating below and/or a review in the comments section further down the page.
Recipe
Print📖 Recipe
Homemade Goldfish Crackers
- Total Time: 75 minutes
- Yield: 300-400 goldfish 1x
- Diet: Vegetarian
Description
These homemade goldfish crackers are cheesy, crunchy, and amazingly addictive. They're also pretty simple and fun to make, so it's a fun activity to do with kids. You only need a few basic pantry ingredients, and you can cut them into any shape you'd like!
Ingredients
- 8 oz sharp cheddar cheese, finely grated
- 1 cup all purpose flour
- 1 teaspoon kosher salt
- 1 teaspoon sugar
- 1 teaspoon baking powder
- ½ teaspoon paprika
- ½ teaspoon celery salt
- ½ teaspoon onion powder
- 2 tablespoons unsalted butter, chilled
- 4-5 tablespoons cold water
- Goldfish cookie cutter (optional)
Instructions
- Finely shred your cheese with a cheese grater and add to a food processor. Process until cheese is very finely chopped. (This will ensure that the cheese becomes well incorporated in the dough.)
- Add in flour, salt, sugar, baking powder, paprika, celery salt, and onion powder and pulse until evenly incorporated.
- Add in butter and 4 tablespoon cold water and pulse a few more times.
- Move the dough to a work surface and knead until it forms a dough that sticks together. If it's still crumbly, add more water in small increments until it comes together. Divide dough in half and shape into two 1" thick discs. Cover and refrigerate for 30 minutes to an hour.
- Meanwhile, preheat oven to 350˚F and line two large baking sheets with parchment paper.
- On a floured work surface, roll out each dough disc into a roughly 9-10" by 11" rectangle. It should be about ⅛" thick. Use your cookie cutter to cut the goldfish, and move to a parchment-lined baking sheet and sprinkle with salt to taste. You can re-roll any dough scraps.
- Bake for 14-16 minutes, until bottoms are slightly browned. Let cool completely on the baking sheet before enjoying.
Notes
Add the goldfish face: For the eye, just stick a skewer or fork tine all the way through the cracker. To make the famous smile, press the edge of a teaspoon-sized measuring spoon (or a small regular spoon) into the cracker. It'll take a few tries to get it right, but once you get the hang of it, you'll have a bunch of smiling goldfish.
Baking time: Ours took about 16 minutes to bake. They'll be done when the bottoms are slightly browned. You want to make sure you don't take them out when the bottoms are still pale, because they just won't be crunchy.
Sprinkle with salt before baking: This step is easy to forget, but it adds a lot of flavor. Don't forget it!
No goldfish cookie cutter? No problem. Use a bottle cap to cut these into round oyster-style crackers. Alternatively, you can cut them into squares (like our cheez-its) or any other shape.
Storage: Keep these stored in an airtight container for about a week. If they start to lose their crispness, pop them back in the oven for a few minutes.
Goldfish is a trademark of Pepperidge Farm, Incorporated. This recipe is an inspired version created for educational purposes for home cooks. This recipe is not associated with, endorsed by, or officially related to Pepperidge Farm, Inc.
- Prep Time: 60 minutes
- Cook Time: 15 minutes
- Category: Snacks
- Method: Oven
- Cuisine: American
Nutrition
- Serving Size: 50 goldfish
- Calories: 161
- Sugar: 0.6 g
- Sodium: 274.3 mg
- Fat: 10 g
- Carbohydrates: 11.3 g
- Fiber: 0.4 g
- Protein: 6.5 g


Keri says
Great recipe. Easy to follow directions. Thank you for adding g the step by step photos as well.
Isak says
Hi, is it possible to cut the dough into shapes and store them in the freezer to bake later?
Lexi says
That should work fine!
Dina says
Can I swap the onion powder for garlic powder?
Lexi says
definitely!
Marie says
Is the sugar really necessary? Can I just omit it?
Lexi says
You can omit it
Jen says
Can you use a subscription for the sugar? Like honey?
Lexi says
Honey should be fine in this recipe.
Maria says
J’ai adoré la recette Mais je me demandais combien de temps peut-on conserver ses petits poissons et comment les conserver?
Jessica says
Can you freeze the dough to make at a later date?
Lexi says
Absolutely!
Marta says
Can this be done on an airfryer?
Lexi says
Unfortunately I don't think it would work as well!
Dina says
Turned out absolutely amazing!
Perfectly crispy and cheesy!
Thank you so much for the recipe
Jules says
Can I use pre shredded cheese? And regular kosher salt instead of celery salt?
Crystal says
Will bob’s red mill all purpose gluten free flour work? If so, is it a diff measurement for the flour? Thanks!
Lexi says
I haven't tried it, but that's the gluten free flour we recommend using!
Nat says
Mine just turned out like little bits of cheesy puff pastry, I rolled the dough out really thin, as close to the 1:8th inch as I could get and they almost 3 times as thick when the came out and didn't resemble little fish anymore, what could I have done wrong I wonder?
They tasted amazing at least 🤣
Brent Harrison says
you might have over-kneaded the dough and unknowingly created some lamination. if you piece together bits of scraps, this is what usually happens. at least they tasted good though!
Britt says
Same thing happened here. They taste delicious! But they aren’t crunchy and they are super fluffy, despite turning brown on the bottom.
Lexi says
Hi Britt, this is likely just because they weren't rolled out thin enough! If they are the correct thickness, they should crisp up without burning on the bottom.
Destiny says
How long are these good for?
Brent Harrison says
3-5 days if stored in an airtight container
Maritza says
We loved these. The taste is amazing. I rolled it out really thin and they crisped up more as they cooled down. My only gripe was that they did not stay crunchy (stored in an airtight container).
Jessica Ingle says
Came out so good !
Made extra dough - how long would it last in the fridge wrapped up ?