
These Chocolate Bliss Balls are a quick, easy to make snack or on-the-go breakfast! Only 10 ingredients (pantry friendly), plant based, gluten free friendly, and perfect for meal prep.
Bliss balls are essentially homemade protein bars, but they're significantly less expensive than store bought AND you can control the sugar level/flavors!
We love to make a big batch to keep on hand during particularly busy weeks. It's so easy to just grab one or two from the fridge. They pack a lot of nutrition into a small bite, so you'll actually stay full!
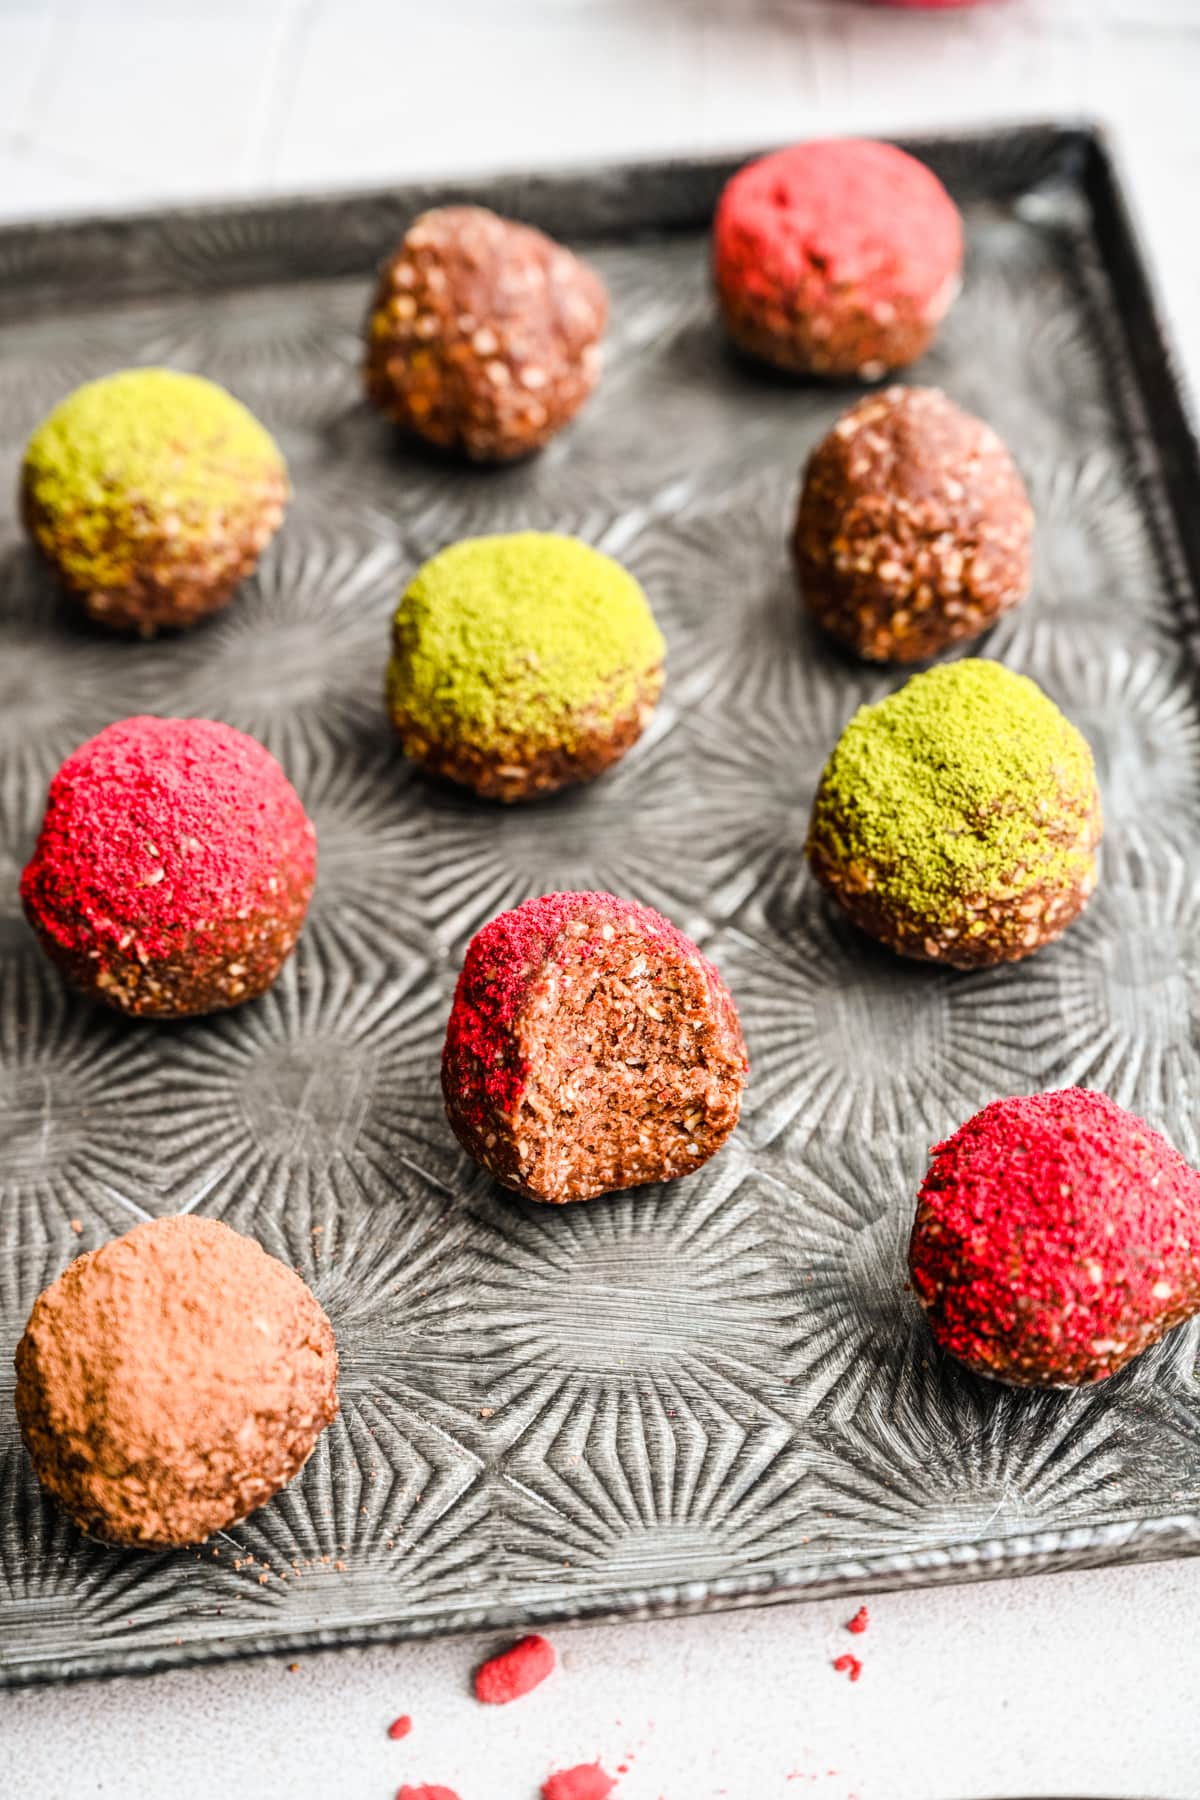
These chocolate bliss balls are one of my favorite versions. They're rich and chocolatey, but not too sweet. Plus, you can customize them with different nut butters or toppings.
Give them a try this week and let us know what you think!
Jump to:
Why We Love This Recipe
- Quick and easy: These bliss balls come together in about 10 minutes and are super easy to make in just a few steps. Plus, they store well in the fridge for up to two weeks, making them a great quick snack throughout your busy week.
- Customizable: You can customize this recipe with various substitutions, like different nut butters, sweeteners, toppings, etc. Simply use whatever you have in your pantry!
- Balanced flavor profile: With maple syrup, chocolate, almond butter and coconut, these chocolate bliss balls have a perfectly balanced flavor profile. They're a little salty, a little sweet, a little nutty and super delicious.
- Meal prep friendly: If you're big on meal prep, these are a great addition to your rotation for a healthy snack or even breakfast. Just 1 or 2 will fill you up and keep you going for hours.
Ingredients
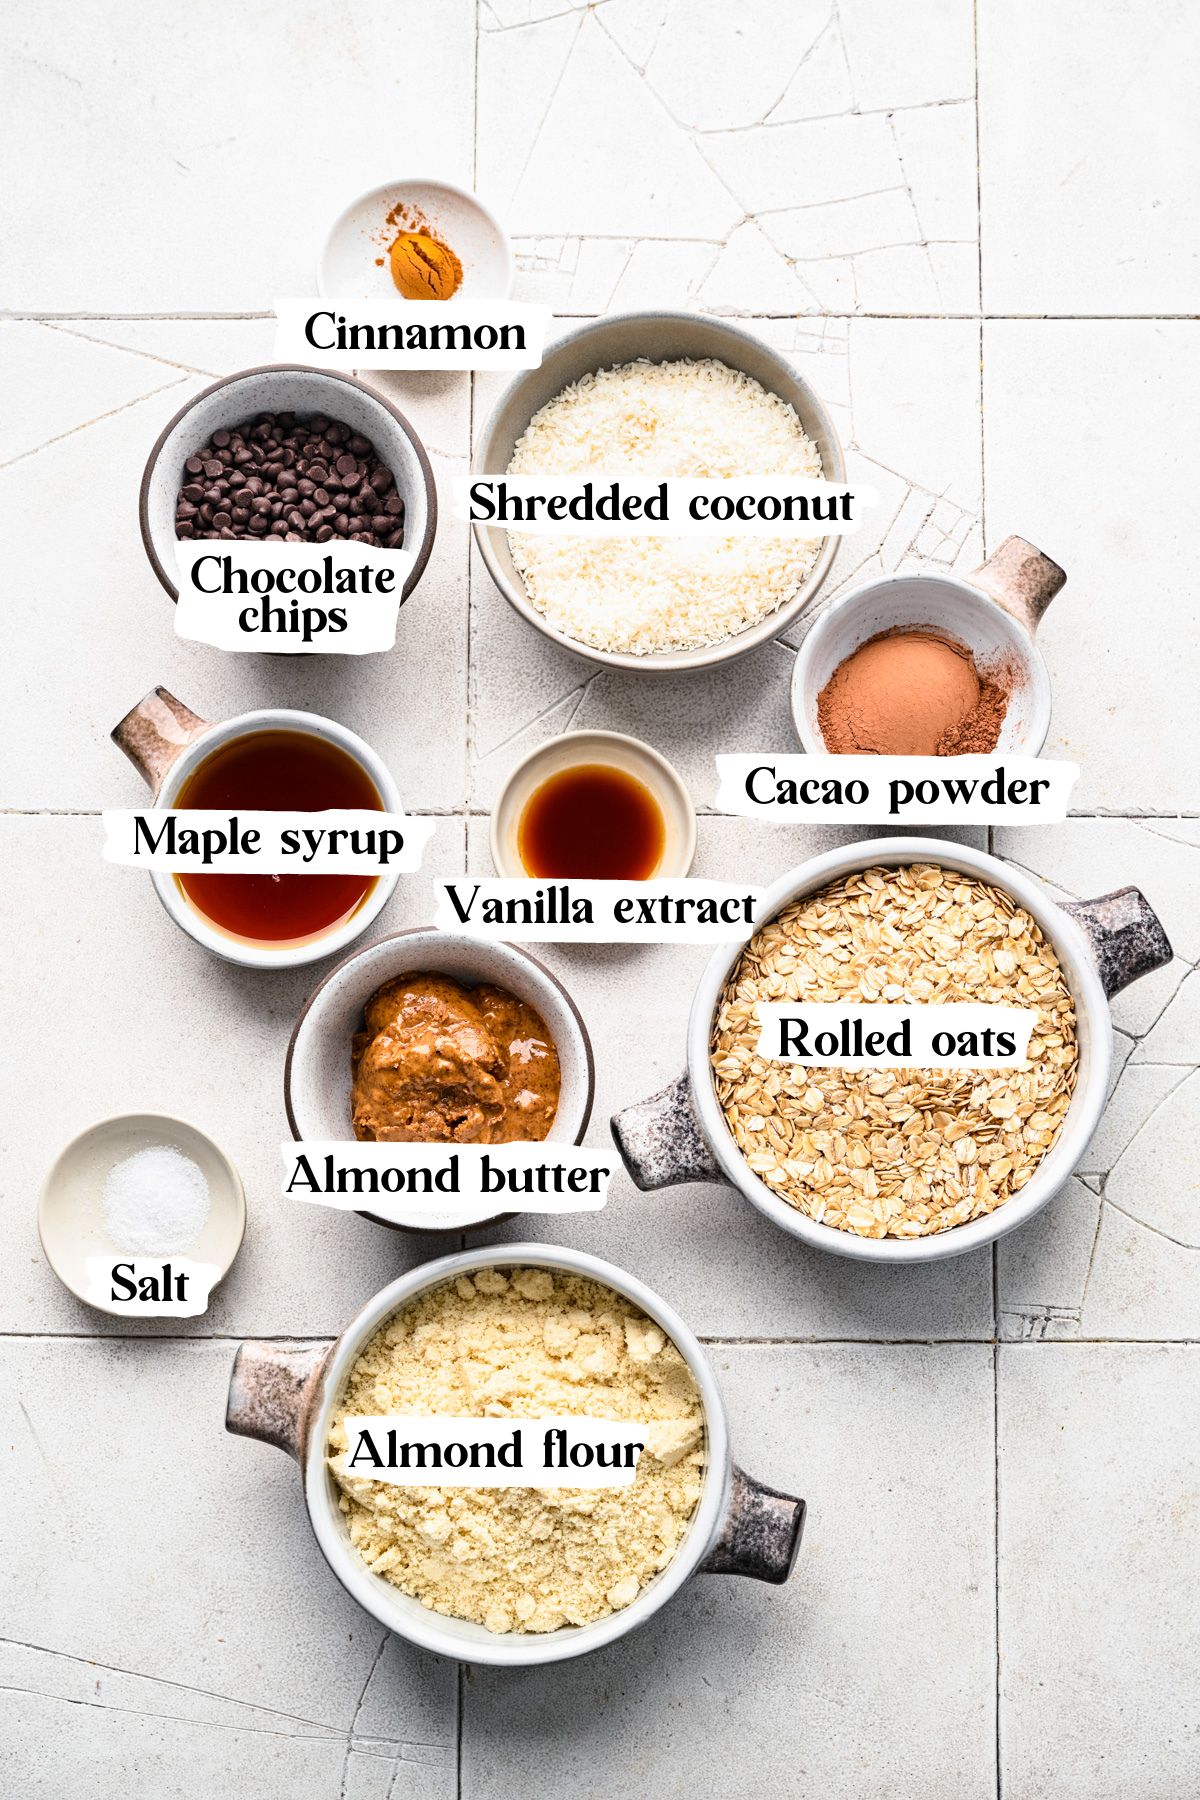
Here's what you'll need to make these chocolate bliss balls:
Ingredient Notes
- Oats: We used old fashioned whole rolled oats in this recipe, not quick cooking oats. Note: Make sure to pulse the oats in the food processor first, otherwise you'll end up with big pieces of oats and the bliss balls won't bind together quite as well.
- Shredded coconut: We prefer using unsweetened coconut in this recipe so that we can control the amount of sugar in these snacks. Be sure to look for shredded or desiccated coconut, not coconut flakes, which are much larger and won't work as well in this recipe.
- Cinnamon, salt and vanilla extract all boost the flavor and take these chocolate bliss balls to the next level. Don't skip them!
- Almond butter: You can use just about any nut or seed butter you'd like if you don't have almond butter on hand. I love using peanut or cashew butter!
- Cocoa powder: We use unsweetened cocoa powder (cacao powder) to cut down on sugar in these chocolate bliss balls.
- Maple syrup: You can also sub with honey or agave.
Instructions
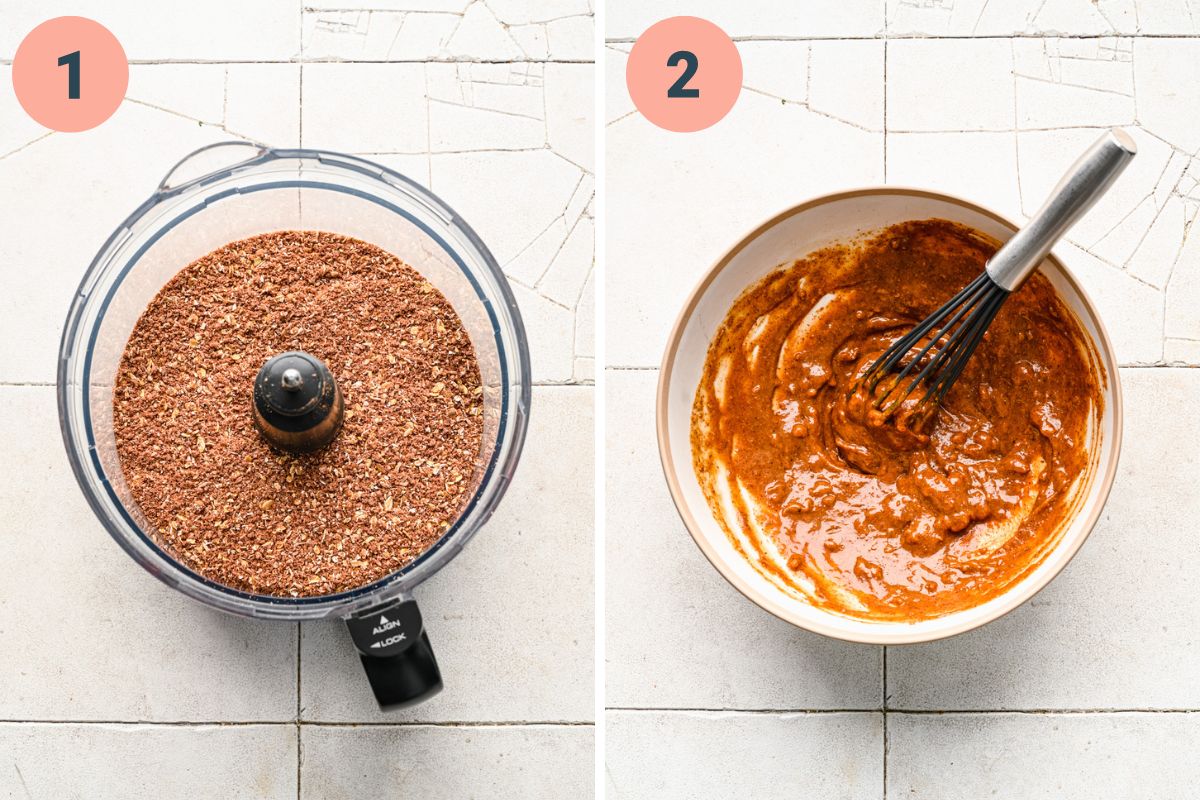
(1) Add oats to a food processor and pulse a few times. Add in the almond flour, shredded coconut, cocoa powder, cinnamon, and salt and pulse a few times to combine.
(2) If your almond butter is thick (not runny), whisk it together in a separate bowl with the maple syrup and vanilla until mostly smooth. Then, add the almond butter mixture to the food processor and pulse until the mixture comes together.
(3) Add in the melted chocolate and pulse again until evenly incorporated.
Using a 1 or 2 tablespoon cookie scoop, portion into balls. Roll (using your hands).
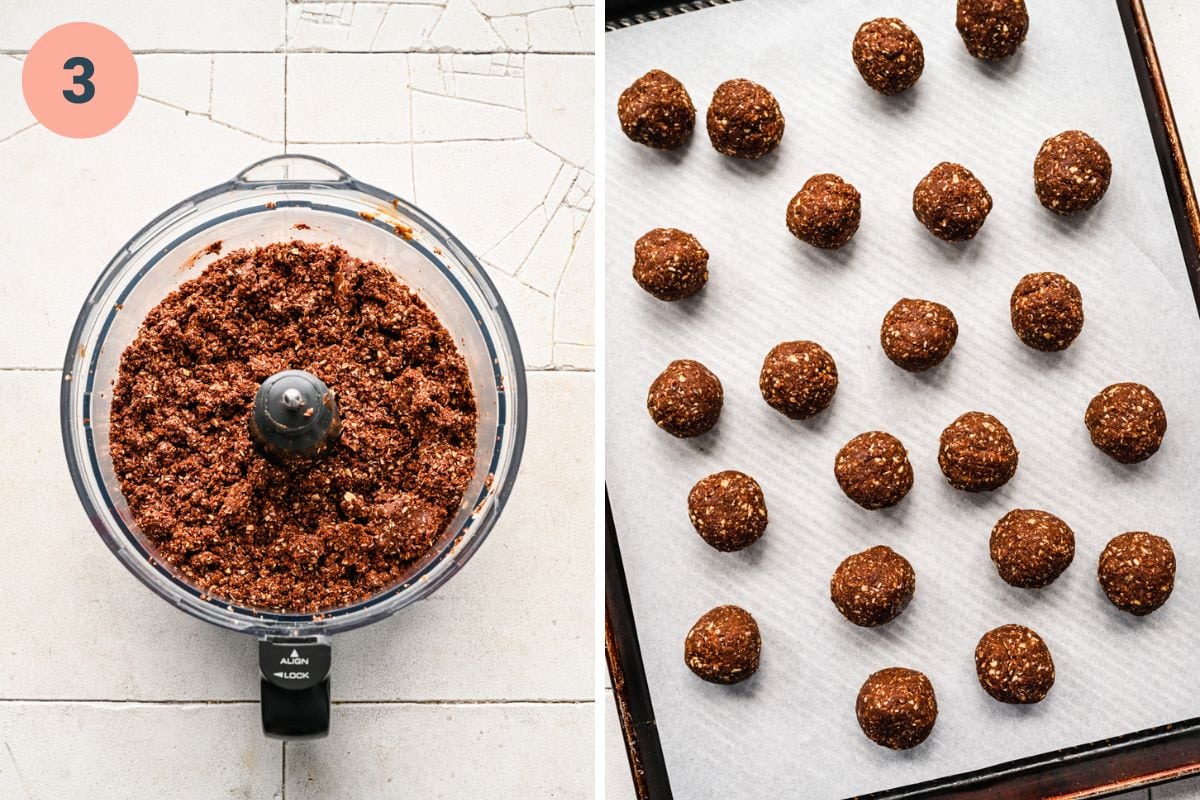
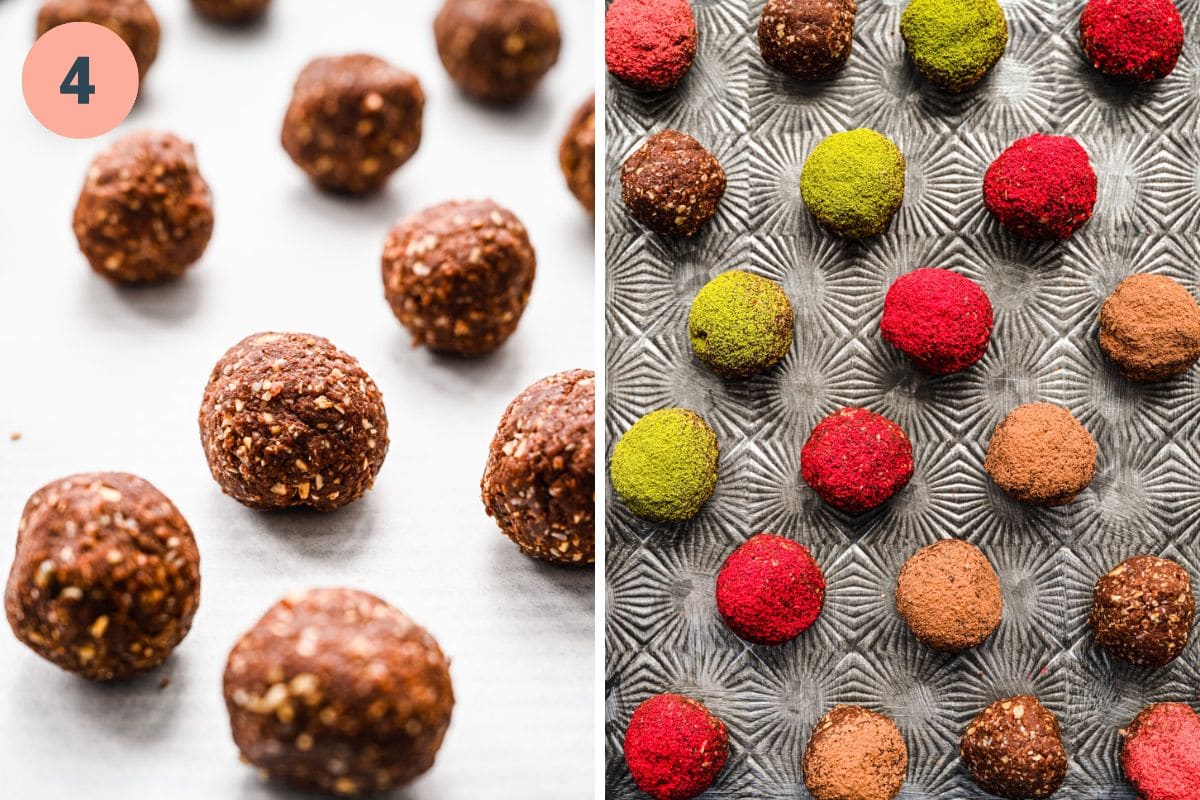
(4) Refrigerate for 30 minutes to set. Store leftovers in an airtight container in the refrigerator.
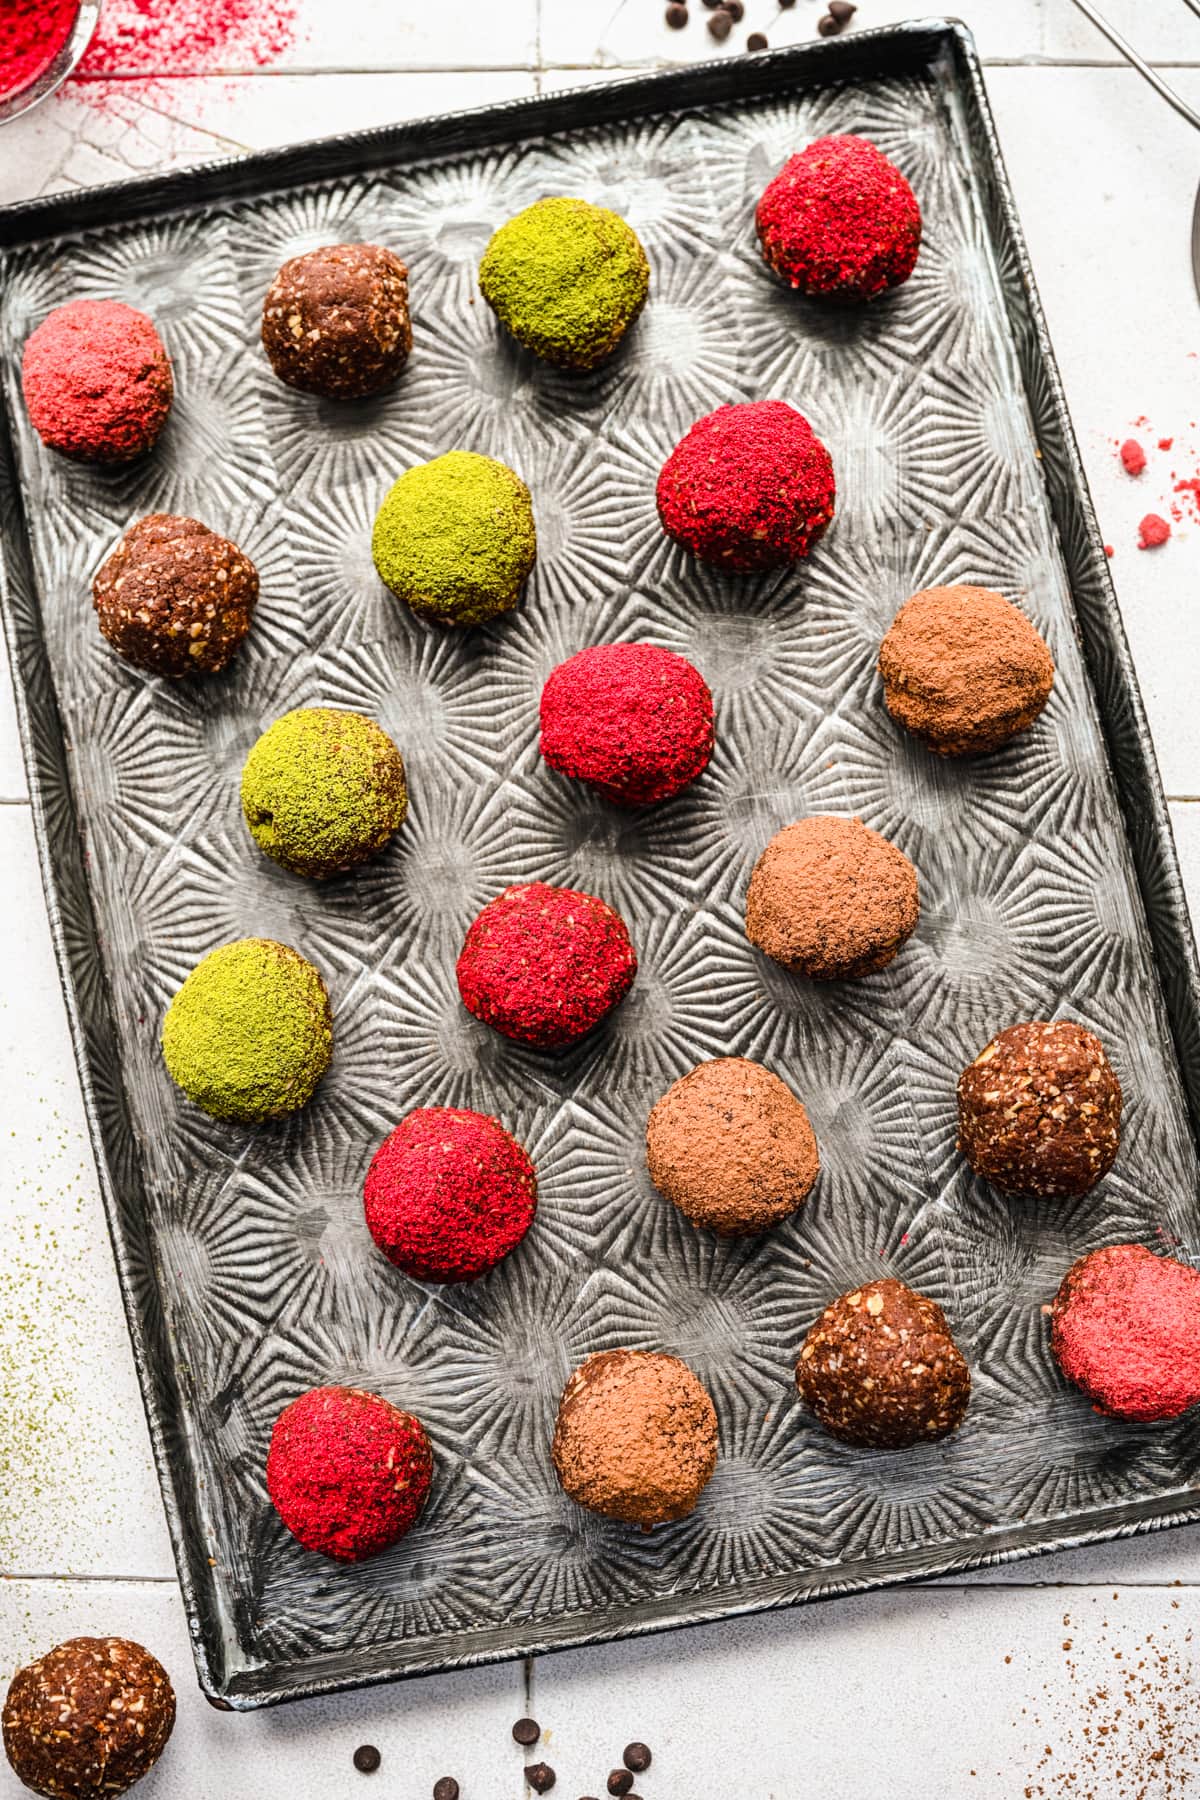
Optional: You can coat the balls in a topping, like shredded coconut, cocoa powder, matcha powder, etc.
Tips and FAQs
- Mixture too dry? This can sometimes happen depending on how runny your nut butter is. If it's a little too dry to roll into a ball, try adding in an additional 1 tablespoon each of nut butter and maple syrup. Repeat until it reaches the right consistency.
- Make it gluten free: These bliss balls are technically naturally gluten free. However, if you have celiac disease or a severe gluten allergy, you'll need to make sure to use certified gluten free oats. (We like to use Bob's Red Mill brand.)
- Wet ingredients: Before adding the wet ingredients into the food processor, it can help to whisk together the almond butter, maple syrup, and vanilla before adding it in. This is especially helpful if your almond butter is on the thick side – otherwise you might end up with big chunks of almond butter.
- Melting the chocolate: For best results, place chocolate in a microwave safe bowl and microwave in 20-25 second intervals, stirring well between each interval, until fully melted. It usually takes about 1 minute total of heating.
- Storage: The best thing about these bliss balls is that they can be stored for up to 2 weeks in an airtight container in the fridge.
- Freezer storage: For even longer storage (3-5 months), place the bliss balls in an airtight container and freeze. Defrost for several hours (or overnight) in the refrigerator before enjoying.
More Easy Snack Recipes to Enjoy
Tried this recipe? Please leave a star ⭐️⭐️⭐️⭐️⭐️ rating below and/or a review in the comments section further down the page.
📖 Recipe

Chocolate Bliss Balls
- Total Time: 10 minutes
- Yield: 2 dozen 1x
- Diet: Vegan
Description
These Chocolate Bliss Balls are a quick, easy to make snack or on-the-go breakfast! Only 10 ingredients (pantry friendly), plant based, gluten free friendly, and perfect for meal prep.
Ingredients
- 1 cup whole rolled oats
- 1 cup almond flour
- ½ cup shredded coconut (we used unsweetened)
- 2 tablespoons unsweetened cocoa powder
- ½ teaspoon cinnamon
- ¼ teaspoon salt
- 6 tablespoons almond butter (or another nut butter of choice)
- 6 tablespoons maple syrup (or honey)
- 1 teaspoon vanilla extract (optional)
- ⅓ cup mini chocolate chips, melted
Instructions
- Add oats to a food processor and pulse a few times. Add in the almond flour, shredded coconut, cocoa powder, cinnamon, and salt and pulse a few times to combine.
- Add in almond butter, maple syrup and vanilla extract and pulse until the mixture comes together.
- Add in the melted chocolate and pulse again until evenly incorporated.
- Using a 1 or 2 tablespoon cookie scoop, portion into balls. Roll (using your hands). Optional: You can coat the balls in a topping, like shredded coconut, cocoa powder, matcha powder, etc.
- Refrigerate for 30 minutes to set. Store leftovers in an airtight container in the refrigerator.
Notes
Mixture too dry? This can sometimes happen depending on how runny your nut butter is. If it's a little too dry to roll into a ball, try adding in an additional 1 tablespoon each of nut butter and maple syrup. Repeat until it reaches the right consistency.
Wet ingredients: Before adding the wet ingredients into the food processor, it can help to whisk together the almond butter, maple syrup, and vanilla before adding it in. This is especially helpful if your almond butter is on the thick side – otherwise you might end up with big chunks of almond butter.
Melting the chocolate: Place chocolate in a microwave safe bowl and microwave in 20-25 second intervals, stirring well between each interval, until fully melted. It usually takes about 1 minute total of heating.
Storage: Store for up to 2 weeks in an airtight container in the fridge or up to 5 months in the freezer. Defrost before enjoying.
- Prep Time: 10 minutes
- Cook Time: 0 minutes
- Category: Snacks
- Method: No cook
- Cuisine: American
Nutrition
- Serving Size:
- Calories: 125
- Sugar: 6.2 g
- Sodium: 17.2 mg
- Fat: 5.7 g
- Carbohydrates: 12.1 g
- Fiber: 1.8 g
- Protein: 2.8 g


Comments
No Comments