
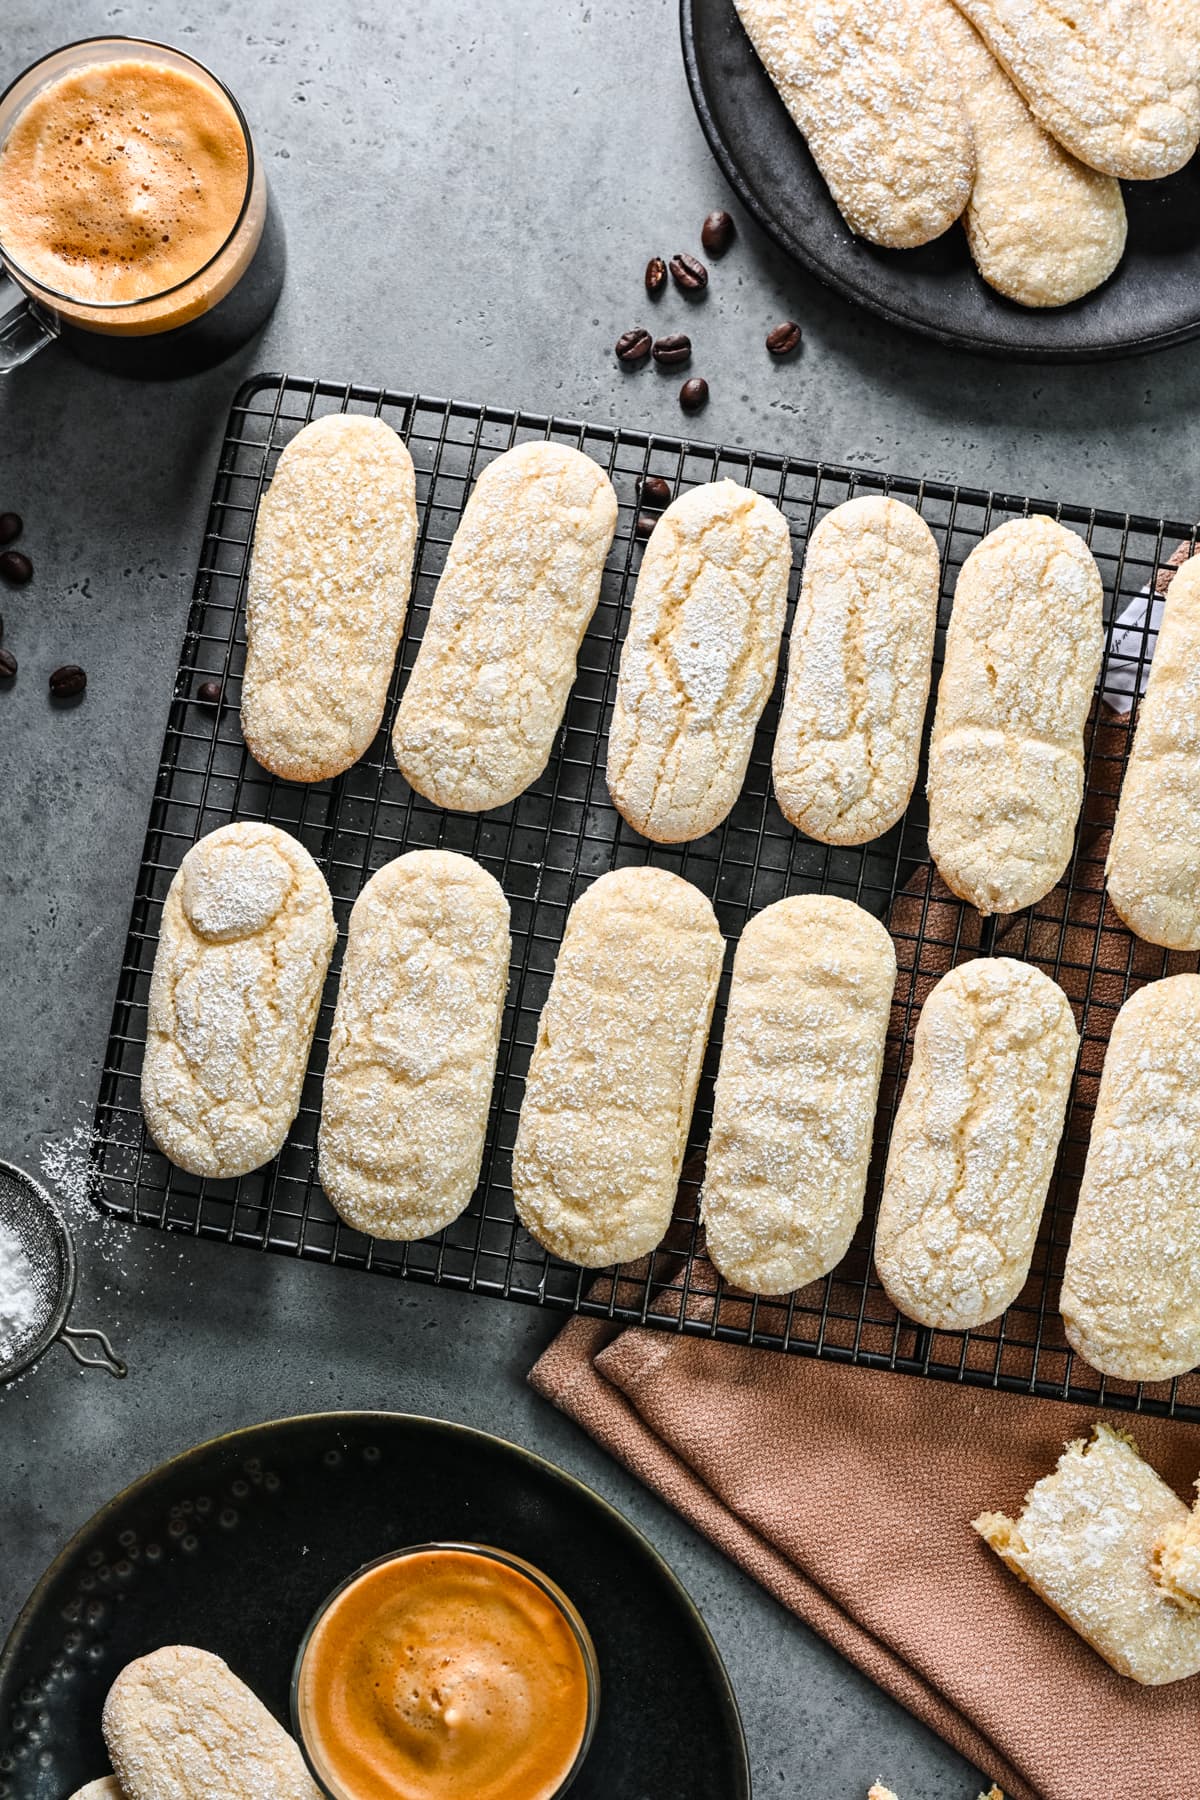
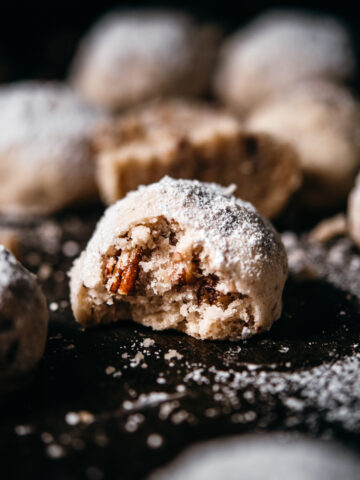
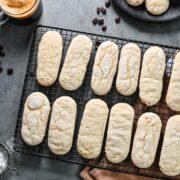
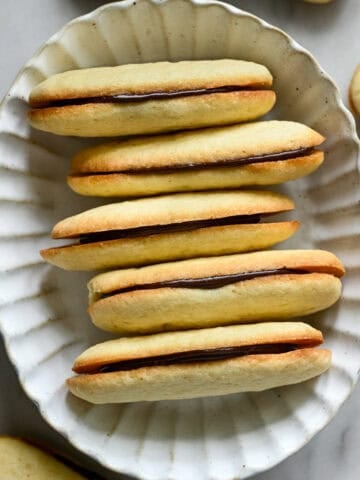
These Vegan Ladyfingers are a delicious and versatile recipe that can be used in a variety of desserts, from tiramisu to trifles and more. They're slightly chewy, crisp, and airy and hold up well when soaked in liquid. They're 100% egg-free and dairy-free, but taste just as good as the classic recipe!
While developing a vegan tiramisu recipe recently, we realized there are essentially no store-bought vegan ladyfingers available. (At least in our area! Do you know of any? Let us know in the comments!)
Since ladyfingers are an essential component of tiramisu, we took matters into our own hands. These took many, many rounds of testing to get them just right, but we're happy to share that the final recipe is a definite winner!
They have just the right texture and crispness for use in a wide variety of recipes, but they're also delicious on their own. Aquafaba, an egg white substitute, is the key ingredient here, and it truly works wonders. We can't wait to hear what you think!
Jump to:
Why We Love This Recipe
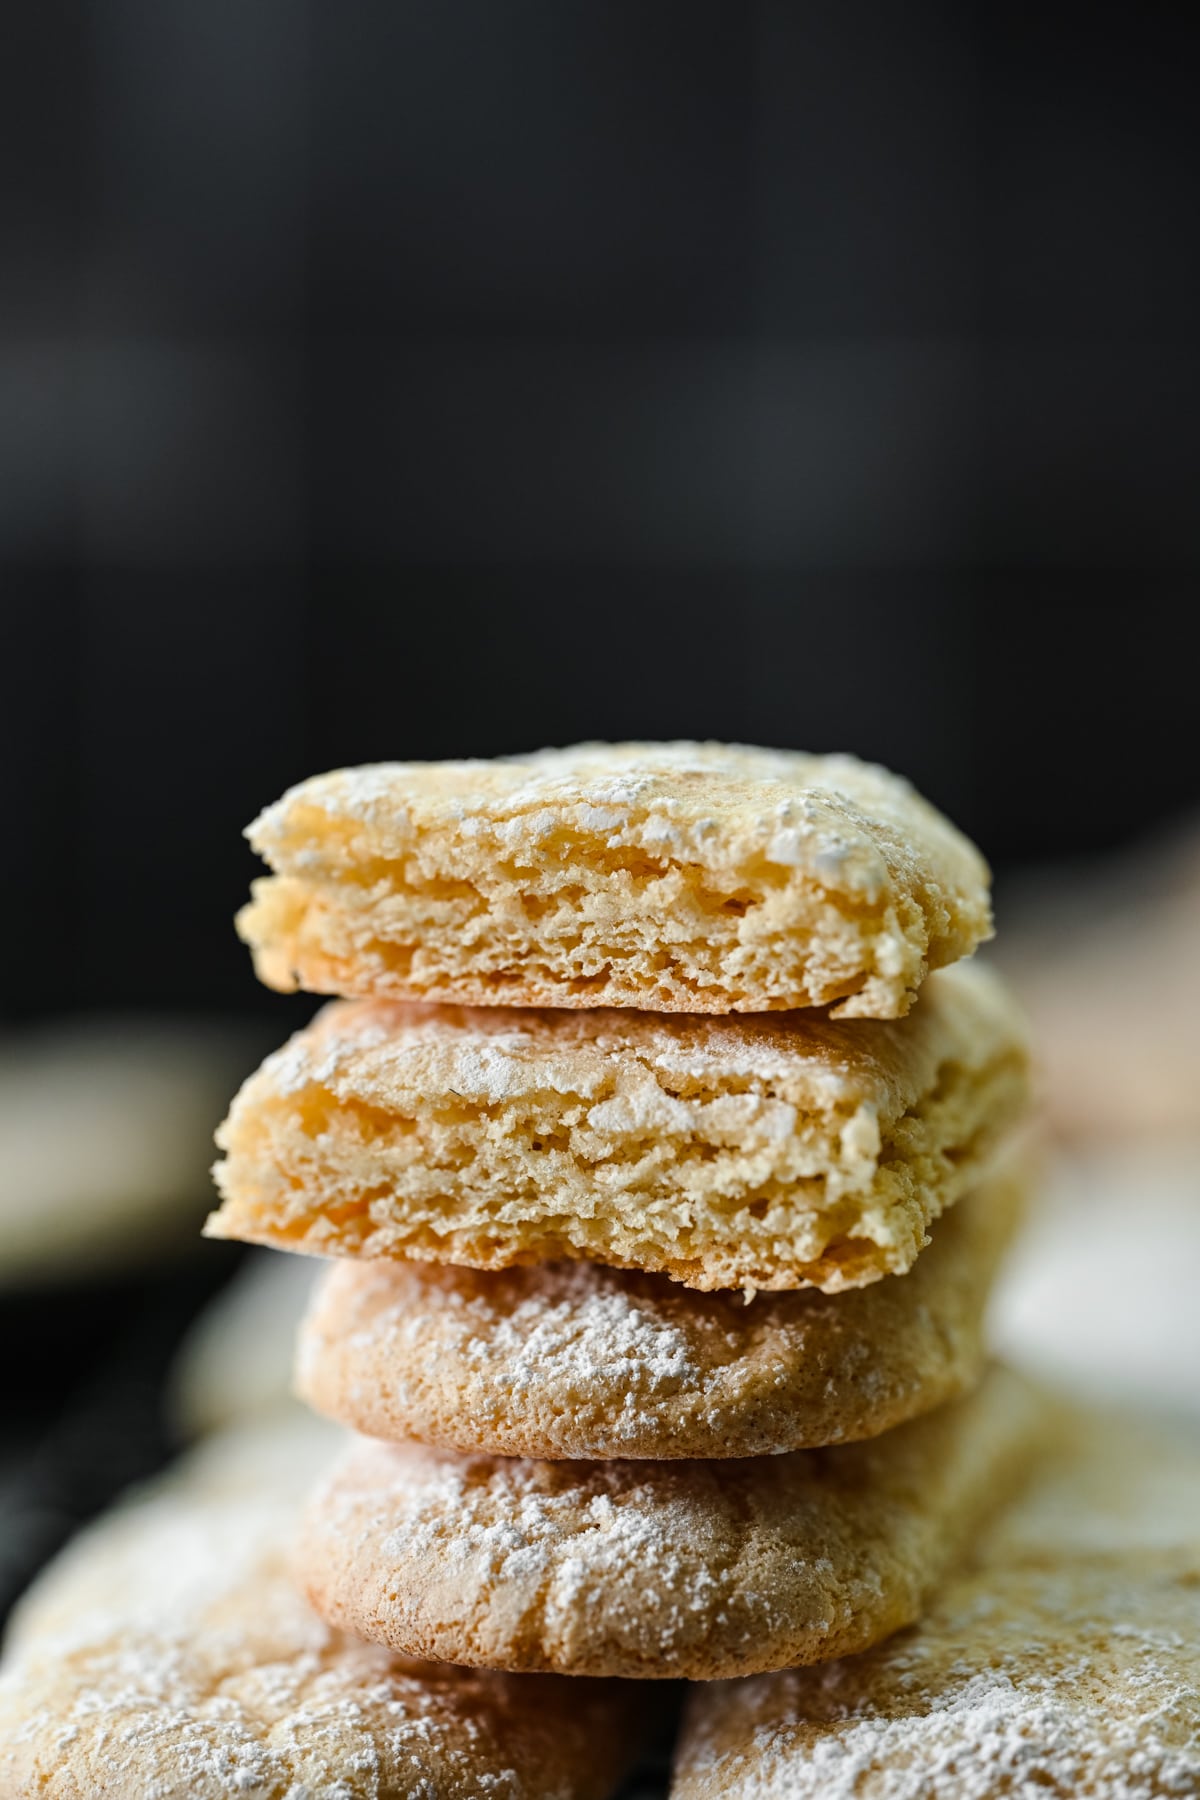
- Perfect texture: These vegan ladyfingers and crisp on the exterior and a little chewy on the interior. They hold up well to liquid, which brings us to our next point...
- Versatile: These can be used in a wide variety of dessert recipes, from tiramisu, to trifles, to icebox cakes. Or, you can just enjoy them plain, or dipped in chocolate (or coffee!).
- Delicious: These vegan ladyfingers are sweet, but not too sweet, and have an addictive crunch that keeps bringing you back for more.
- Surprisingly easy: The process may look a bit intimidating, but once you get it down, these vegan ladyfingers aren't all that challenging.
Ingredients
Here's what you'll need to make these vegan ladyfingers:
Ingredient Notes
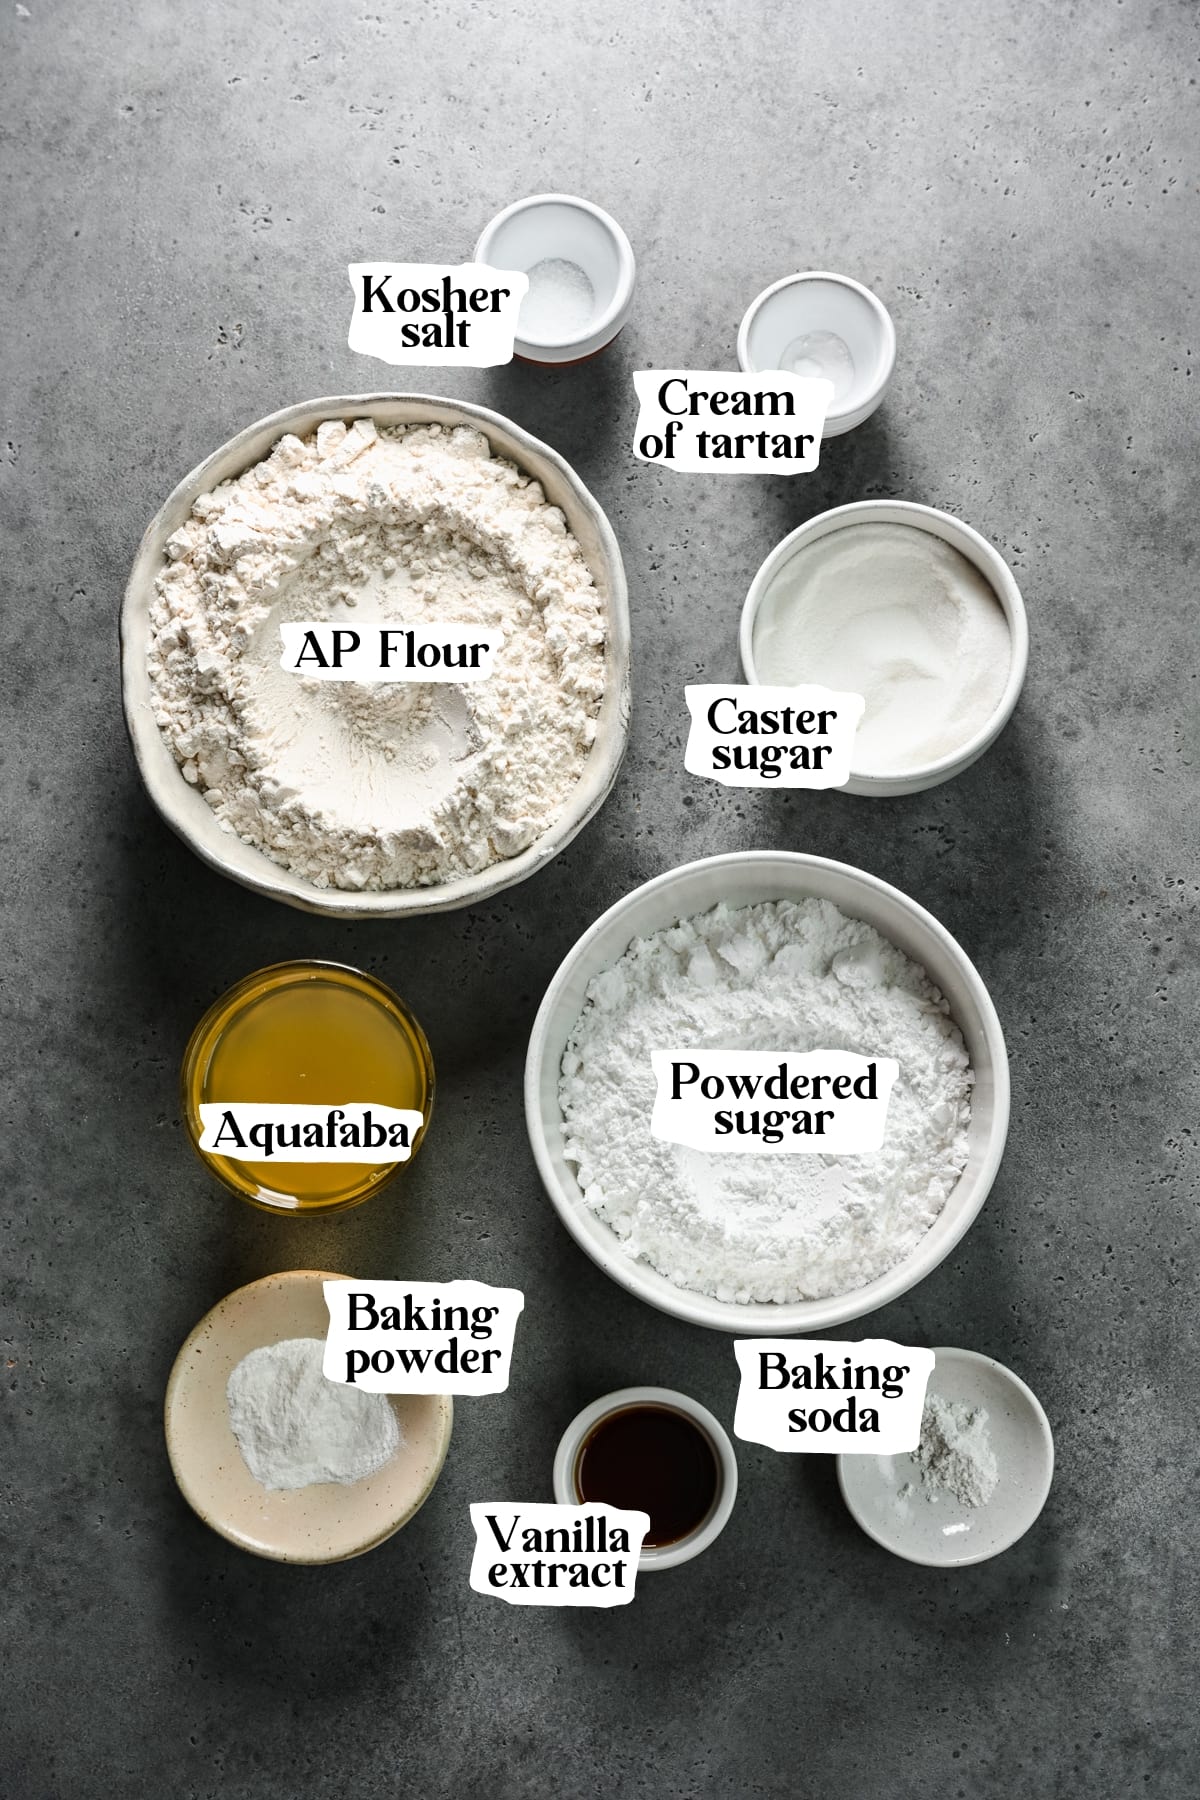
- Flour: We used regular all-purpose flour.
- Gluten free: We have NOT tried this recipe with gluten free flour, so we are not 100% sure if it will turn out well. If you'd like to make this recipe gluten-free, make sure to use a 1:1 gluten free flour substitute.
- Aquafaba: This is the liquid from a can of chickpeas, and it stands in as our egg substitute. It might be hard to believe, but when whipped, it behaves a lot like egg whites. (See these vegan meringues for more proof!) This ingredient cannot be substituted – it's absolutely essential to getting these vegan ladyfingers right.
- Cream of tartar: This helps to stabilize the beaten aquafaba, works in conjunction with the baking soda as a leavening agent to provide rise to the ladyfingers, and lowers the overall pH of the batter, helping the ladyfingers to brown up in the oven. If you don't have any on hand or can't find it at the store, use an equal amount of lemon juice or white vinegar.
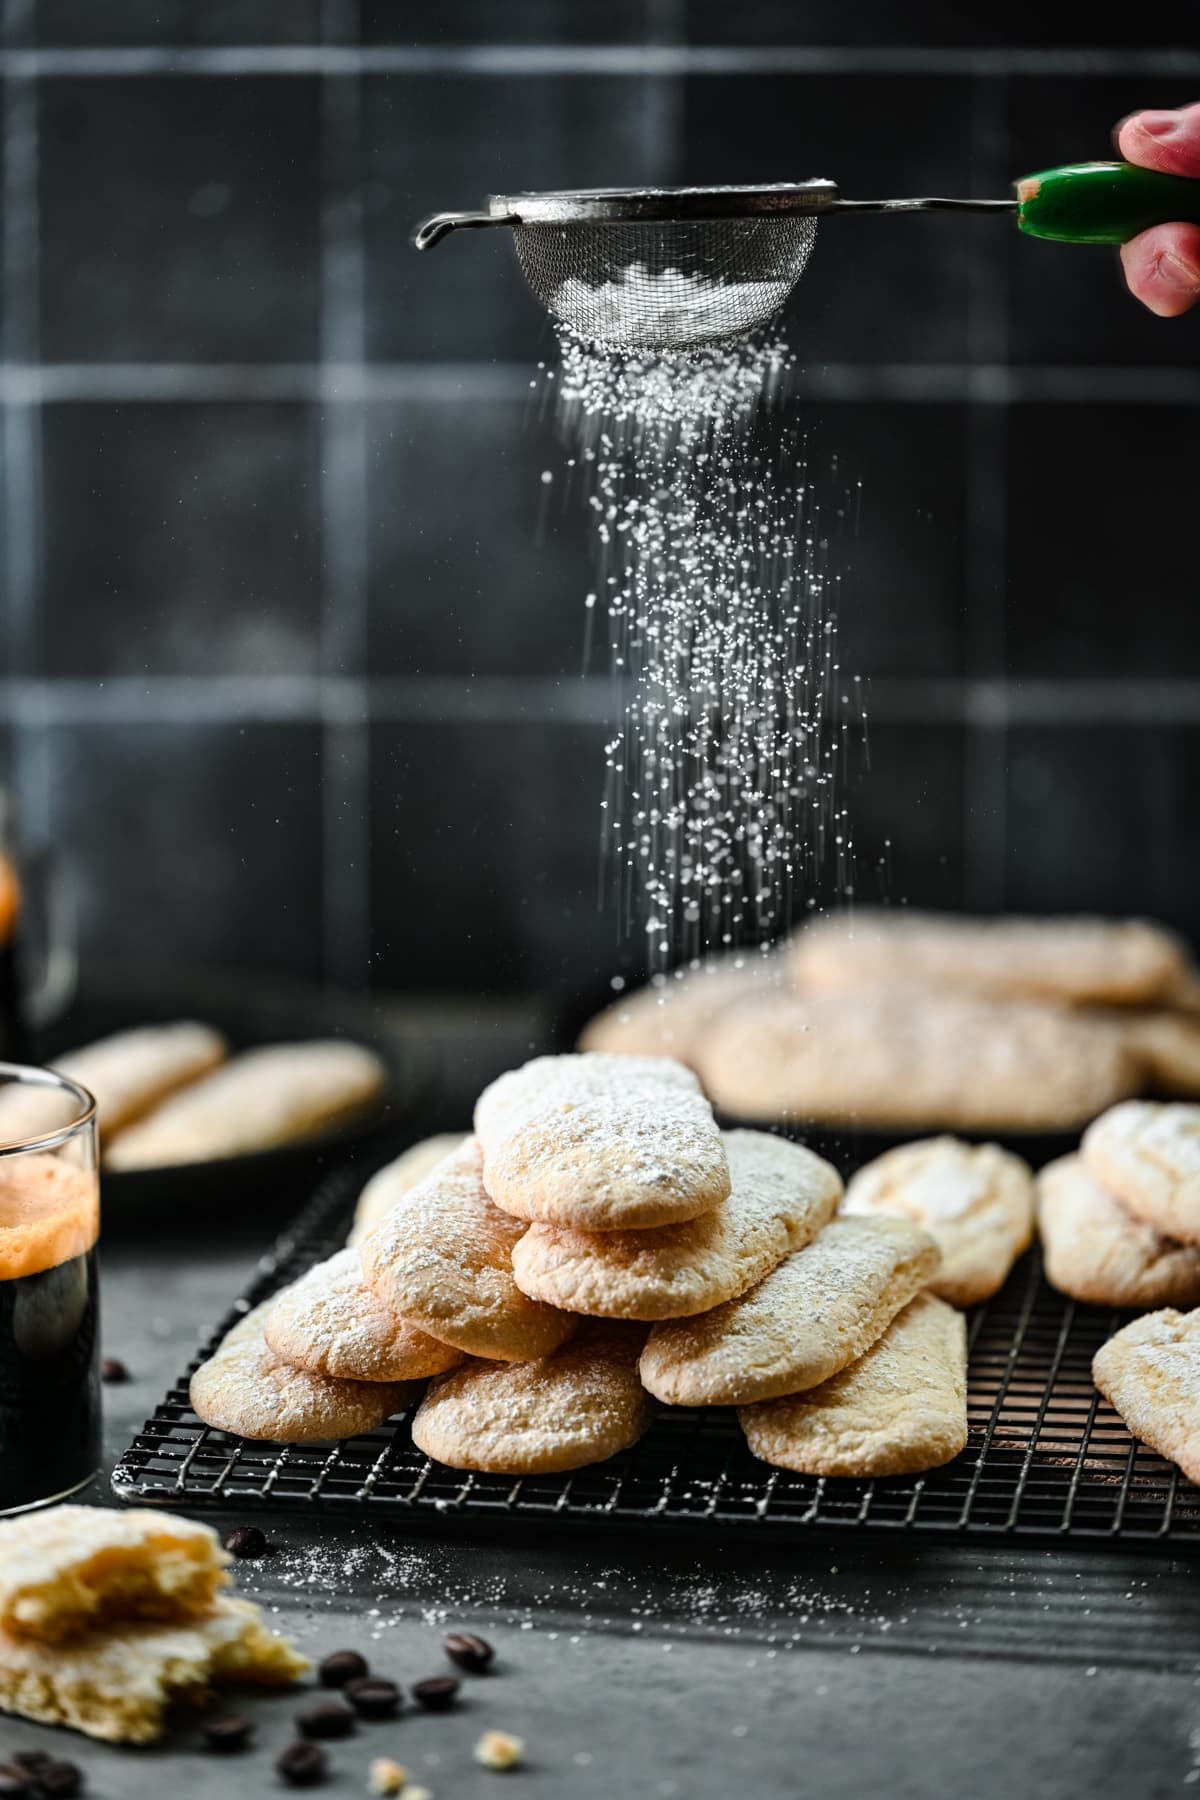
- Powdered sugar: This is both for the batter and for dusting before baking your ladyfingers.
- Caster sugar: This is a fine grain sugar that helps keep the batter nice and smooth, and it also keeps the aquafaba mixture from collapsing. If you don't have any caster sugar, regular granulated sugar should work, but be sure to add it very slowly to give it a chance to fully incorporate into the mixture.
- Kosher salt: We always use Diamond brand kosher salt in our recipes unless otherwise. We do not recommend using table salt. Sea salt is fine to use, but it has a finer grain than kosher salt, so you may want to start with less and add more if needed.
Instructions
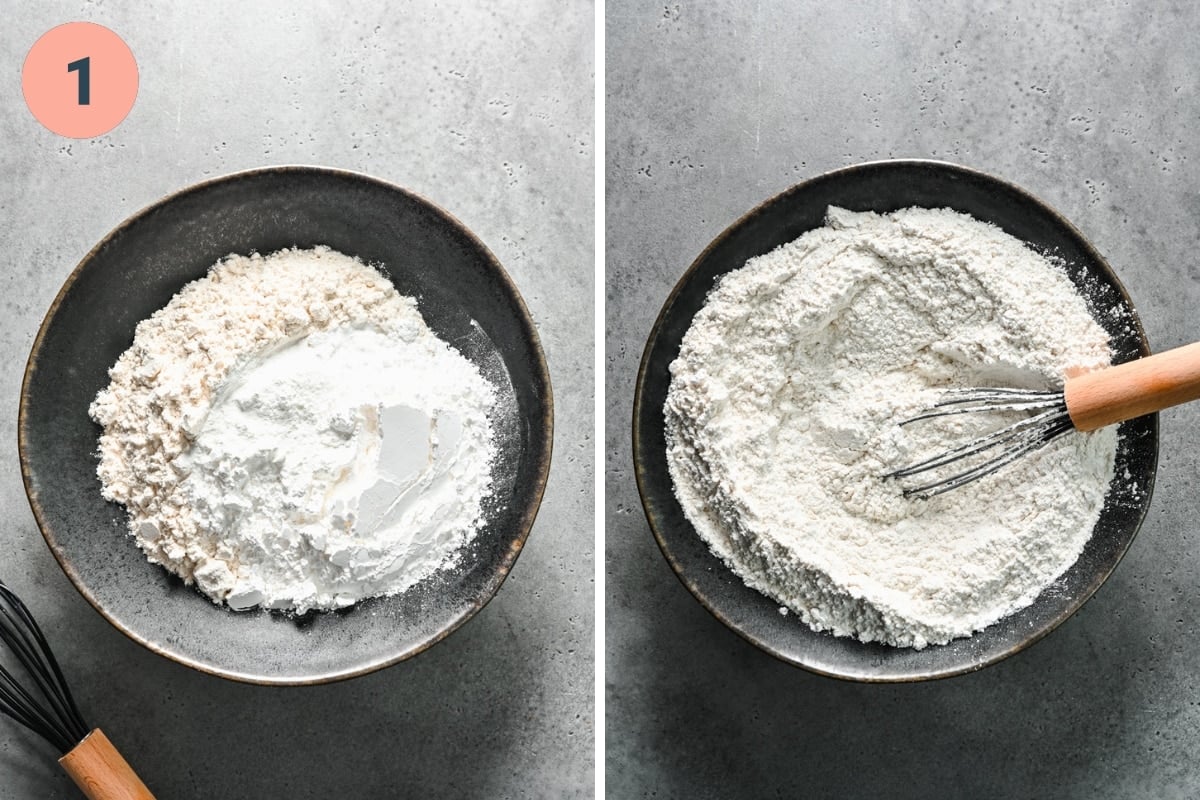
STEP 1: In a medium-sized mixing bowl, stir together the flour, 1 cup of powdered sugar, baking powder, baking soda, and salt.
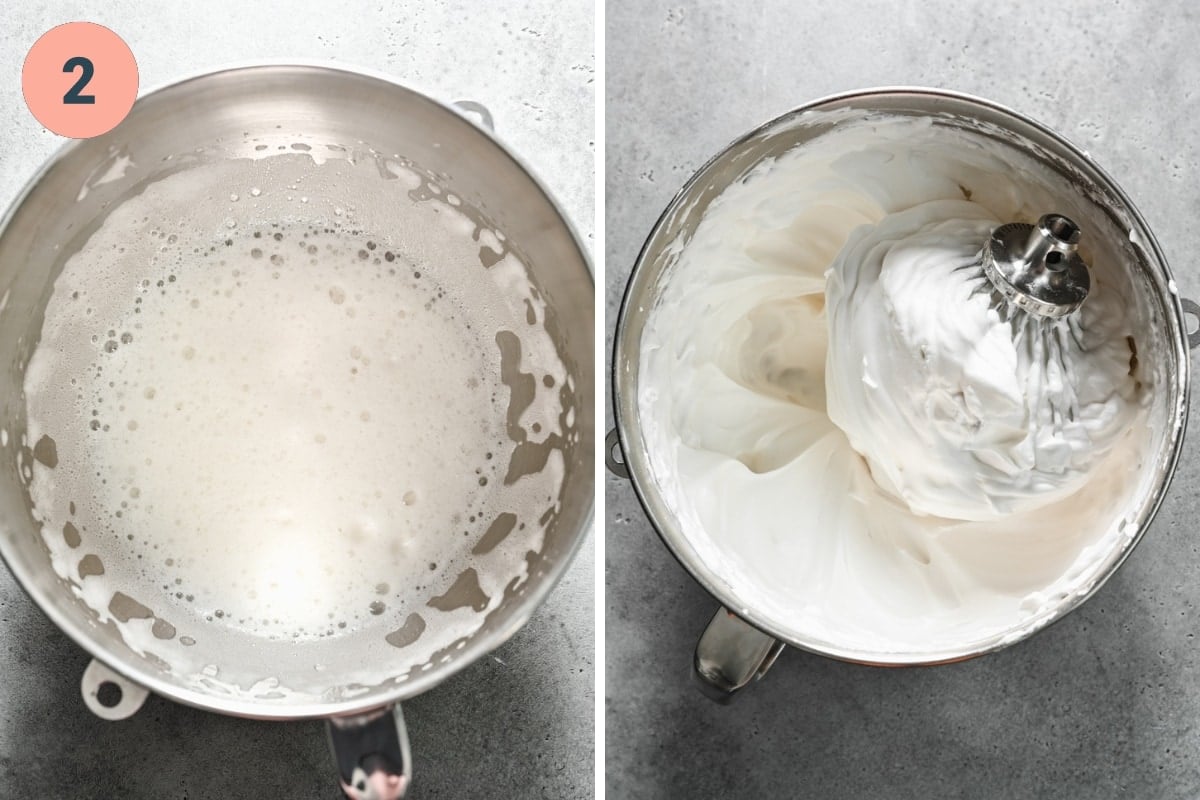
STEP 2: Using a stand or handheld mixer, beat the aquafaba on medium speed until it becomes foamy, which should take about one minute. Add the cream of tartar and beat on high speed for 3 minutes.
Scrape down the sides of the bowl and add the caster sugar to the aquafaba 1 tablespoon at time, beating for 30 seconds in between each addition. It's important to do this slowly so the aquafaba doesn't collapse and the sugar gets fully incorporated.
Beat until stiff peaks form, about 5 minutes. Scrape down the sides with a spatula, then add the vanilla extract and beat for an additional 30 seconds.
STEP 3: Gently fold the dry ingredients into the aquafaba until they're just barely combined. Don't over mix. See below for 3 stages of what the batter will look like at various points of mixing.
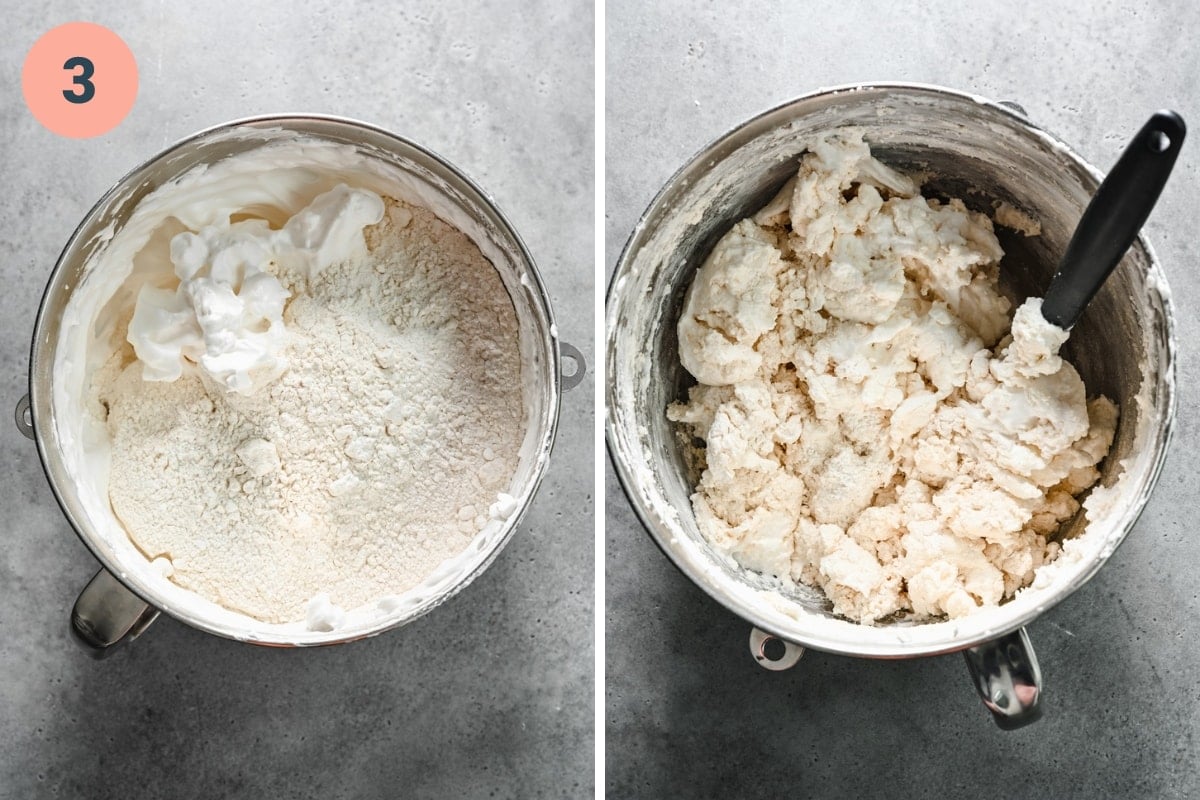
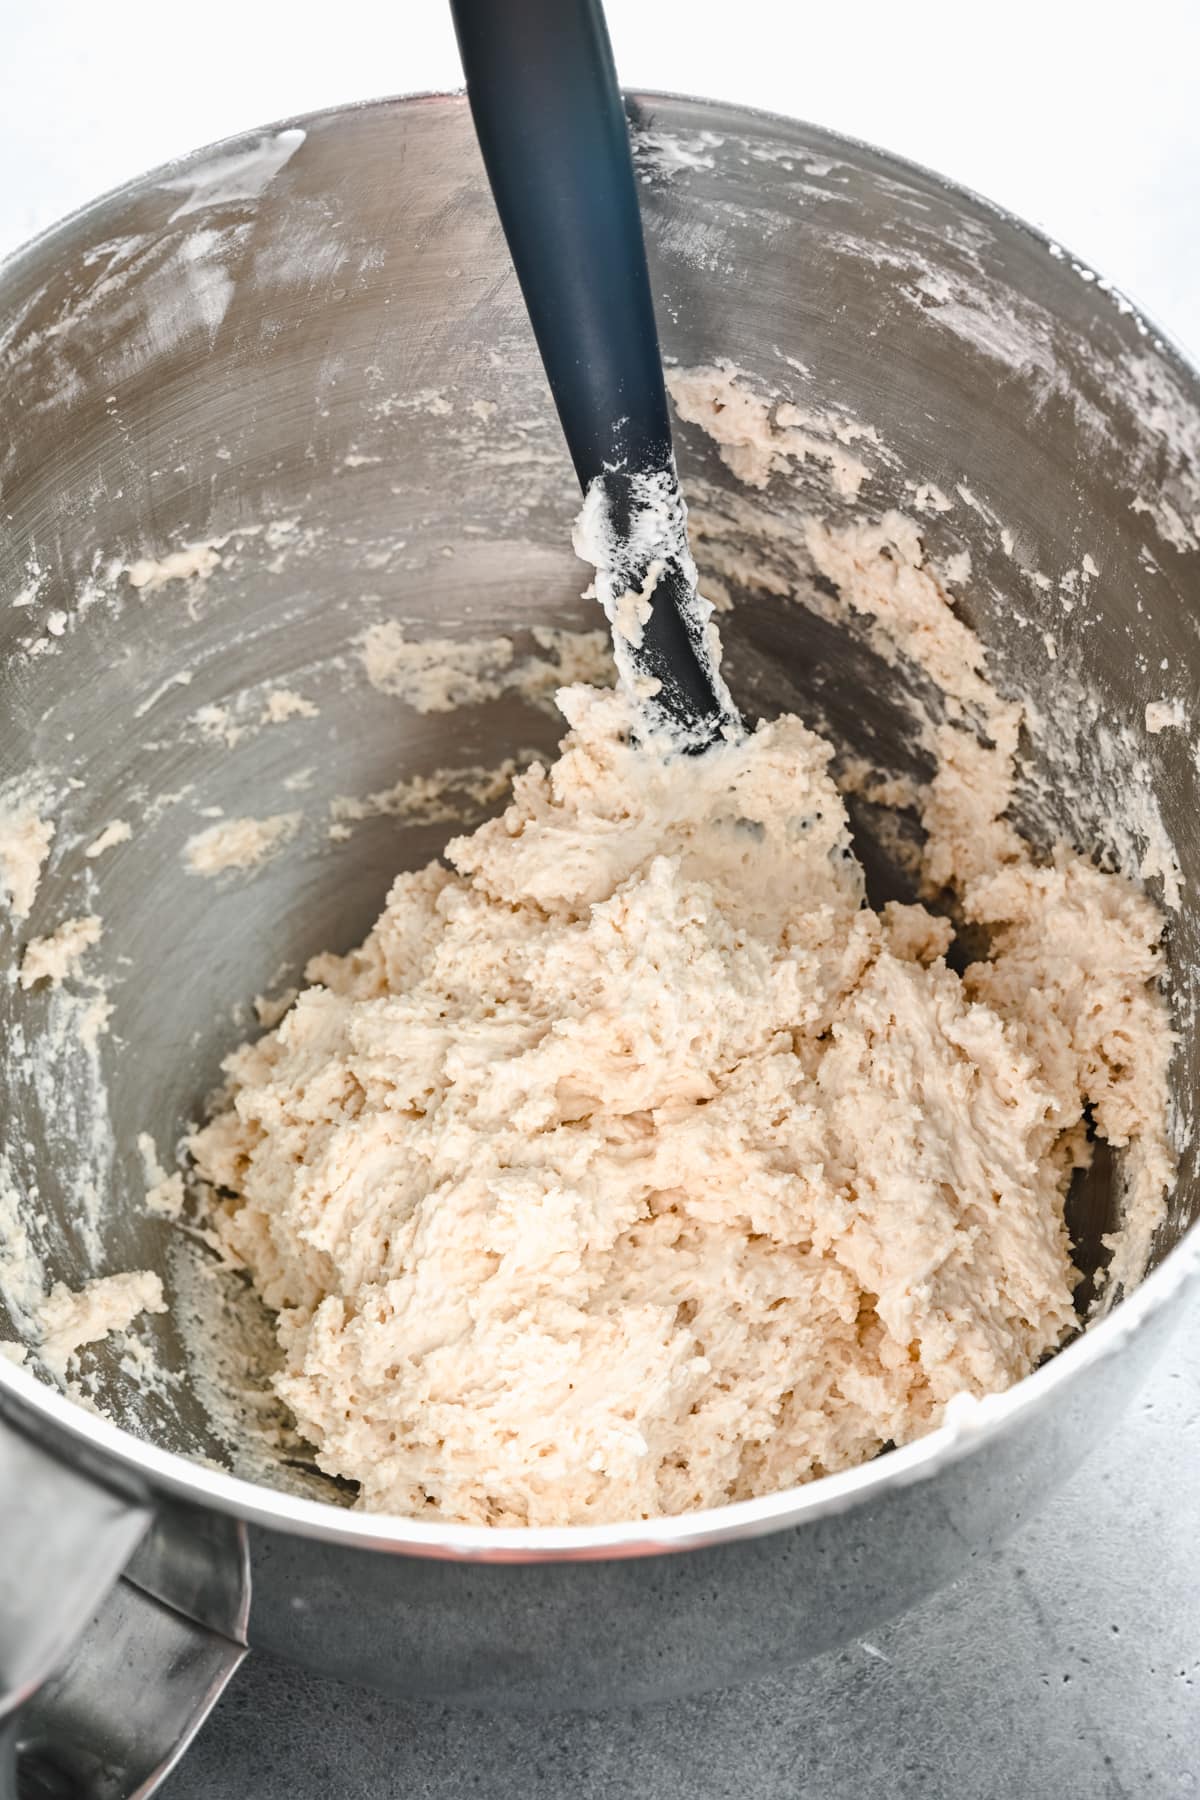
As you continue to fold in the dry mixture, the aquafaba will deflate significantly and the batter will become thick and tacky. That's completely normal! It looks strange, but that's how it's supposed to look. See below for the finished batter.
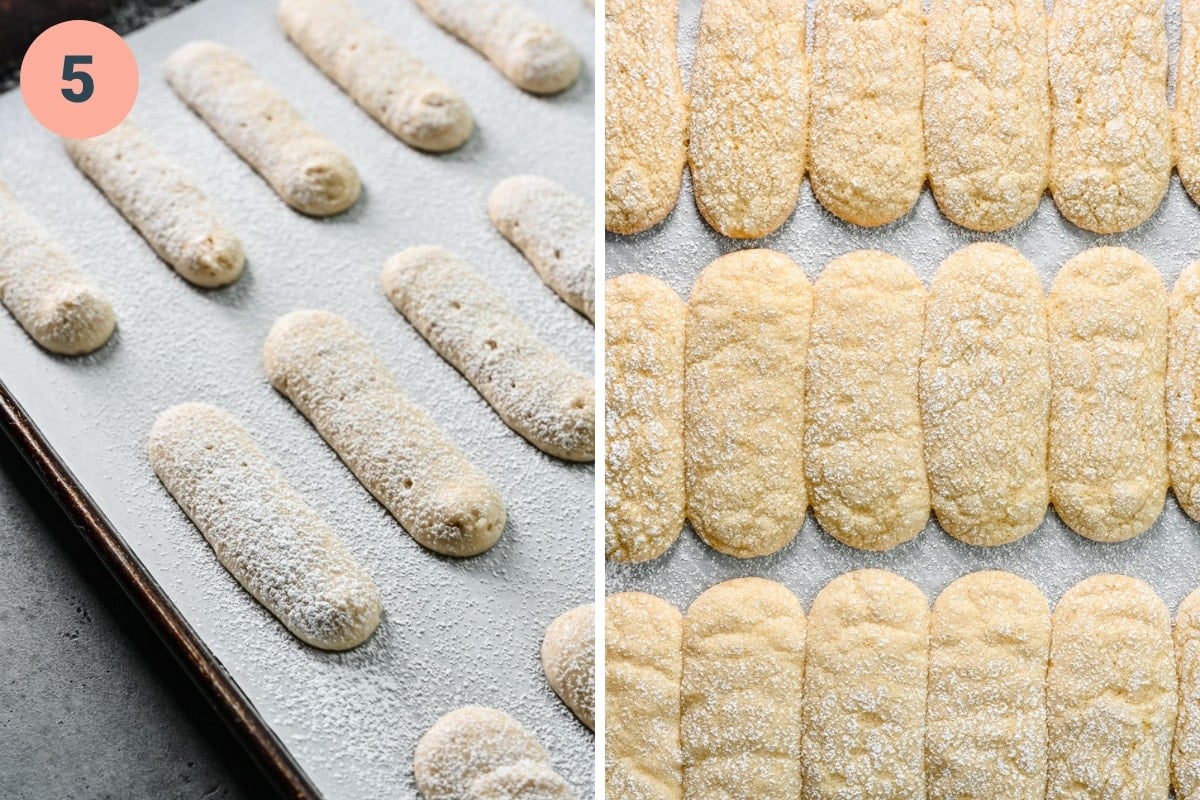
STEP 4: Transfer the mixture to a piping bag with a ½-inch diameter piping tip or a ziplock bag with a corner snipped off. Pipe the batter into 3-inch strips, leaving about 1-inch between each ladyfinger, since they will flatten out and spread as they bake.
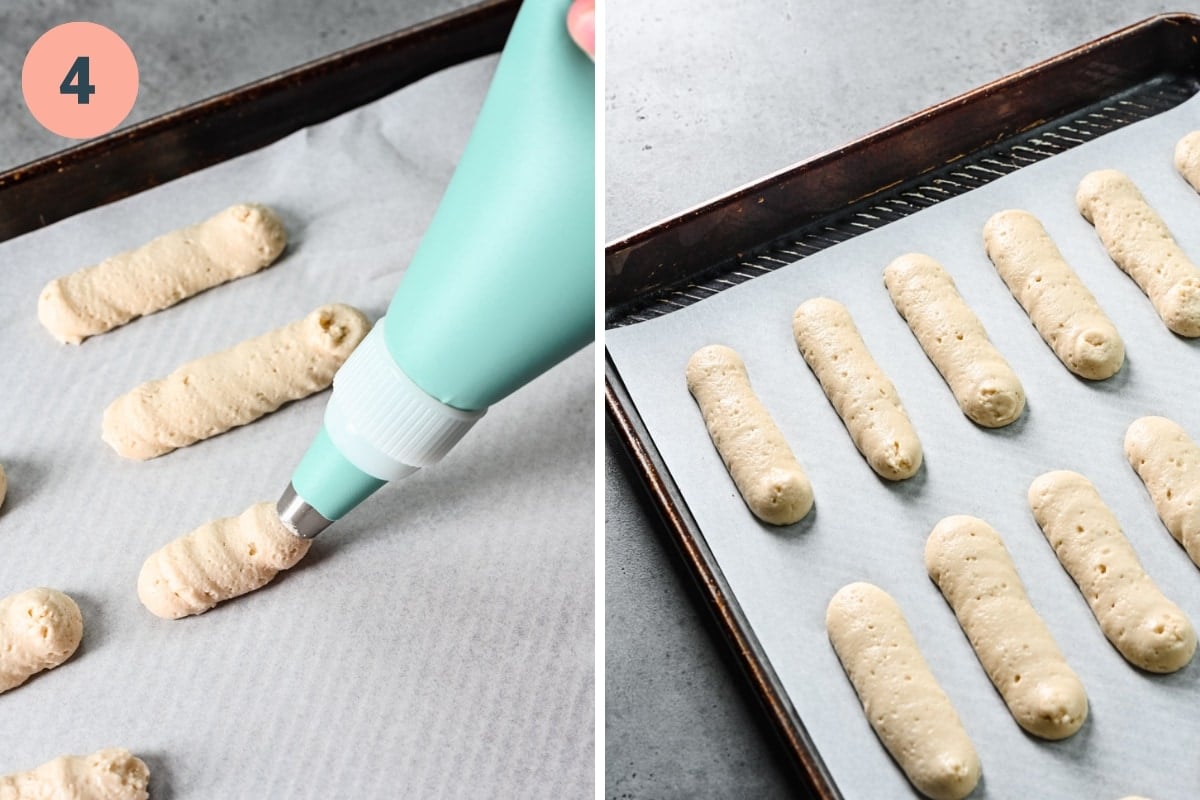
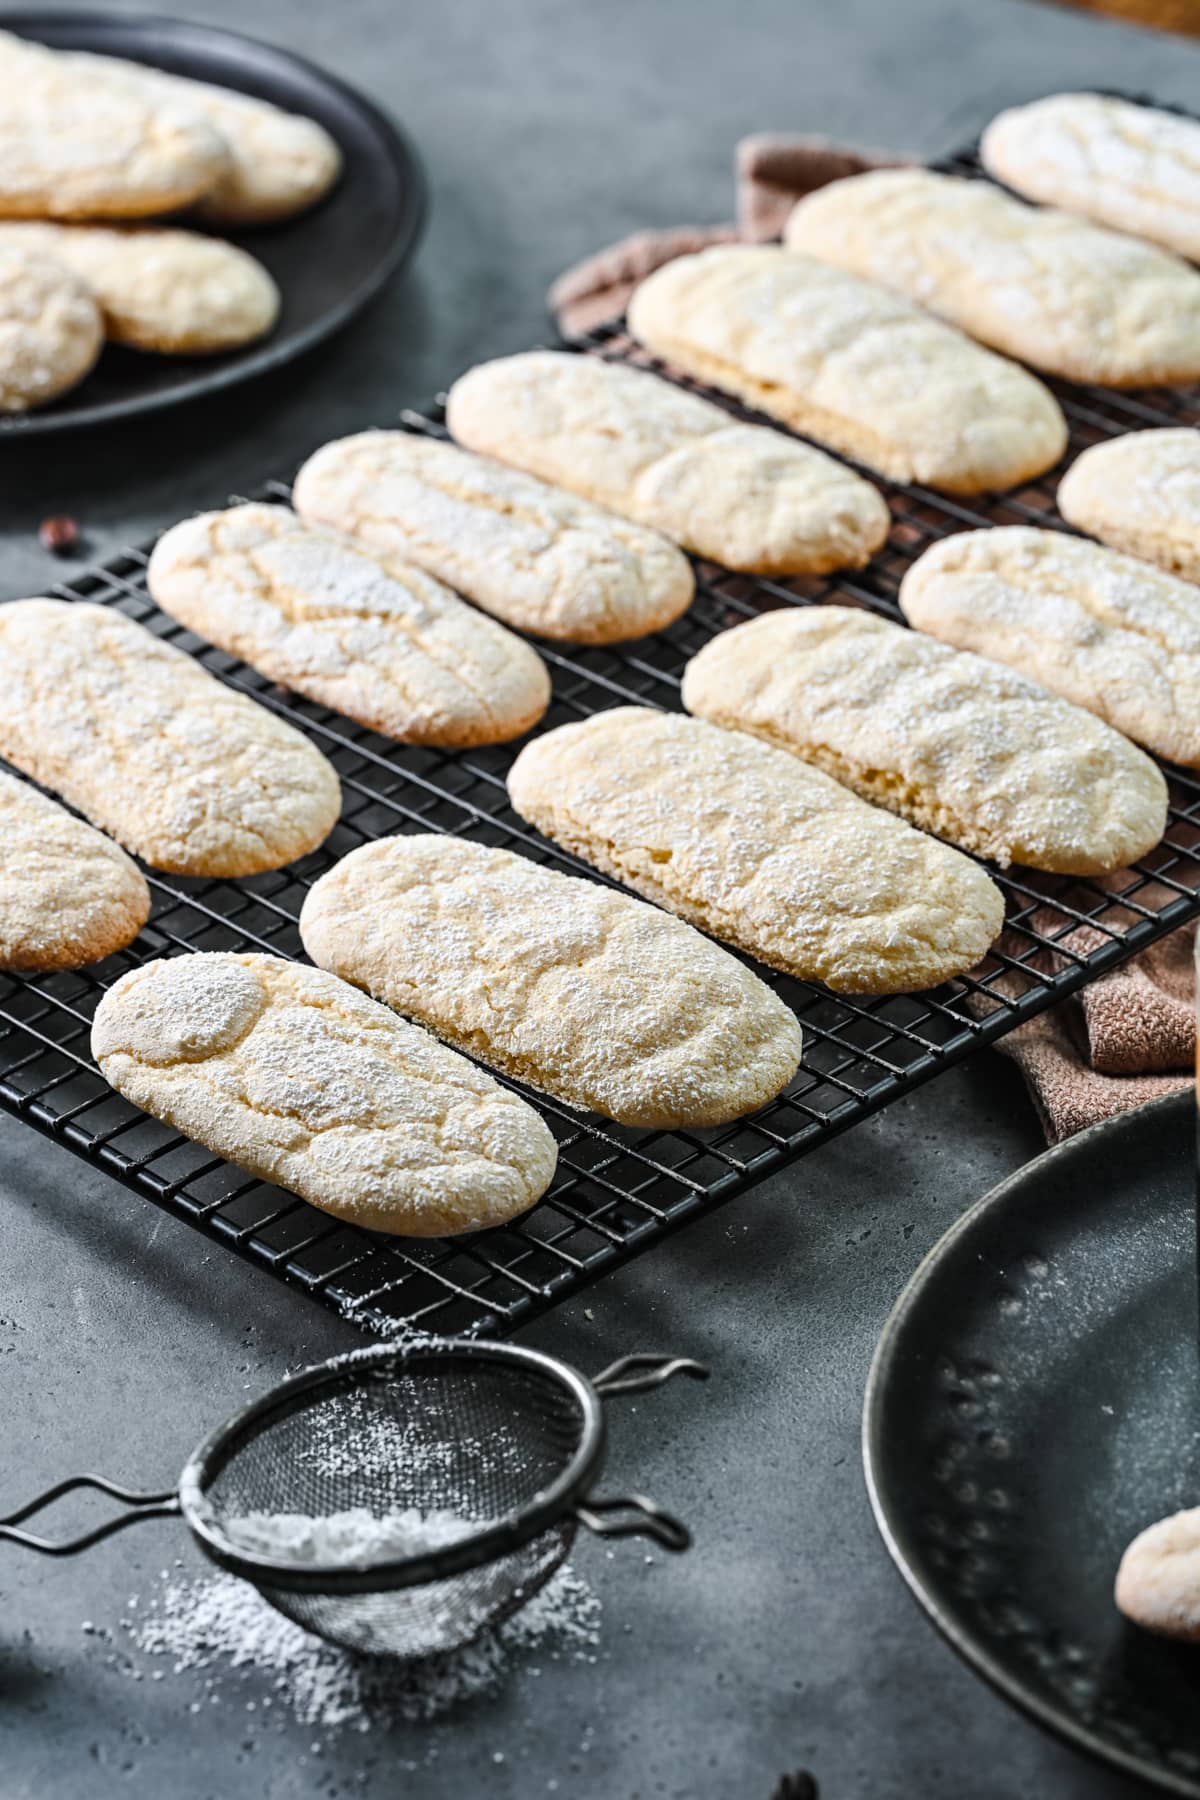
STEP 5: Dust the ladyfingers with powdered sugar. Bake at 375˚F / 175˚C for 12-14 minutes, until edges are golden brown. Let cool for 10-15 minutes, then transfer to a cooling rack to cool completely before using.
Uses for Vegan Ladyfingers
Below are a few of our favorite ways to use these vegan ladyfingers in various recipes and beyond:
- Enjoy plain with coffee or an affogato.
- Enjoy with your favorite ice cream (try our no churn vanilla or our blueberry lemon ice cream – both vegan!).
- Use in homemade tiramisu. This is our favorite use and the reason we developed this recipe in the first place! Ladyfingers are the traditional base for any tiramisu recipe. These vegan ones hold up well when dipped in coffee, so you don't have to worry about them getting too soggy.
- Use in a trifle with homemade jam, fresh fruit and vegan pudding or custard.
- Use in an icebox cake or a Charlotte with ice cream and/or vegan whipped cream.
- Dip them in chocolate and serve as a simple dessert.
Tips and FAQs
- Don't overmix the batter: Overmixing can make the cookies dense and tough, so mix just until the flour is fully incorporated into the aquafaba mixture. That said, it's also important to mix it enough – you don't want any dry flour clumps!
- The batter may look strange, but that's okay. Every time we make these vegan ladyfingers, we're always stressed about how the batter looks (even though it's our recipe!). It looks totally abnormal – not smooth, very thick and tacky, and just a bit wrong. But we promise it's supposed to look like that, and it turns out perfectly every time! If you're not sure how it should look, be sure to reference the step by step photos in the "instructions" section above.
- Use a piping bag: A piping bag is your best bet for evenly sized ladyfingers. We used a round piping tip with a ½-inch diameter.
- Shortcut: If you don't have the correct piping tip, you can use a plastic bag and cut off the corner. They won't be quite as neat, but it will still work just fine!
- Don't worry if the batter runs together when baking: It's easy to break or slice them apart once they are cool.
- Let them cool completely: Ladyfingers need to cool completely before using them in a recipe. This allows them to firm up and become slightly crispy, which is important for their texture in desserts like tiramisu.
- Storage: Store in an airtight container at room temperature or in the refrigerator for up to 5 days. Be sure to store in a sealed container, otherwise they will become stale very quickly.
Yes, you can freeze these vegan ladyfingers for up to three months. Let them cool completely, then place them in an airtight container or freezer bag.
We would not suggest changing the type of sugar used in this recipe. The sugar is important to the stability of the batter and the crispy texture, so liquid alternatives (like maple syrup or agave) would not work well.
Yes, you can make the batter ahead of time and store it in the refrigerator for up to 24 hours. Just be sure to mix it well before piping.
More Vegan Cookie Recipes to Try


Tried this recipe? Please leave a star ⭐️⭐️⭐️⭐️⭐️ rating below and/or a review in the comments section further down the page.
📖 Recipe
Vegan Ladyfingers
- Total Time: 45 minutes
- Yield: About 30 cookies 1x
- Diet: Vegan
Description
These vegan ladyfingers are a delicious and versatile recipe that can be used in a variety of desserts, from tiramisu to trifles and more. They're slightly chewy, crisp, and airy and hold up well when soaked in liquid. They're 100% egg-free and dairy-free, but taste just as good as the classic recipe!
Ingredients
- 2 cups all-purpose flour
- 1 cup powdered sugar, plus 1 tablespoon for dusting
- 2 teaspoons baking powder
- ½ teaspoon baking soda
- ½ teaspoon salt
- ⅔ cup aquafaba (liquid from a can of chickpeas)
- ¼ teaspoon cream of tartar
- ½ cup caster sugar (superfine sugar)*
- 2 teaspoons vanilla extract
Instructions
- Preheat oven to 375˚F / 175˚C and line 2 baking sheets with parchment paper.
- In a medium-sized mixing bowl, stir together the flour, 1 cup of powdered sugar, baking powder, baking soda, and salt.
- Using a stand or handheld mixer, beat the aquafaba on medium speed until it becomes foamy, which should take about one minute. Add the cream of tartar and beat on high speed for 3 minutes.
- Scrape down the sides of the bowl and add the caster sugar to the aquafaba 1 tablespoon at time, beating for 30 seconds in between each addition. It's important to do this slowly so the aquafaba doesn't collapse and the sugar gets fully incorporated.
- Beat until stiff peaks form, about 5 minutes. Scrape down the sides with a spatula, then add the vanilla extract and beat for an additional 30 seconds.
- Gently fold the dry ingredients into the aquafaba until they're just barely combined. Don't over mix. The batter will be very thick and the aquafaba will deflate significantly – that's normal. (See blog post for photos of how the batter should look.)
- Transfer the mixture to a piping bag with a ½-inch diameter piping tip or a ziplock bag with a corner snipped off. Pipe the batter onto the parchment paper lined baking sheets into 3-inch strips, leaving about 1-inch between each ladyfinger, since they will flatten out and spread as they bake.
- Dust the ladyfingers with powdered sugar. Bake for 12-14 minutes, until edges are golden brown. Let cool for 10-15 minutes, then transfer to a cooling rack to cool completely before using.
Notes
*Caster sugar: This is a fine grain sugar that helps keep the batter nice and smooth, and it also keeps the aquafaba mixture from collapsing. If you don't have any caster sugar, regular granulated sugar should work, but be sure to add it very slowly to give it a chance to fully incorporate into the mixture.
Let them cool completely: Ladyfingers need to cool completely before using them in a recipe. This allows them to firm up and become slightly crispy, which is important for their texture in desserts like tiramisu.
Don't overmix the batter: Overmixing can make the cookies dense and tough, so mix just until the flour is fully incorporated into the aquafaba mixture. That said, it's also important to mix it enough – you don't want any dry flour clumps!
Storage: Store in an airtight container at room temperature or in the refrigerator for up to 5 days. Be sure to store in a sealed container, otherwise they will become stale very quickly. You can also freeze them for up to 3 months.
Gluten free: We have NOT tried this recipe with gluten free flour, so we are not 100% sure if it will turn out well. If you'd like to make this recipe gluten-free, make sure to use a 1:1 gluten free flour substitute.
Nutrition information provided is an estimate. It may vary based on cooking method and specific ingredients used.
- Prep Time: 30 minutes
- Cook Time: 15 minutes
- Category: Desserts
- Method: Oven
- Cuisine: French
Nutrition
- Serving Size: 3 cookies
- Calories: 166
- Sugar: 17.9 g
- Sodium: 164.4 mg
- Fat: 0.3 g
- Carbohydrates: 38.3 g
- Fiber: 0.7 g
- Protein: 2.6 g
Comments
No Comments