
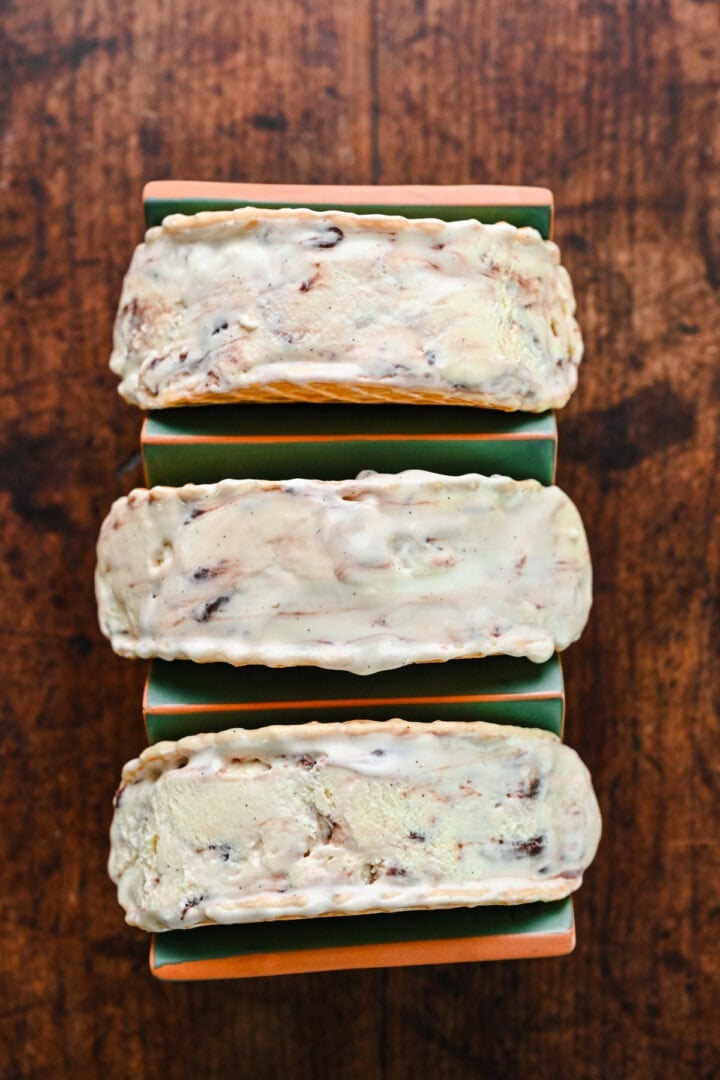
These homemade Choco Tacos are a fun, nostalgic treat that's perfect for summer! No churn fudge-swirled vanilla ice cream is stuffed inside a sweet and crispy waffle cone, then the whole thing is dipped in a chocolate and chopped peanut mixture.
Disclosure: Some of the links below are affiliate links. This means that, at zero cost to you, I may earn an affiliate commission if you click through the link and finalize a purchase. Read our full affiliate disclosure here.

We keep hearing rumors of the Choco Taco's return, but sadly, the only way to get your hands on one is to make it on your own! That's why we're making these as part of our Better Than Store Bought series, where we're making homemade versions of everyone's favorite snacks.
These look like they'd be tricky, but they're actually super easy to make, so don't be intimidated! They're a super cool, nostalgic dessert that's perfect for bringing to a party or for entertaining.
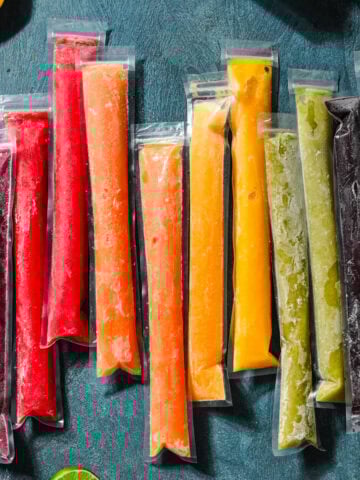
If you're looking for other homemade versions of classic snacks, check out these Homemade Freeze Pops or our Homemade Cheez-Its.
Jump to:
Homemade Choco Taco Ingredients
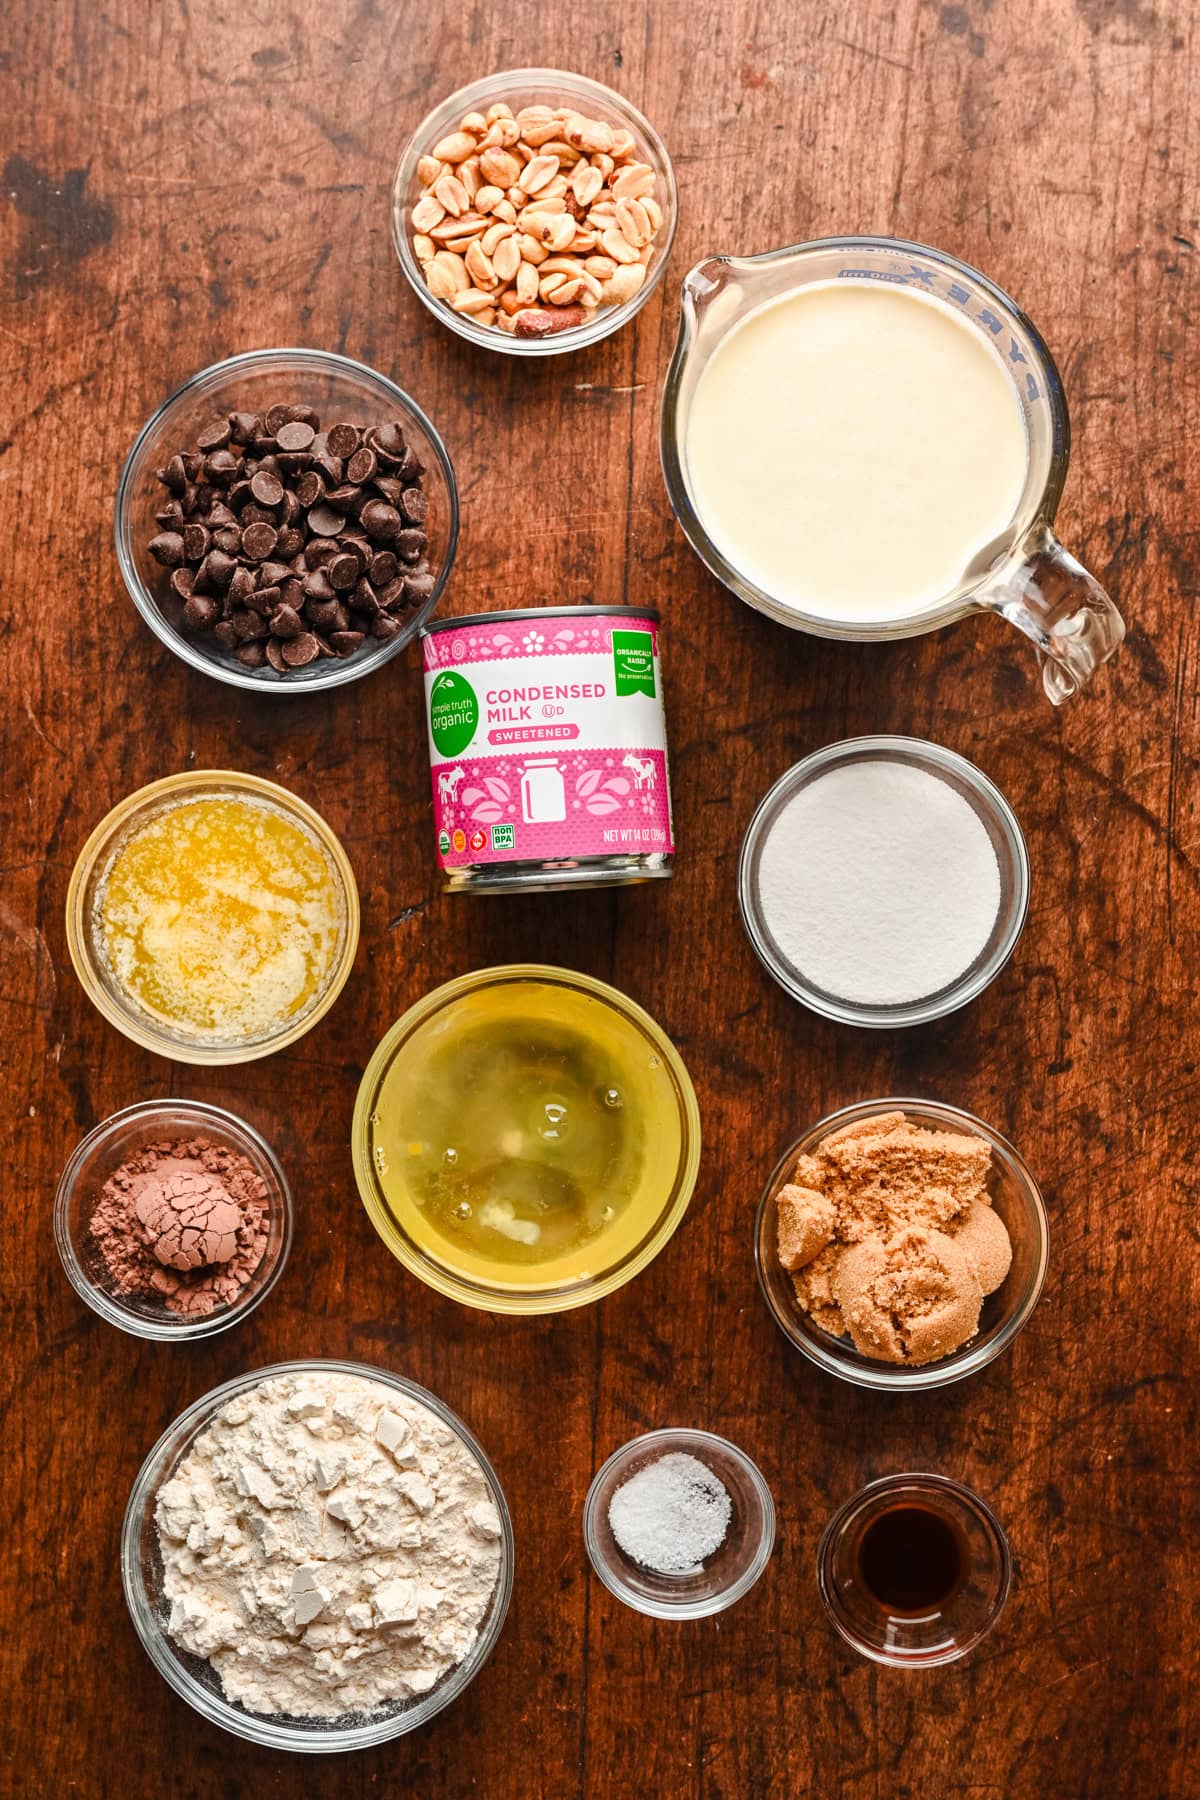
For the no-churn ice cream
- Heavy cream: this is whipped until it forms stiff peaks, and is half of the no-churn base, alongside...
- Condensed milk: this provides the sweetness for the ice cream, and teams up with the heavy cream to create a soft, rich texture that's perfect for these choco tacos.
- Vanilla bean paste: this is my favorite choice for homemade vanilla ice cream. You can also use vanilla extract instead.
- Kosher salt: helps to balance out the sweetness of the ice cream.
For the fudge ripple
- Cocoa powder: this provides all of the chocolatey flavor.
- Sugar: plain granulated white sugar works best.
- Heavy cream and unsalted butter: these add fats to the sauce to give it a luxurious fudgy texture.
- Vanilla extract: you could use vanilla bean paste, or leave it out if you want.
- Kosher salt: helps to balance out the sauce's sweetness.
For the waffle taco shell
- Egg whites: be sure to use only the whites, and not the entire egg.
- Sugar: we used half white and half brown sugar to add some color and depth of flavor to the cones.
- Vanilla extract: adds a great vanilla flavor to the cones - we wouldn't recommend skipping this ingredient.
- Butter: melt unsalted butter in the microwave, cooking it at with intervals of 10-15 seconds on, 10-15 seconds off, stirring in between. We let the butter cool slightly before adding it to the rest of the batter, to prevent it from cooking the eggs prematurely.
- Flour: plain all purpose flour works best.
- Kosher salt
For the peanut topping
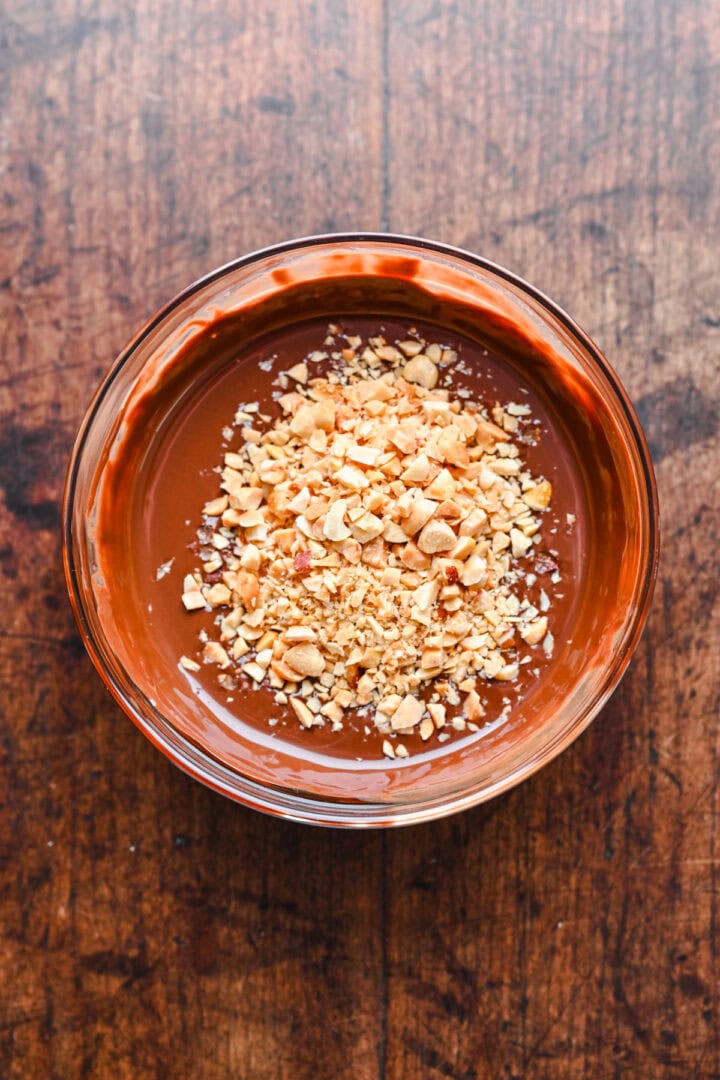
- Peanuts: we used roasted, unsalted peanuts, but salted would probably be good, too.
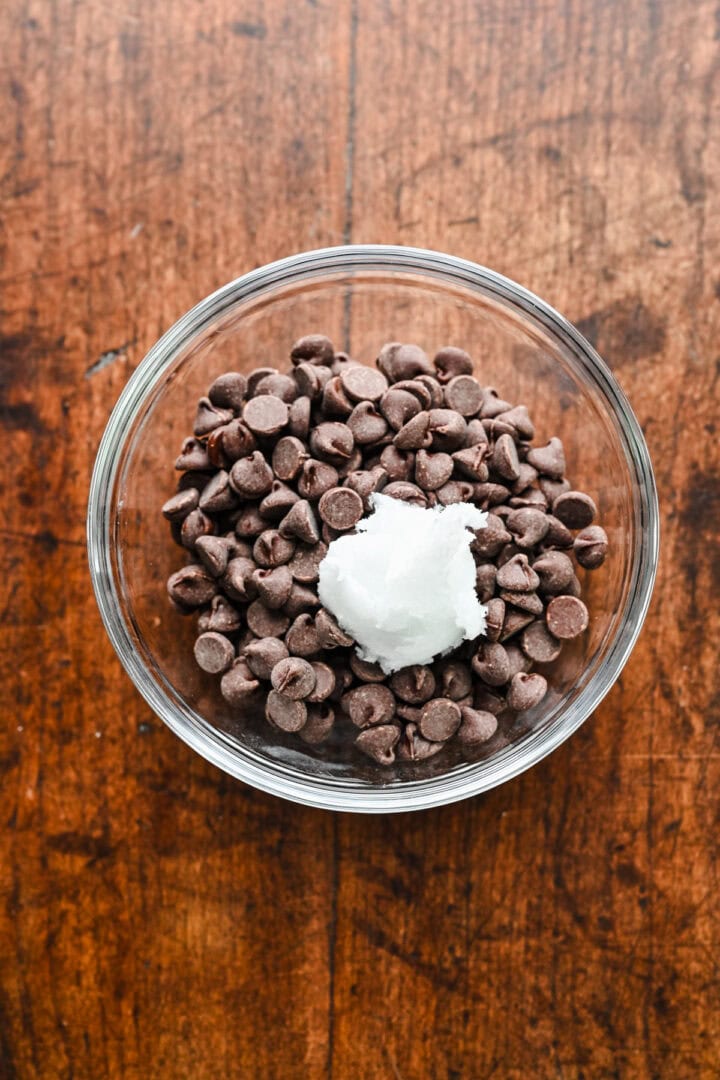
- Chocolate: semisweet chocolate chips provide the best blend of chocolate flavor and sweetness, and are easy to melt.
- Coconut oil: this helps the chocolate to set more quickly atop the ice cream, and we wouldn't recommend skipping it.
How to Make this Homemade Choco Taco Recipe
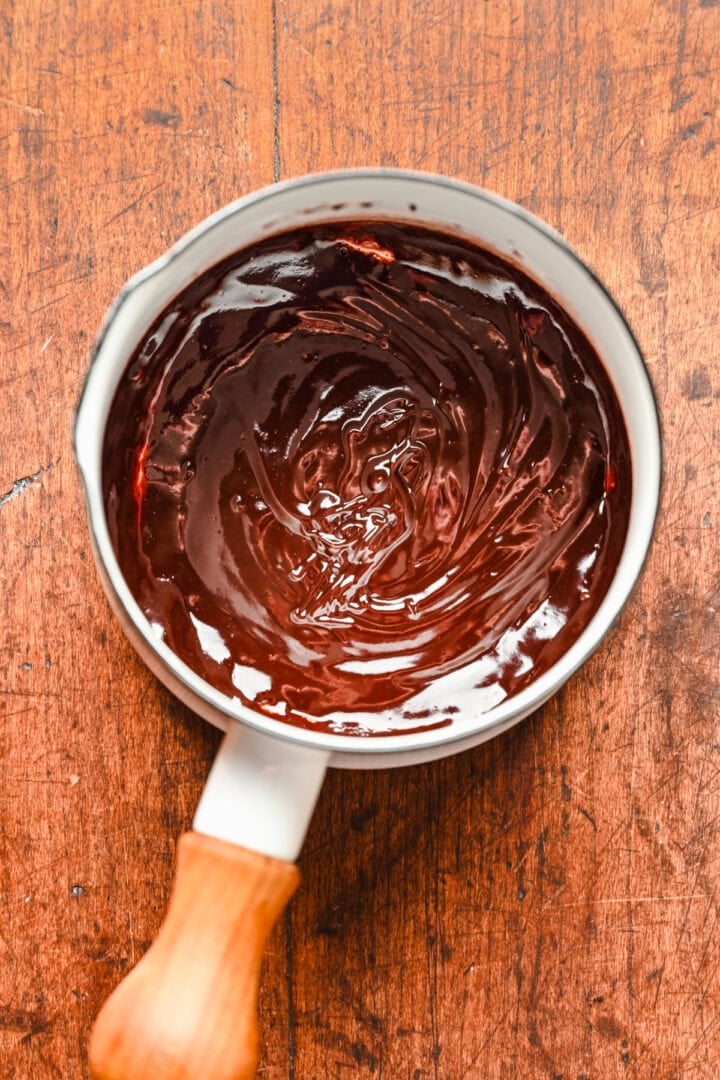
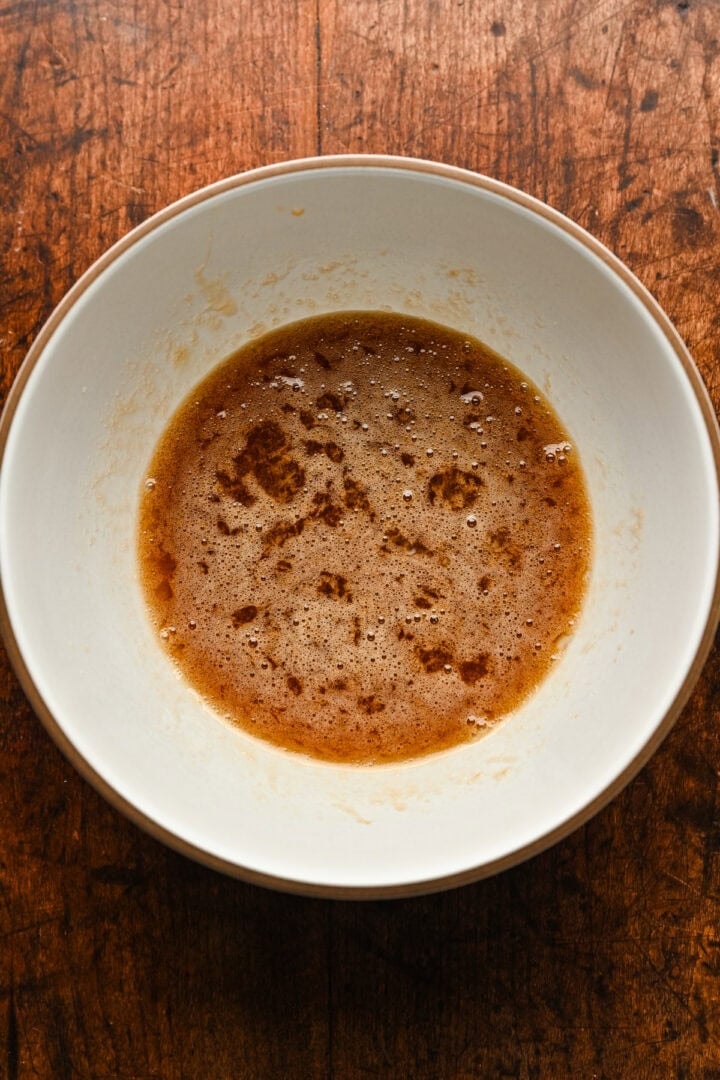
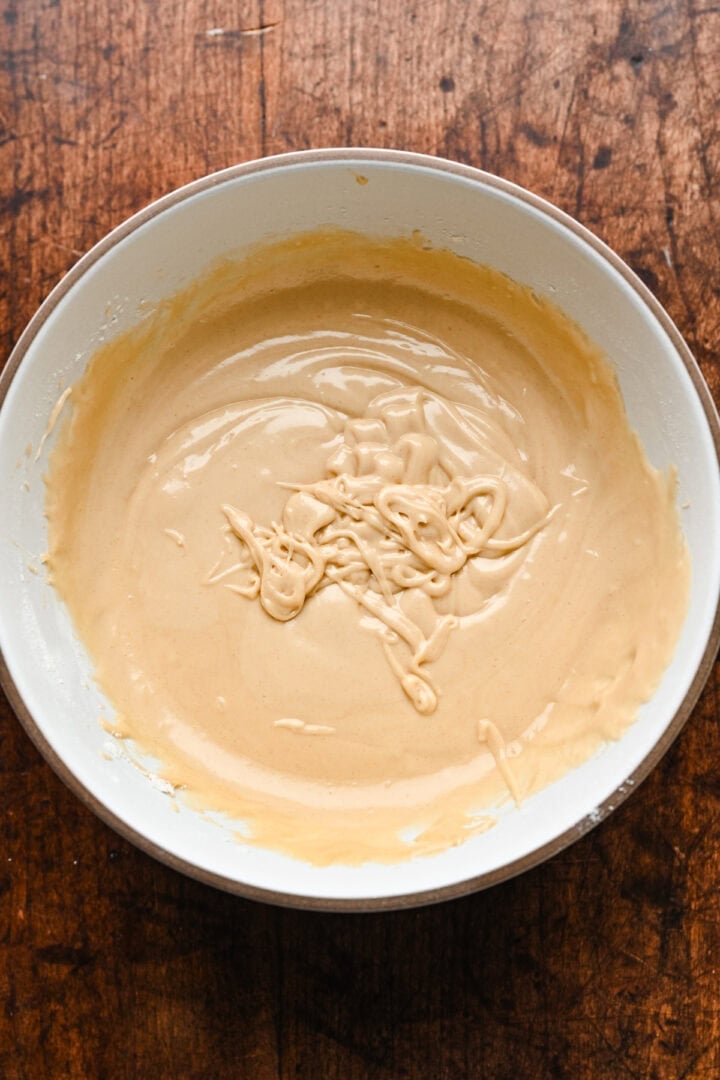
STEP 1: Make the fudge sauce for the ice cream ripple.
In a small saucepan, whisk together the cocoa powder, sugar and heavy cream over medium-low heat. Once it starts to heat up, add in the butter and whisk until the butter is melted and the mixture is smooth and shiny. Remove from heat and whisk in the vanilla and salt. Set aside to cool.
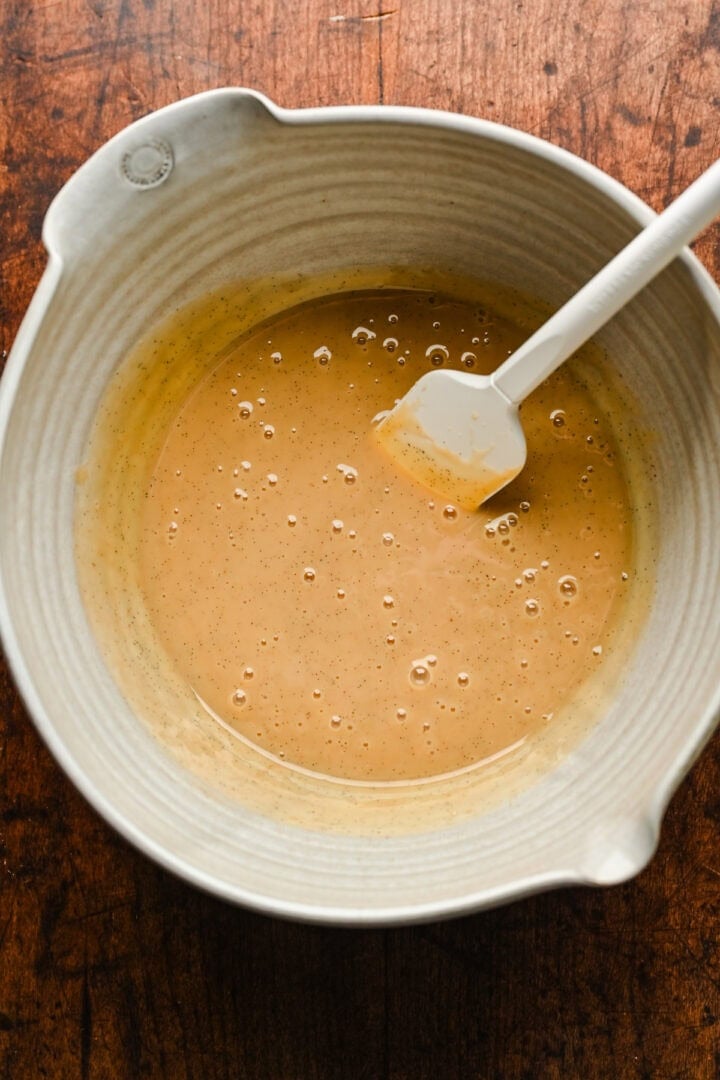
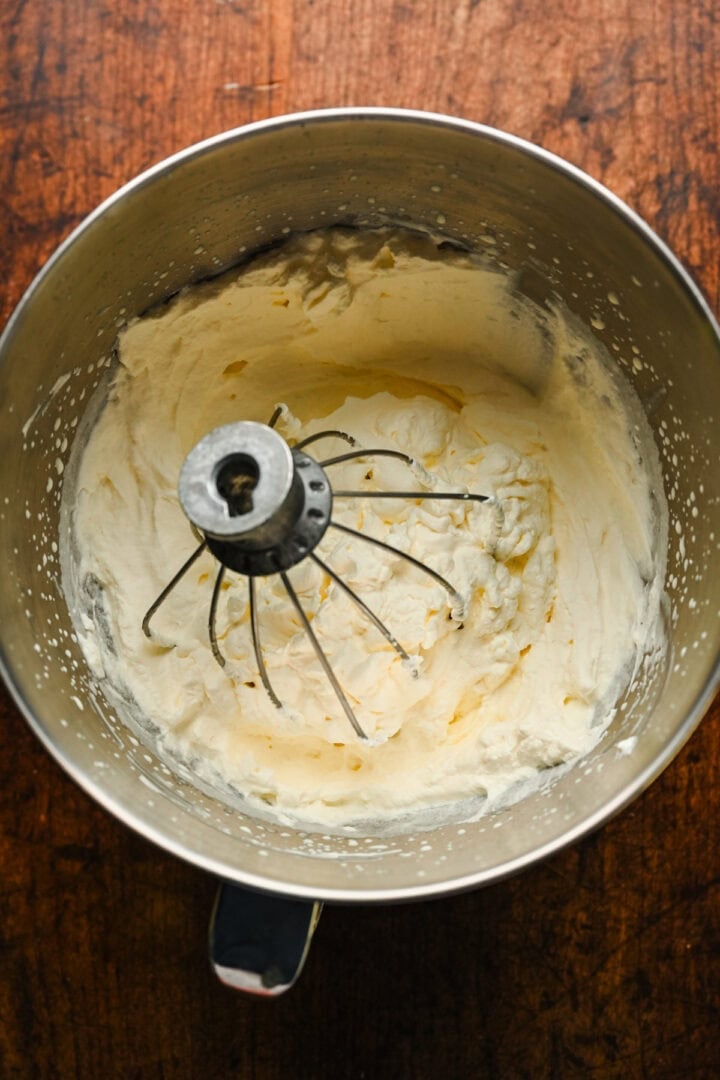
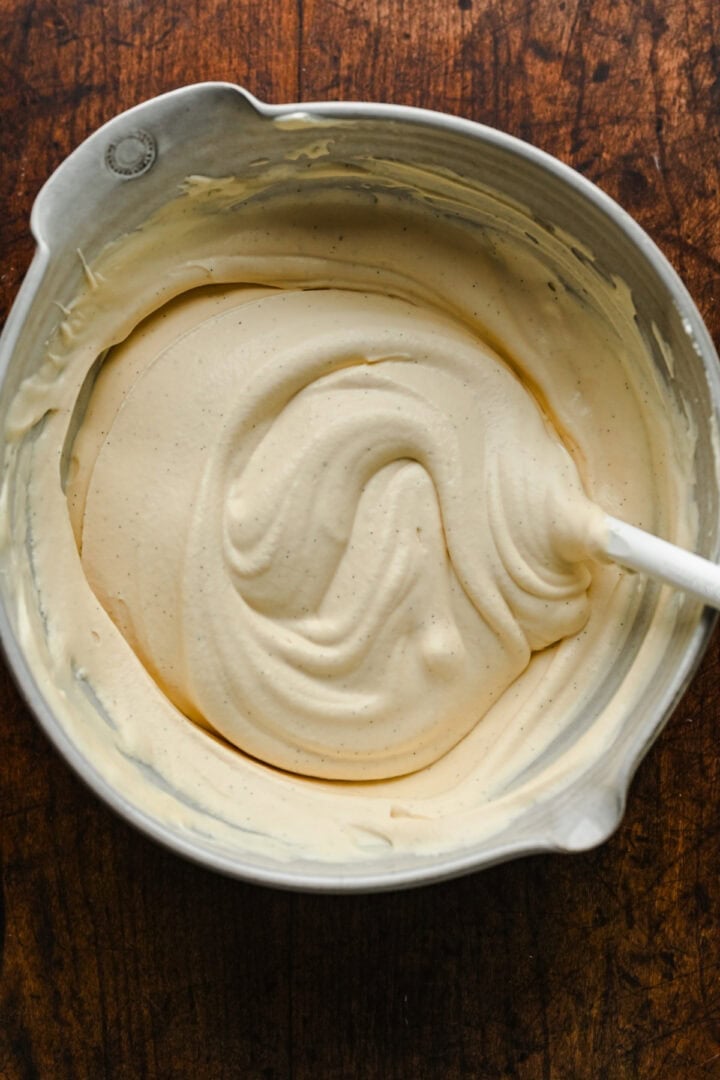
STEP 2: Prepare the ice cream base.
Add heavy cream to a stand mixer (or a bowl with a hand mixer) and beat until stiff peaks form (a few minutes).
In a large bowl, mix together condensed milk, vanilla bean paste and salt. Add about 1 cup of the whipped cream in and gently fold it in, then add in the remaining whipped cream and fold until no lumps remain.
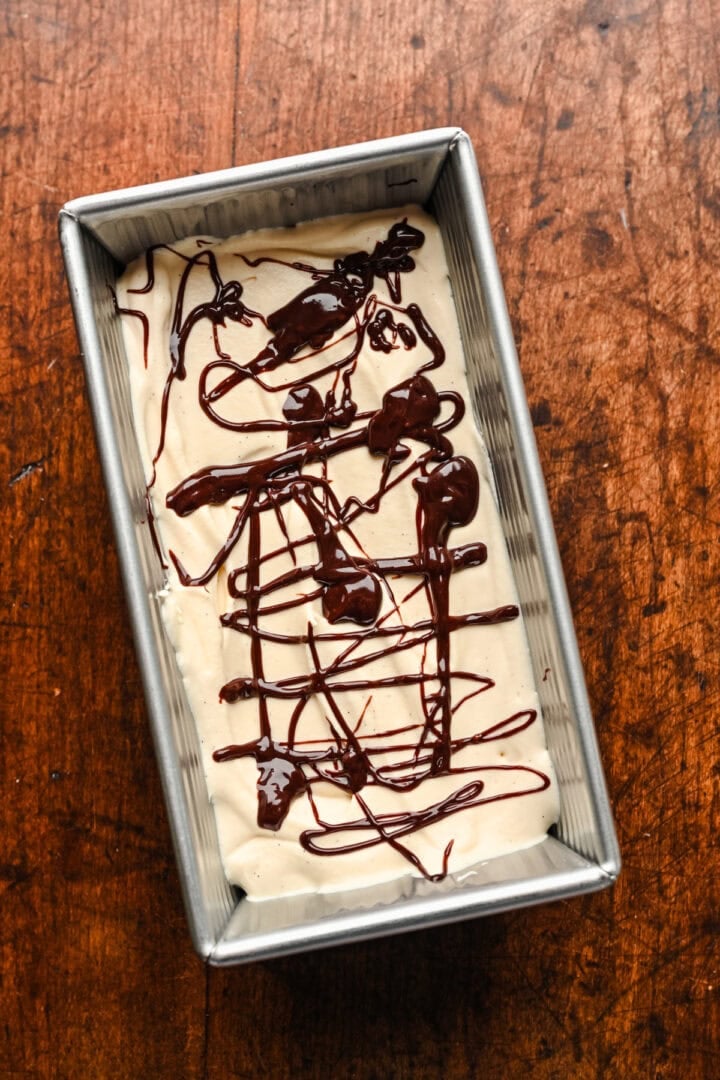
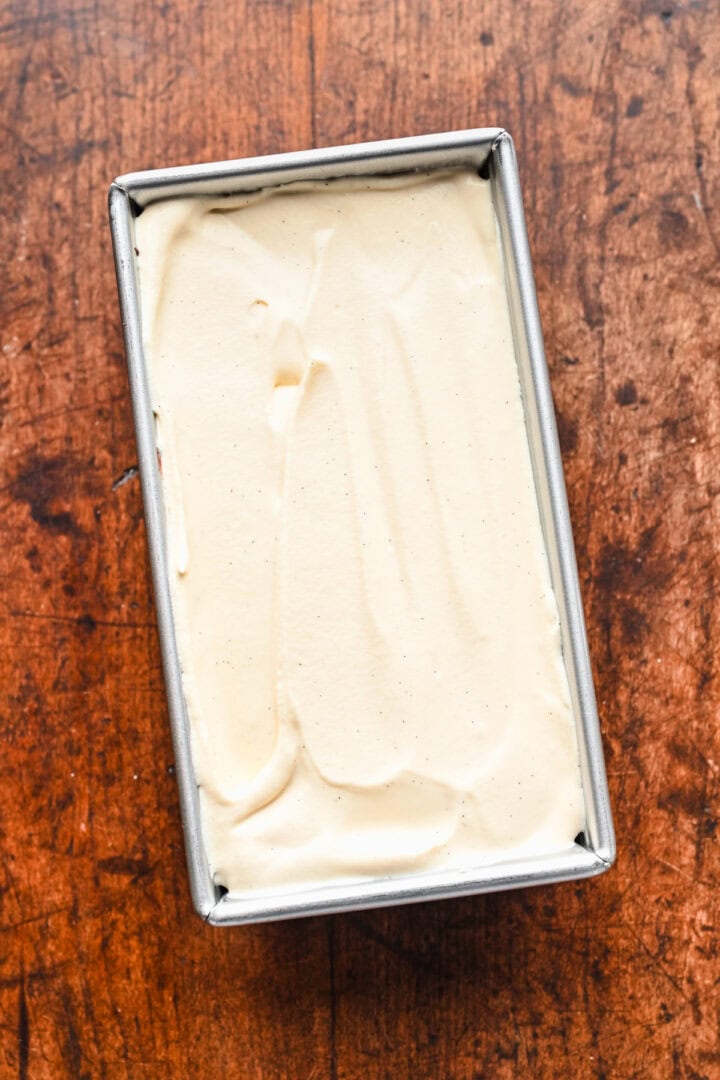
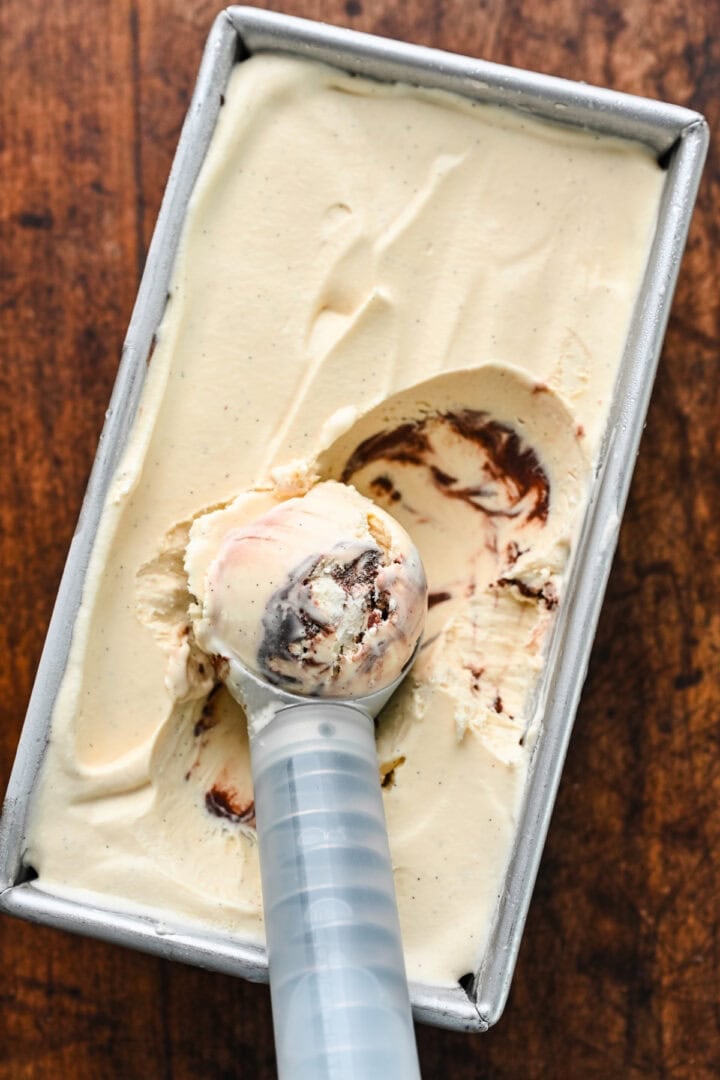
STEP 3: Layer the ice cream.
Pour ¼ of the ice cream base into a loaf pan, then drizzle on ⅓ of the fudge sauce. Repeat 3 more times, finishing with a layer of ice cream. Freeze until set – about 3 hours.
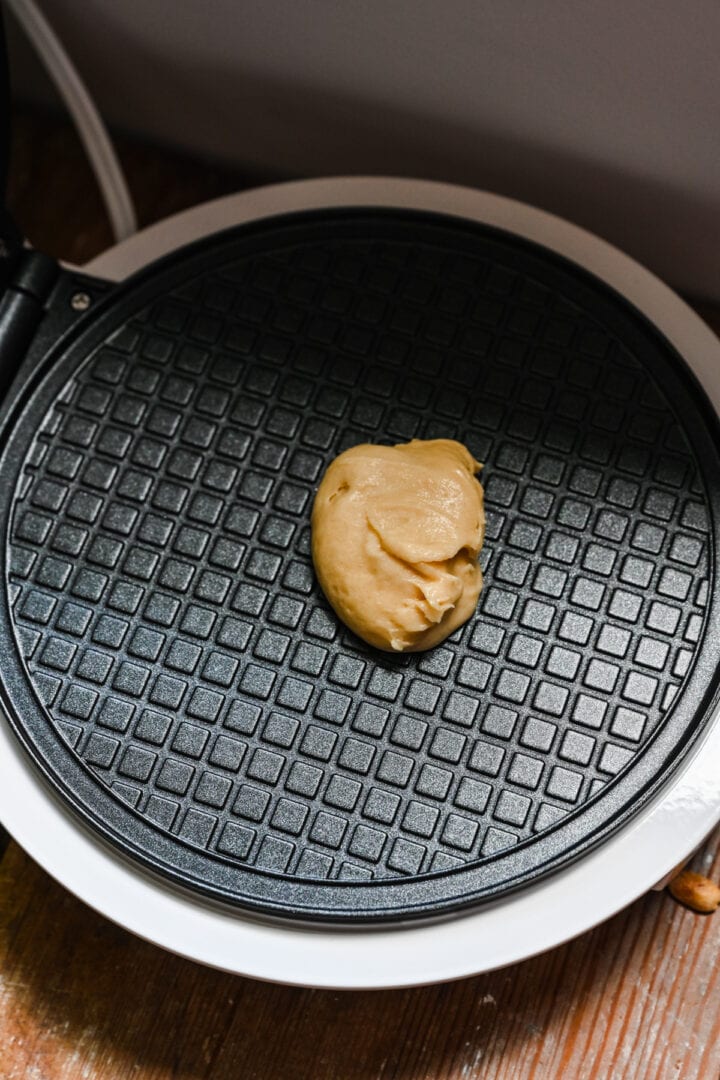
STEP 4: Make the waffle cones.
Add egg whites, both sugars and vanilla extract to a bowl and beat with a hand mixer until well combined. Add in salt and half of the flour and continue mixing until smooth.
Add in remaining flour and melted butter and mix until a smooth batter forms. The batter should be thick.
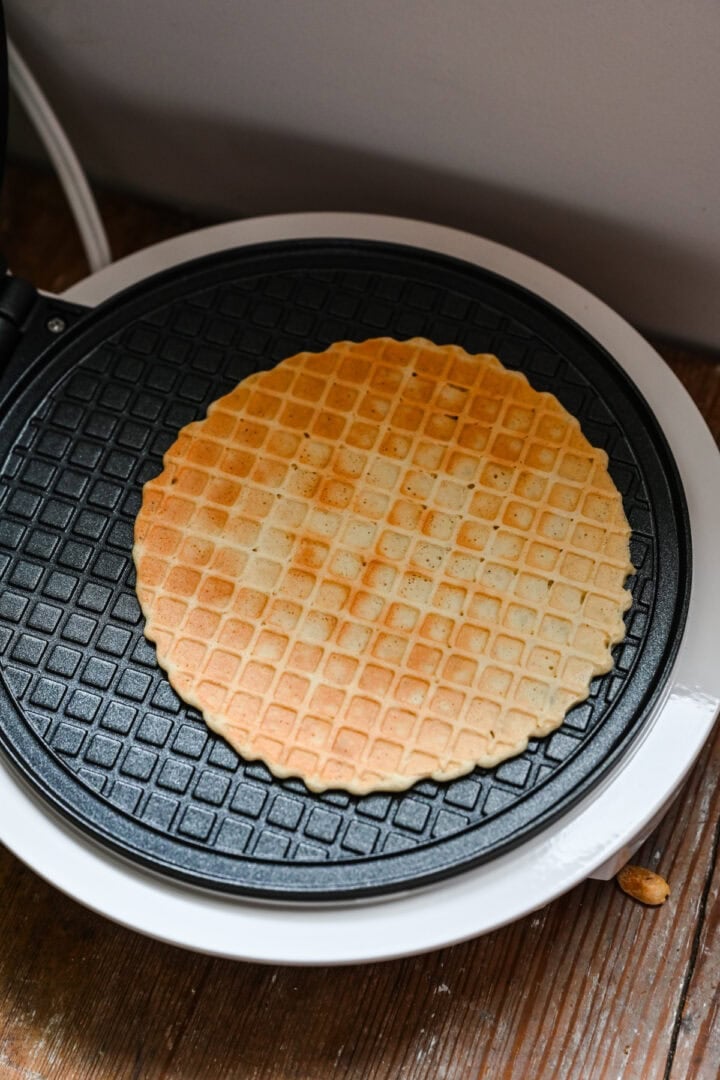
Preheat waffle cone maker to just above medium heat. Place one heaping tablespoon of batter in the center of the waffle cone maker, then close it. Every waffle cone maker will cook differently, but ours took about 3 minutes to get golden brown.
Remove with tongs, let cool for a few seconds, then (carefully) shape into a taco shape with your hands and hold in place for 15 seconds. They will harden in less than a minute.

STEP 5: Scoop ice cream into shells and freeze briefly.
Scoop slightly softened ice cream into each of the “taco” cones, using a small spatula or the back of a spoon to smooth out the ice cream. Place in freezer for 10-15 minutes.
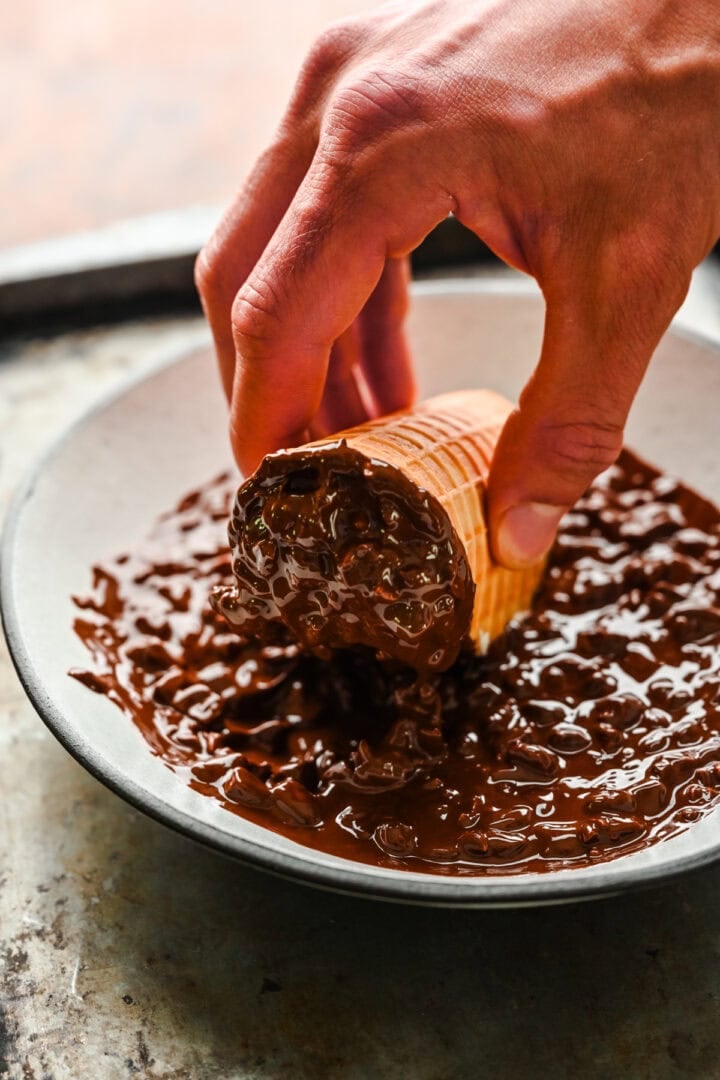
STEP 6: Prepare peanut-chocolate topping and assemble.
Add chocolate chips and coconut oil to a microwave safe bowl. Microwave in 30 second intervals, stirring well between each interval, until fully melted.
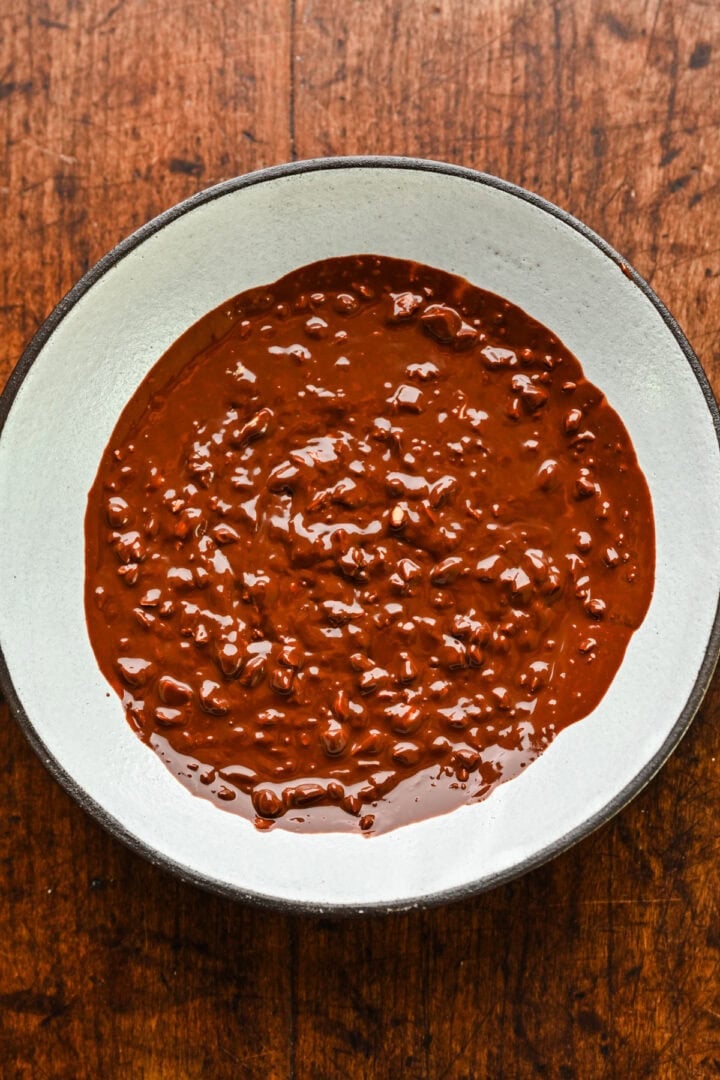
Stir in chopped peanuts. Dip the top of ice cream taco in the chocolate peanut mixture. Return to freezer for 5-10 minutes, or until hardened. Keep stored in freezer.

Substitutions and Variations
We went all-out to make everything from scratch, but you can easily substitute ingredients in to save on time.
- Ice cream - You can use a store-bought vanilla or really any kind of ice cream that you like instead of making it from scratch. This will save you about 4 hours. If our goal weren't to make everything from scratch, we would do this too! These would be SO delicious with a peanut butter chocolate ice cream.
- Waffle cone - It's pretty hard to find a store-bought waffle taco cone, but we have heard of a Crowded Kitchen reader microwaving store-bought stroopwafels, then shaping them and filling them with ice cream to make their own choco tacos at home.

Equipment
If you're planning on making your own cones, you'll need a waffle cone maker. We used this one from Proctor Silex.
Storage
These are a bit tricky to stand up in your freezer. We used taco stands, which worked pretty well, but you could also just put them on a half sheet pan, and accept that one side of the chocolate will be slightly less attractive.
For longer-term storage, we'd recommend placing into an airtight container, since the chocolate topping is susceptible to freezer burn. They should keep for 2-3 months.
Tips and FAQ
Top tip
Be sure to add the choco tacos back to the freezer after stuffing them with ice cream. Odds are, you will have some melting that will need to re-solidify. You also want the tacos to be as cold as possible when you dip them in the chocolate coating, so that it sets quickly.
More tips
- Make it dairy free: Use your favorite store-bought nondairy ice cream for the filling, and use nondairy butter in the waffle cone batter!
- Gluten free: We have not tested the waffle cones with gluten free flour, and we're not 100% sure if they would be quite as crispy.
- When adding the melted butter to the waffle batter, let it cool slightly before incorporating.
- Let the fudge sauce cool before layering it into the ice cream.
- Let the taco shells cool before filling them with ice cream.
- Make sure the chocolate peanut topping has cooled slightly before dipping the ice cream-filled shells into it.
- Remove the waffle cone from the waffle cone maker with tongs, and let it cool off before shaping with your hands.
- Short on time? Just use store bought ice cream instead.
During the pandemic, a lot of brands pared back their product offerings, and Unilever (parent company of Klondike) was one such brand to do so. The choco taco was discontinued in 2022, and the ice cream aisle hasn't been the same since.
Though there are often articles saying it's making a comeback, you can't currently buy a choco taco anywhere.
More homemade snack recipes
Looking for other recipes like this? Try these:


Tried this recipe?
Please leave a star ⭐️⭐️⭐️⭐️⭐️ rating below and/or a review in the comments section further down the page. You can also stay in touch with us through social media by following us on Instagram, Pinterest, TikTok, Facebook or by subscribing to our newsletter.
📖 Recipe

Homemade Choco Tacos
- Total Time: 4 hours 55 minutes
- Yield: 8-10 choco tacos 1x
- Diet: Vegetarian
Description
These homemade Choco Tacos are a fun, nostalgic treat that's perfect for summer! No churn fudge-swirled vanilla ice cream is stuffed inside a sweet and crispy waffle cone, then the whole thing is dipped in a chocolate and chopped peanut mixture.
Ingredients
Ice cream base:
- 2 cups heavy cream, cold
- 1 14oz can sweetened condensed milk
- 1 tbsp vanilla bean paste or 2 tsp vanilla extract
- Pinch of salt
Fudge ripple:
- 2 tablespoons cocoa powder
- 2 tablespoons granulated sugar
- 2 tablespoons heavy cream
- 1 tablespoon unsalted butter
- ½ teaspoon vanilla extract
- Pinch of salt
Waffle cones:
- 2 egg whites
- 3 ½ tablespoons granulated sugar
- 3 ½ tablespoons brown sugar
- ¾ teaspoon vanilla extract
- ⅛ teaspoon salt
- ⅔ cup flour
- 2 tbsp melted butter
For coating:
- 1 ½ cups chocolate chips
- 1 ½ tablespoon coconut oil
- ¾ cup finely chopped peanuts
Instructions
- Make the fudge sauce for the ice cream ripple. In a small saucepan, whisk together the cocoa powder, sugar and heavy cream over medium-low heat. Once it starts to heat up, add in the butter and whisk until the butter is melted and the mixture is smooth and shiny. Remove from heat and whisk in the vanilla and salt. Set aside to cool.
- Prepare the ice cream base. Add heavy cream to a stand mixer (or a bowl with a hand mixer) and beat until stiff peaks form (a few minutes). In a large bowl, mix together condensed milk, vanilla bean paste and salt. Add about 1 cup of the whipped cream in and gently fold it in, then add in the remaining whipped cream and fold until no lumps remain.
- Layer the ice cream. Pour ¼ of the ice cream base into a loaf pan, then drizzle on ⅓ of the fudge sauce. Repeat 3 more times, finishing with a layer of ice cream. Freeze until set – about 3 hours.
- Make the waffle cones. Add egg whites, both sugars and vanilla extract to a bowl and beat with a hand mixer until well combined. Add in salt and half of the flour and continue mixing until smooth. Add in remaining flour and melted butter and mix until a smooth batter forms. The batter should be thick. Preheat waffle cone maker to just above medium heat. Place one heaping tablespoon of batter in the center of the waffle cone maker, then close it. Every waffle cone maker will cook differently, but ours took about 3 minutes to get golden brown. Remove with tongs, let cool for a few seconds, then (carefully) shape into a taco shape with your hands and hold in place for 15 seconds. They will harden in less than a minute.
- Scoop ice cream into shells and freeze briefly. Scoop slightly softened ice cream into each of the “taco” cones, using a small spatula or the back of a spoon to smooth out the ice cream. Place in freezer for 10-15 minutes.
- Prepare peanut-chocolate topping and assemble. Add chocolate chips and coconut oil to a microwave safe bowl. Microwave in 30 second intervals, stirring well between each interval, until fully melted. Stir in chopped peanuts. Dip the top of ice cream taco in the chocolate peanut mixture. Return to freezer for 5-10 minutes, or until hardened. Keep stored in freezer.
Notes
Waffle cone maker: This is the one we use.
Make it dairy free: Use your favorite store-bought nondairy ice cream for the filling, and use nondairy butter in the waffle cone batter!
Be sure to add the choco tacos back to the freezer after stuffing them with ice cream. Odds are, you will have some melting that will need to re-solidify. You also want the tacos to be as cold as possible when you dip them in the chocolate coating, so that it sets quickly.
Short on time? Just use store bought ice cream instead.
Let the fudge sauce cool before layering it into the ice cream.
Let the taco shells cool before filling them with ice cream.
Make sure the chocolate peanut topping has cooled slightly before dipping the ice cream-filled shells into it.
Choco Taco is a registered trademark of Simco Logistics, Inc. and/or Klondike, a Unilever brand. This recipe is a homemade version inspired by the original Choco Taco and is not affiliated with or endorsed by Klondike or Unilever. All trademarks, service marks, and trade names are the property of their respective owners.
Our waffle cone recipe is adapted from Pudge Factor, which was adapted from David Lebovitz's The Perfect Scoop.
Fudge sauce recipe adapted from The Pioneer Woman.
- Prep Time: 45 minutes
- Freeze Time: 4 hours
- Cook Time: 10 minutes
- Category: Desserts
- Method: Freezer
- Cuisine: American
Nutrition
- Serving Size: 1 choco taco
- Calories: 574
- Sugar: 53 g
- Sodium: 565.3 mg
- Fat: 33.3 g
- Carbohydrates: 63.7 g
- Fiber: 3.9 g
- Protein: 10.8 g


Suzy says
Have you made the ice cream before hand? I'm trying to see how long in advance I can make it. I want to make it for the weekend which is 5 days out.
Lexi says
That's completely fine! Just make sure to cover it well to avoid freezer burn.
Diane says
Is a mini waffle iron too deep?
Lexi says
I haven't tried it so I'm not 100% sure! I have it feeling it might be. But it could possibly work with a very thin layer of batter!
Laura says
Could you put this ice cream recipe in a Cuisinart ice cream maker?
Rebecca says
Any idea how far ahead I could make the taco shells before filling them?
Lexi says
Probably 3-4 days before they start to go stale!
Joan Ayotte says
I do not want to have to purchase another small appliance to enjoy this recipe.
Any ideas?
Brent Harrison says
You can pour the batter out into a pan, then flatten it out with a greased spatula. Flip it once, cook til brown on both sides, and shape with your hands. It won't be perfect, but it should work!
MaryRose says
Is the 8-10 yield for the original portions of the recipe (2 cups of heavy whipping cream in the ice cream, etc.) or do you have to hit the 2x or 3x to get the 10?
Lexi says
8-10 is the yield for the original portion of the recipe.
Rebecca sparacino says
I used a pizelle maker and it worked great!
Lexi says
Glad to hear that!
Amber Ames says
I did the same thing. It worked great!
Riaan Venter says
Hi can you send me your recipe of the.Choco Taco.
Lexi says
Hi, the recipe is above!
Omi says
Hi there, How about a sugarfree or diabetic friendly version? Otherwise hubby would be so yelous
Lexi says
I'm not sure it's possible to substitute the condensed milk with something sugar free, but otherwise you can use sugar substitutes for the rest of the recipe.
Chinma says
I have never tried this before in my life, but this is absolutely so good you need to try it out.