
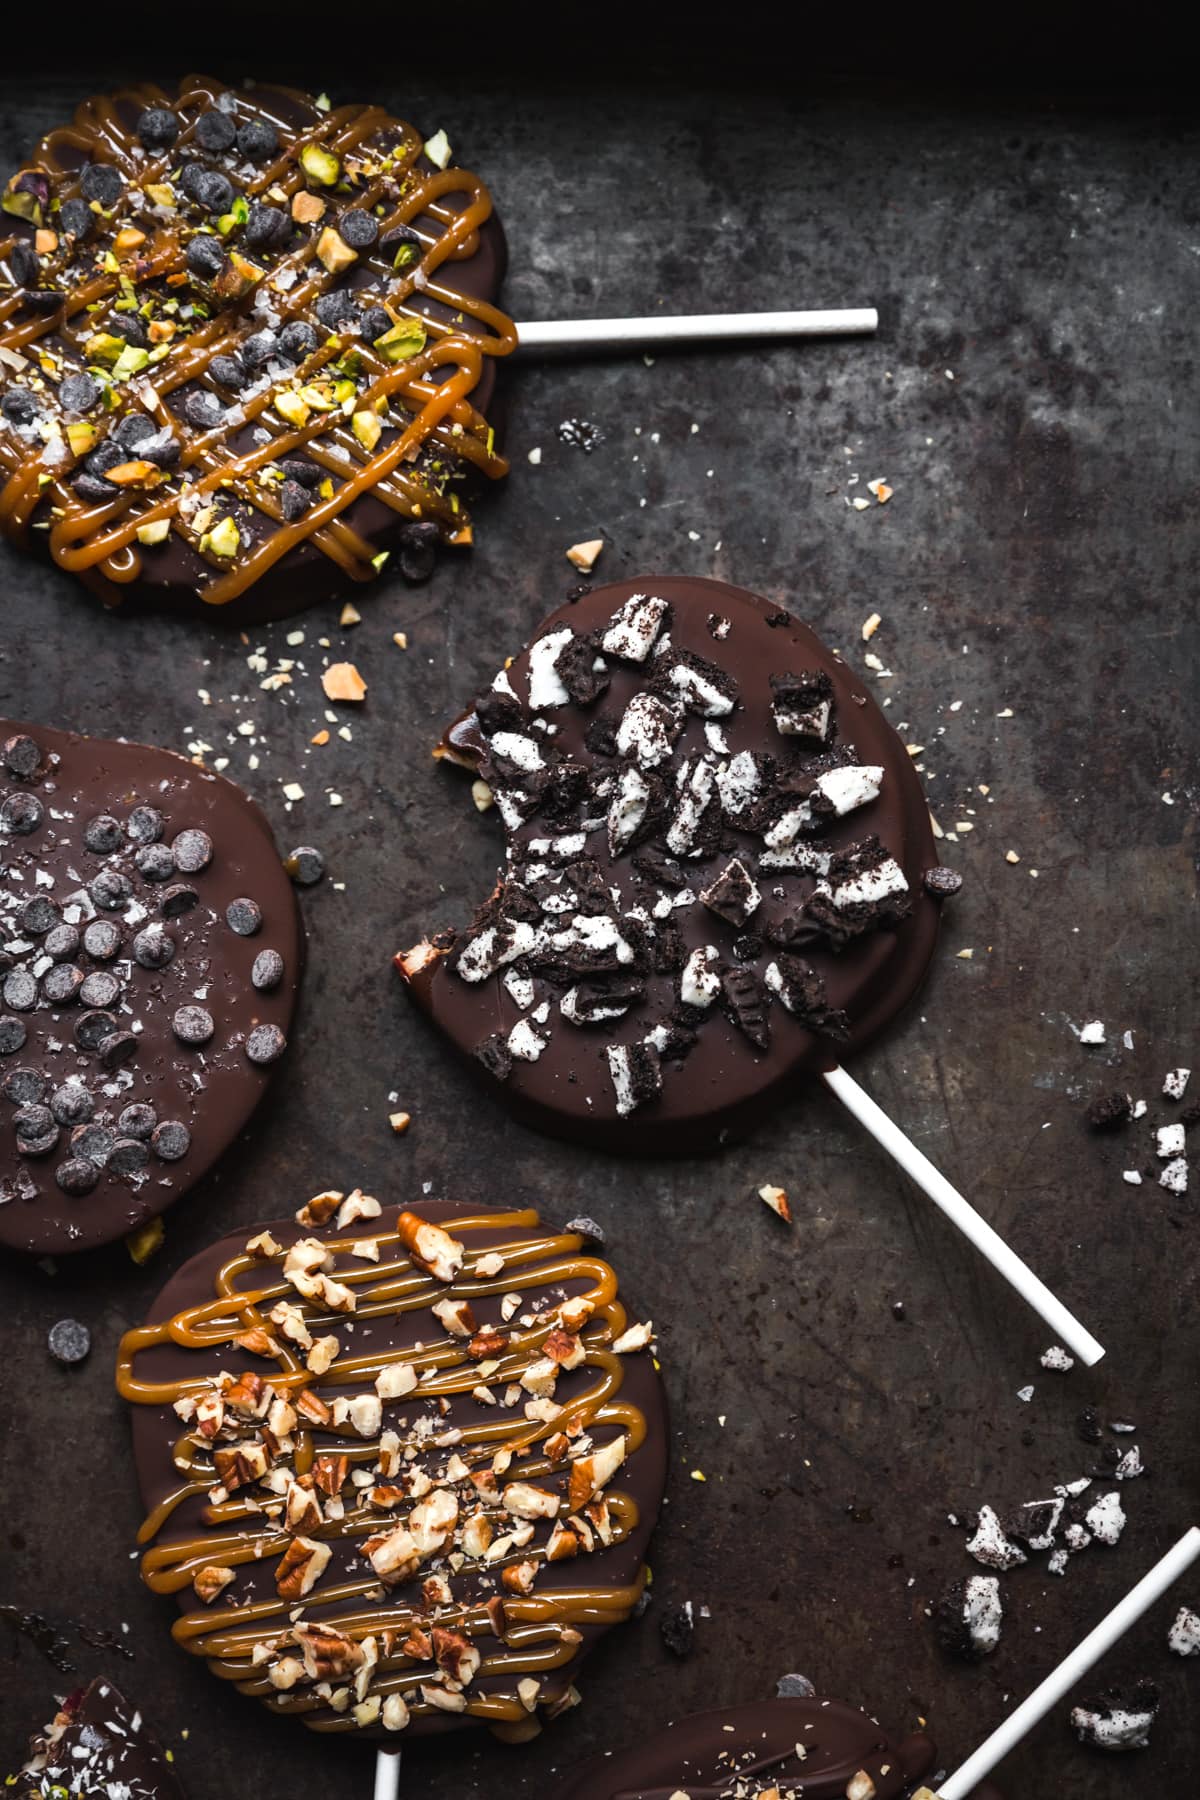
These dark chocolate covered apple slices are such a fun, kid-friendly, easy snack or light dessert! SO much easier to make (and eat) than caramel apples, and you can customize with your favorite toppings. Perfect for an after-school (or work) fall snack!
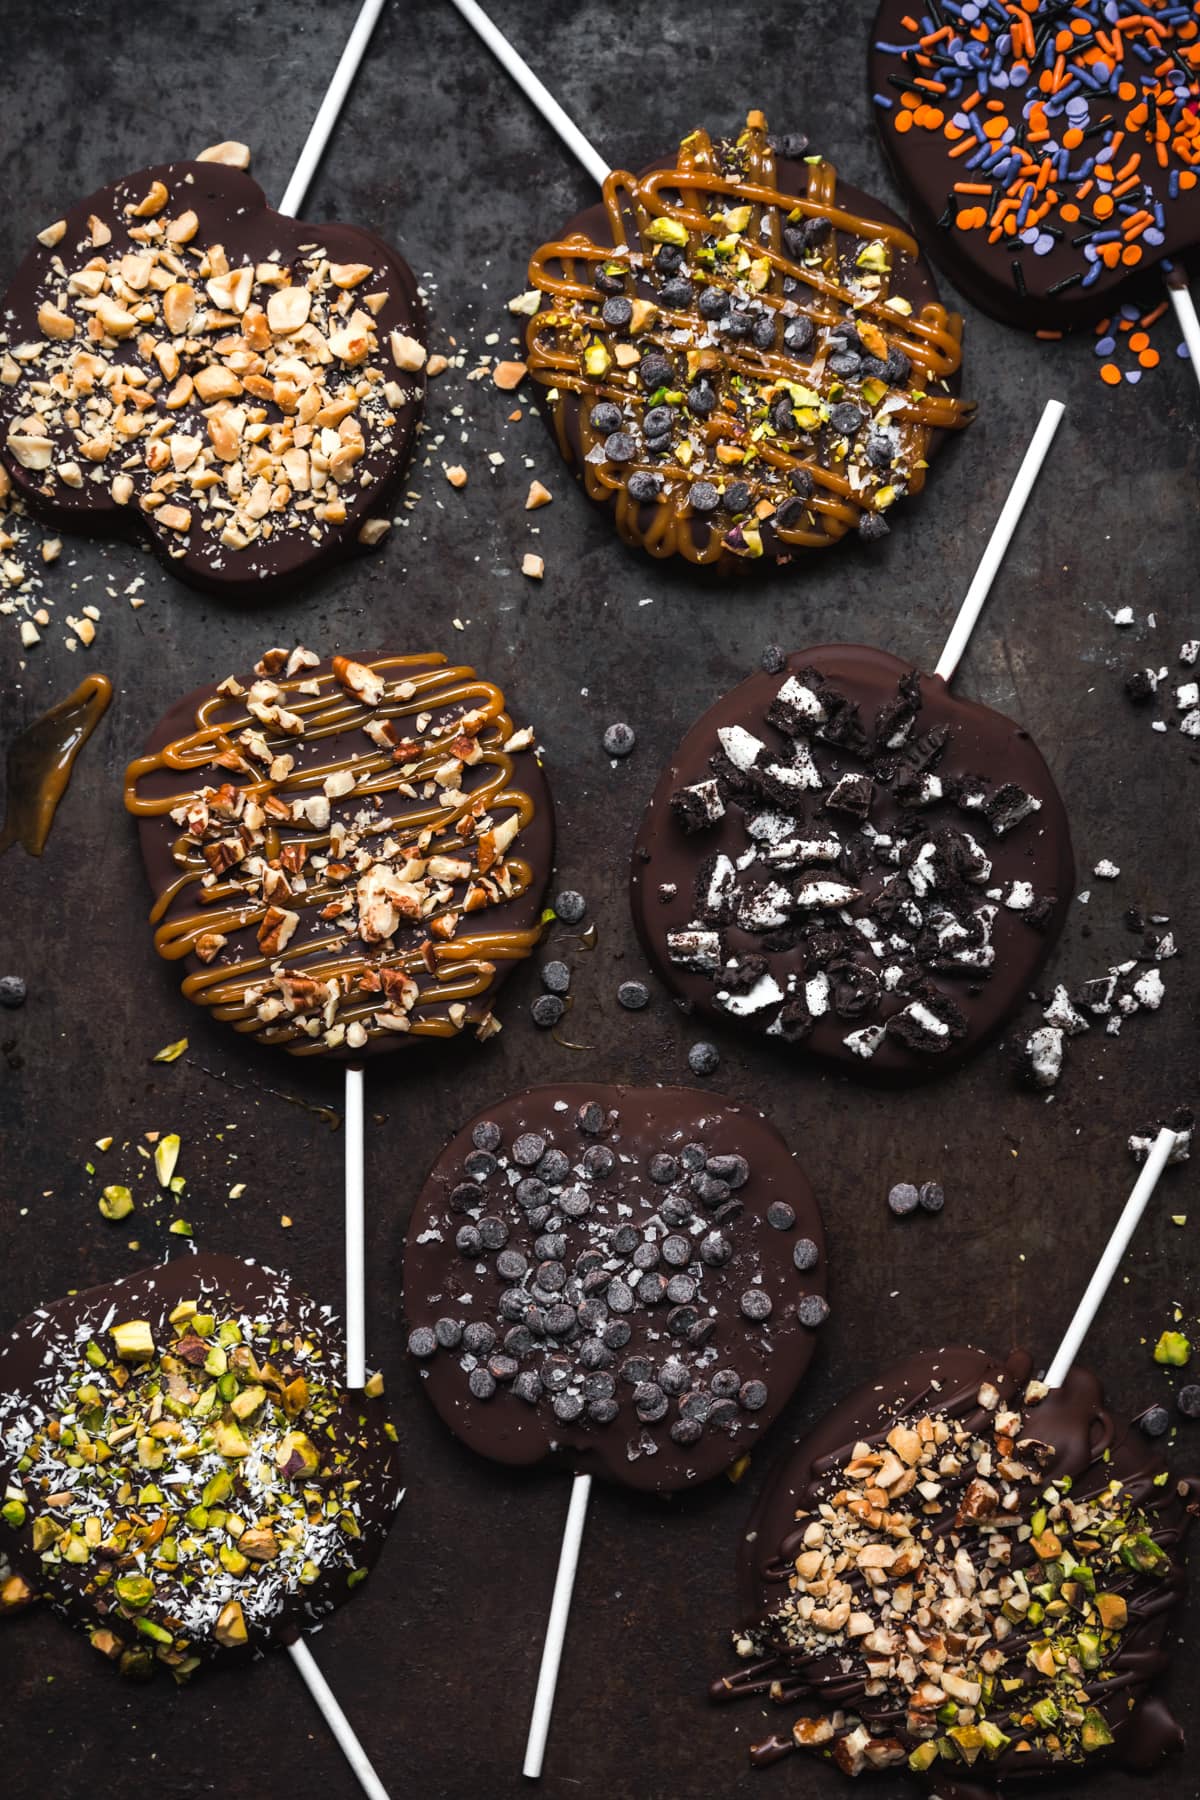
I think these chocolate covered apple slices might be my favorite recipe we've shared so far this fall! To be fair, they're not really a recipe (just apples, chocolate and toppings), but they're just so much fun!
Not sure about you, but I'm not really a huge fan of caramel apples. Don't get me wrong, I LOVE the idea (and obviously caramel + apple is the best fall combo), but they're just so hard to eat!
Apple slices, however, are WAY easier to make, eat and customize. Plus, you don't have to eat an entire gigantic candy apple in one sitting. Much better for a quick snack or dessert!
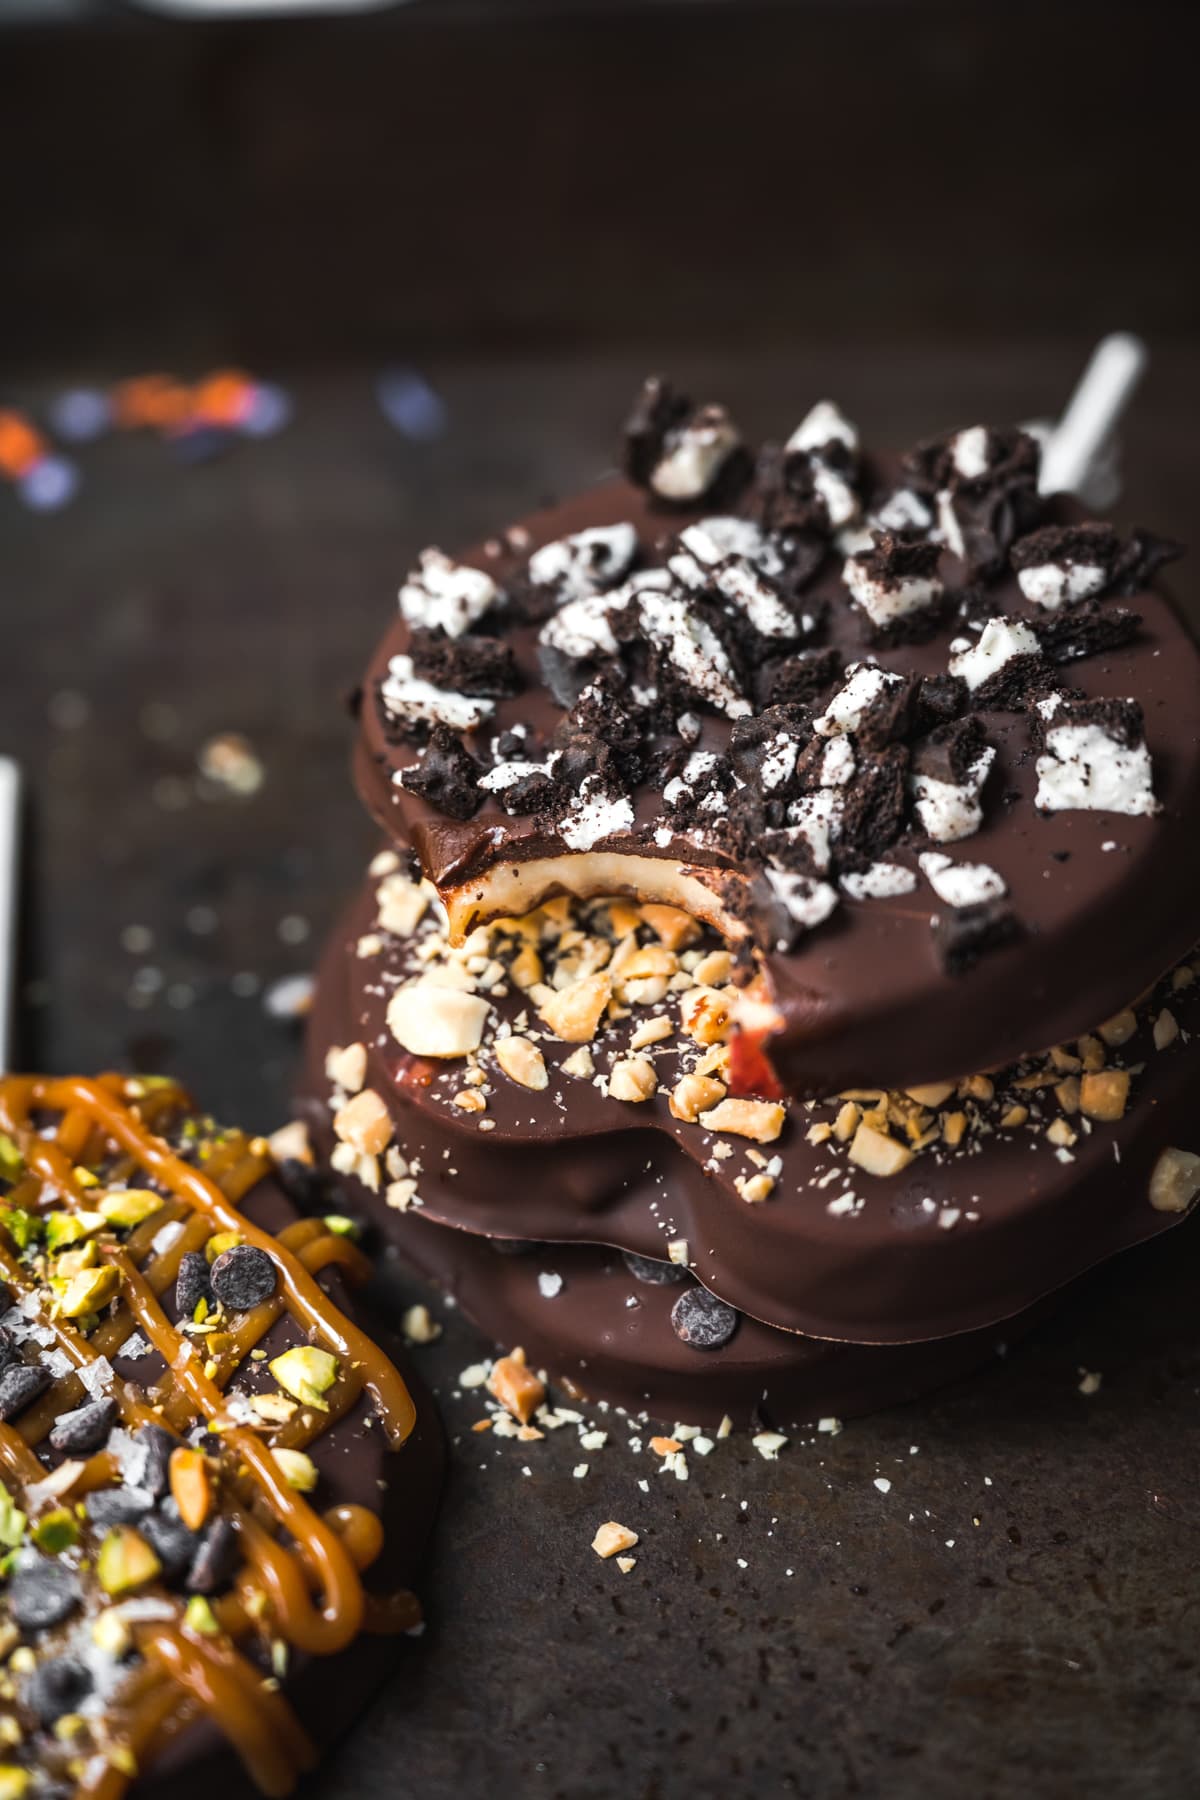
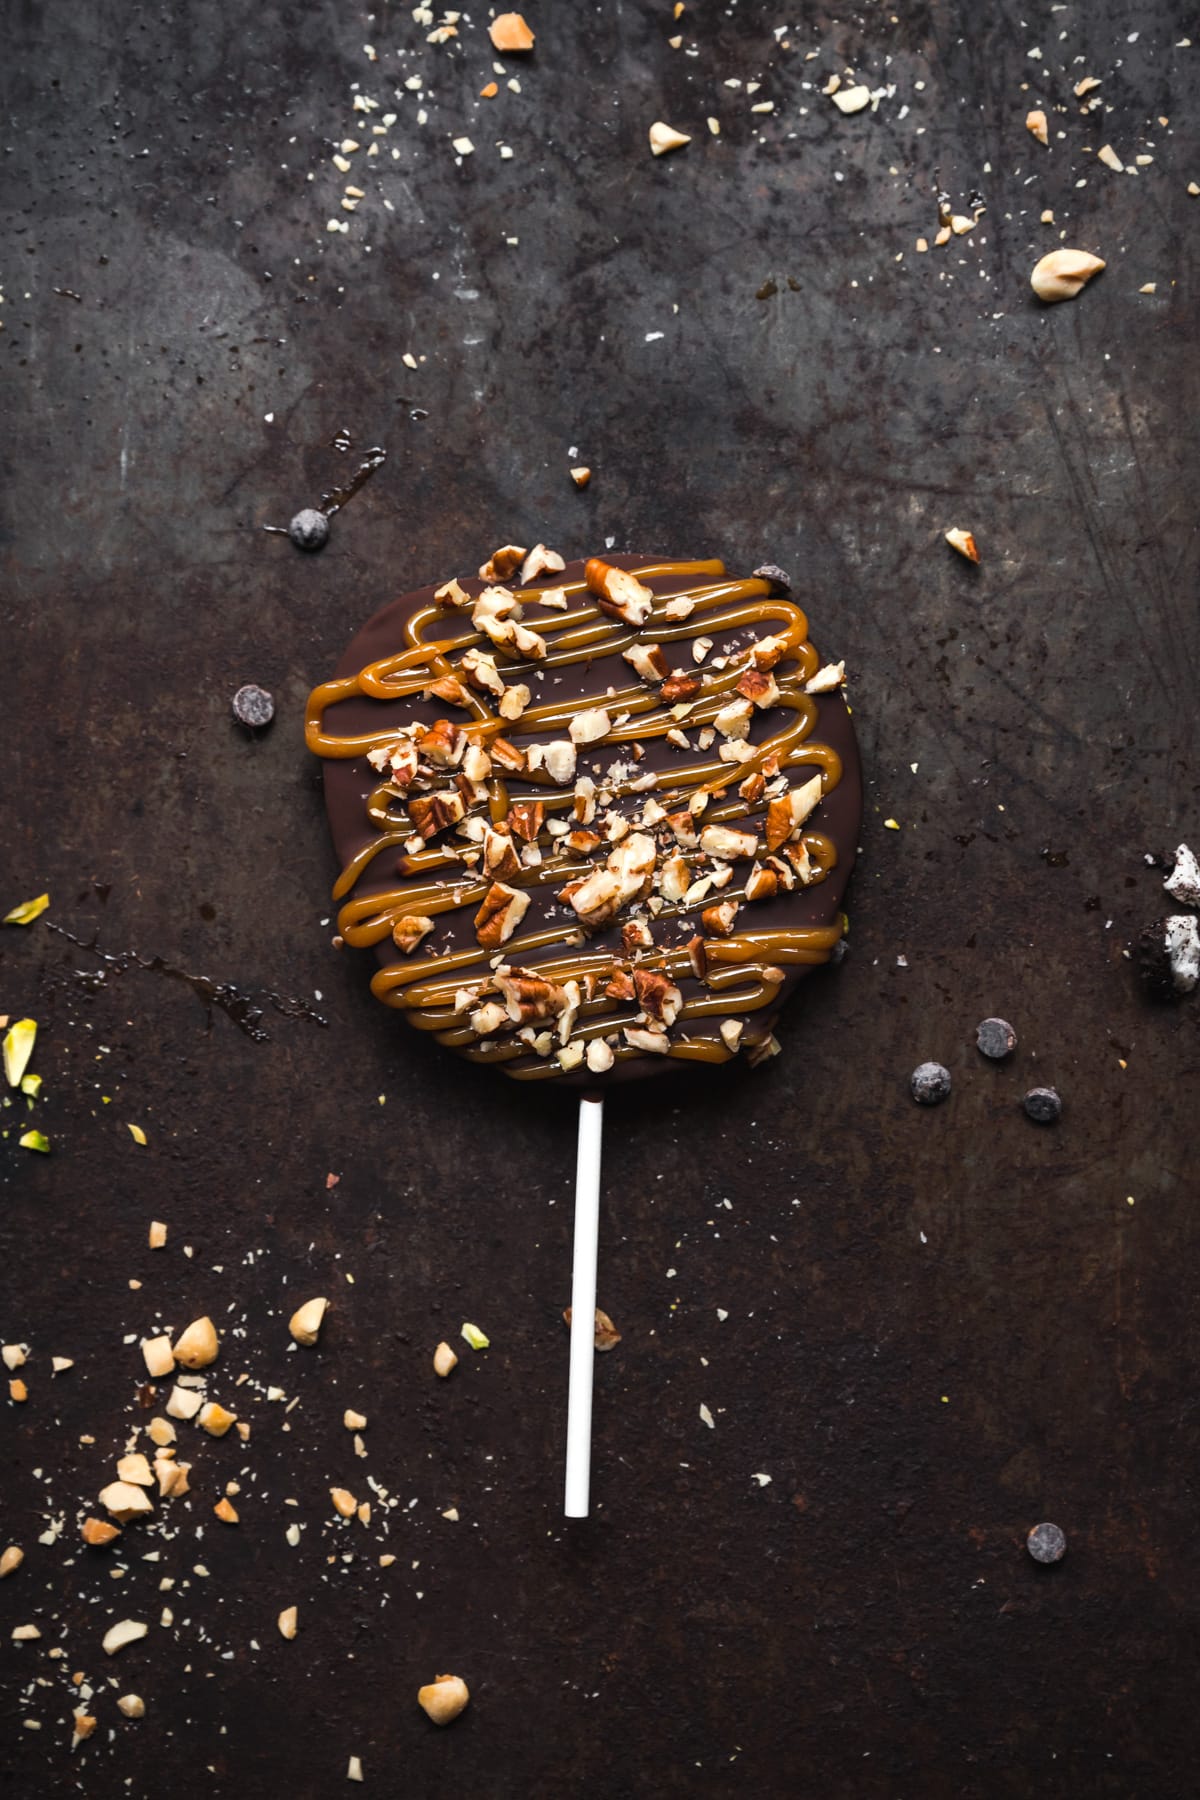
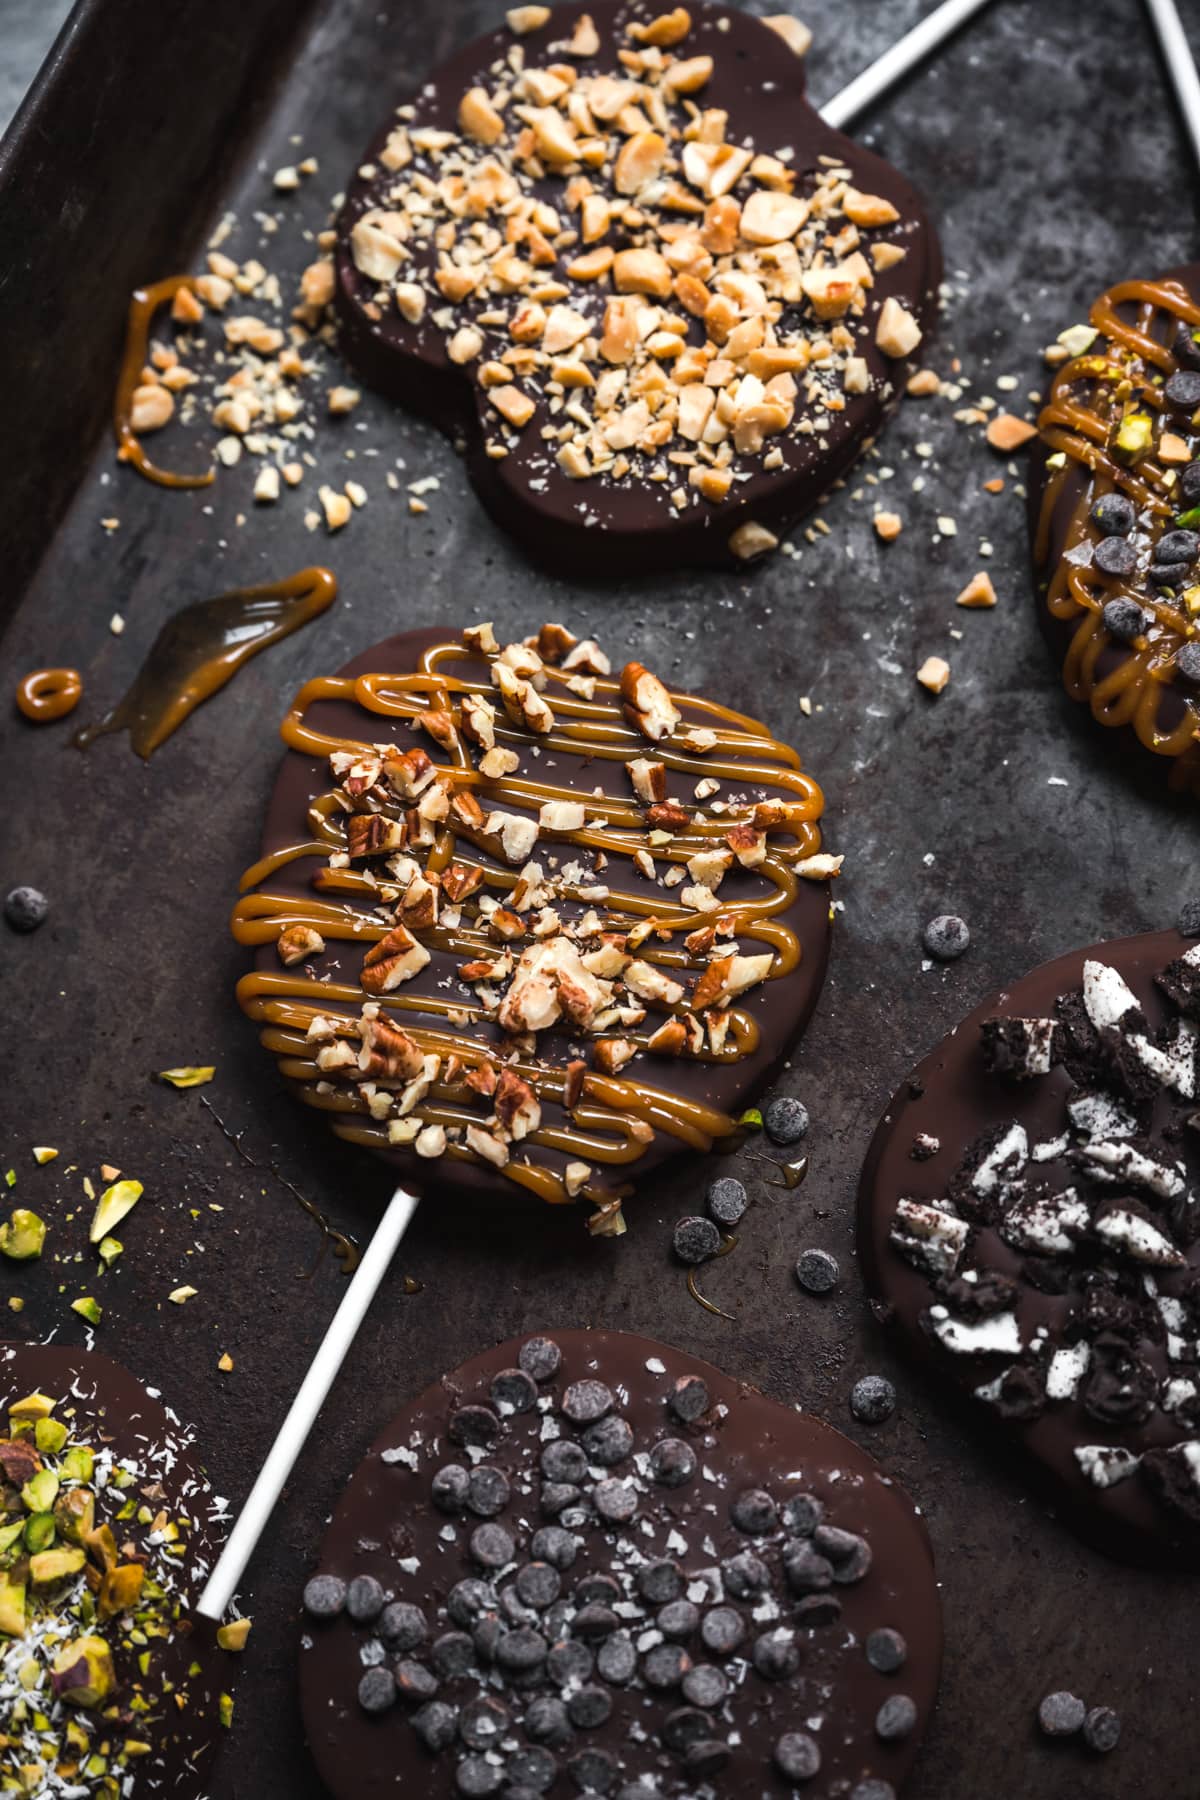
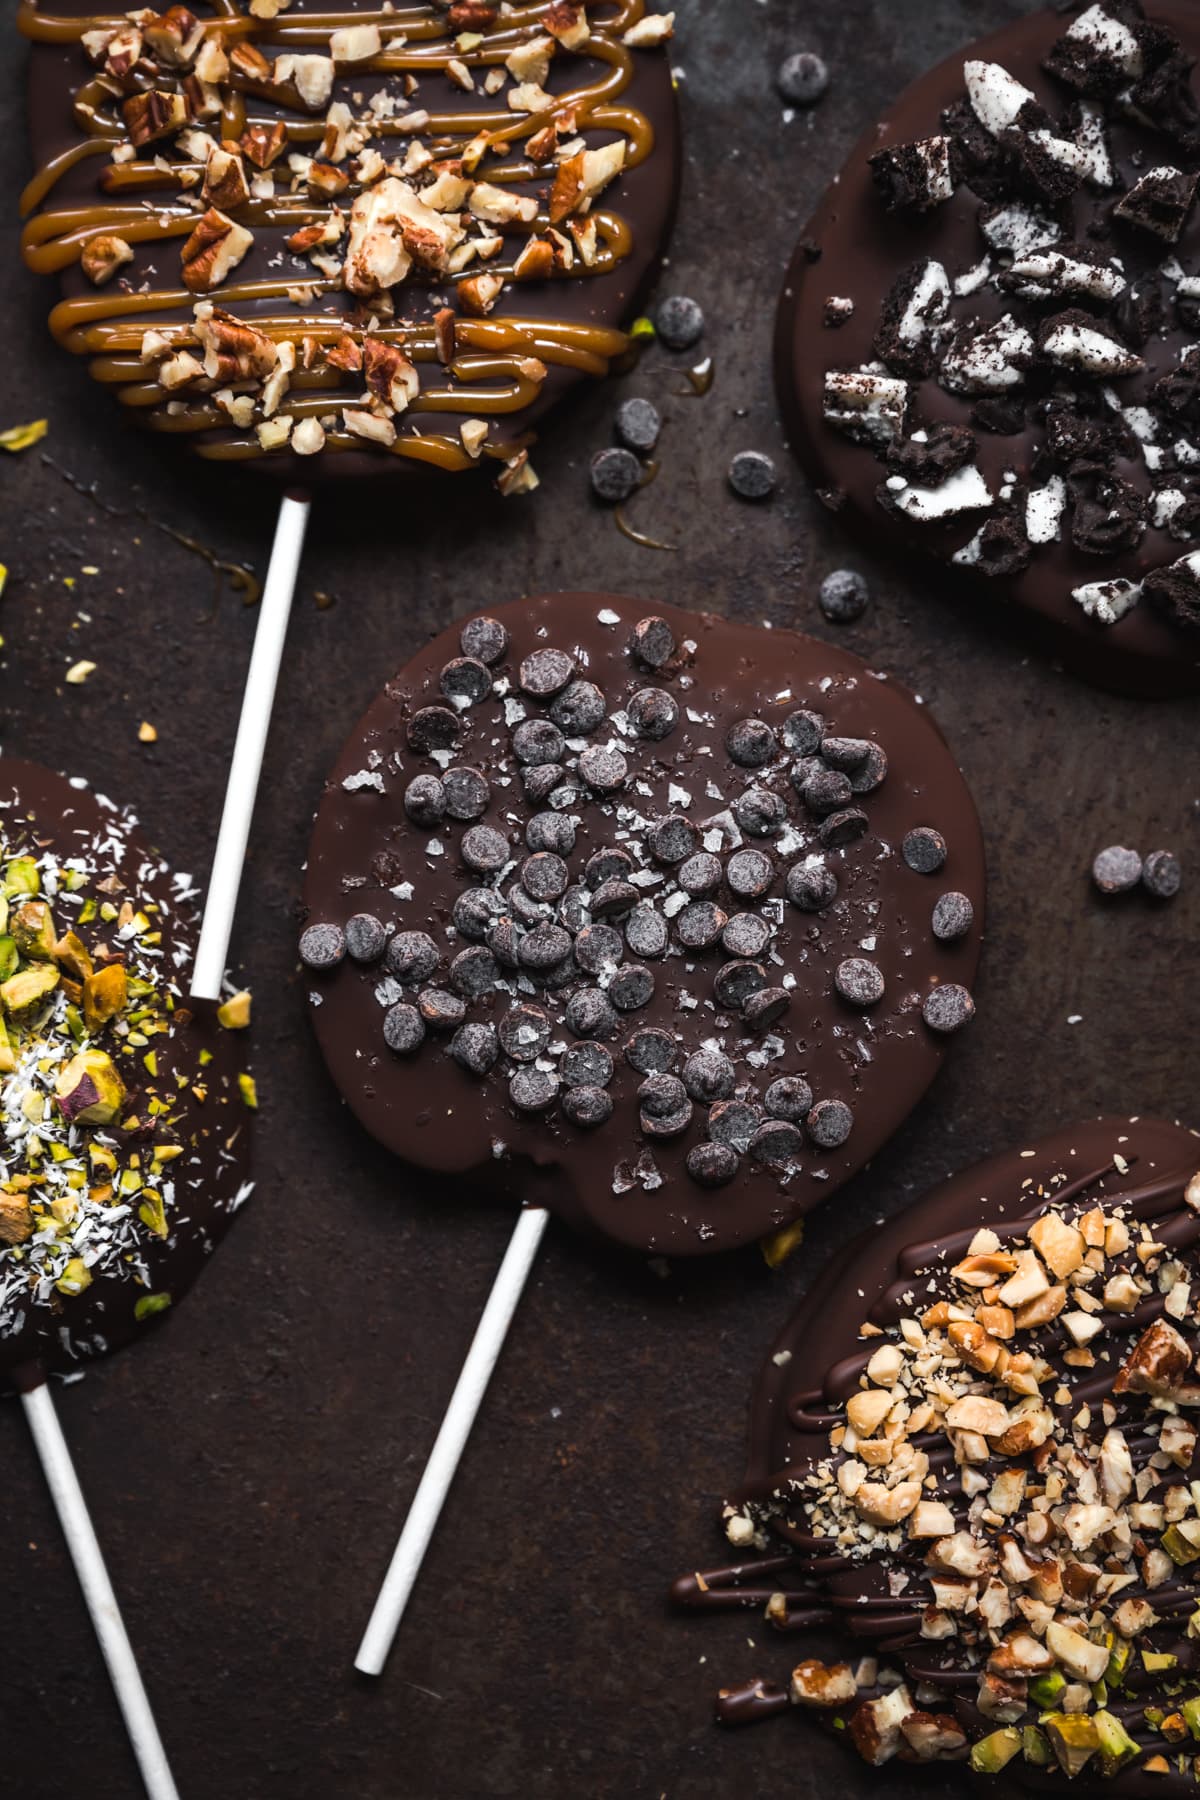
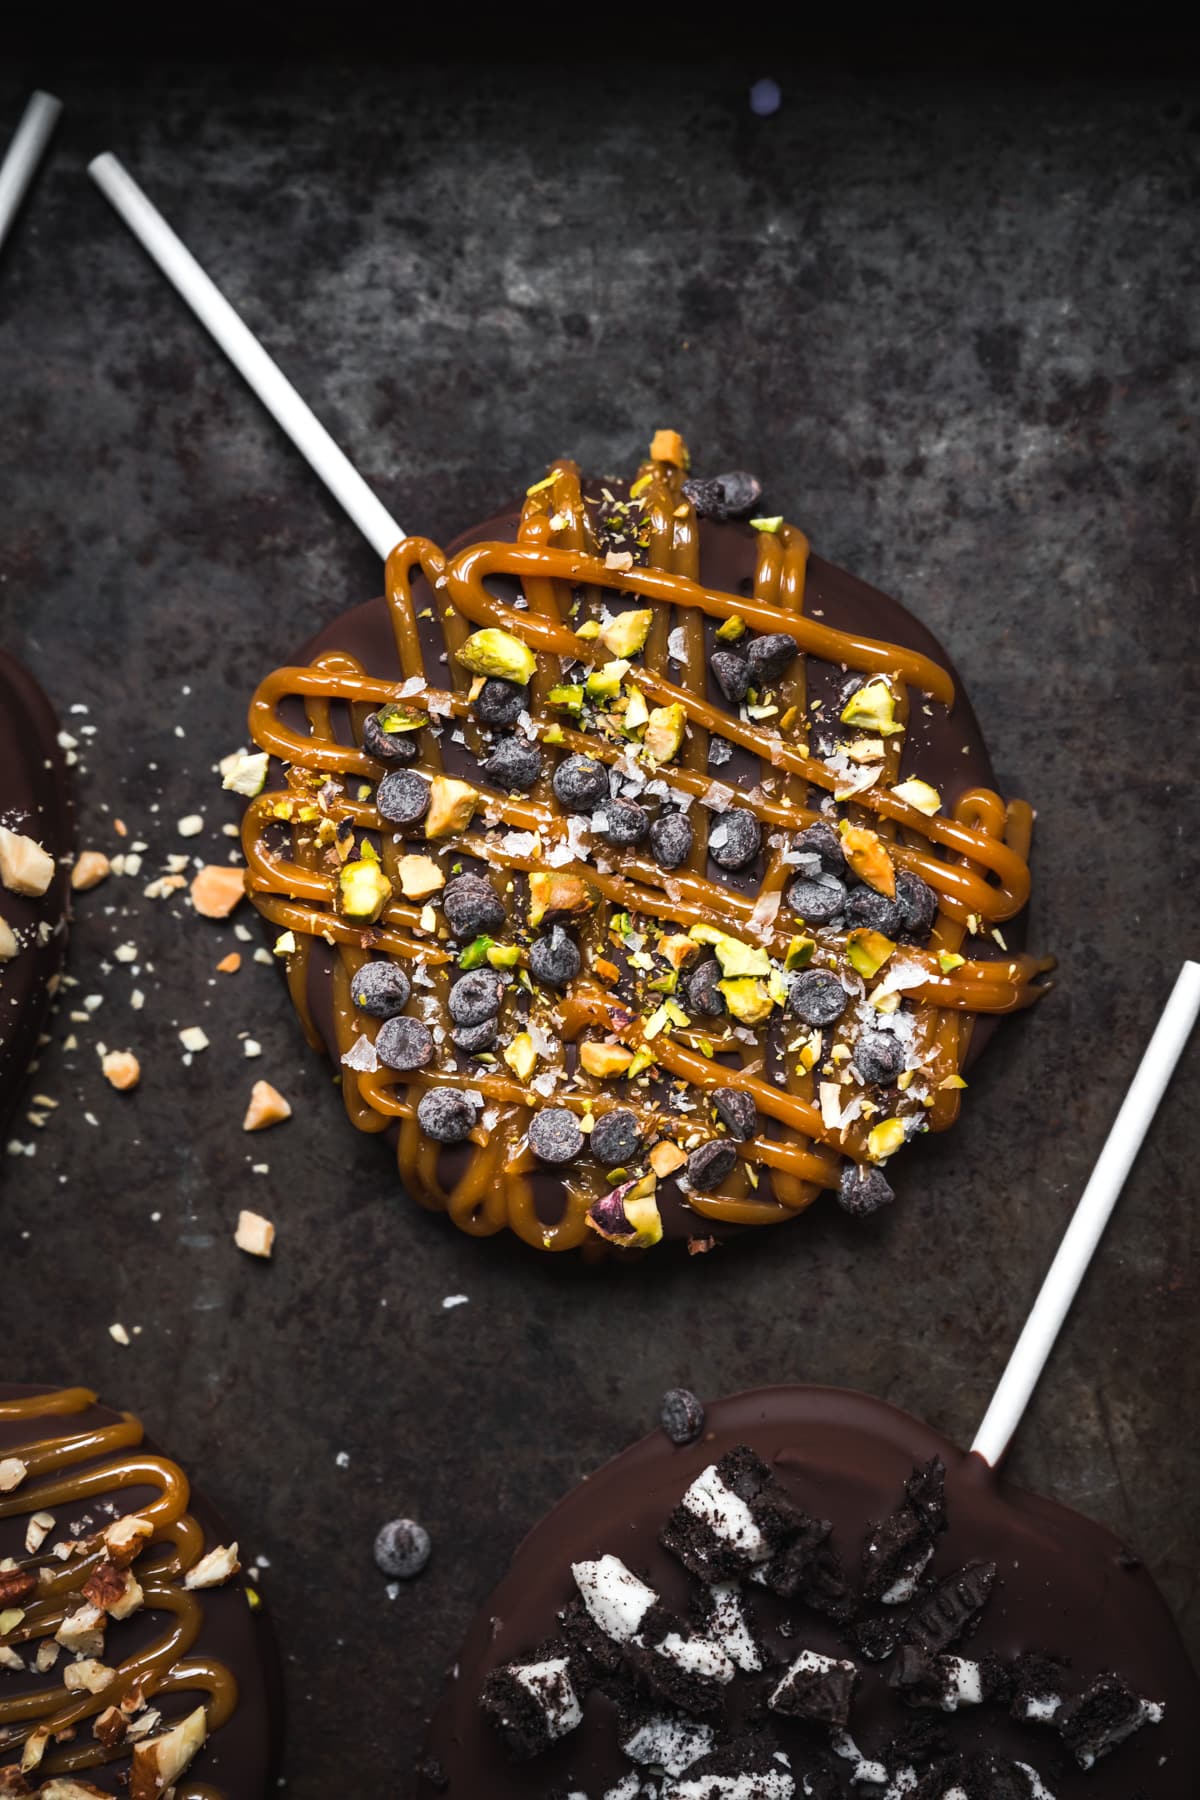
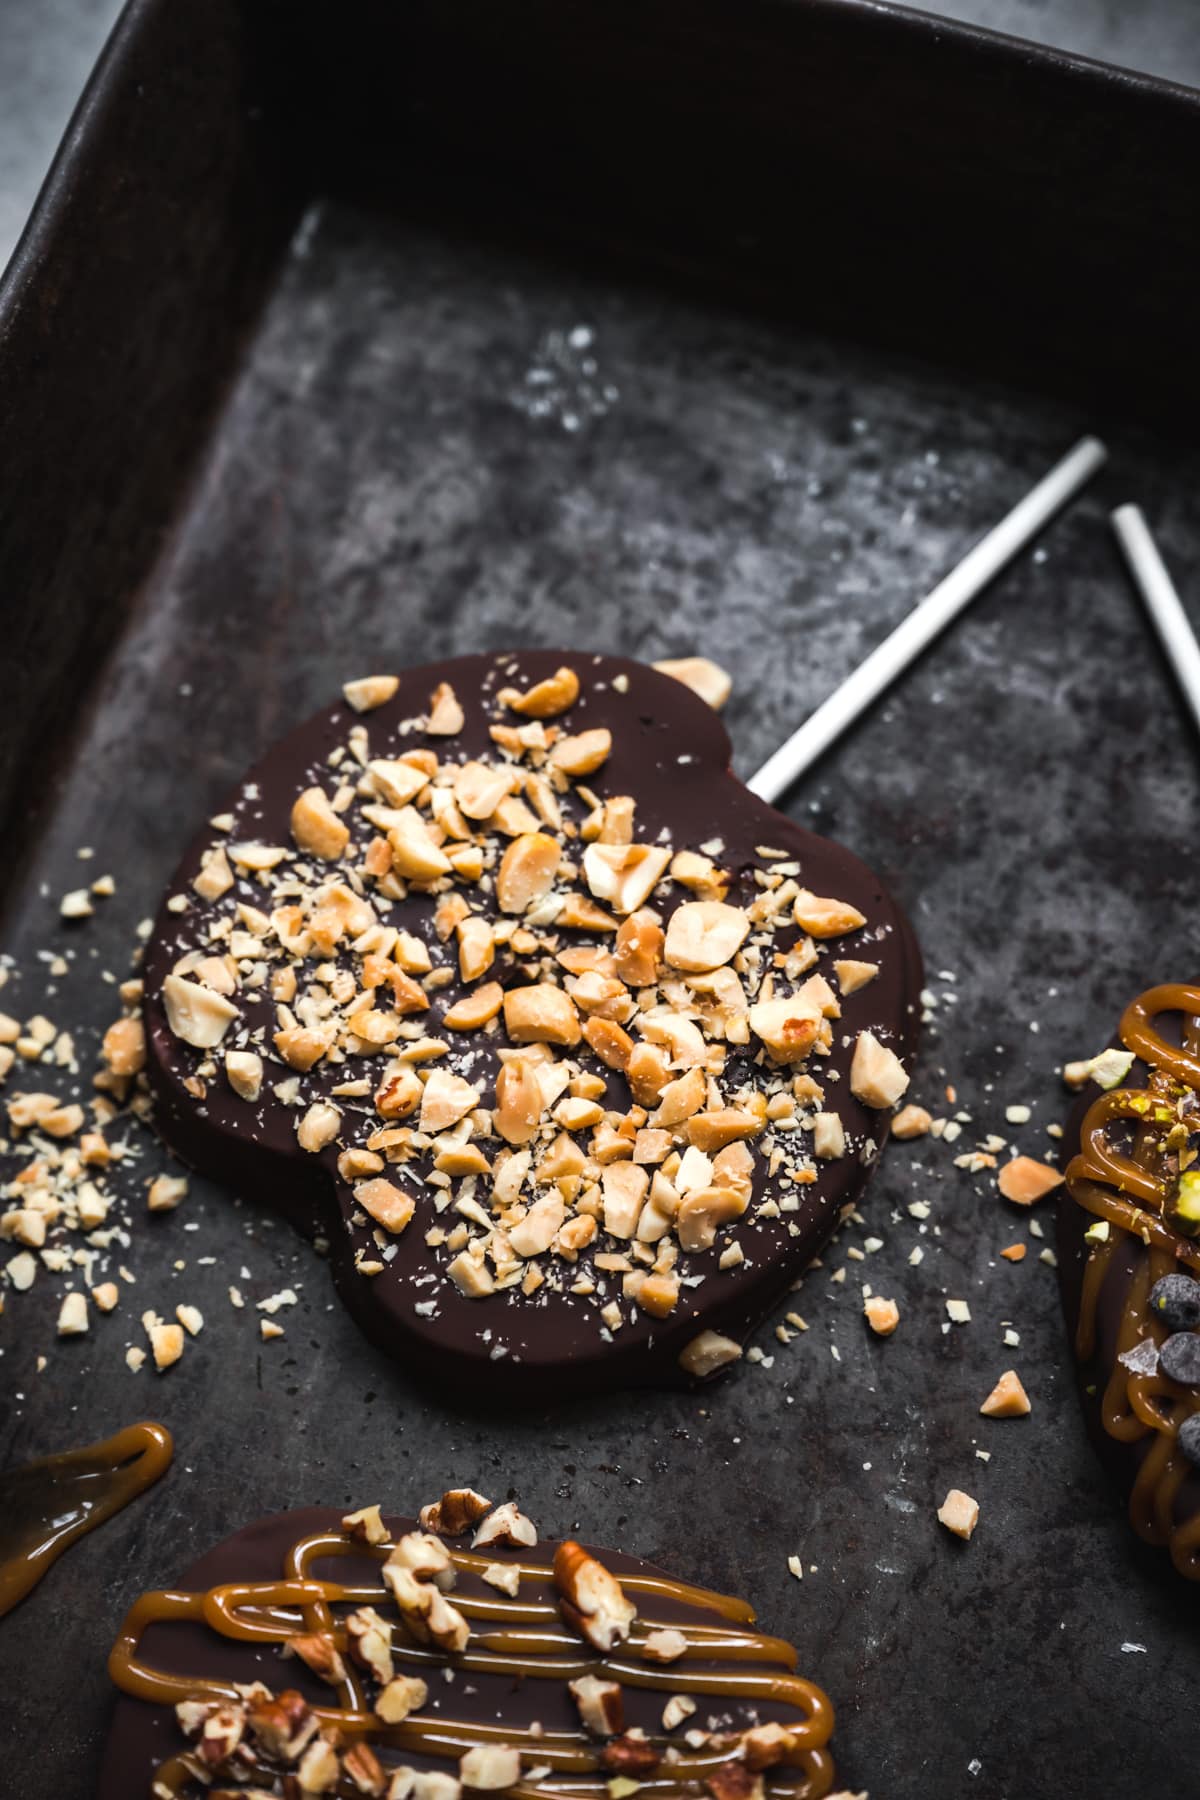
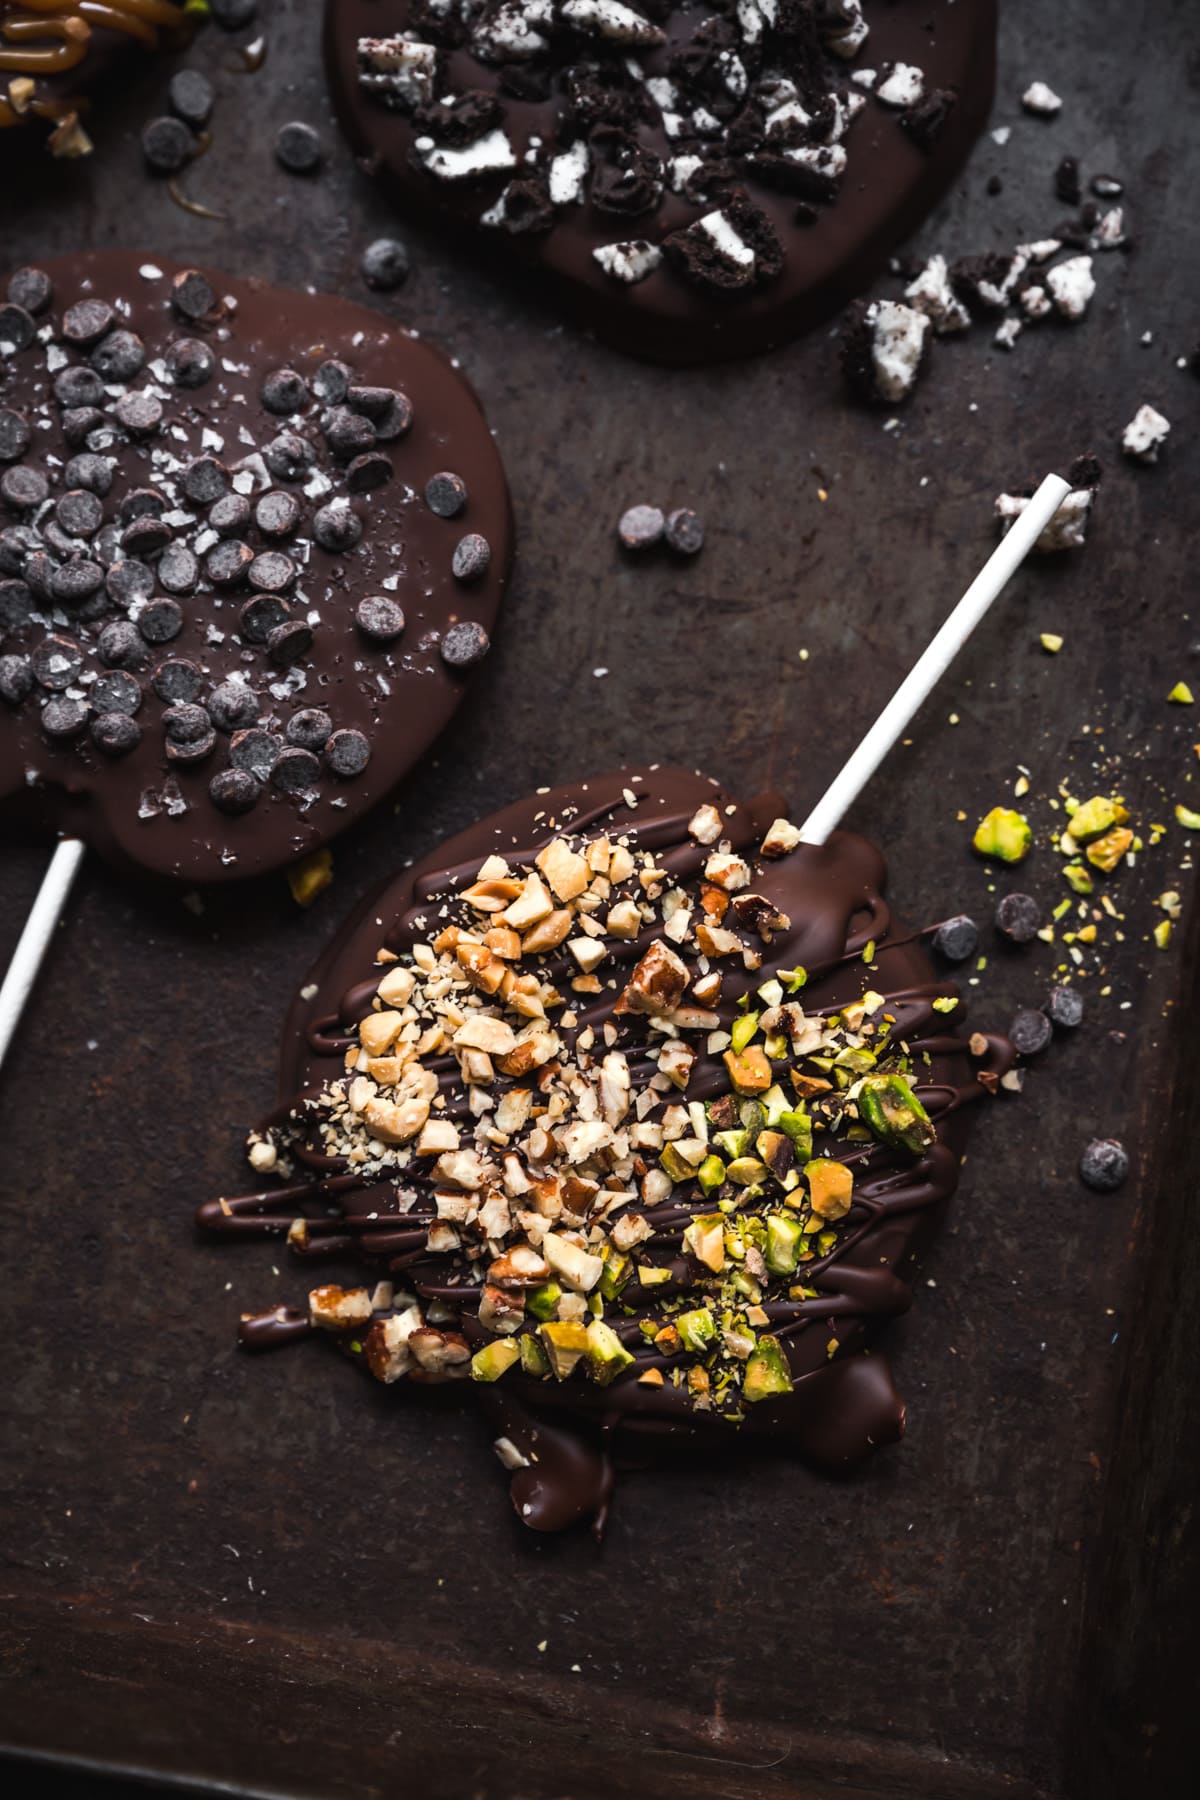
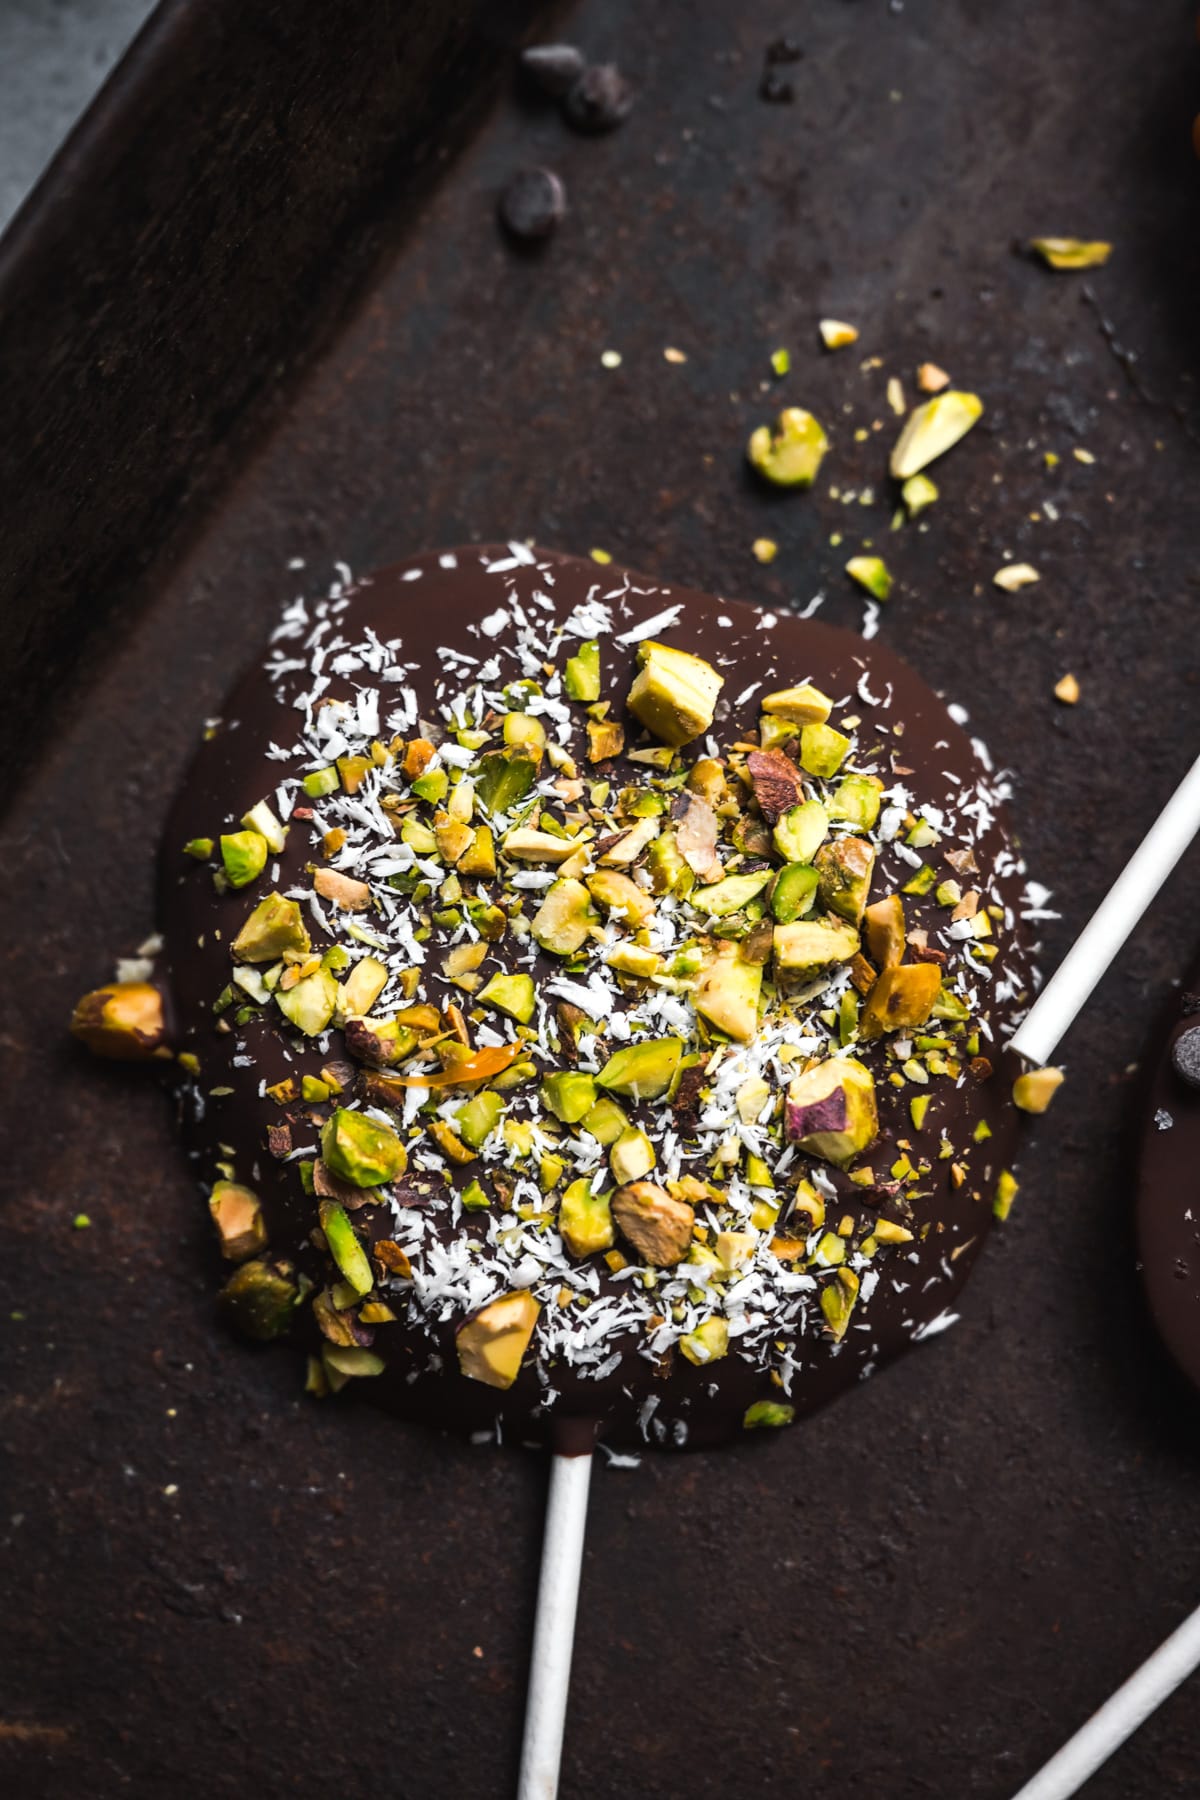
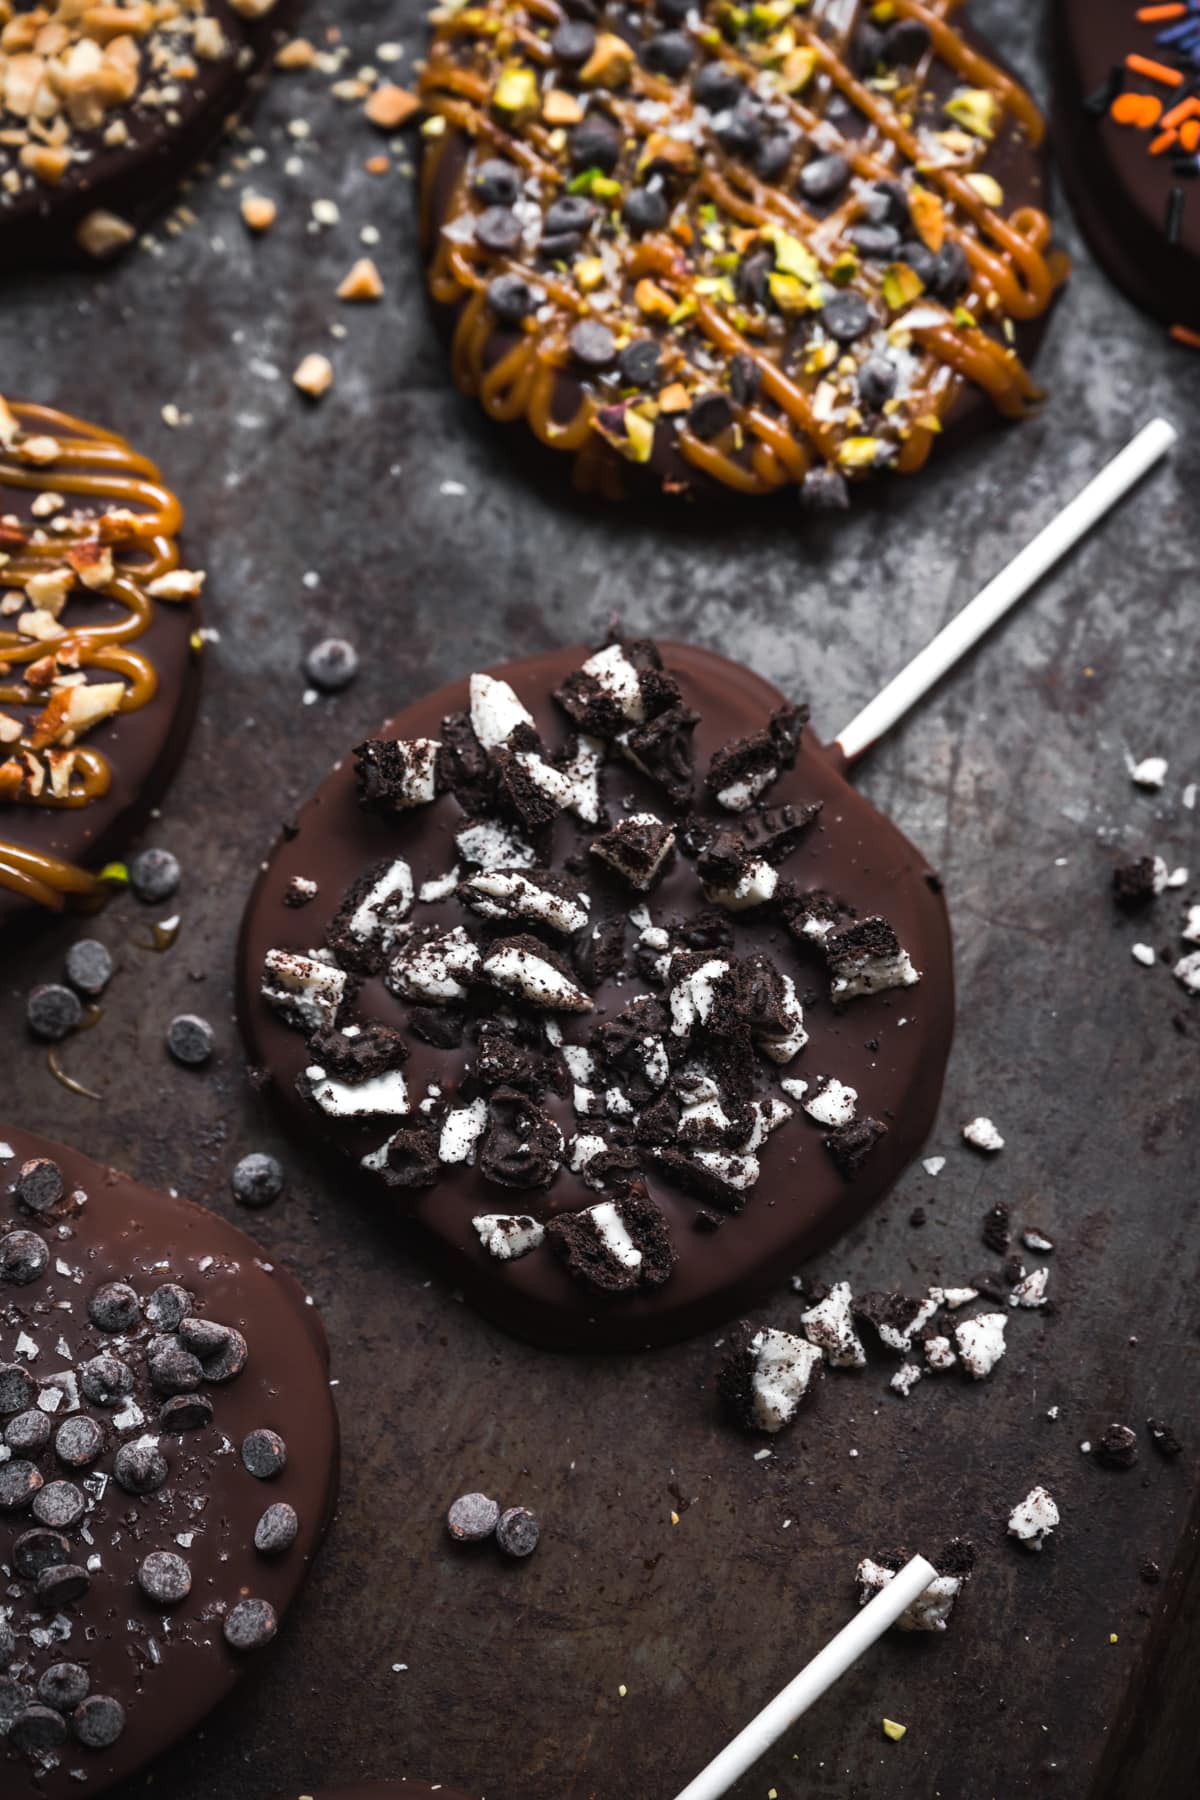
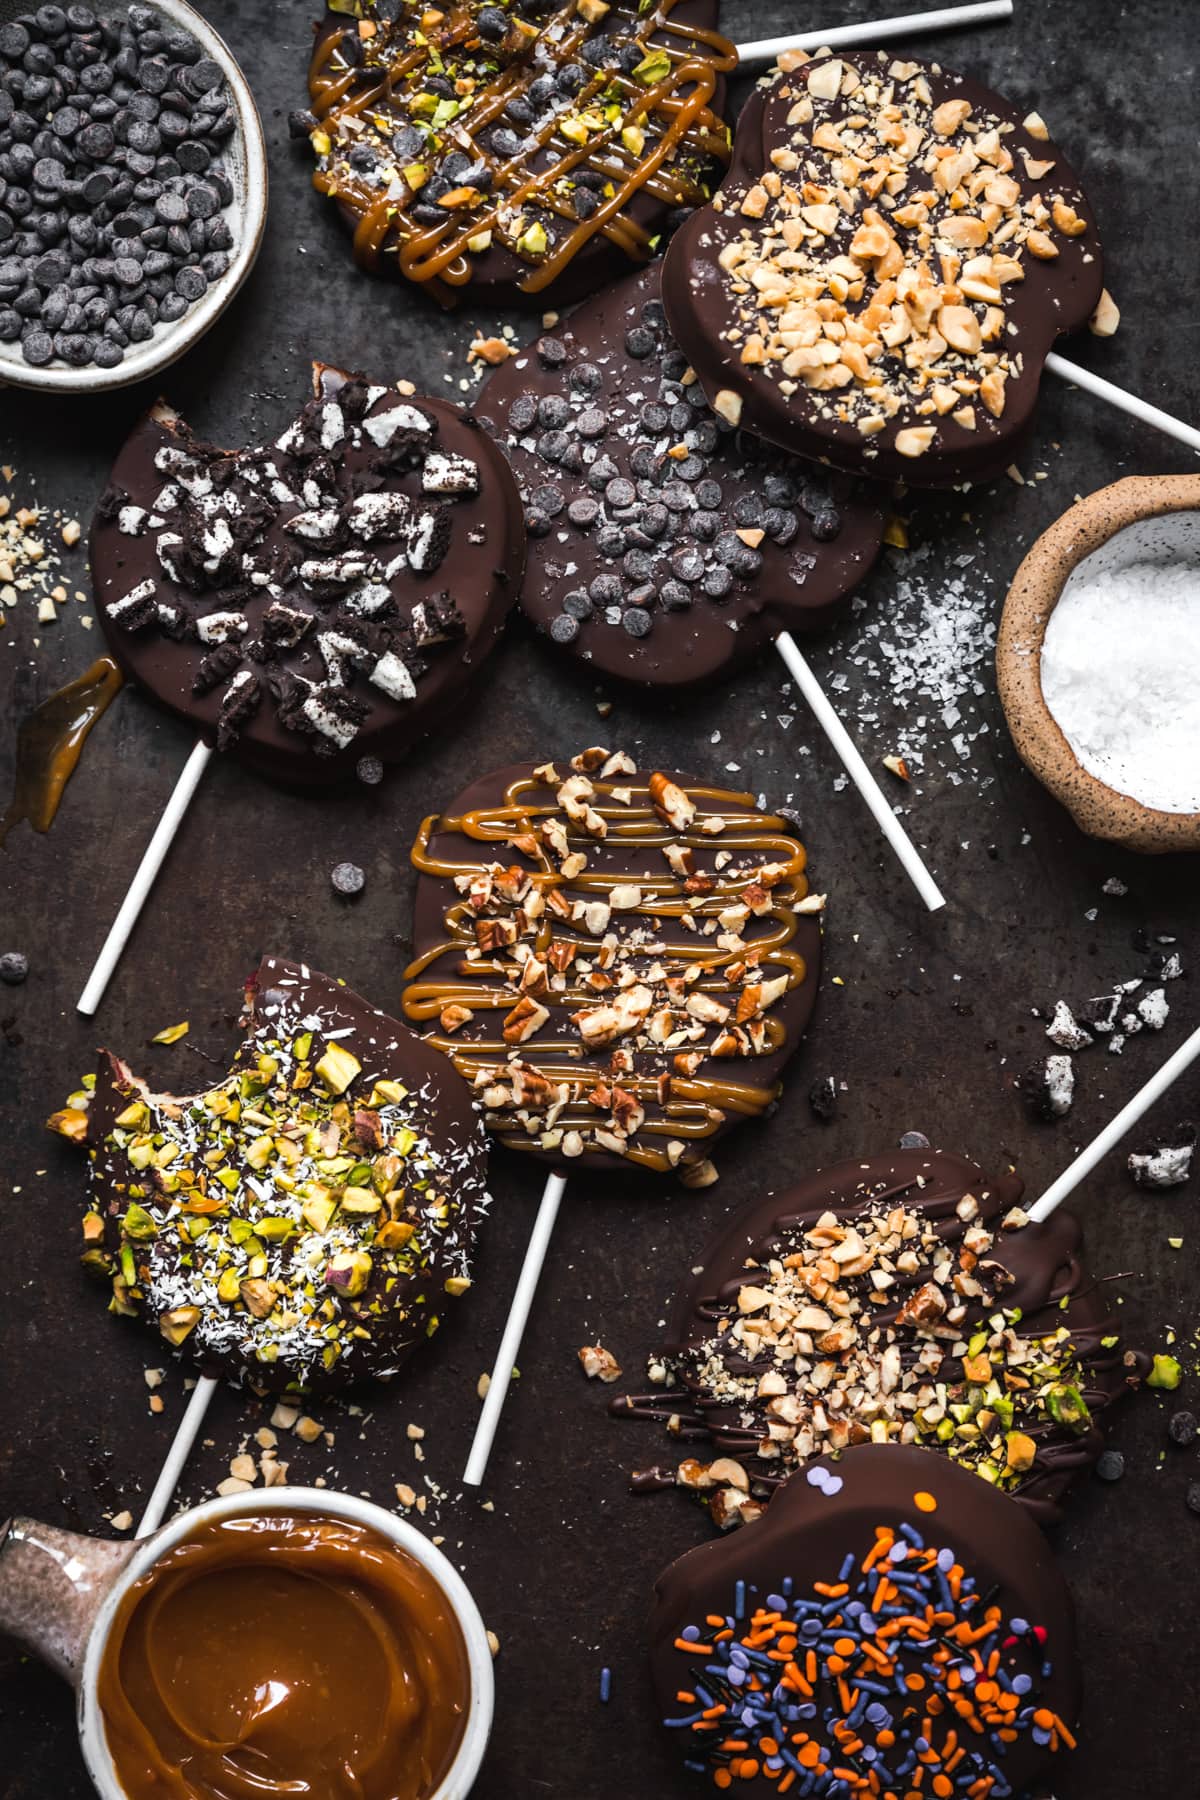
If you don't want an entire large slice, you can slice the apples into wedges instead. Perfect for a small bite! I love these cross-section slices, though – so much surface area for plenty of toppings 😉
These are a fun fall activity for kids and adults alike. Give each kid a task (inserting the popsicle sticks, dipping in chocolate, adding toppings) and let them customize their own. A great way to keep them busy without making too much of a mess in the kitchen 😉
Best apples to use
To make these chocolate covered apple slices, you'll want to choose an apple that's firm, slightly tart and sweet. Firmness is important so that the slice can stand up to heavier toppings (and all of that chocolate!).
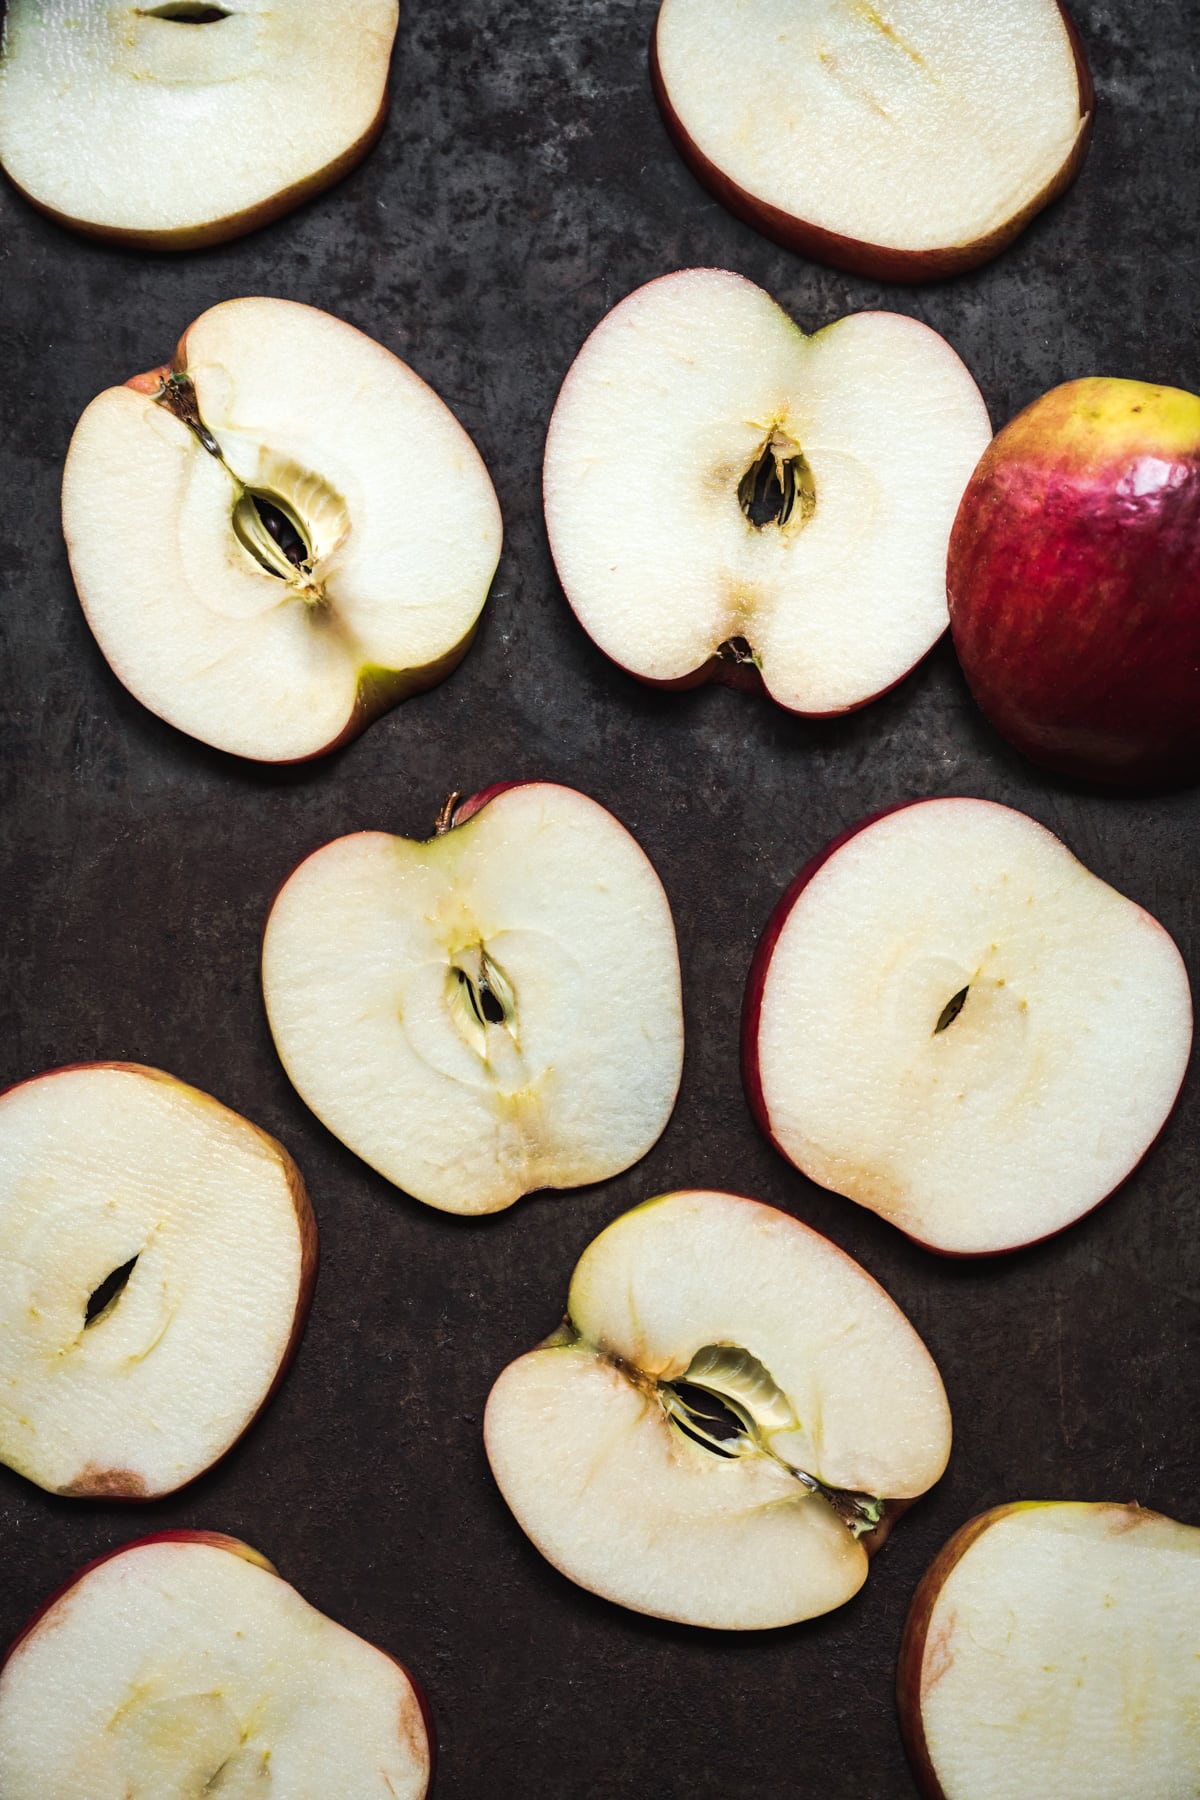
A few of our favorite varieties include:
- Honeycrisp (my favorite - SO flavorful!)
- Granny Smith
- Fuji
- Jazz
- Gala
Instructions
These chocolate covered apple slices are super easy to make. All you'll need are some apples, popsicle sticks, chocolate and toppings!
PREP: Wash your apples and dry thoroughly. Slice into thin-ish (¼") slices and remove any seeds/stem. Insert popsicle sticks through the bottom. If the slices are too thin, the slice may break in half, so do one or two test trials before slicing all of your apples.
Popsicle sticks are necessary keeping these relatively mess-free. You can use regular flat popsicle sticks or paper lollipop sticks, like the ones we used here. Note: we found the lollipop sticks slightly easier to insert!
MELT CHOCOLATE: Next, add chopped chocolate (or chocolate chips) to a heat-safe bowl. Microwave in 30 second intervals, stirring well between each interval, until completely melted. We add in a tablespoon or so of coconut oil to thin it out.
DIP: Since the apple slices have easy-to-grab sticks, they're pretty easy to dip. Dip the slice in the bowl of chocolate, using a spoon to coat the entire slice. Let excess chocolate drip off, then transfer to a parchment paper-lined tray.
TOPPINGS: Add dry toppings like nuts, cookies, sprinkles, chocolate chips, coconut, etc right away. Refrigerate or freeze until solid. For toppings like caramel or peanut butter, let the chocolate harden first before topping.
If you're making these with kids, it's fun to set up a toppings bar with various toppings in bowls so they can customize their own slices. So easy and so much fun!
Don't want quite as much chocolate? Drizzle with chocolate instead of dipping.
Toppings
The options for toppings are endless, but here are a few of our favorites:
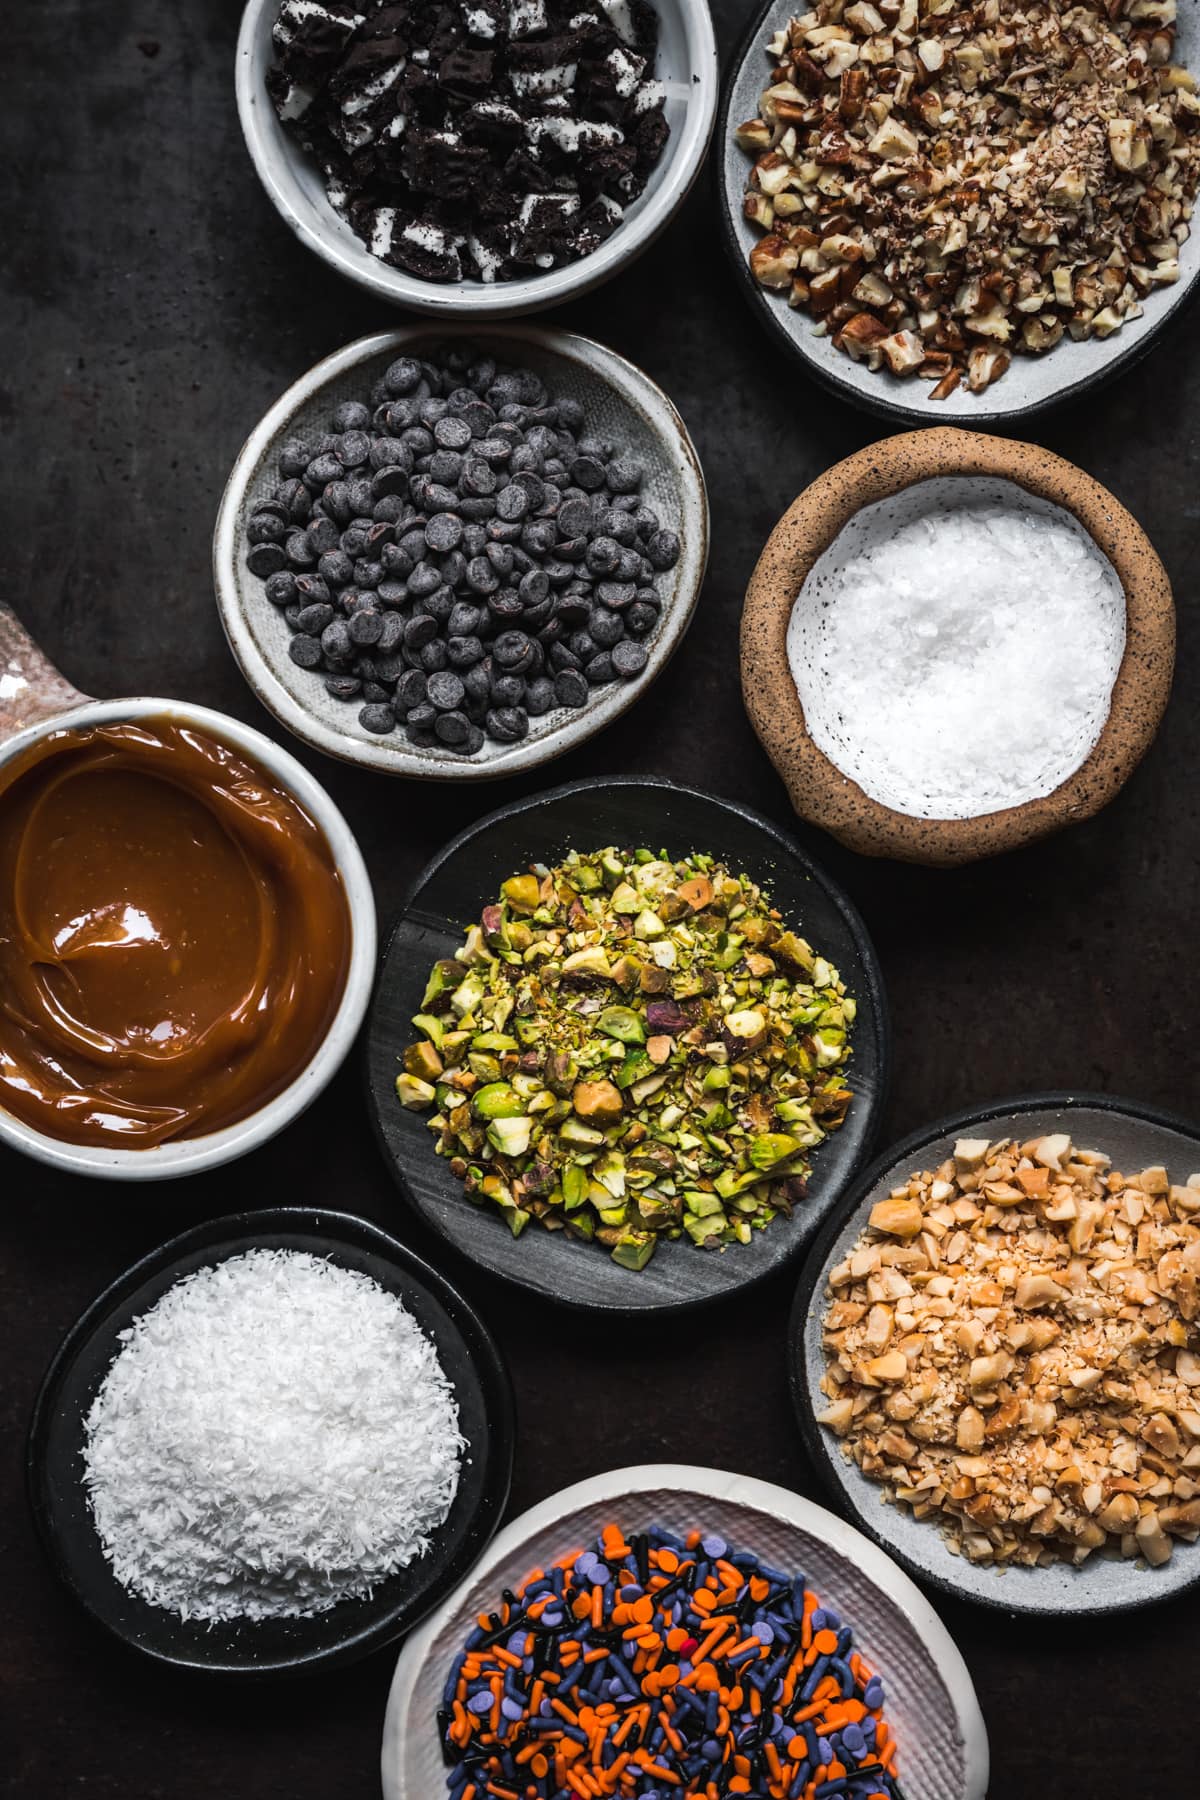
- Caramel (make homemade vegan caramel sauce here!)
- Chopped nuts (pecans, peanuts, pistachios, walnuts, almonds, etc)
- Seeds (pumpkin, sunflower, chia, etc)
- Sprinkles
- Mini Chocolate Chips
- Shredded Coconut
- Crushed cookies (Oreos, specifically!)
- Dried or freeze dried fruit
- Toffee or other crushed candy
- Graham cracker crumbs
- Mini marshmallows
- Flaky salt
- More chocolate...
...and just about anything else your heart desires! Feel free to mix and match (like combining caramel + pecans, chocolate chips and flaky salt, peanuts and dried fruit, etc).
Storage
Since these are sliced (and not whole apples), you can't store them at room temperature. We recommend storing them in the refrigerator for no longer than 3-4 days, though they are best eaten fresh.
More easy vegan dessert recipes
- Mini Almond Joy Bites
- Edible Cookie Dough Bites
- Chocolate Caramel Pecan Turtle Clusters
- Dark Chocolate Bark with Strawberries and Pistachios
- Chocolate Peanut Butter Cups
If you make these vegan chocolate covered apple slices, we’d love for you to leave a comment and rating below! We also love to see your creations on Instagram – tag us at @crowded_kitchen so we can see what you’ve been cooking.
Print📖 Recipe

Chocolate Covered Apple Slices
- Total Time: 30 minutes
- Yield: 12 servings 1x
- Diet: Vegan
Description
These dark chocolate covered apple slices are such a fun, kid-friendly, easy snack or light dessert! SO much easier to make (and eat) than caramel apples, and you can customize with your favorite toppings. Perfect for an after-school fall snack!
Ingredients
- 4 apples, sliced about ¼" thick (Honeycrisp, Granny Smith, Fuji, etc)
- 12 oz dark chocolate, melted
- 1 tbsp coconut oil (optional)
- Topping ideas: caramel, chopped nuts, seeds, sprinkles, coconut, crushed cookies, mini chocolate chips, flaky salt, dried fruit, candy, graham cracker crumbs, mini marshmallows, etc.
Instructions
- Wash apples and dry thoroughly. Slice into thin-ish (¼") slices and remove any seeds/stem. Insert popsicle sticks through the bottom. If the slices are too thin, the slice may break in half, so do one or two test trials before slicing all of your apples.
- Add chopped chocolate (or chocolate chips) to a heat-safe bowl. Microwave in 30 second intervals, stirring well between each interval, until completely melted. Optional: add 1 tablespoon coconut oil to thin it out (makes it easier to dip).
- Dip each apple slice in chocolate, using a spoon to coat the entire slice. Let excess chocolate drip off, then transfer to a parchment paper-lined tray.
- Add dry toppings like nuts, cookies, sprinkles, chocolate chips, coconut, etc right away. Refrigerate or freeze until solid. For toppings like caramel or peanut butter, let the chocolate harden first before topping. Store in the refrigerator for 3-4 days.
Notes
Don't want quite as much chocolate? Drizzle the slices instead of dipping. Note: since these are not completely encased in chocolate, they won't last for quite as long in the refrigerator.
You can use flat popsicle sticks or paper lollipop sticks (like we used here).
- Prep Time: 20 minutes
- Cook Time: 10 minutes
- Category: Dessert
- Method: No Bake
- Cuisine: American
Nutrition
- Serving Size: 1 Slice
- Calories: 210
- Sugar: 17.7 g
- Sodium: 9.3 mg
- Fat: 12.1 g
- Saturated Fat: 7.2 g
- Trans Fat: 0 g
- Carbohydrates: 24.2 g
- Fiber: 3.7 g
- Protein: 1.9 g
- Cholesterol: 1.7 mg
Nancy says
will theses freeze for about a month
Allison Mackey says
They taste pretty good frozen straight from the freezer, but we would not recommend defrosting them as the texture will change.
Makhaya says
Loved this round up of healthy Halloween treats! I want to make so many things for our Halloween get together and these ideas are perfect. Thanks for sharing!
Ella says
I made these with vegan/plant based chocolate! I used a bit of vegetable oil due to an allergy of coconut oil, and they turned out great! Topped with pecans, and homemade vegan caramel sauce!
Karen says
Hi, after refrigeration I have noticed that there is some juice coming from the apple the next day. What can I do the prevent it from happening?
Lexi says
Hi Karen, it definitely may depend on the variety of apple you're using as some have more moisture. It should help to pat the slices dry with paper towel before coating in chocolate. I hope that helps!
Karen says
Thanks 😊
Bonnie says
I tried to make these but the chocolate would not stick to the apples, I used Royal Gala and dried them with paper towel after slicing, is there a trick I'm missing?
Lexi says
Hi Bonnie, hm, that's so strange, we've never had that issue! What kind of chocolate were you using?
Jamie says
What chocolate should be used for the apples? I’ve also had issues with the chocolate sliding off the sliced apple.
Lexi says
Try dabbing the apple slices with paper towel before coating. Sometimes the extra moisture prevents the chocolate from sticking. We use somewhere around 72% chocolate.
JOY says
Hi! Can I leave it overnight in the fridge?
Lexi says
Yes, absolutely!