
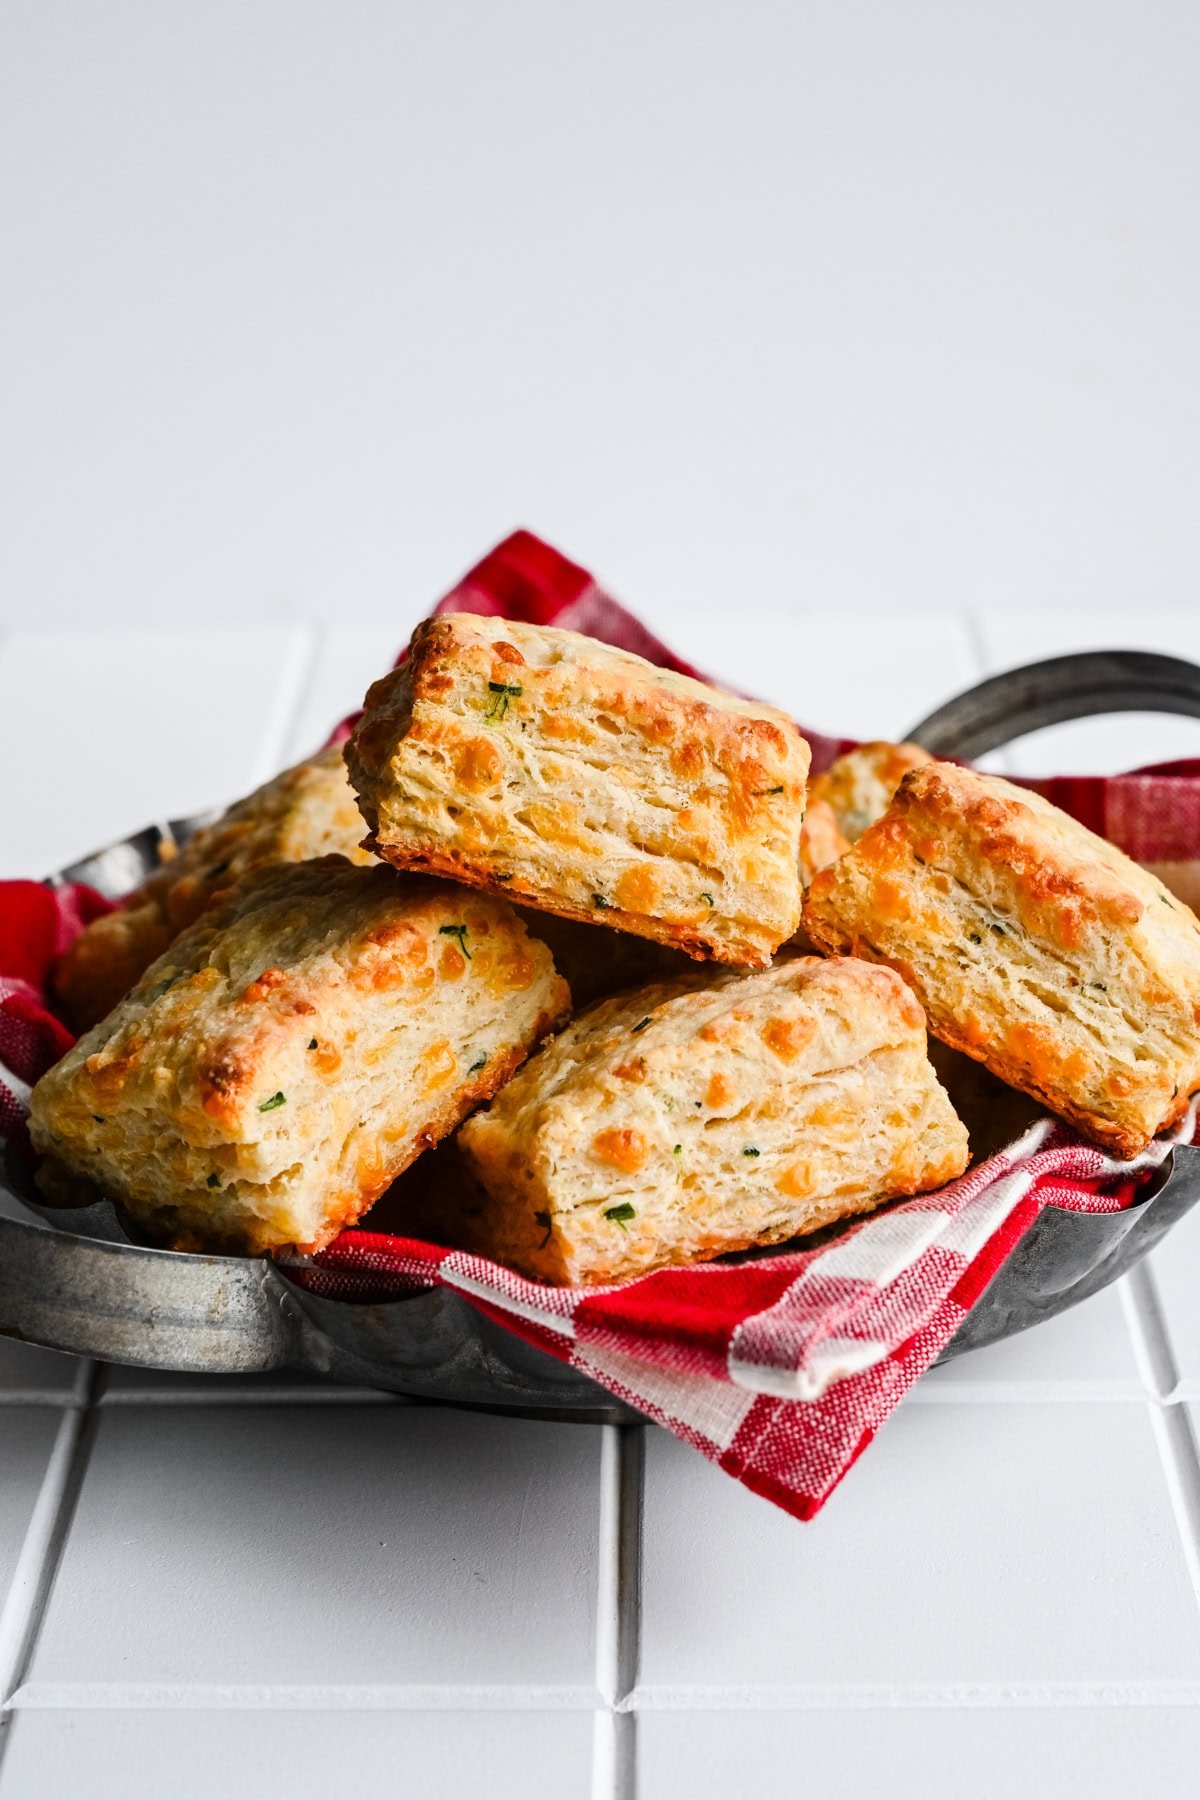
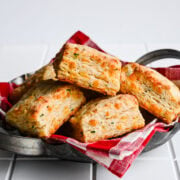
These Make Ahead Buttermilk Biscuits with cheddar and chives are perfect for the holidays! You can make the dough, shape them, then freeze for up to a few months. When it's time to eat, just pop them in the oven straight from the freezer and enjoy!
This post is sponsored by Zwilling. All opinions are our own. This post contains affiliate links, and I may receive commissions for purchases made through links on this post.
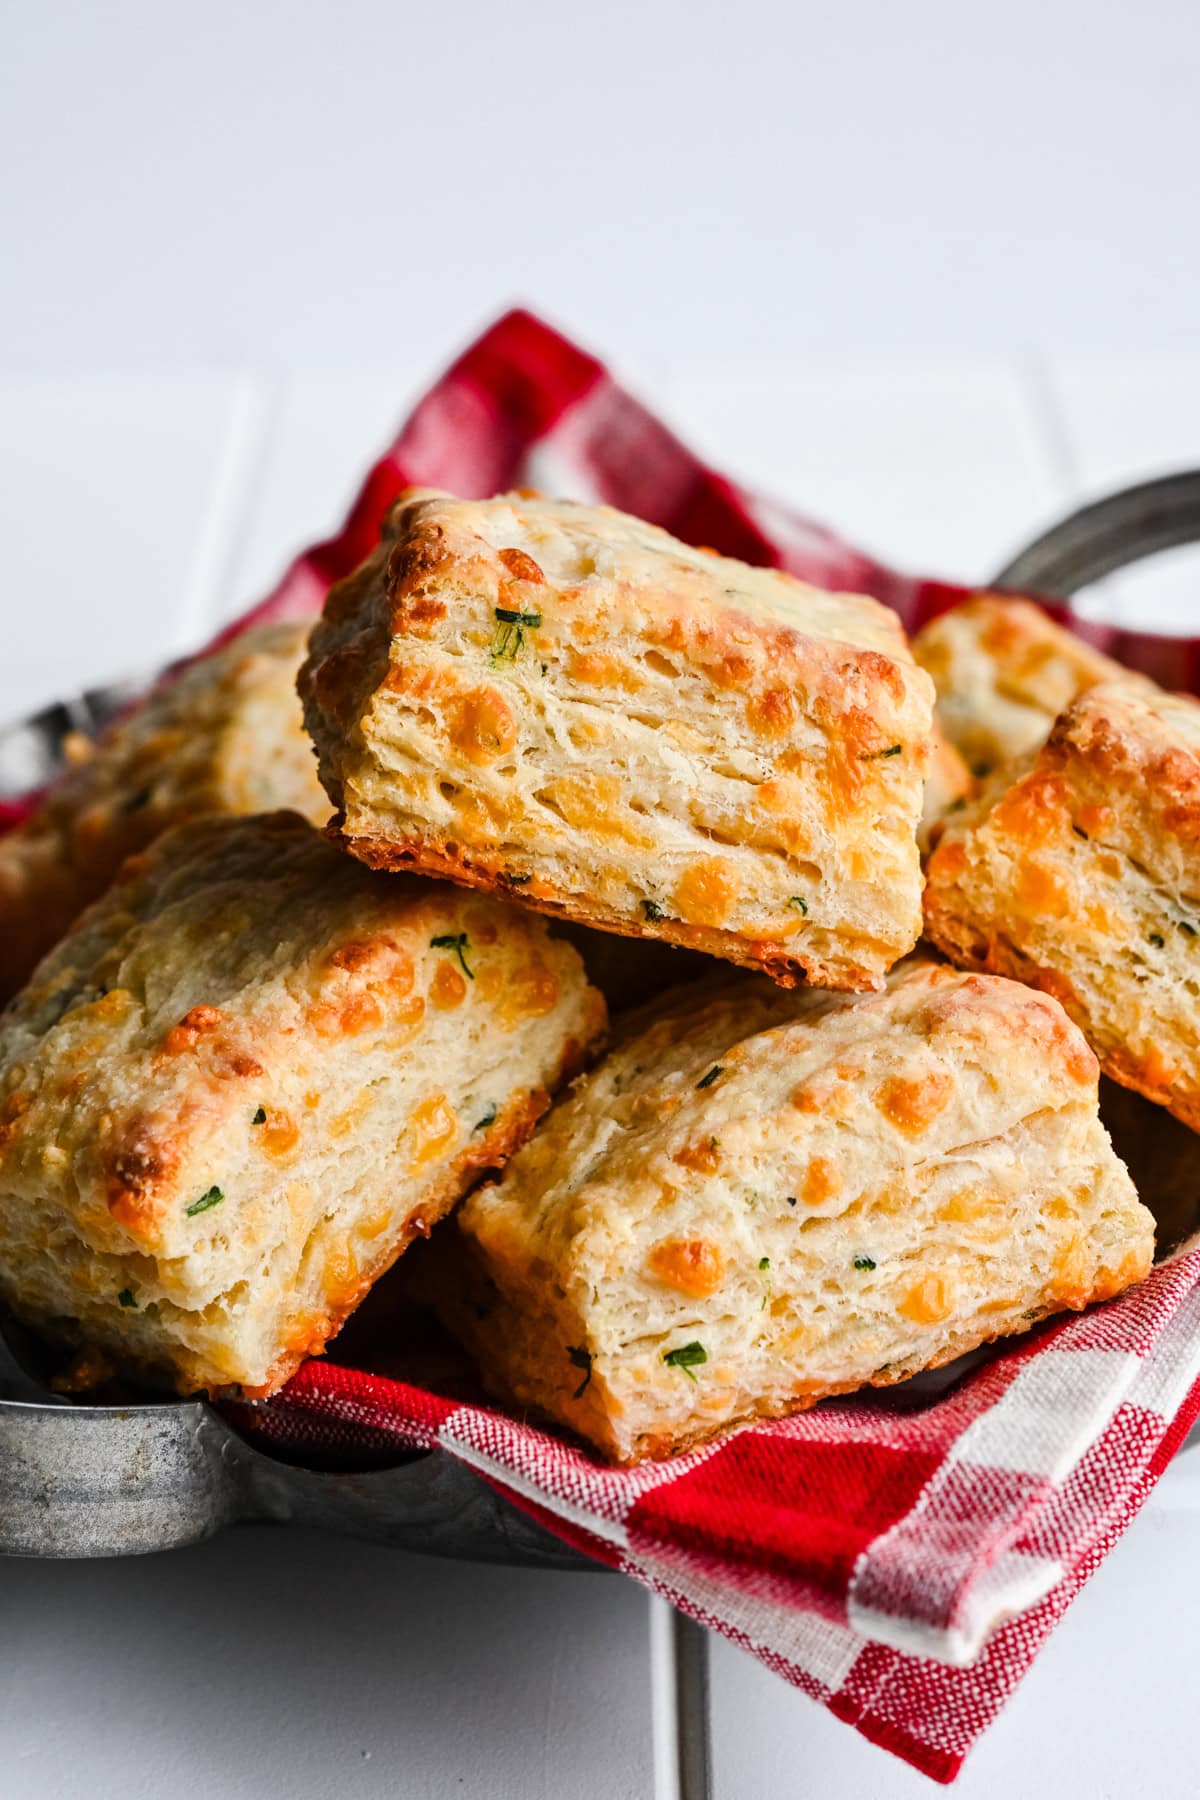
Cooking around the holidays can be stressful, so to make things easier, we like to make everything that we can in advance. Biscuits are a perfect holiday side dish, and these are packed with sharp cheddar cheese and fresh chives. But you probably didn't think you could make them in advance, so let us show you how!
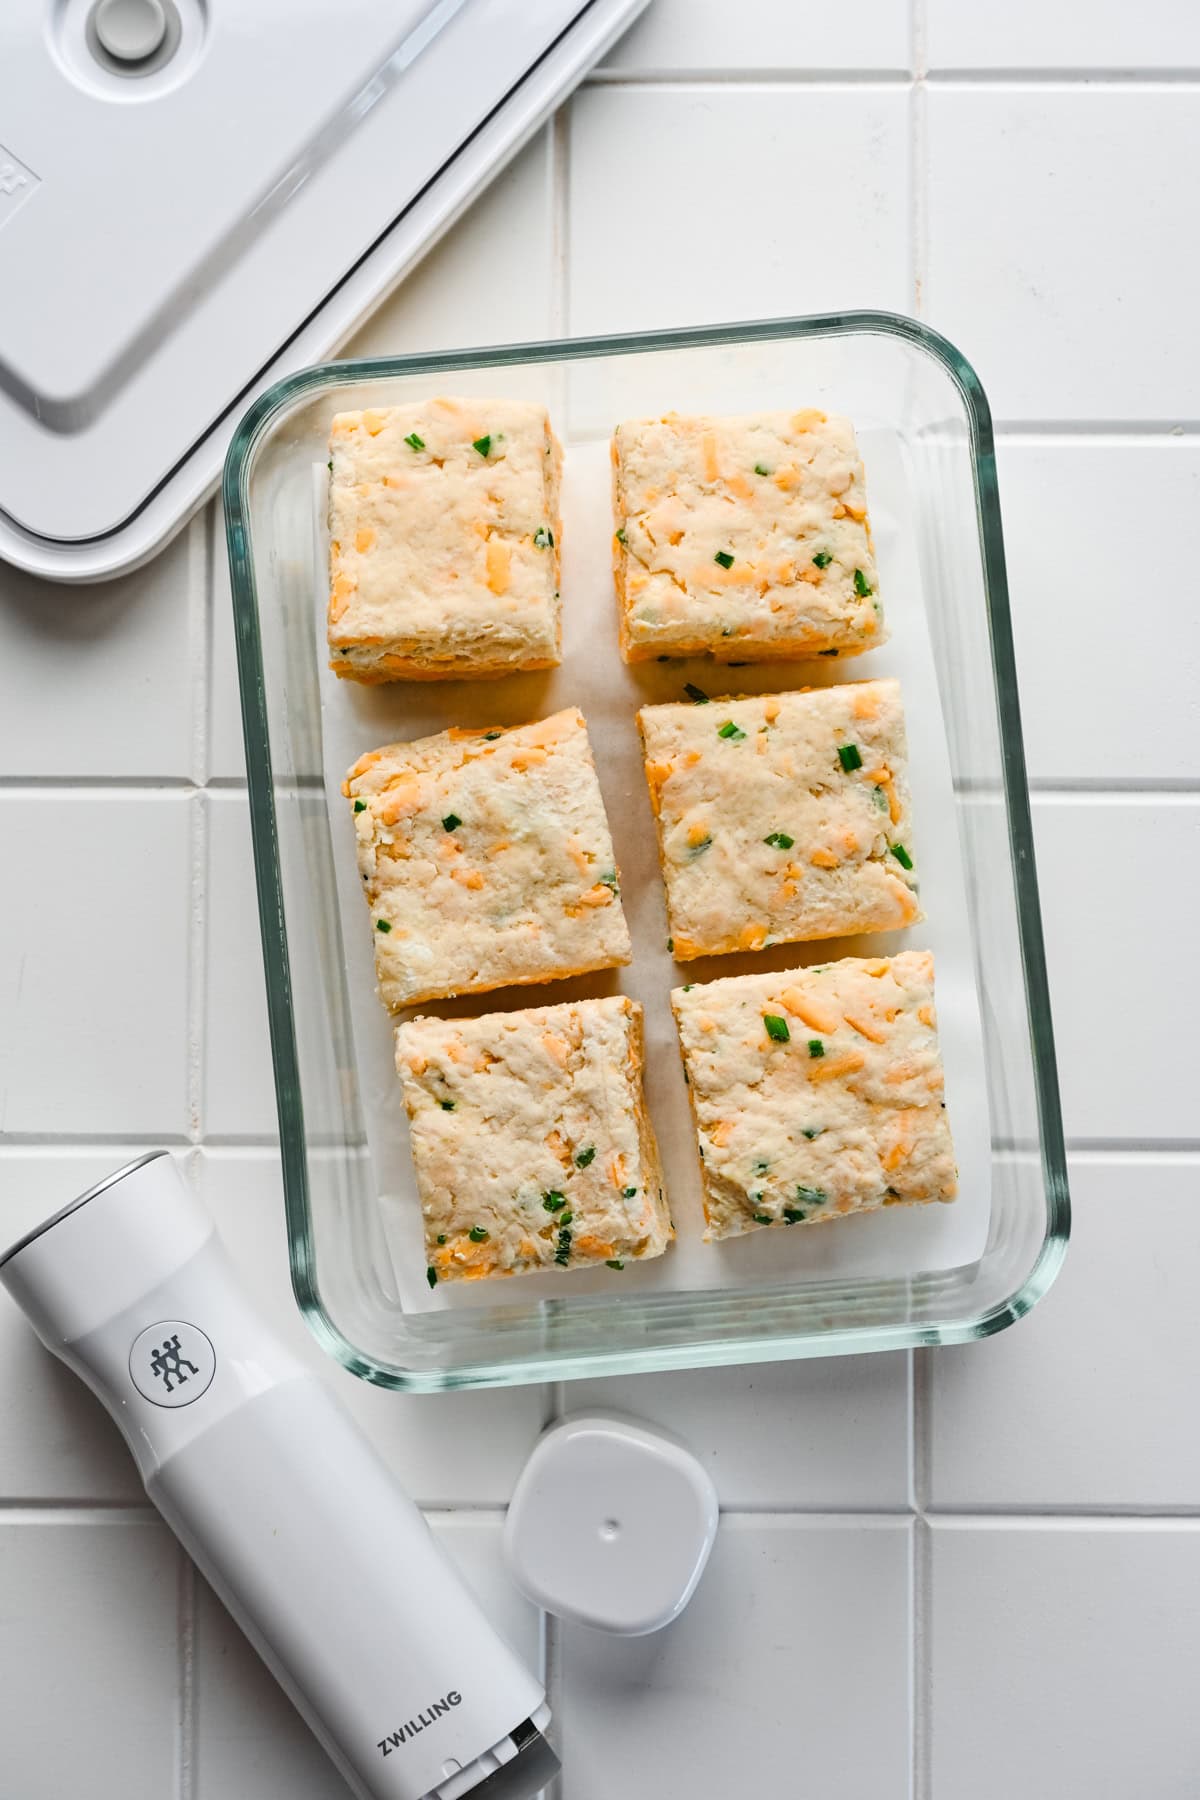
Thanks to Zwilling's Fresh & Save Vacuum Seal Containers, you can prep the dough in advance, freeze it in one of the containers, and then bake straight from the freezer on the day of your occasion and enjoy!
We like to serve these with a roasted garlic butter, which can also be made ahead and frozen until the day of.
Jump to:
Make Ahead Buttermilk Biscuits Ingredients
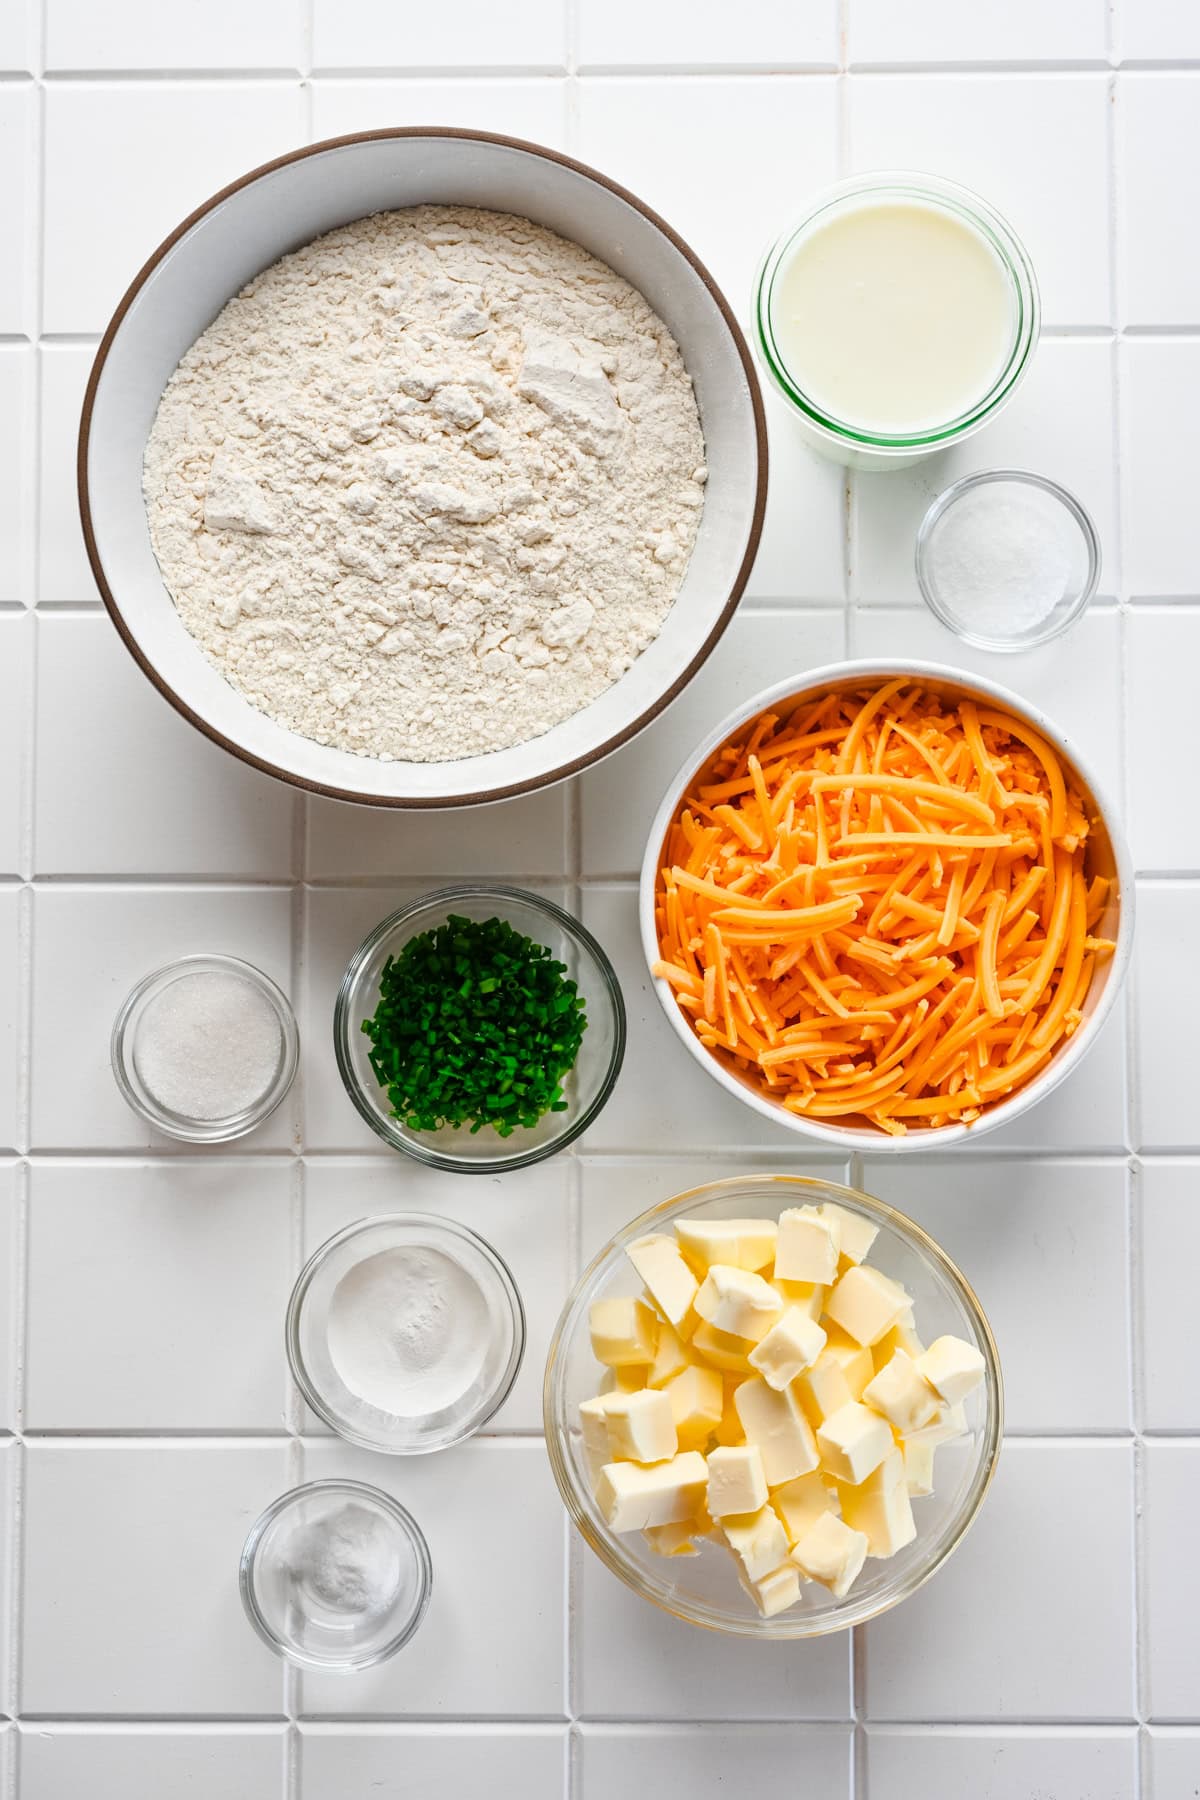
- All-purpose flour: AP flour is best for biscuits, and we wouldn't recommend using other types like whole wheat or bread flour. We have not tried this recipe with gluten free flour.
- Baking powder: Baking powder helps the biscuit rise and become light and fluffy.
- Baking soda: This will help contribute to the browning of your biscuits.
- Salt and sugar: Helps to round out the flavor profile of the biscuit.
- Butter: Butter is key because it helps to create that perfect flaky texture that you want to see in a biscuit. Make sure your butter is very cold when you incorporate it! We like to dice the butter, then place it in the freezer for about 15 minutes before using it.
- Buttermilk: Buttermilk's acidity interacts with baking soda and powder to help the biscuit rise, and it also adds a slight tang to the biscuit that you can't get with regular milk.
- Sharp cheddar: The sharper the cheddar, the more you'll be able to taste the cheese in your biscuit. We prefer to shred cheddar from a block versus buying it pre-shredded, as the stuff that comes in a bag contains anti-caking agents that prevents it from melting quite as well.
- Chives: These are optional, but they add a nice mild, garlic-like flavor to the biscuit.
How to Make this Make Ahead Buttermilk Biscuits Recipe
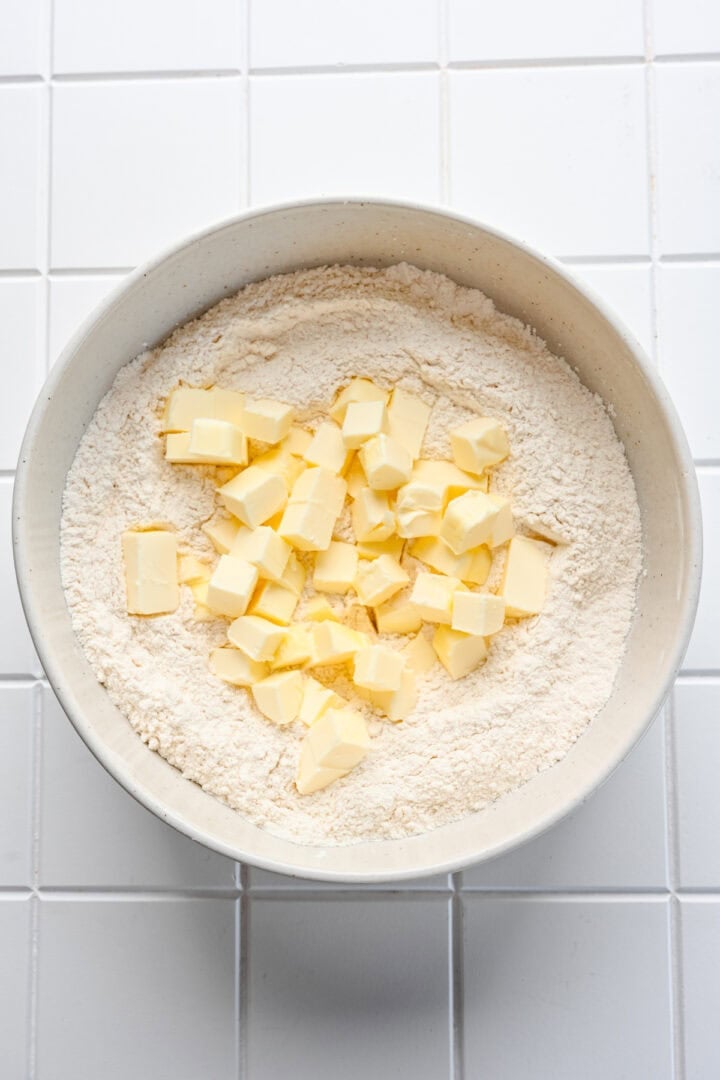
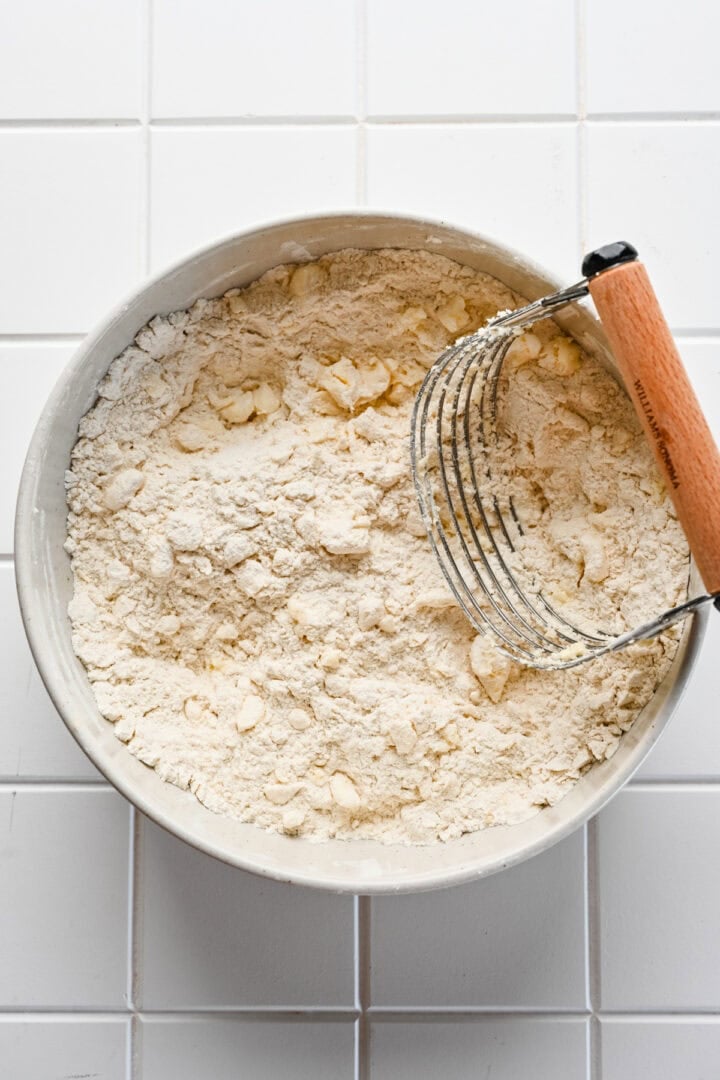
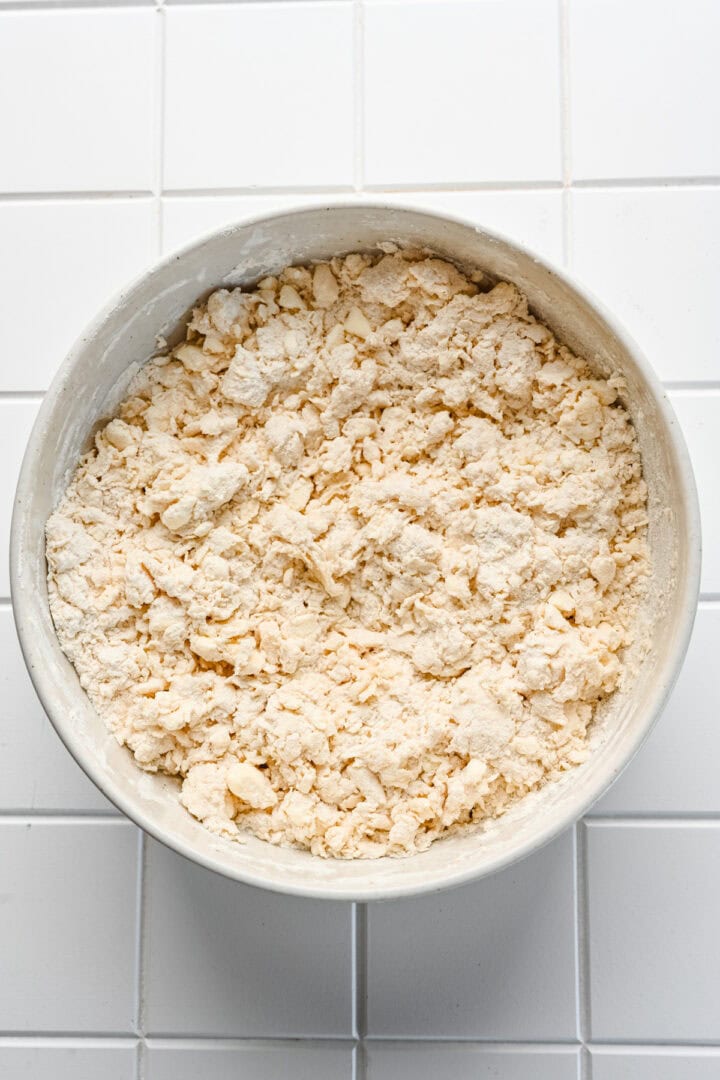
STEP 1: Preheat oven to 425˚F. Mix together flour, baking powder, baking soda, salt and sugar. Cut butter into cubes, and then use a pastry cutter or your fingers to break apart the butter into smaller chunks.
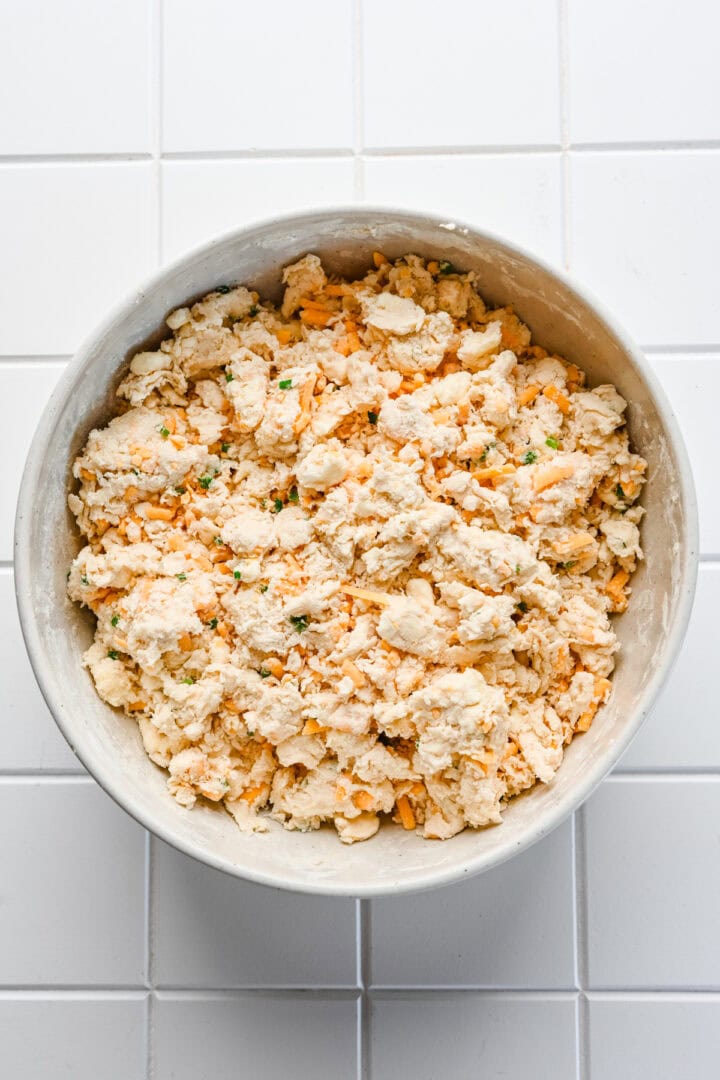
STEP 2: Slowly add in about half of the buttermilk, stirring with a fork or spatula to combine. Fold in the shredded sharp cheddar and chopped chives, then add in the rest of the buttermilk, stirring until a shaggy dough forms. If it's too dry, add another 1-2 tablespoon of buttermilk.
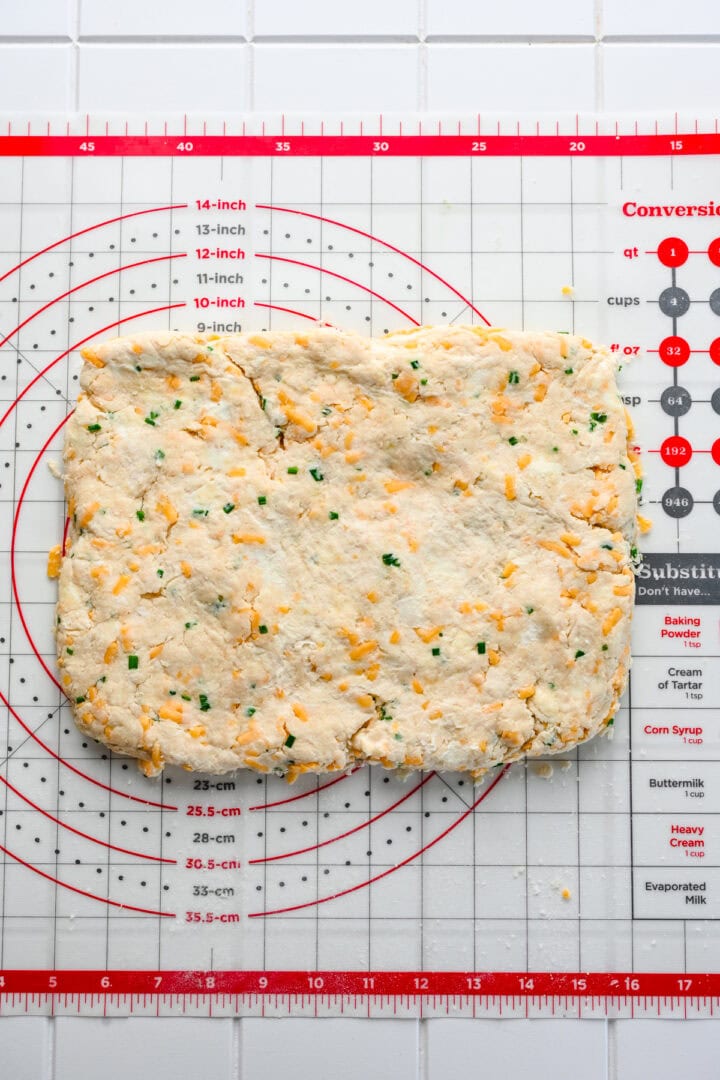
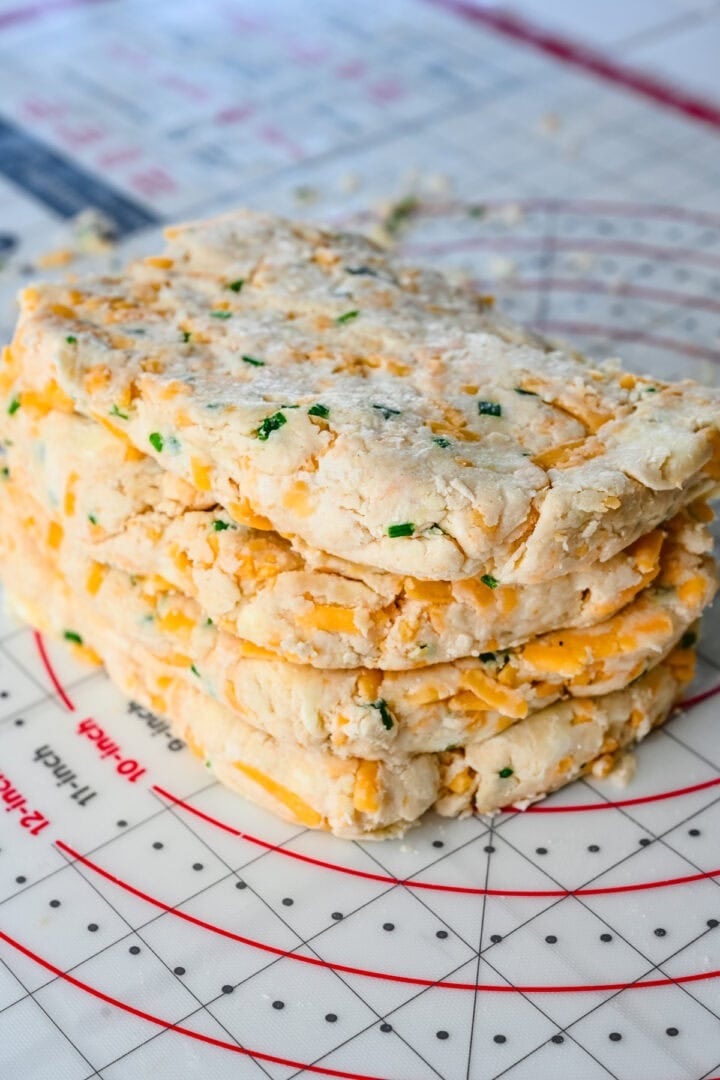
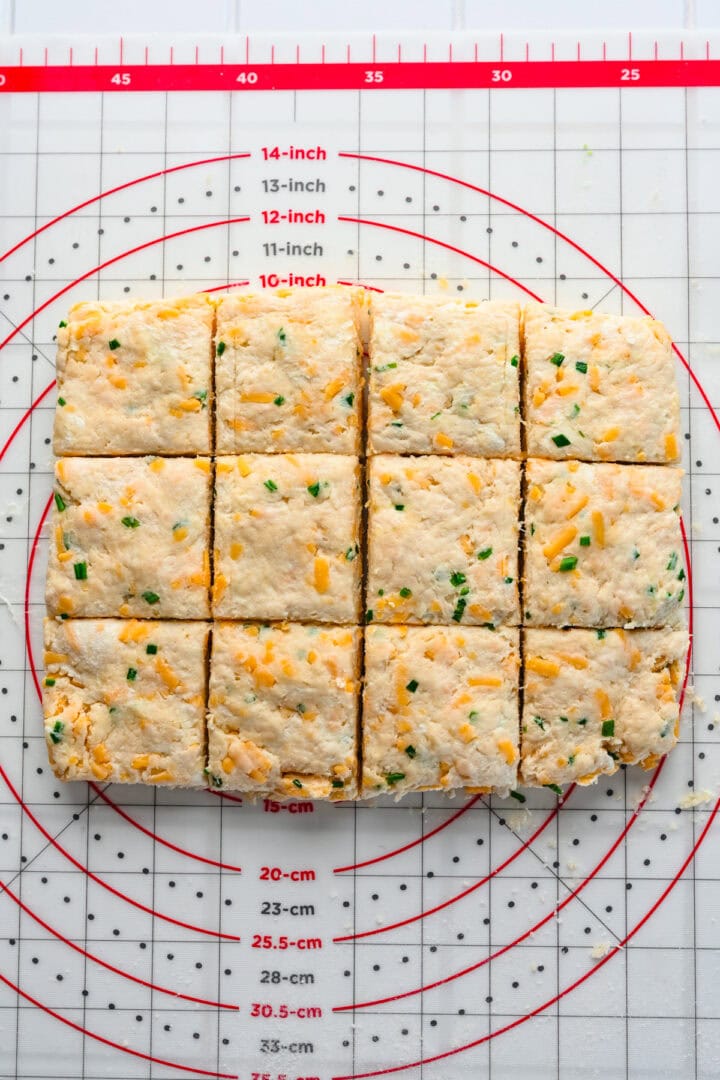
STEP 3: Lightly knead the dough until it comes together slightly. Pat into a rectangle, fold in half lengthwise, and then fold again into quarters. Flatten it back into a 1" rectangle, then repeat this process 1-2 more times. Pat into a 1" thick rectangle. Trim the edges, and then cut into rectangles. You can cut into 12 larger or 16 smaller biscuits.
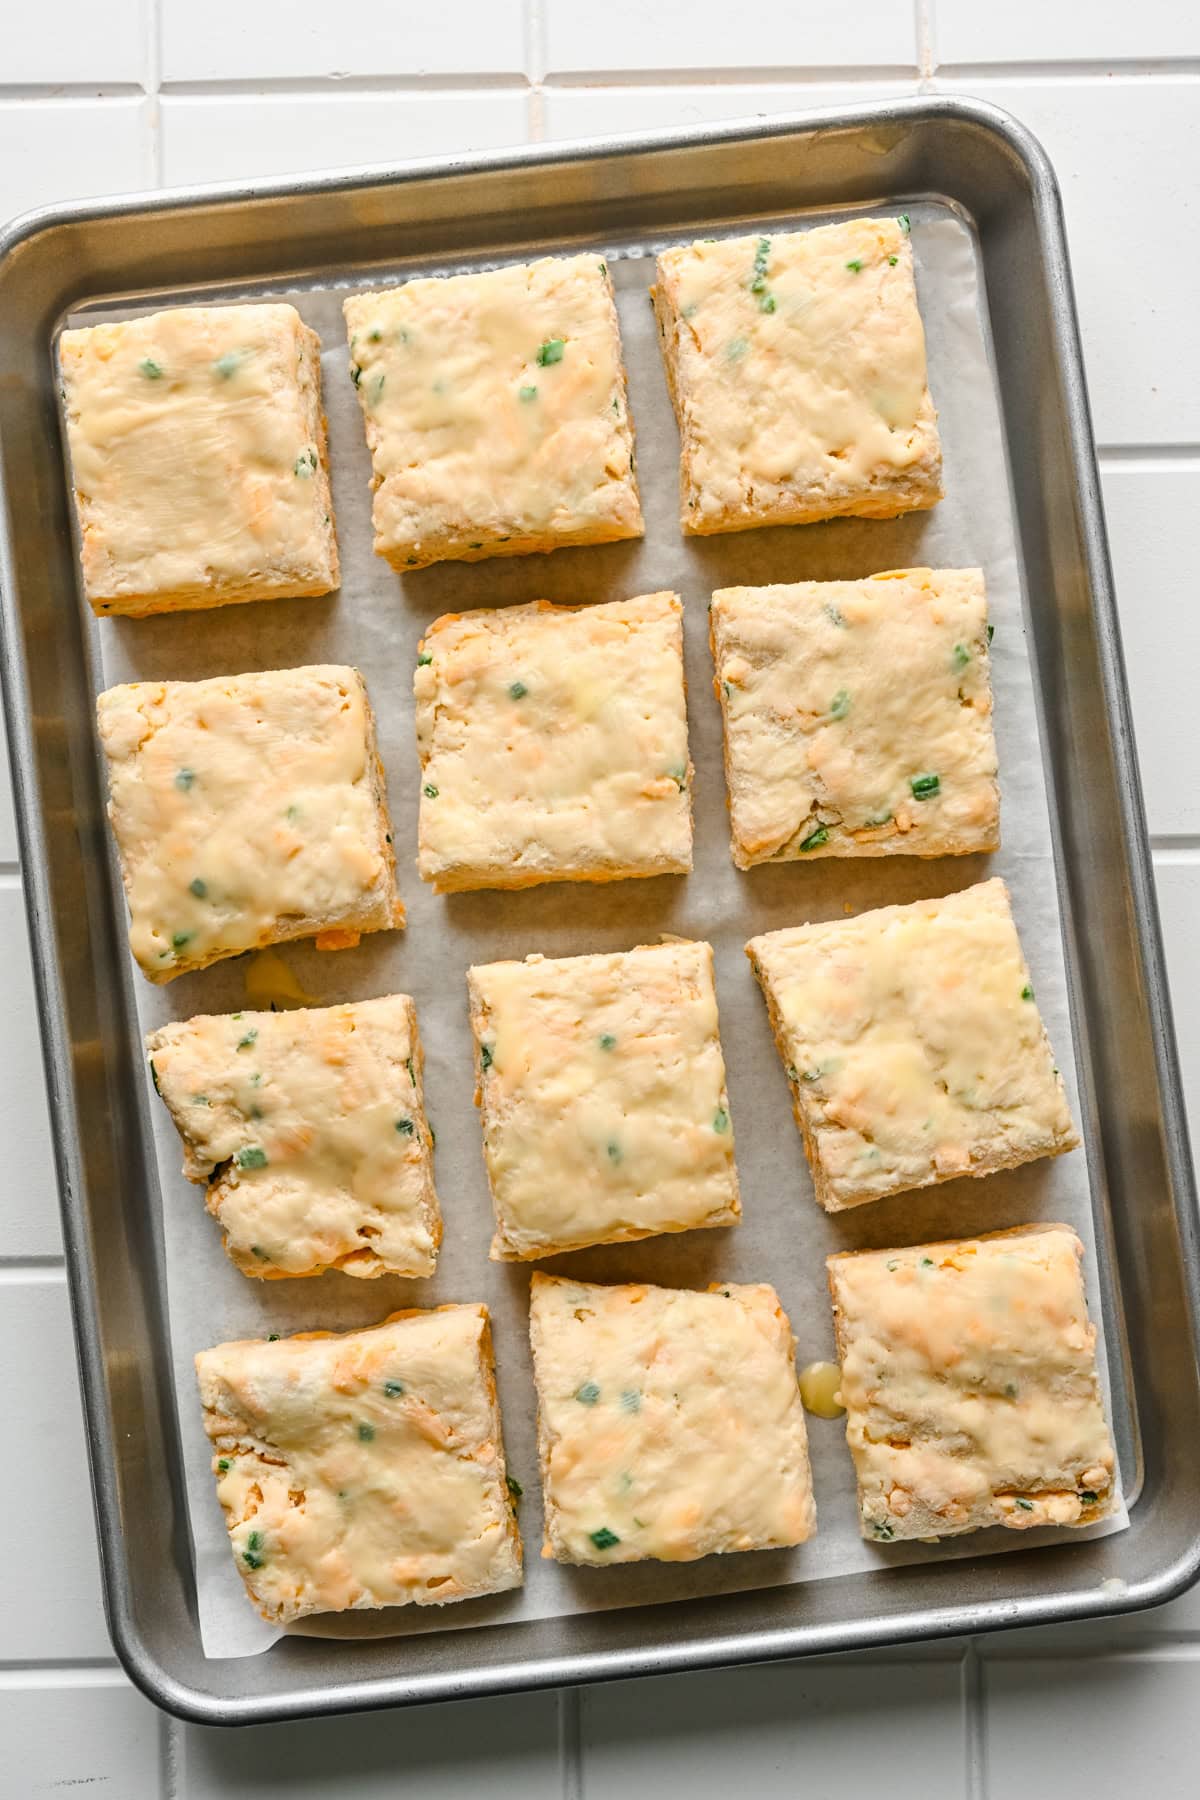
STEP 4: Freeze for 15 minutes before baking, or if you're making ahead, freeze on a baking sheet, then transfer to Zwilling Fresh and Save vacuum seal container. Freeze for up to 3 months.
STEP 5: Just before adding the biscuits to the oven, lower temperature to 400˚F. Brush the top of the biscuits with melted butter, then bake for 20-25 minutes, until golden brown on top. If you're baking from frozen, they will probably need 25 minutes.
Substitutions and Variations
- Chives - If you don't have any chives on hand, you can leave them out or substitute with a dried herb like parsley.
- Cheddar - You can leave this out if you don't want any extra cheese in your biscuits, or you can substitute for another cheese, like gruyere.
What to Serve with Make Ahead Buttermilk Biscuits
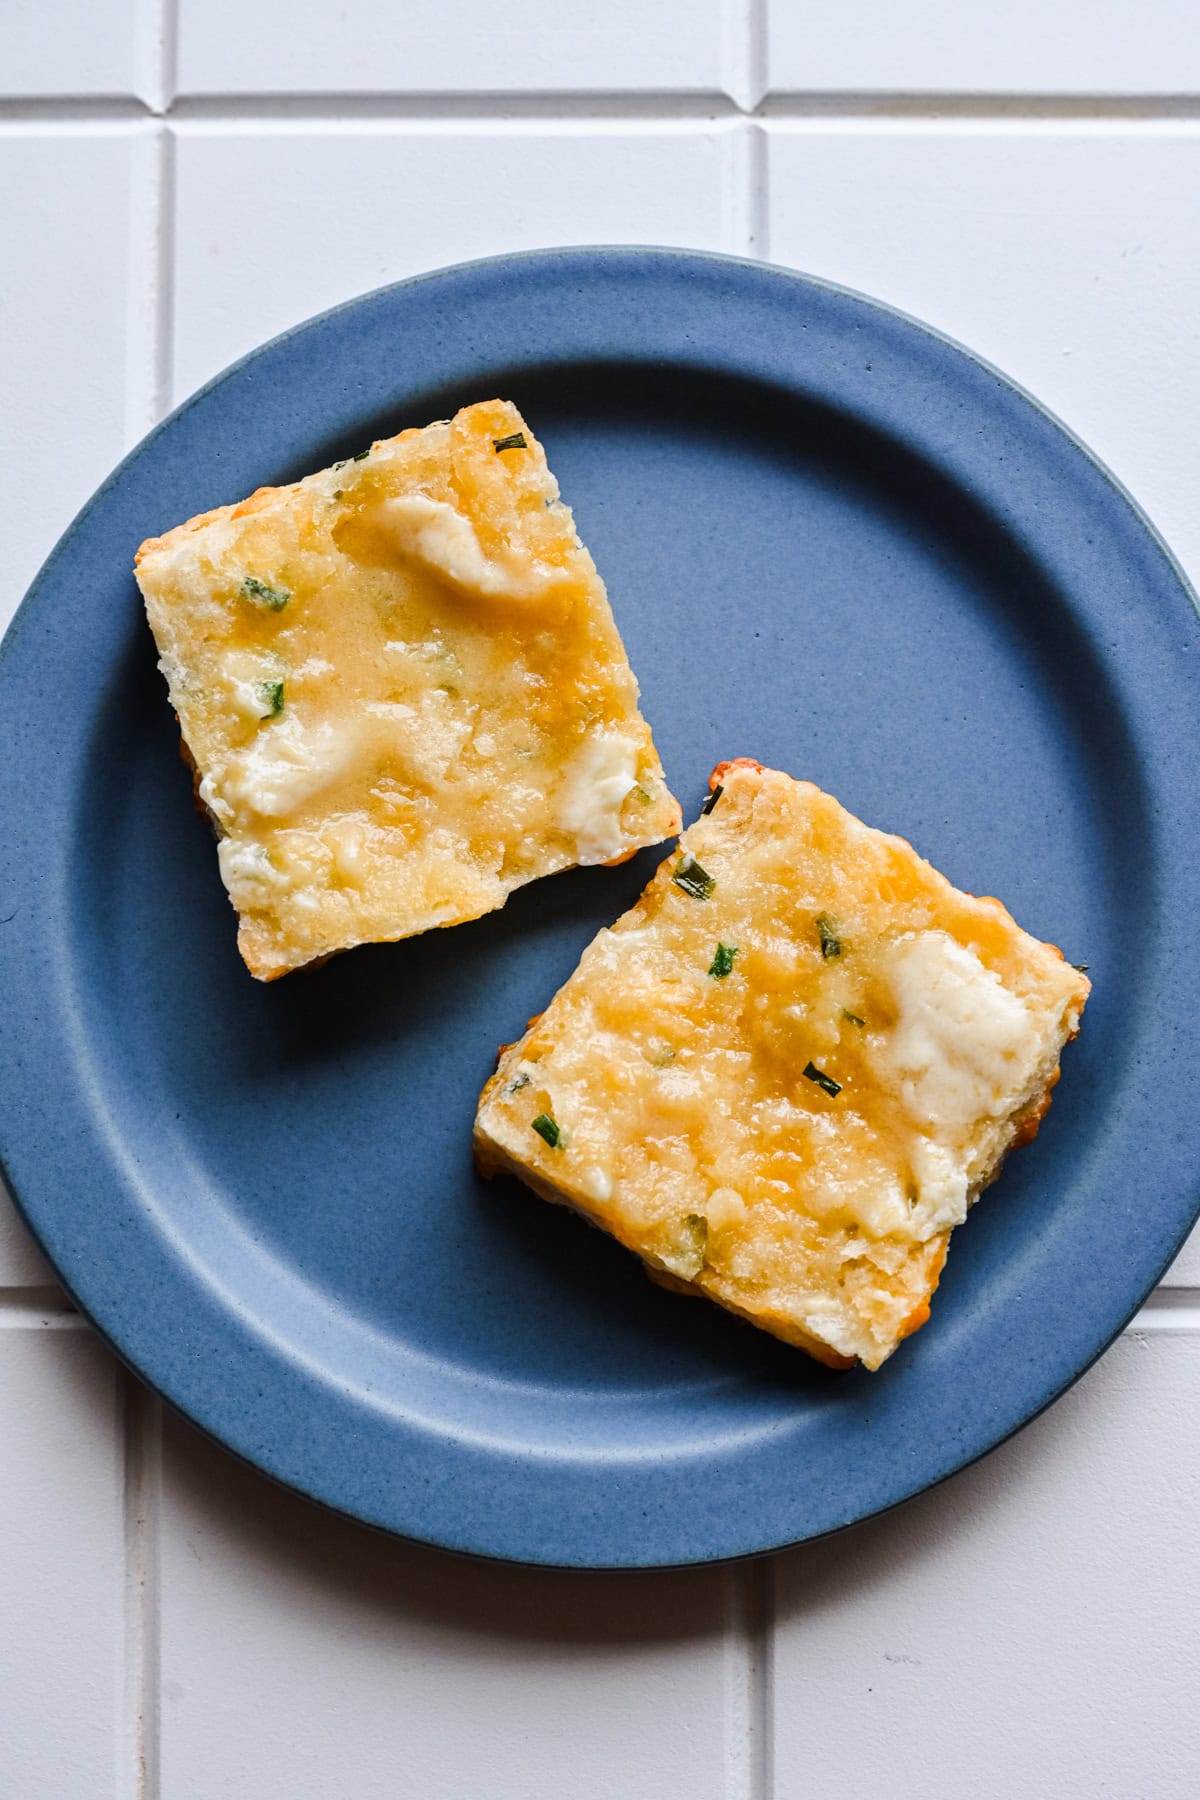
You can serve these biscuits simply with a pat of butter, but they're extra delicious with our roasted garlic butter (recipe below)! The garlic butter can also be made ahead of time and frozen until you're ready to use it. Defrost overnight in the fridge, then let it sit at room temperature for an hour or two before serving with warm biscuits.
These make ahead buttermilk biscuits are also great with savory jams or alongside Thanksgiving gravy. They're also amazing as buns for a breakfast sandwich, or for a holiday leftovers sandwich.
Equipment
When it comes to meal prep containers, you can't go wrong with Zwilling's Fresh & Save containers!
These containers can be vacuum sealed to keep food fresh for up to five times longer than regular containers. We've been using Zwilling's Fresh & Save line for years now, and they're the only storage containers we use - there's a drawer in our house that's filled with them, and our fridge is always packed with Fresh & Save containers!
Best of all, they're dishwasher safe, microwave safe, freezer safe and they come in plenty of sizes. The glass ones that we show here are also oven safe! So go ahead, try them out!
P.S. If you use our code “CROWDED” when purchasing the 7-piece starter set, you’ll receive a free small lunch box!
Storage
If you're freezing these before baking, you can keep them in the freezer for 3-6 months before baking. Once baked, they'll keep for 3-5 days in an airtight container.
To reheat, place back into a 400˚F oven until heated through, about 5-8 minutes.
Tips and FAQ
Make sure to fold your dough
Folding the dough over repeatedly helps to create the layers that make a flaky and delicious biscuit, so don't skip this step!
More tips
- We find that biscuits can burn pretty easily on the bottom. To help prevent this, stack a second sheet pan underneath your sheet pan while baking the biscuits.
- Make sure to use very cold butter and don't overwork it. You want chunks of butter in your dough. These will melt and the water in the butter will evaporate, thus providing some lift to the dough and creating fluffy air pockets. If the butter starts to get melty at any point while you're working with the dough, transfer to the freezer for a few minutes before continuing. If you're not prepping these ahead of time, it's also essential to freeze the biscuits for at least 15 minutes before baking.
- Use a sharp or medium sharp cheddar cheese. The sharper the cheese, the more you'll be able to taste it in the finished product.
More holiday side dish recipes
Looking for other recipes like this? Try these:

Tried this recipe?
Please leave a star ⭐️⭐️⭐️⭐️⭐️ rating below and/or a review in the comments section further down the page. You can also stay in touch with us through social media by following us on Instagram, Pinterest, TikTok, Facebook or by subscribing to our newsletter.
📖 Recipe
Make Ahead Buttermilk Biscuits
- Total Time: 1 hour
- Yield: 12-16 1x
Description
These Make Ahead Buttermilk Biscuits with cheddar and chives are perfect for the holidays! You can make the dough, shape them, then freeze for up to a few months. When it's time to eat, just pop them in the oven straight from the freezer and enjoy!
Ingredients
Biscuits:
- 3 ½ cups all-purpose flour
- 1 tablespoon baking powder
- ¼ teaspoon baking soda
- 1 ½ teaspoon kosher salt
- 1 tablespoon sugar
- 1 cup chilled unsalted butter, cut into cubes
- 1 cup chilled buttermilk
- 2 cups (8 oz) shredded sharp cheddar cheese
- ¼ cup finely chopped chives
Roasted Garlic Butter (optional):
- 1 head of garlic
- Olive oil and salt
- ½ cup (1 stick) of butter, softened to room temperature
- Salt to taste
Instructions
Biscuits:
- Preheat oven to 425˚F.
- In a large bowl, whisk together the flour, baking powder, baking soda, salt and sugar. Cut butter into cubes, and then use a pastry cutter to incorporate the butter until the pieces are about the size of a pea.
- Slowly add in about half of the buttermilk, stirring with a fork or spatula to combine. Fold in the cheddar and chives, then add in the rest of the buttermilk, stirring until a shaggy dough forms. If it's too dry, add another 1-2 tablespoon of buttermilk.
- Lightly knead the dough until it mostly comes together. Pat into a 1" rectangle, then fold the dough in half lengthwise, and then fold again into quarters. Flatten it back into a rectangle, then repeat this process 1-2 more times.
- Pat into a 1" thick rectangle. Trim the edges, and then cut into rectangles. You can cut into 12 larger biscuits or 16 smaller biscuits.
- Freeze for 15 minutes before baking, or if you're making ahead, freeze on a baking sheet, then transfer to Zwilling Fresh and Save vacuum seal container and freeze for 3+ months.
- Just before adding the biscuits to the oven, lower temperature to 400˚F. Brush the top of the biscuits with melted butter or buttermilk, then bake for 20-25 minutes, until golden brown on top. If you're baking straight from frozen, they will need 25+ minutes.
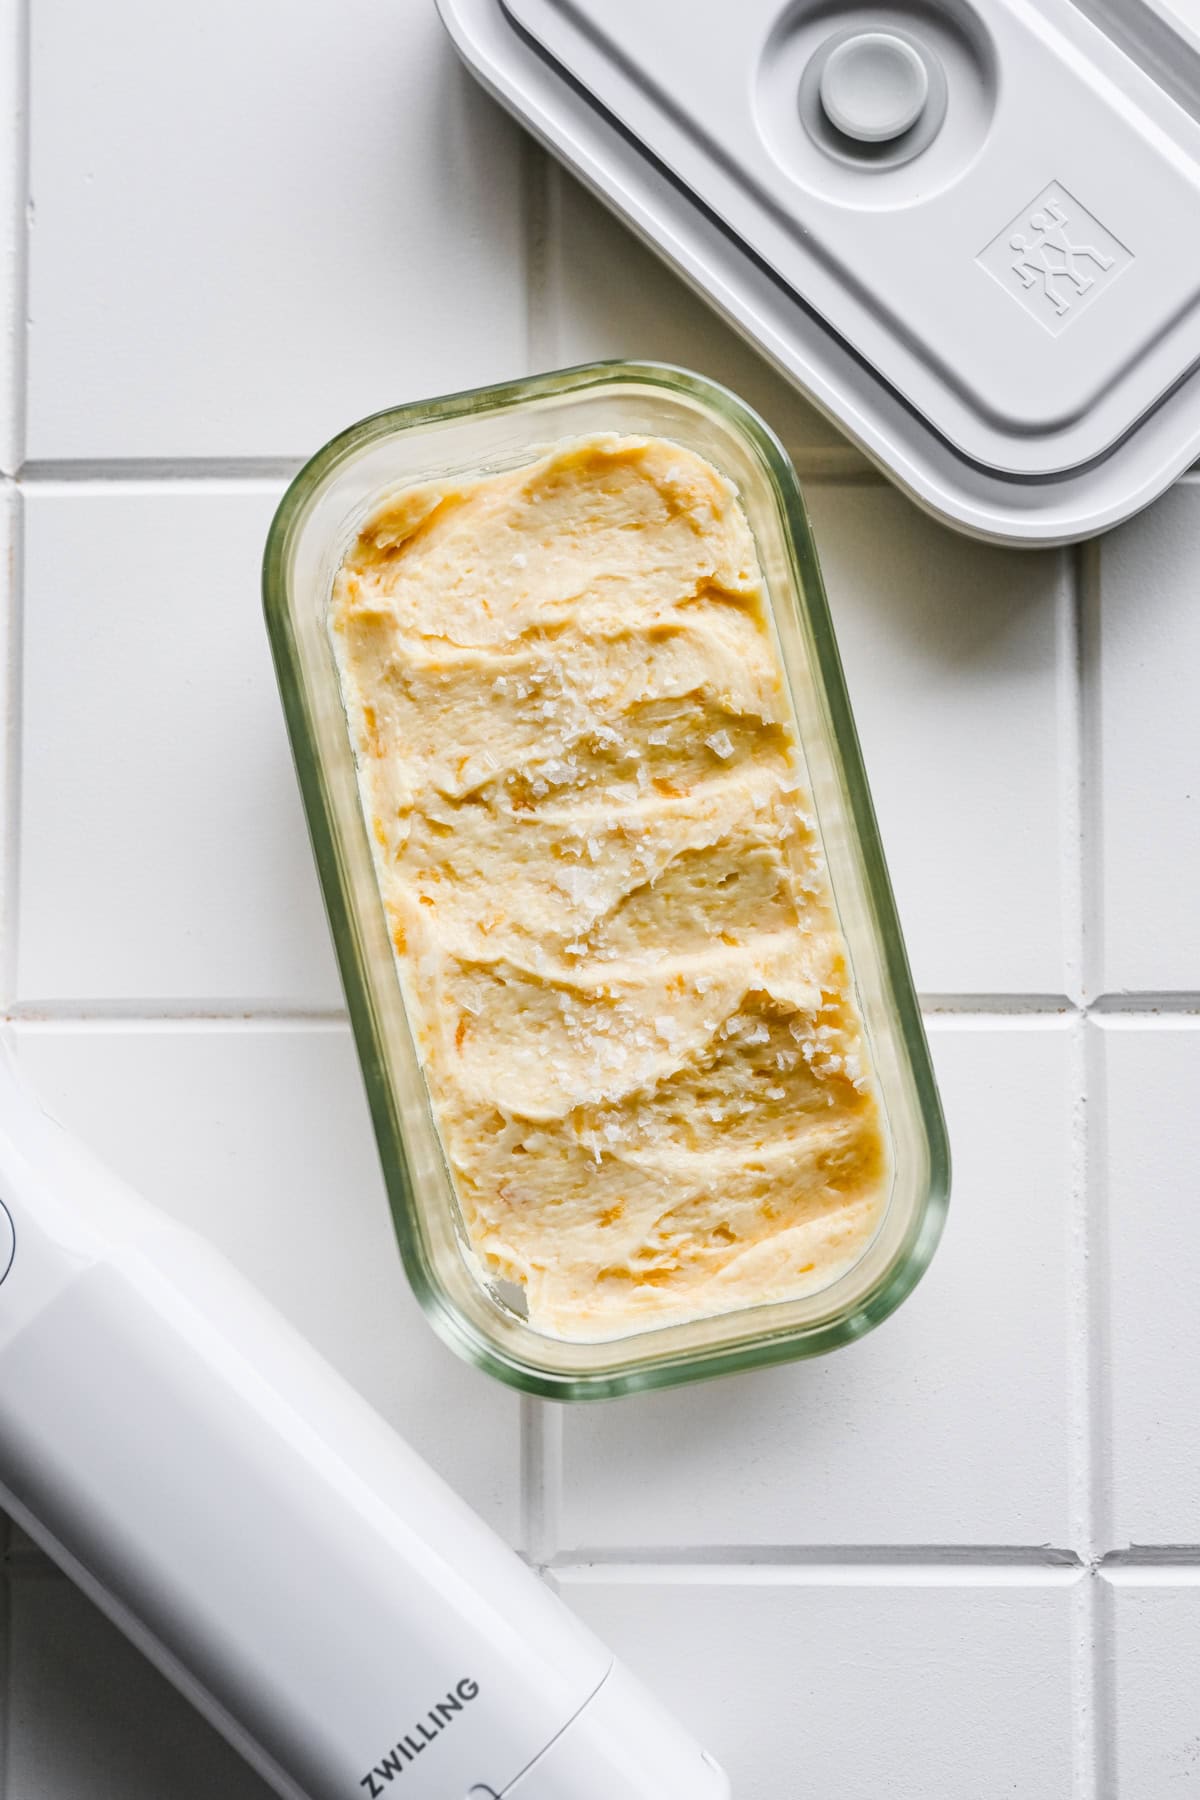
Roasted Garlic Butter (optional):
- Preheat oven to 400˚F.
- Slice the top off of a head of garlic so the cloves are exposed. Drizzle with a small amount of olive oil and season with salt. Wrap in aluminum foil and roast in the oven for 1 hour, until the cloves are golden brown and soft. Let cool to room temperature.
- Squeeze all garlic out into a bowl with the softened butter. Season with salt to taste. (You can also add fresh herbs, black pepper and any other seasonings you'd like!) Stir until well combined.
- Transfer to a container and freeze until the day before you plan to use it. Defrost overnight in the refrigerator, then allow it to soften at room temperature for an hour or two just before serving so it's easy to spread.
Notes
Freezer storage containers: We use these Zwilling Fresh & Save Vacuum Seal Containers! They keep food fresh for up to 5x longer and are freezer, dishwasher, microwave and oven safe.
We find that biscuits can burn pretty easily on the bottom. To help prevent this, stack a second sheet pan underneath your sheet pan while baking the biscuits.
Make sure to use very cold butter and don't overwork it. If the butter starts to get melty at any point while you're working with the dough, transfer to the freezer for a few minutes before continuing. If you're not prepping these ahead of time, it's also essential to freeze the biscuits for at least 15 minutes before baking.
Storage: If you're freezing these before baking, you can keep them in the freezer for 3-6 months before baking. Once baked, they'll keep for 3-5 days in an airtight container.
To reheat, place back into a 400˚F oven until heated through, about 5-8 minutes.
Nutritional information below does not include the roasted garlic butter.
- Prep Time: 35 minutes
- Cook Time: 25 minutes
- Category: Side Dish
- Method: Oven
- Cuisine: American
Nutrition
- Serving Size: 1 biscuit
- Calories: 272
- Sugar: 1.7 g
- Sodium: 247.2 mg
- Fat: 17 g
- Carbohydrates: 23.3 g
- Fiber: 0.8 g
- Protein: 6.7 g
Comments
No Comments
Terrence says
Can you use self rising flour?