
These Grissini (Italian breadsticks) are crunchy, salty, and savory. They're the perfect addition to charcuterie boards and a great companion for almost any dinner!
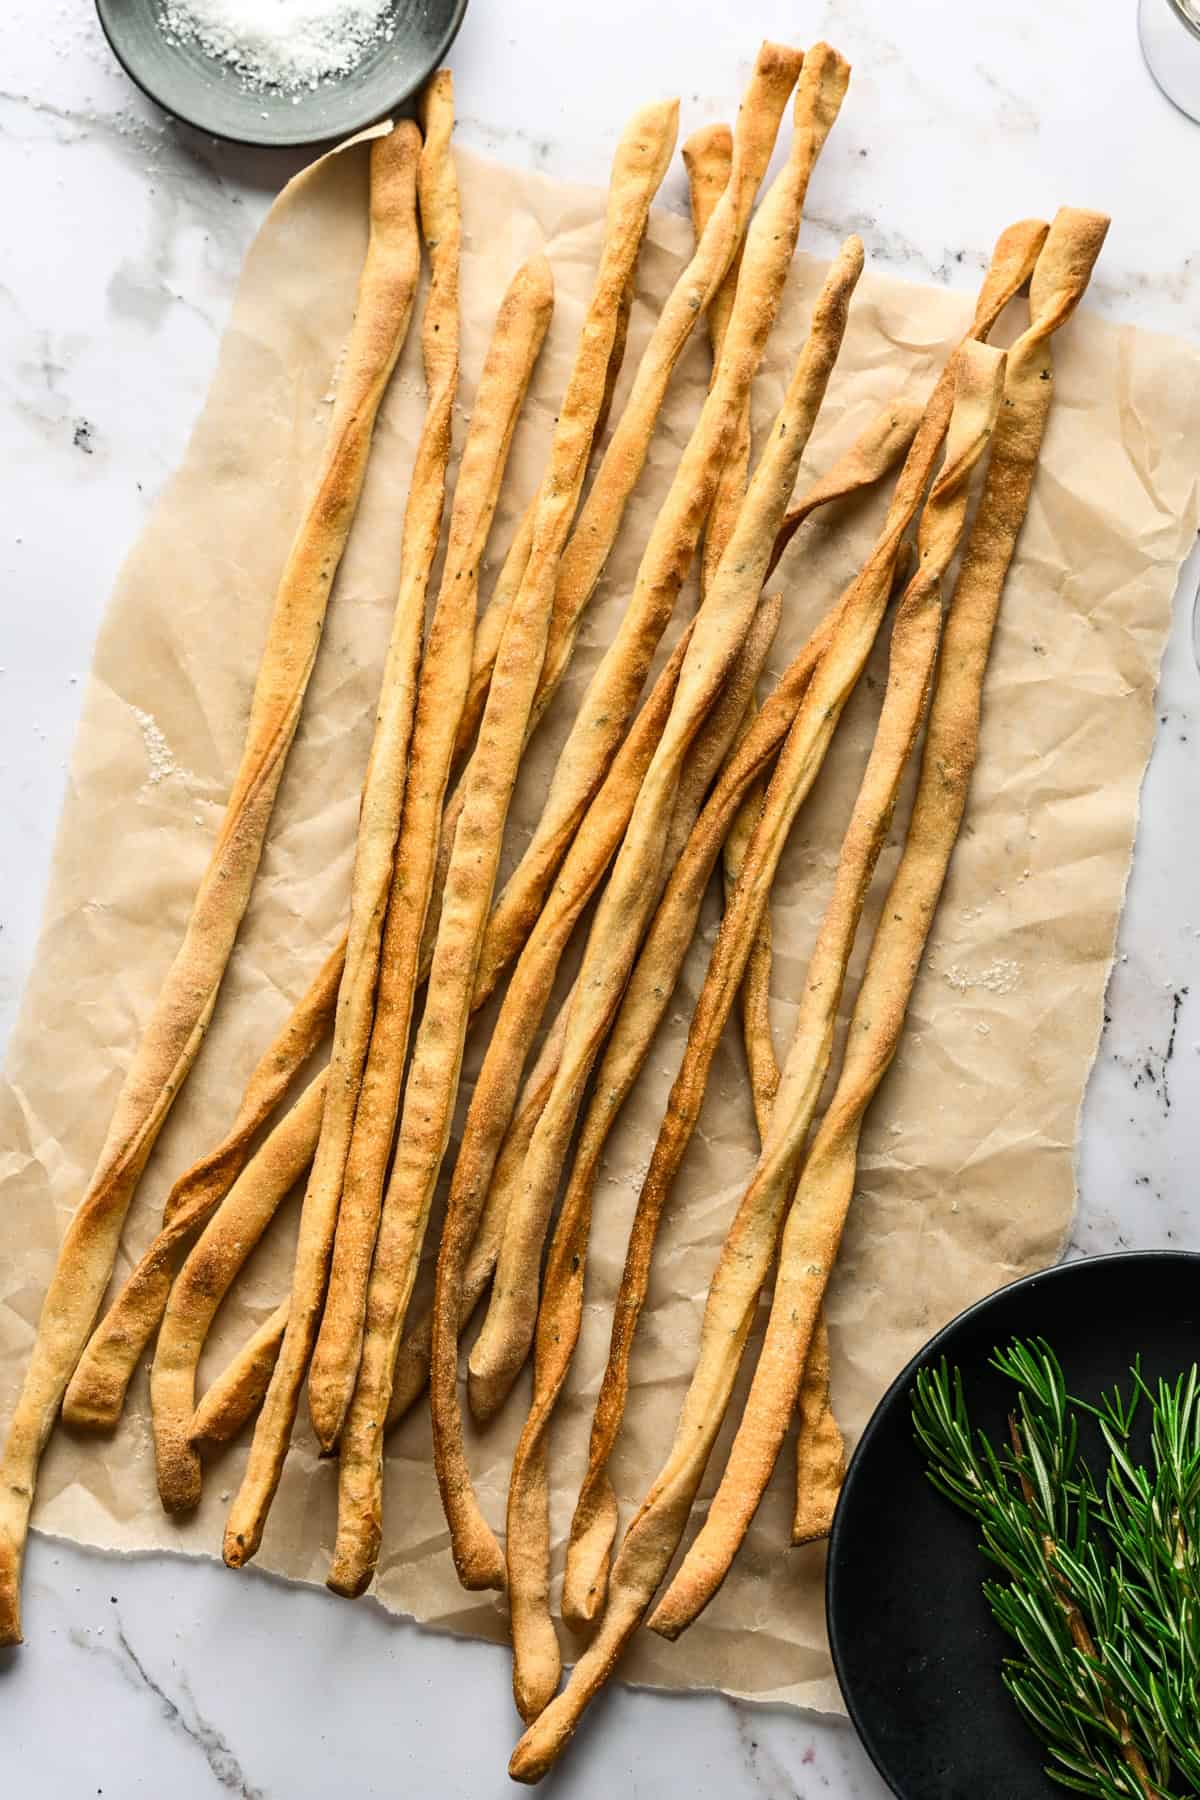
These grissini are just so satisfying to eat - they have the perfect snap, they're super crunchy, and they have just the right about of herbs and salt to give them enough flavor to stand on their own, without overpowering whatever they're dipped into.
This recipe is part of our 2025 Recipe Advent Calendar. If you love to make snacks at home, try our Orange & Pomegranate Pâtes de Fruits or Slice & Bake Cheddar Cheese Coins next!
Jump to:
What You'll Need to Make This Recipe
- Bread flour: Bread flour has a higher protein content than all-purpose flour, resulting in a sturdier, snappier breadstick. In a pinch, all-purpose flour would be ok.
- Rosemary and thyme: We used freshly chopped rosemary and thyme, and chopped them up really small. Since these breadsticks are pretty thin, you don't want big chunks of herbs.
- Semolina flour: This is just used to add a bit of texture to the outside of the breadsticks, but you can skip it if you don't have it
- Active dry yeast
- Regular or extra virgin olive oil
- Kosher salt
- Water
How to Make This Recipe
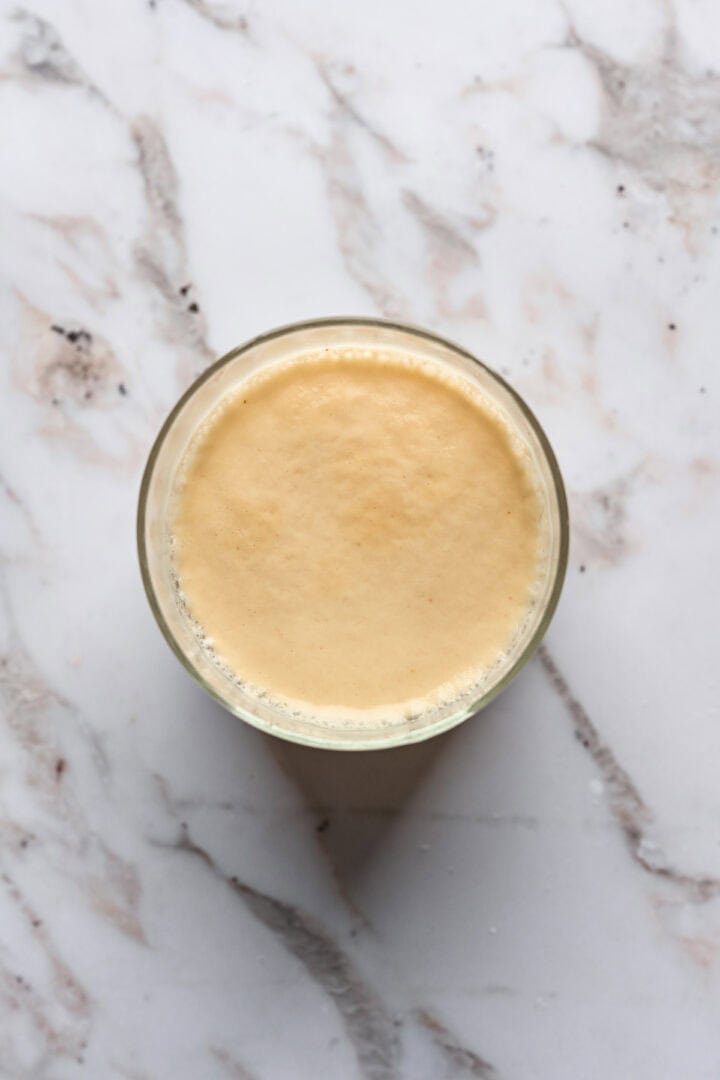
STEP 1: Combine honey and warm water in a small mixing bowl or measuring cup, then pour yeast over the top. Wait about 10 minutes, until yeast forms a foamy head.
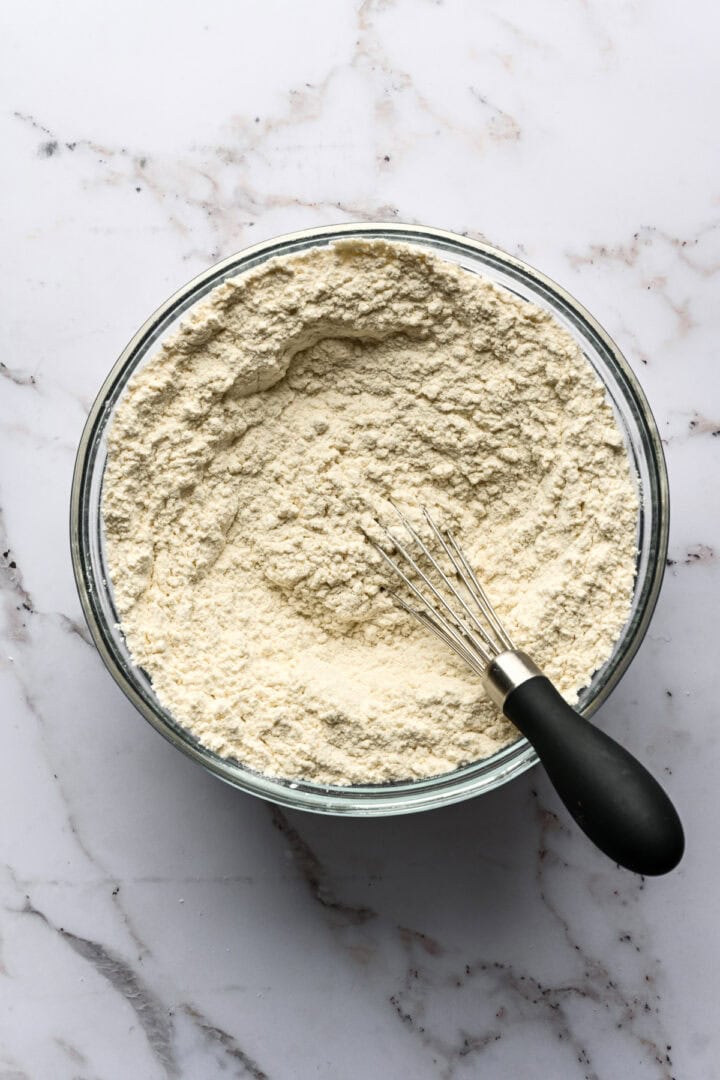
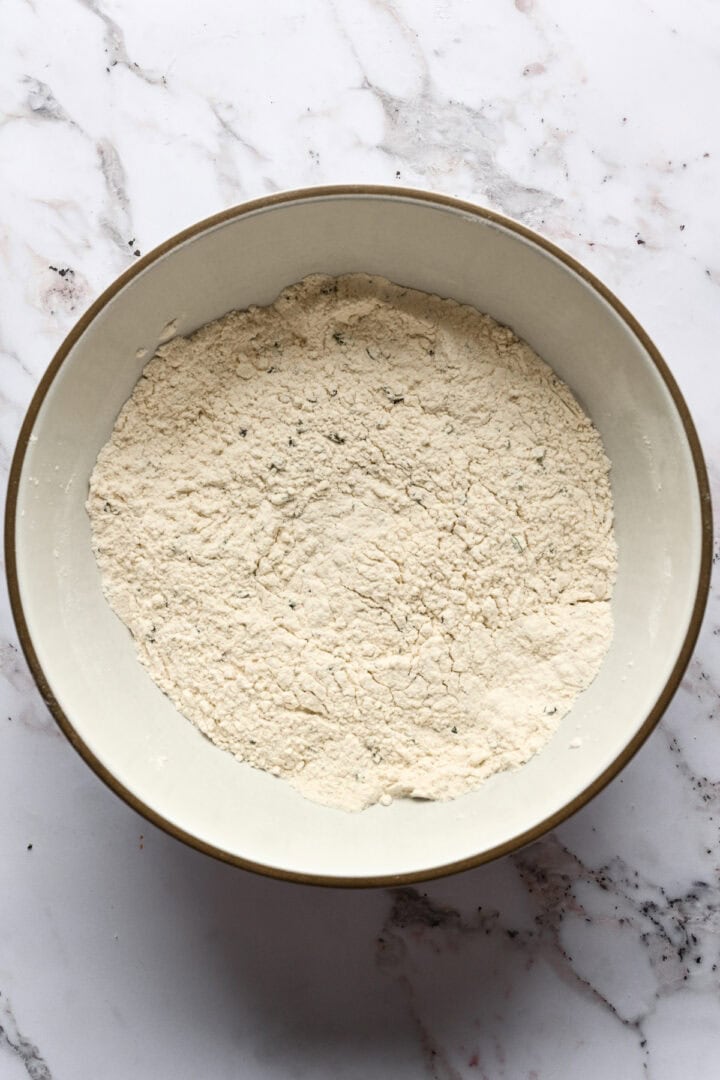
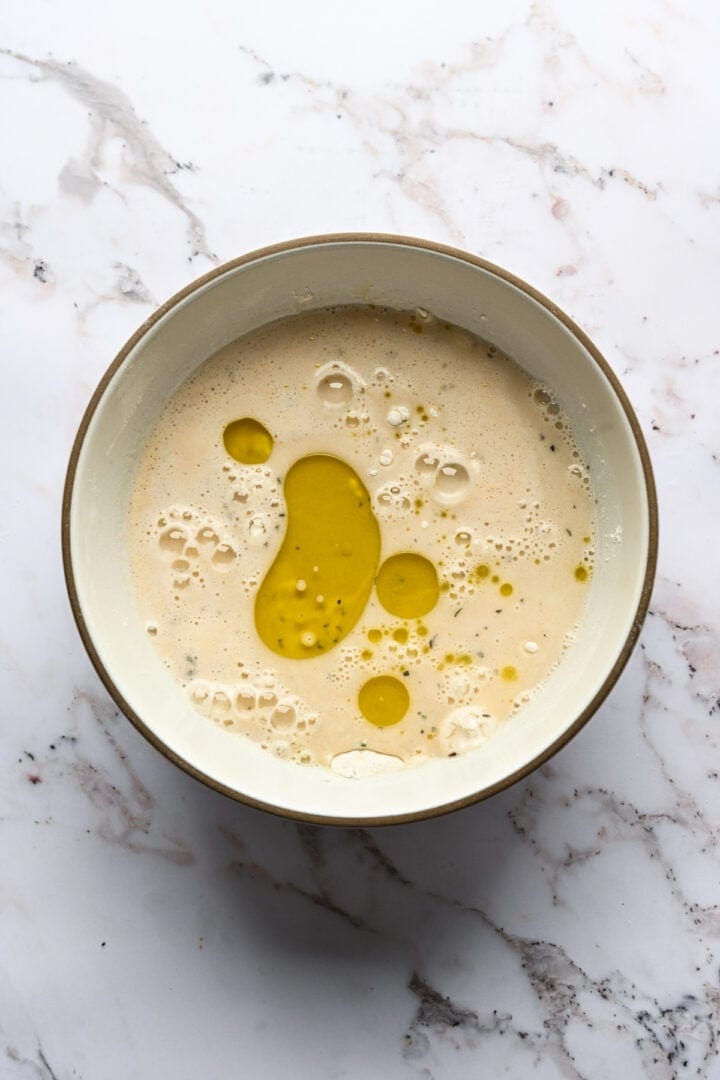
STEP 2: To a large mixing bowl, add the flour, kosher salt, thyme, and rosemary and whisk them together. Pour the yeast mixture over the dry ingredients and add in the olive oil.
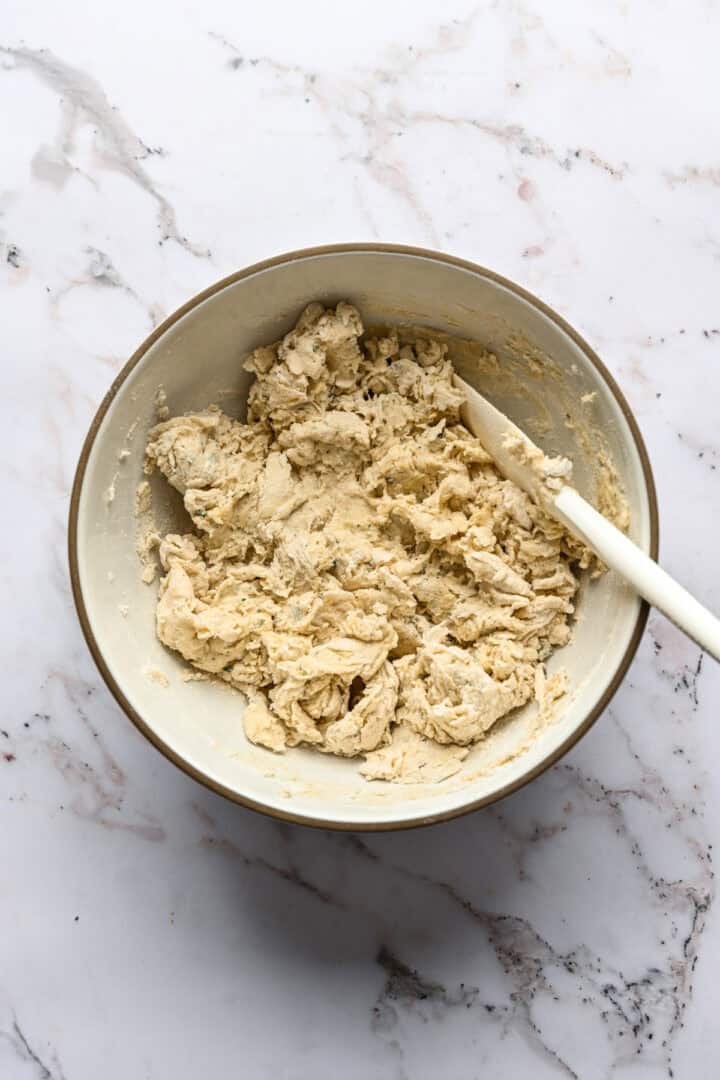
STEP 3: Using a silicone spatula, mix the dough until a somewhat dry and shaggy dough forms.
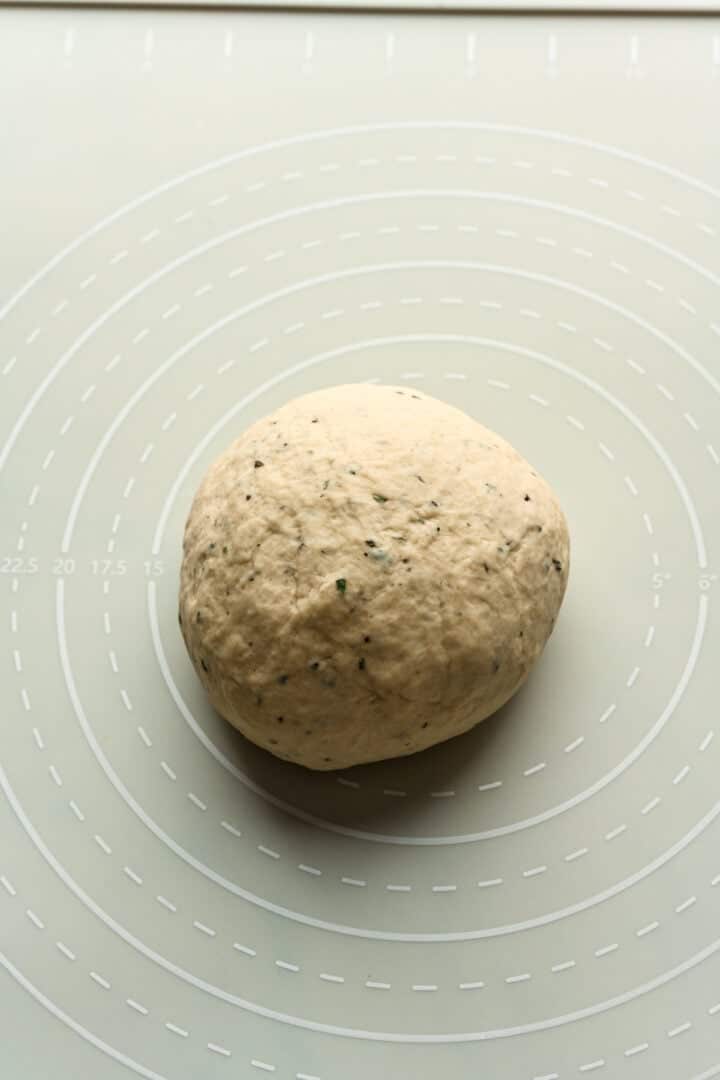
STEP 4: Turn the dough out onto a silicone baking sheet or a lightly floured work surface, and knead the dough until it's relatively smooth and elastic, about 8 minutes. Then cover the dough with plastic wrap and let it rest for about 30 minutes.
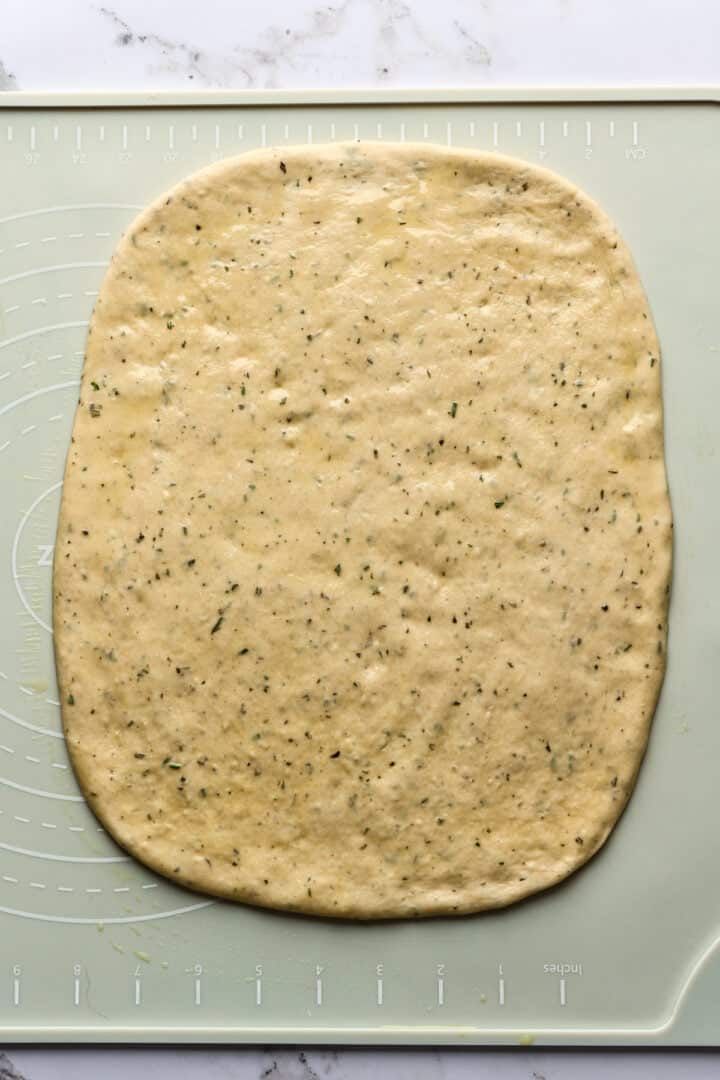
STEP 5: Take the plastic wrap off the dough and use your hands (or a rolling pin) to pat the dough ball into a rectangle that's roughly 8x12-inches (20x30cm). Drizzle a little olive oil on the dough if it's sticking to your hands or the work surface. Cover again with plastic wrap, then let the dough proof for one hour.
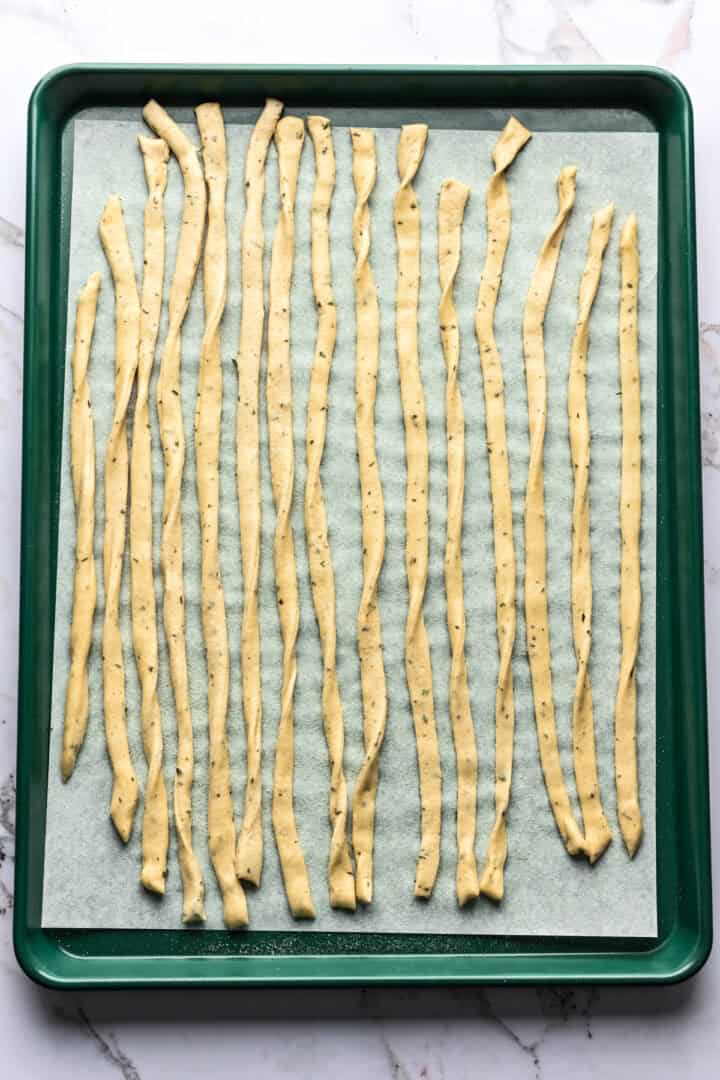
STEP 6: Preheat your oven to 400˚F / 205˚C. Prepare a large rimmed baking sheet with a piece of parchment paper and sprinkle some semolina onto the parchment.
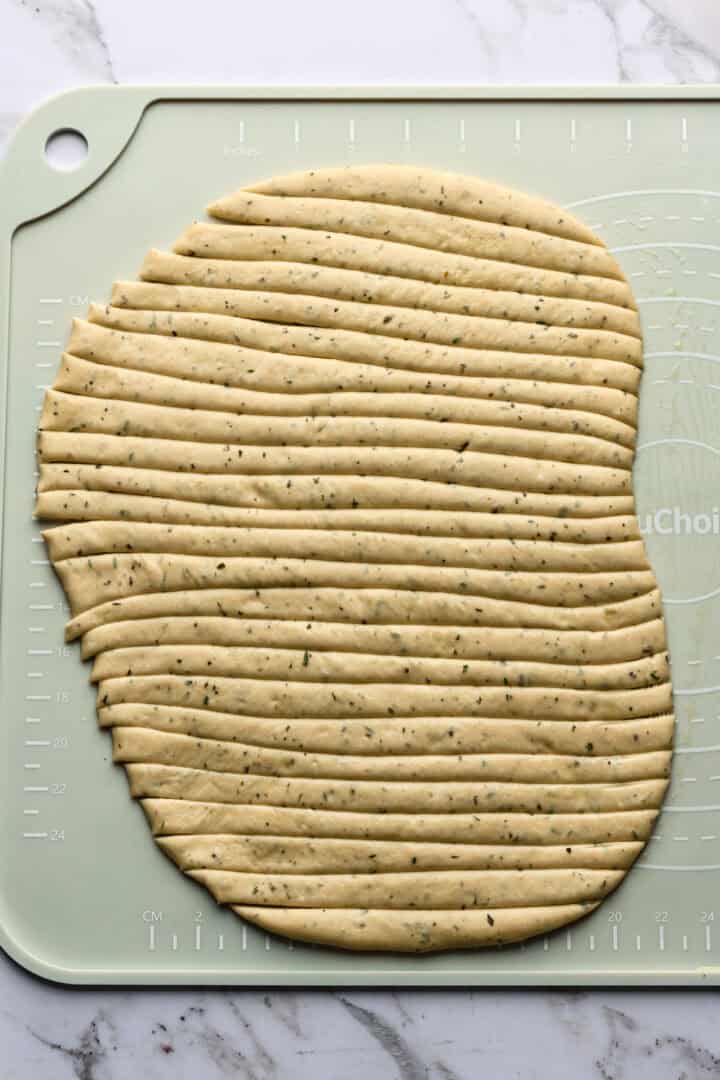
STEP 7: Use a ruler or measuring tape to mark ½ increments along the long (12in) side of your dough rectangle. Using a pizza wheel, pastry cutter, bench scraper, or knife, cut rectangle into strips that are 8 inches long and ½ inch wide. Be sure to separate each strip from the rest of the dough right after cutting it, or they may end up sticking together.
STEP 8: Use your hands to gently stretch and twist the dough strips into breadsticks, then place them down on top of the semolina-dusted parchment paper. They should be about 12-14 inches long after stretching. They don't expand or spread much, so you can leave about ¼" - ½" of room between each breadstick. Sprinkle some more semolina on top of the breadsticks.
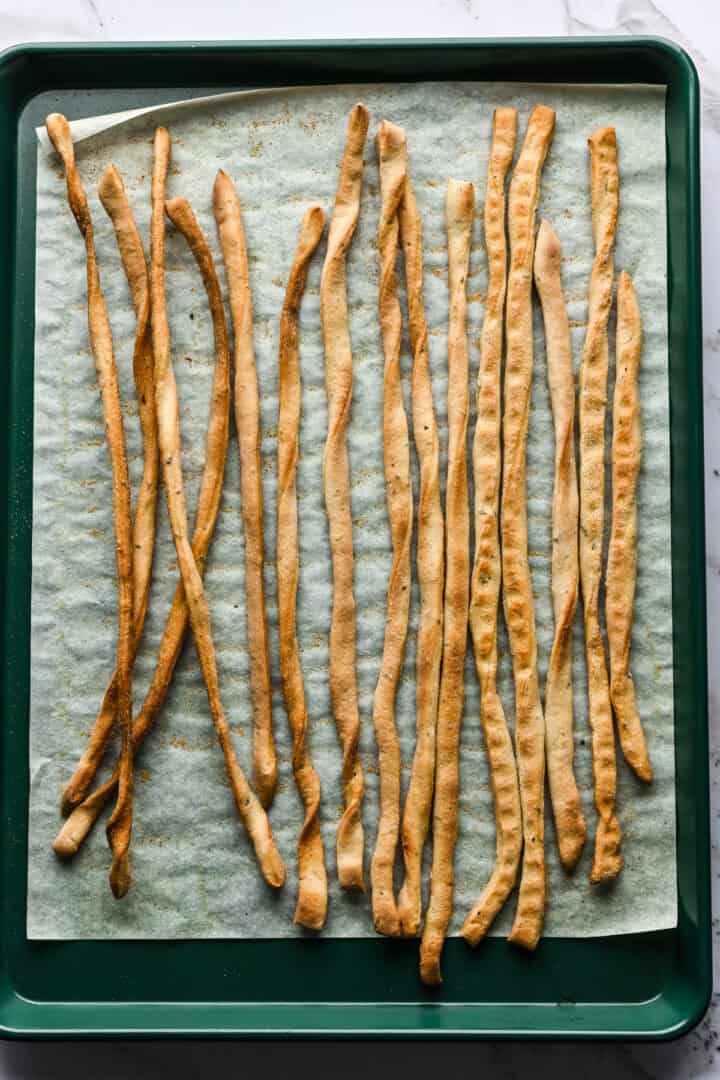
STEP 9: Bake for 10 minutes, then remove from oven and turn the breadsticks over, and bake for an additional 5 minutes. Breadsticks should be slightly browned and crisp.
Lexi and Beth's Best Tips and Tricks
- Cooking time: Your cooking time will vary depending on how thin you stretch your breadsticks. We've found that the cooking time can vary pretty wildly depending on their thickness, so be sure to check the oven after about 8-10 minutes, flipping them carefully if they're starting to brown too much. You're looking for a golden brown color, though some thinner sections of the breadsticks may achieve a darker color.
- How to serve: These are great as the star cracker of a charcuterie board, where they can be enjoyed alongside olives, prosciutto, butter, and cheeses.
- Substitutions: If rosemary and thyme aren't your favorite, you can replace with equal quantities whatever herbs you prefer, or just leave out the herbs entirely.
Storage
- These breadsticks can end up being too long for traditional containers, so we recommend putting them in a gallon-sized plastic bag, where they'll keep for a few days before getting stale.
Frequently Asked Questions
Grissini dates back to the 17th century, specifically from Turin in the piedmont region of Italy.
More crunchy snacks to try...

📖 Recipe
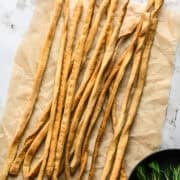
Rosemary and Thyme Grissini (Crunchy Italian Breadsticks)
- Total Time: 1 hour 55 minutes
- Yield: 24 breadsticks 1x
- Diet: Vegan
Description
These Grissini (Italian breadsticks) are crunchy, salty, and savory. They're the perfect addition to charcuterie boards and a great companion for almost any dinner!
Ingredients
- 1 teaspoon active dry yeast
- 1 teaspoon sugar or honey
- ¾ cup warm (95˚F / 35˚ C) water
- 2 ¼ cups bread flour*
- 1 tablespoon olive oil
- 2 teaspoons kosher salt
- 1 ½ teaspoons finely chopped fresh chopped thyme
- 1 ½ teaspoons finely chopped fresh chopped rosemary
- Semolina, for dusting (optional)
Instructions
- Combine the honey and warm water in a small mixing bowl or measuring cup, then sprinkle the yeast over the top. Wait about 10 minutes, until yeast forms a foamy head.
- To a large mixing bowl, add the flour, salt, thyme, and rosemary and whisk to combine. Add in the yeast mixture and olive oil.
- Using a silicone spatula, mix the dough until a shaggy dough forms.
- Turn the dough out onto a silicone baking sheet or a lightly floured work surface, and knead the dough until it's smooth and elastic, about 8 minutes. Cover the dough with plastic wrap and let it rest for about 30 minutes.
- Take the plastic wrap off the dough and use your hands to pat the dough ball into a rectangle that's roughly 8x12-inches (20x30cm). Drizzle a little olive oil on the dough if it's sticking to your hands or the work surface. Cover again with plastic wrap, then let the dough proof for one hour.
- Preheat your oven to 400˚F / 205˚C. Prepare a large rimmed baking sheet with a piece of parchment paper and sprinkle some semolina onto the parchment.
- Use a ruler or measuring tape to mark ½-inch increments along the long (12in) side of your dough rectangle. Using a pizza wheel, pastry cutter, bench scraper, or knife, cut rectangle into strips that are 8 inches long and ½ inch wide. Be sure to separate each strip from the rest of the dough right after cutting it, or they may end up sticking together.
- Use your hands to gently stretch and twist the dough strips into breadsticks, then place them down on top of the semolina-dusted parchment paper. They should be about 12-14 inches long after stretching. They don't expand or spread much, so you can leave about ¼" - ½" of room between each breadstick. Sprinkle some more semolina on top of the breadsticks.
- Bake for 10 minutes, then remove from oven and turn the breadsticks over, and bake for an additional 5 minutes. Breadsticks should be slightly browned and crisp.
Notes
Storage: These breadsticks can end up being too long for traditional containers, so we recommend putting them in a gallon-sized plastic bag, where they'll keep for a few days before getting stale. (Or, break them in half to fit in a standard size container!)
*Bread flour: Bread flour has a higher protein content than all-purpose flour, resulting in a sturdier, snappier breadstick. In a pinch, all-purpose flour is okay.
Semolina: This is just for adding a little bit of texture to the exterior of the breadsticks and you can leave it out if you don't have it.
This recipe is adapted from Marcellina's recipe.
- Prep Time: 100 minutes
- Cook Time: 15 minutes
- Category: Baking
- Method: Oven
- Cuisine: Italian
Nutrition
- Serving Size: 3 breadsticks
- Calories: 249
- Sugar: 1.3 g
- Sodium: 321.7 mg
- Fat: 2.9 g
- Carbohydrates: 47.3 g
- Fiber: 2.5 g
- Protein: 8 g


Comments
No Comments