
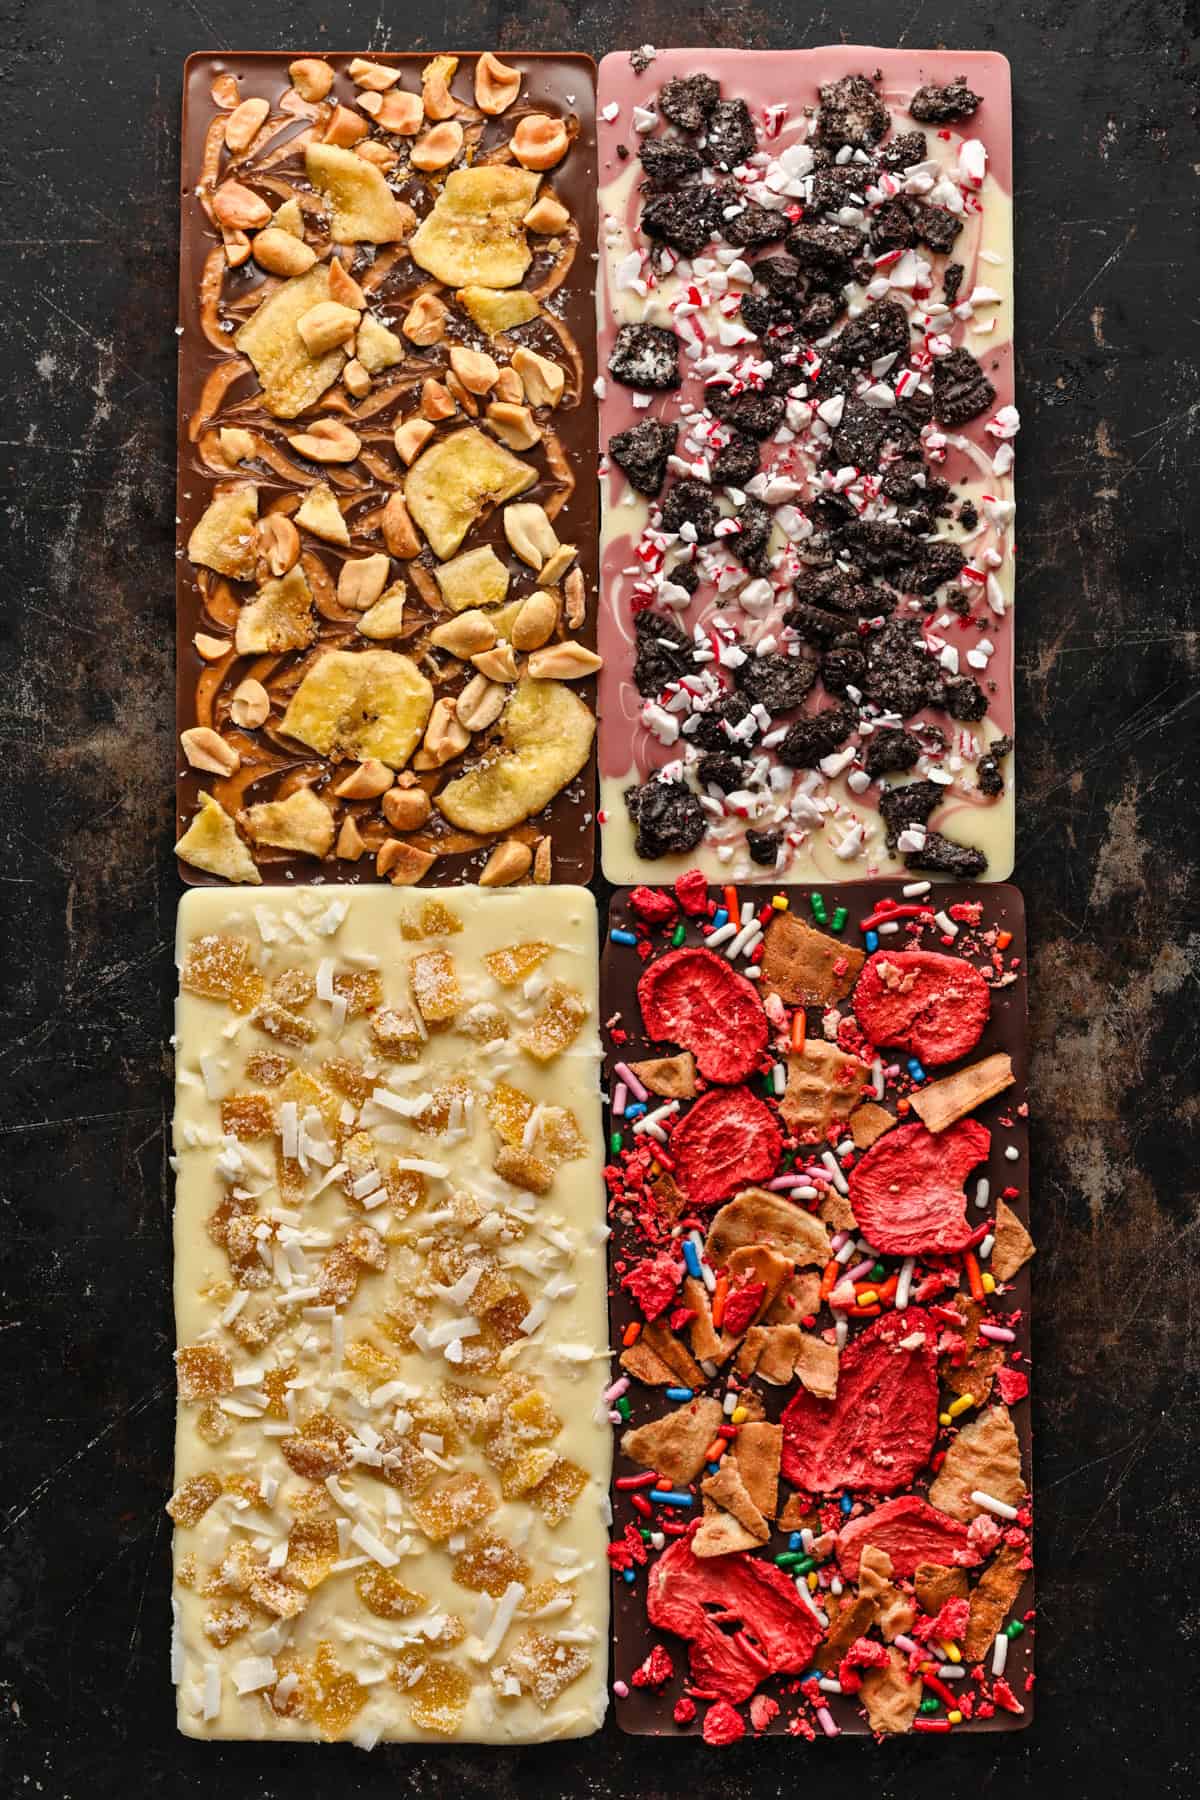
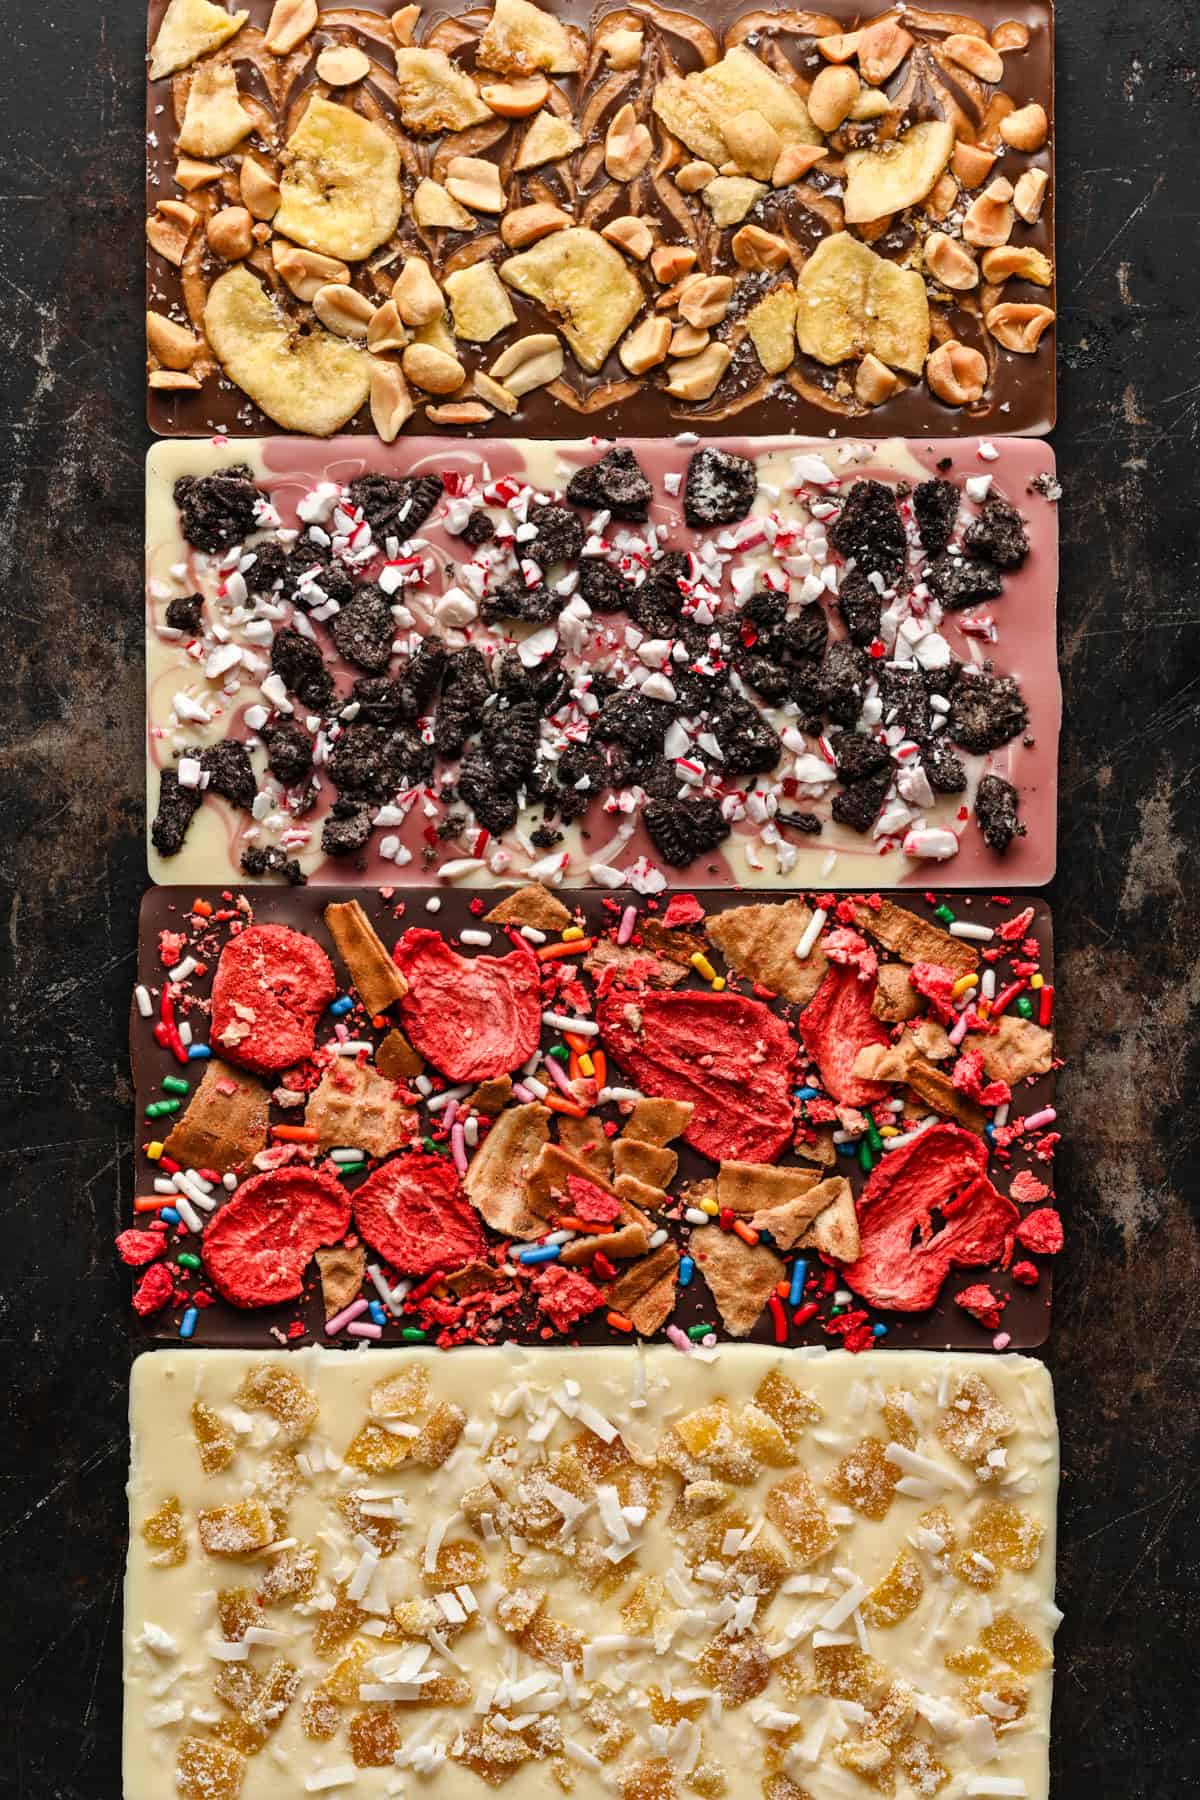
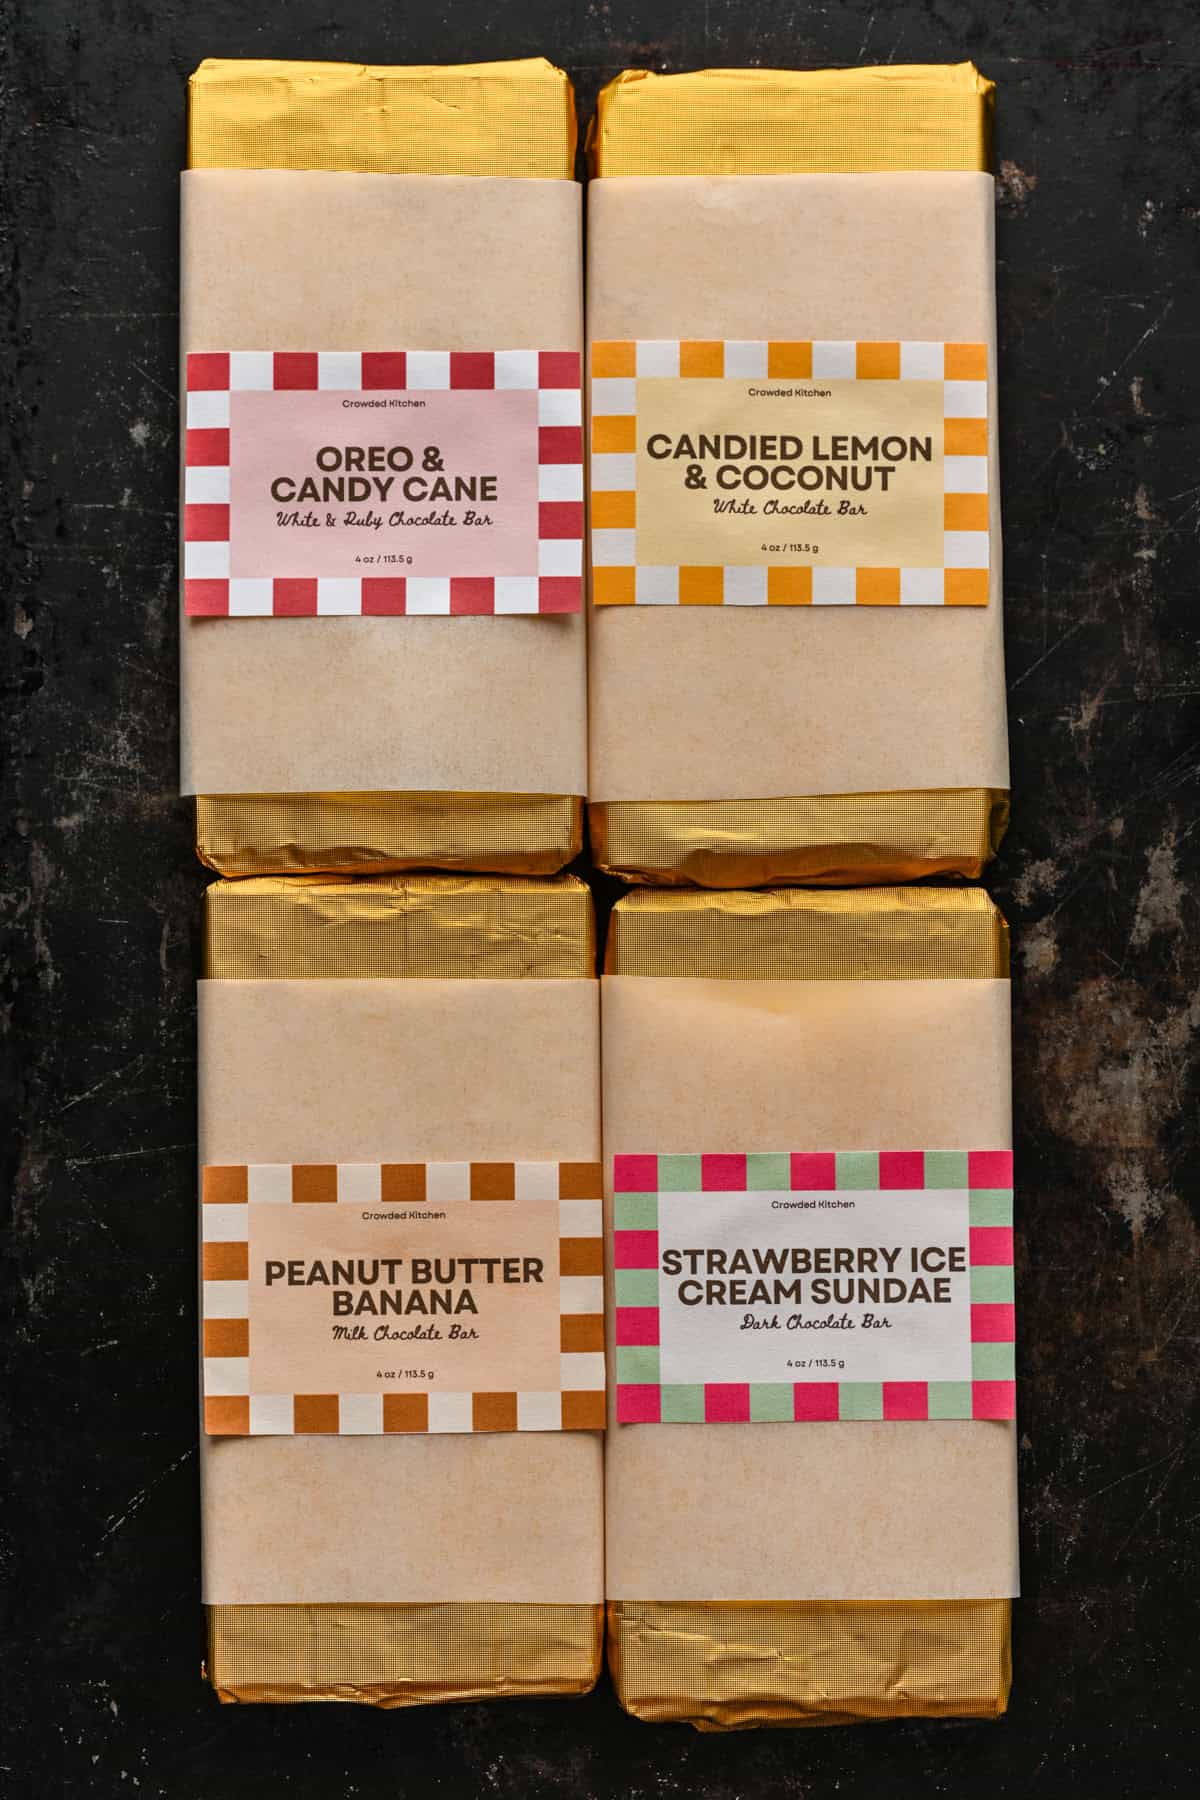
These beautiful homemade chocolate bars are easy to make and are a great DIY gift for the holidays (or any occasion!). We made four flavors: Oreo & Candy Cane, Peanut Butter Banana, Candied Lemon & Coconut and Strawberry Ice Cream Sundae, but the options are endless. Download our free, printable labels below!
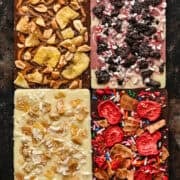
These are so easy to make with an inexpensive silicone chocolate mold! But if you don't have chocolate molds, you can also make these into chocolate bark. Spread the chocolate onto a parchment paper lined sheet pan to your desired size, add the toppings and let it set before breaking it up into smaller pieces.
Jump to:
The four flavors we made include:
- Oreo & Candy Cane: Striped ruby and white chocolate with oreos and crushed candy canes
- Candied Lemon & Coconut: White chocolate with candied lemon peel and shreded coconut
- Strawberry Ice Cream Sundae: Dark chocolate with freeze dried strawberries, waffle cone and sprinkles
- Peanut Butter Banana: Milk Chocolate with peanut butter, banana chips, peanuts and flaky salt
If you're looking for more homemade food gifts, try our Homemade Ferrero Rocher or Sweet and Savory Rosemary Roasted Nuts.
What You Need To Make This Recipe
- Chocolate: You can really use any chocolate you'd like in this recipe. We used 4 different varieties – white chocolate, ruby chocolate, dark chocolate and milk chocolate. Whatever kind of chocolate you choose, purchase chocolate in bar form instead of chocolate chips. Chocolate chips often contains stabilizers that make it more difficult to temper.
- Toppings: Again, the options are endless here!
- Chocolate molds: These are the ones we use.
- Candy thermometer: This is essential for tempering chocolate correctly.
- Foil for wrapping: The chocolate molds we use come with gold foil for wrapping your chocolate bars! You could also use clear cellophane wrap (so you can see the flavors) or wax paper.
- Parchment paper: After wrapping these in foil, I use double sided tape to adhere a parchment paper sleeve around the chocolate bar. This is optional, but keeps the foil from tearing and makes it easier to affix a label.
- Labels:
How to Temper Chocolate
Tempering chocolate creates a stable structure of cocoa butter crystals, which is what gives a chocolate bar its characteristic shine and satisfying snap. If you don't temper chocolate, it will be dull and melty at room temperature. Tempering chocolate can be a bit temperamental (pun intended!), so it's okay to skip this step, but keep in mind that these will not turn out as professional.
In a double boiler fitted with a candy thermometer, melt ⅔ of your chocolate to the "Melt To" temperature listed in the table below, stirring constantly.
Add the reserved ⅓ of the unmelted chocolate to the melted mixture and stir, cooling the chocolate to the "Cool To" temperature listed in the table below.
Continue stirring over low heat, warming the chocolate to the "Working Temp" listed in the table below.
Tempering Temperatures by Chocolate Type
| Chocolate | Melt To | Cool To | Working Temp |
|---|---|---|---|
| Dark | 45–50°C / 113–122°F | 27–28°C / 80–82°F | 31–32°C / 88–90°F |
| Milk | 40–45°C / 104–113°F | 26–27°C / 78–80°F | 29–30°C / 84–86°F |
| White | 40–45°C / 104–113°F | 25–26°C / 77–79°F | 28–29°C / 82–84°F |
| Ruby | 40–45°C / 104–113°F | 25–26°C / 77–79°F | 28–29°C / 82–84°F |
How to assemble homemade chocolate bars
Arrange your molds on a clean cookie sheet for easy transport.
Pour the melted, tempered chocolate into the mold. Lift up the cookie sheet and gently tap it to the countertop to help remove any bubbles and level out the chocolate in the mold.
Sprinkle your bar with toppings. Let set completely before removing from molds.
There are a few special steps for the ruby/white chocolate bar and the peanut butter bar.
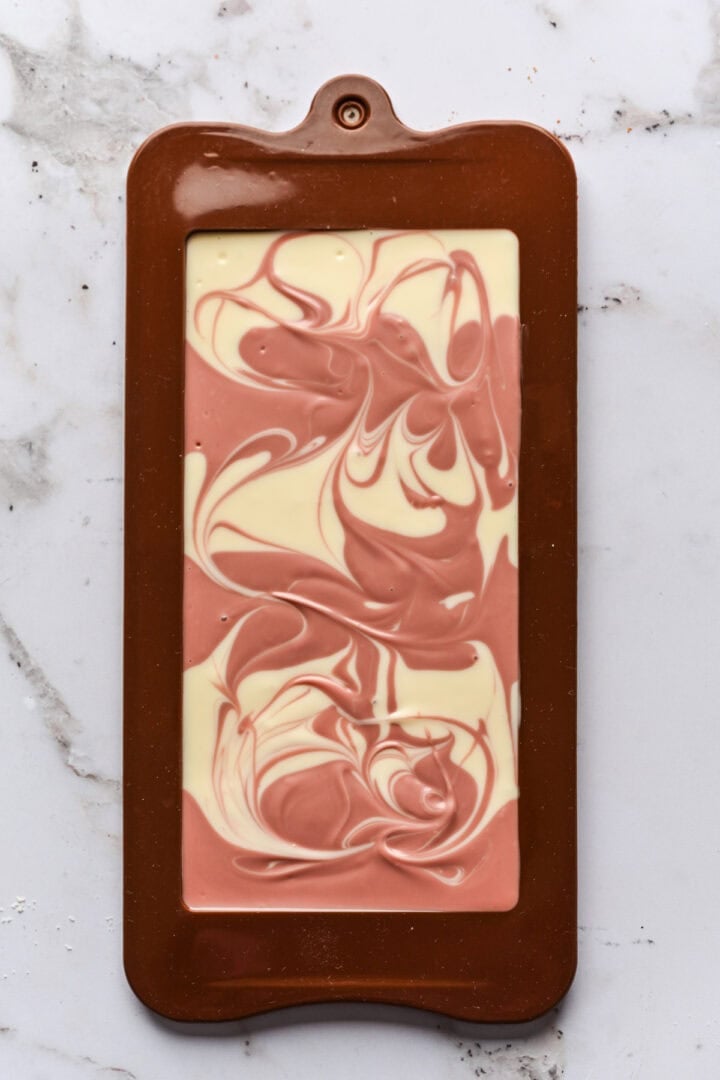
For the ruby/white chocolate: Spoon the melted ruby chocolate into a piping bag or Ziplock. Repeat with white chocolate. Snip the corners of the bags to make a small hole.
Pipe a line of ruby chocolate into the mold, repeat with white chocolate. Continue to fill the mold, making a stripe pattern. Continue by adding the toppings as usual.

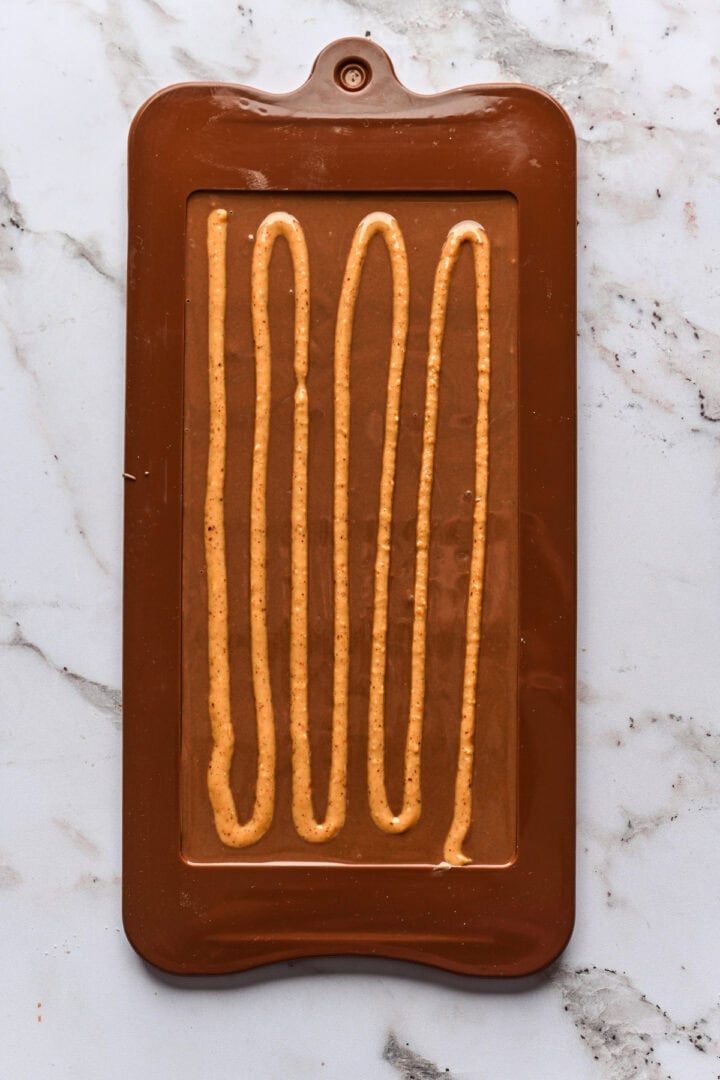
For the peanut butter: Spoon some peanut butter into into a piping bag or Ziplock. Snip the corner of the bag to make a very small hole.
Pipe the peanut butter into thin lines, and use a toothpick to drag through the bar, making a feathered pattern. Continue by adding the toppings as usual.

Storage
You can keep these stored wrapped tightly at room temperature for several months. If you don't temper the chocolate, we suggest storing in the refrigerator, as the chocolate will become soft and melty at room temperature.
Printable Labels
We made free, printable labels for all four flavors of these chocolate bars! Click the button below to print them.
More Homemade Food Gifts


📖 Recipe
Homemade Chocolate Bars (4 Ways)
- Total Time: 45 minutes
- Yield: 4 large chocolate bars 1x
- Diet: Vegetarian
Description
These beautiful homemade chocolate bars are easy to make and are a great DIY gift for the holidays (or any occasion!). We made four flavors: Oreo & Candy Cane, Peanut Butter Banana, Candied Lemon & Coconut and Strawberry Ice Cream Sundae, but the options are endless. Download our free, printable labels below!
Ingredients
Ruby and White Chocolate Bar with Peppermint and Oreos
- 2oz ruby chocolate
- 2oz white chocolate
- candy canes, crushed
- Oreos, crushed
White Chocolate Bar with Candied Lemon and Coconut
- 3.5oz bar white chocolate
- candied lemon peel, finely chopped
- shredded coconut
Milk Chocolate Bar with Banana Chips, Peanut Butter and Peanuts
- 3.5oz bar milk chocolate
- banana chips, lightly crushed
- peanut butter
- peanuts, chopped
- flakey sea salt
Dark Chocolate Bar with Waffle Cones, Strawberries and Sprinkles
- 3.5oz bar dark chocolate
- waffle cones, crushed
- freeze dried strawberries, lightly crushed
- sprinkles
Instructions
Guide for Tempering Chocolate (you can skip tempering, but keep in mind that your chocolate will not have that characteristic snap of a chocolate bar, and it will be soft):
- In a double boiler fitted with a candy thermometer, melt ⅔ of your chocolate to the "Melt To" temp listed in the table below, stirring constantly.
- Add the reserved ⅓ of the unmelted chocolate to the melted mixture and stir, cooling the chocolate to the "Cool To" temp listed in the table below.
- Continue stirring over low heat, warming the chocolate to the "Working Temp" listed in the table below.
Tempering Temperatures by Chocolate Type
| Chocolate | Melt To | Cool To | Working Temp |
|---|---|---|---|
| Dark | 45–50°C / 113–122°F | 27–28°C / 80–82°F | 31–32°C / 88–90°F |
| Milk | 40–45°C / 104–113°F | 26–27°C / 78–80°F | 29–30°C / 84–86°F |
| White | 40–45°C / 104–113°F | 25–26°C / 77–79°F | 28–29°C / 82–84°F |
| Ruby | 40–45°C / 104–113°F | 25–26°C / 77–79°F | 28–29°C / 82–84°F |
Ruby and White Chocolate Bar with Peppermint and Oreos
- Optional: temper your chocolate.
- Arrange your mold on a clean baking sheet for easy transport. Spoon the melted ruby chocolate into a piping bag or Ziplock. Repeat with white chocolate. Snip the corners of the bags to make a small hole.
- Pipe a line of ruby chocolate into the mold, repeat with white chocolate. Continue to fill the mold, making a stripe pattern. Lift up the cookie sheet and gently tap it to the countertop to help remove any bubbles and level out the chocolate in the mold.
- Sprinkle your bar with toppings. Let set completely before removing from molds.
White Chocolate Bar with Candied Lemon and Coconut
- Optional: temper your chocolate.
- Arrange your mold on a clean cookie sheet for easy transport. Pour the melted chocolate into mold. Lift up the cookie sheet and gently tap it to the countertop to help remove any bubbles and level out the chocolate in the mold.
- Sprinkle your bar with toppings. Let set completely before removing from molds.
Milk Chocolate Bar with Banana Chips, Peanut Butter and Peanuts
- Optional: temper your chocolate.
- Arrange your mold on a clean cookie sheet for easy transport. Pour the melted chocolate into mold. Lift up the cookie sheet and gently tap it to the countertop to help remove any bubbles and level out the chocolate in the mold.
- Spoon some peanut butter into into a piping bag or Ziplock. Snip the corner of the bag to make a very small hole.
- Pipe the peanut butter into thin lines, and use a toothpick to drag through the bar, making a feathered pattern. Sprinkle your bar with toppings.
- Let set completely before removing from molds.
Dark Chocolate Bar with Waffle Cones, Strawberries and Sprinkles
- Optional: temper your chocolate.
- Arrange your mold on a clean cookie sheet for easy transport. Pour the melted chocolate into mold. Lift up the cookie sheet and gently tap it to the countertop to help remove any bubbles and level out the chocolate in the mold.
- Sprinkle your bar with toppings. Let set completely before removing from molds.
Notes
These are the chocolate molds we use.
Download our free, printable labels HERE.
You can keep these stored wrapped tightly at room temperature for several months. If you don't temper the chocolate, we suggest storing in the refrigerator, as the chocolate will become soft and melty at room temperature.
If you don't have chocolate molds, you can also make these into chocolate bark. Spread the chocolate onto a parchment paper lined sheet pan to your desired size, add the toppings and let it set before breaking it up into smaller pieces. It still looks beautiful!
- Prep Time: 15 minutes
- Cook Time: 30 minutes
- Category: Desserts
- Method: Stovetop
- Cuisine: American
Nutrition
- Serving Size:
- Calories: 2649
- Sugar: 237.1 g
- Sodium: 394 mg
- Fat: 159.9 g
- Carbohydrates: 281.3 g
- Fiber: 19.7 g
- Protein: 33.9 g

Comments
No Comments