
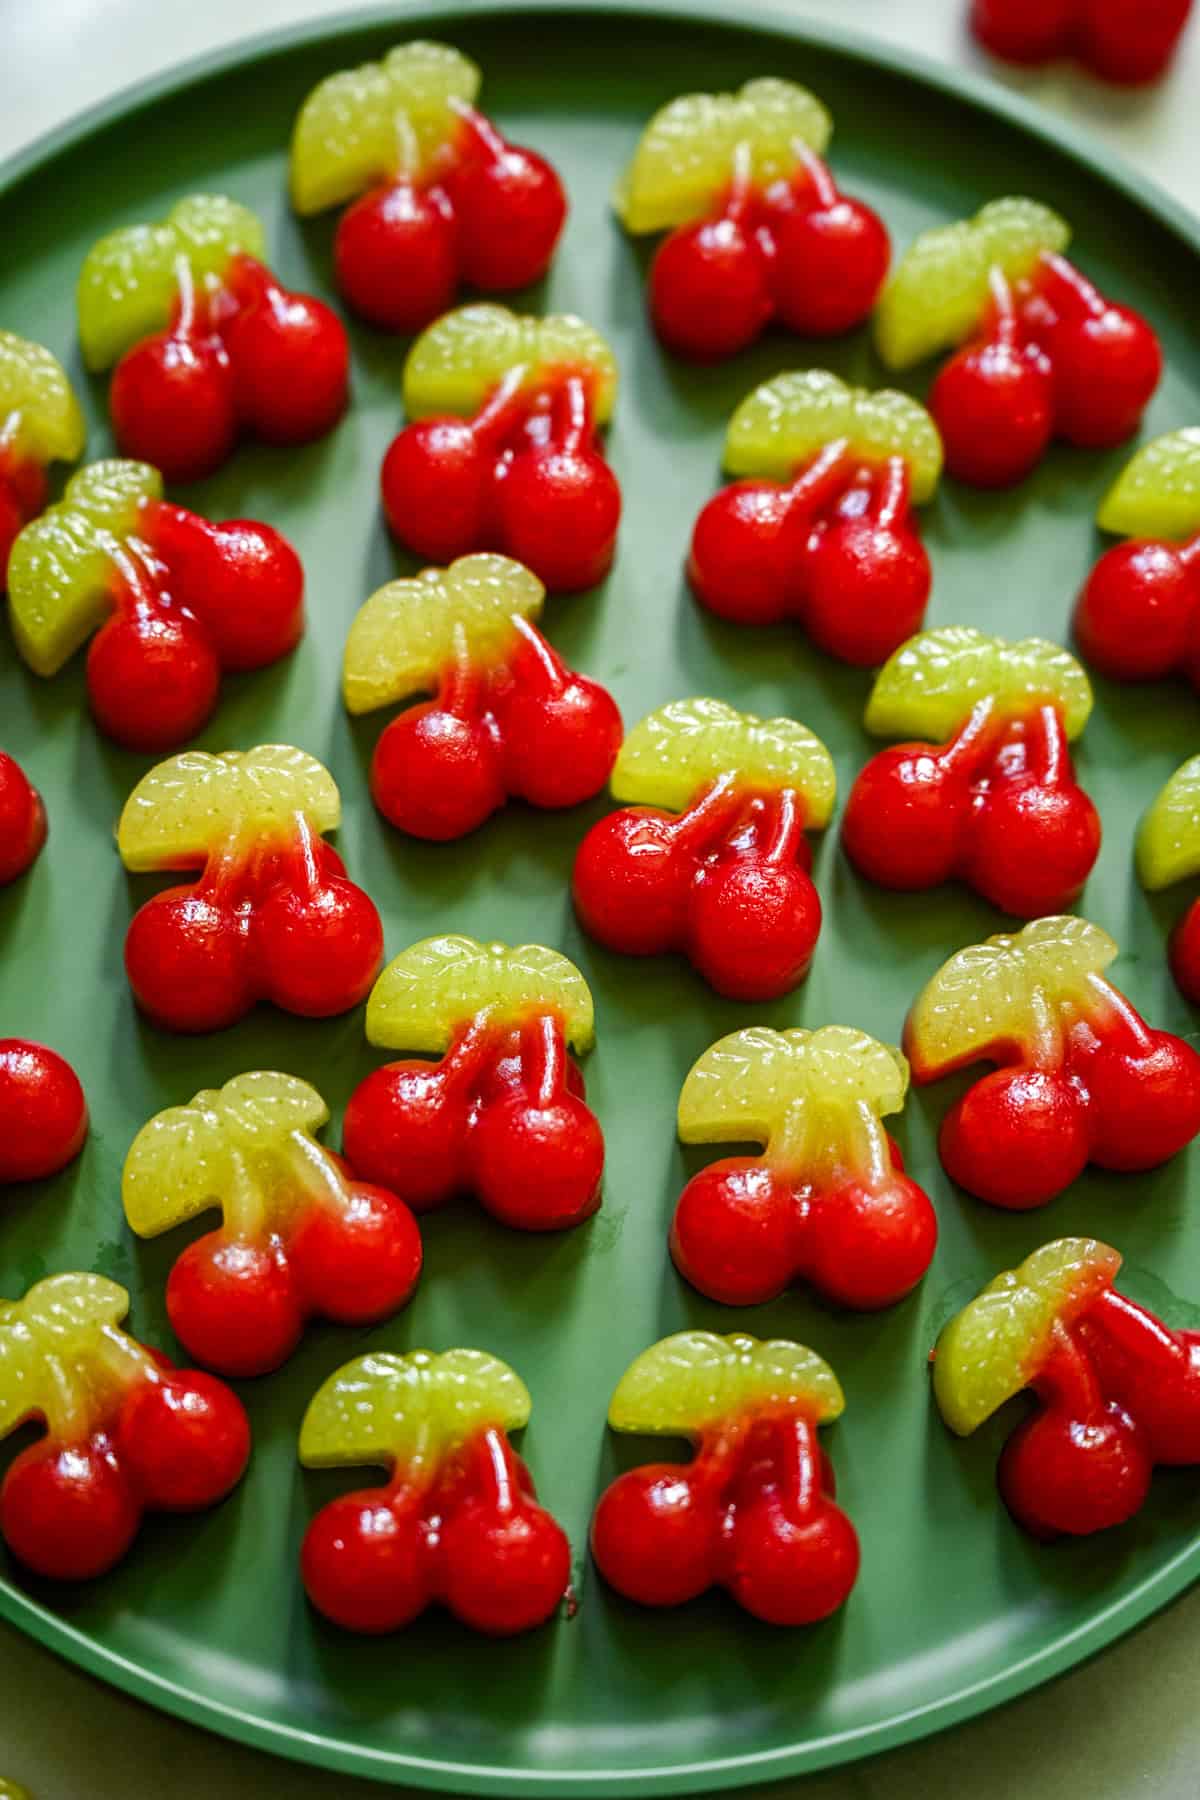
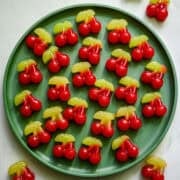
These homemade cherry gummies are sweet, tart, chewy, and super cute! With only 6 ingredients, these taste like real fruit and are so much better than store-bought!
We've been making gummies from fresh fruit from years now, and I think we've gotten really good at it, so if you want to learn how to make your own gummies at home, keep reading this post, or check out our recipes for Homemade Peach Rings or Homemade Fruit Snacks if you'd like to try some different flavors.

Why Make Gummies At Home?
We have really perfected the technique for homemade gummies over the years. They're super simple to make: just blend up your fruit, bloom your gelatin with citrus juice, then heat up your fruit purée, add your gelatin and a little bit of sweetener, and you've got the base for gummies that come out perfect every time.
Best of all, they're made with real fruit which gives them a bright, tart flavor and an awesome cherry-red color with NO artificial flavors or colors. They're the perfect snack to make and enjoy with kids!
There are a few key steps that we think make our gummy recipes better than most on the internet. For one, we bloom gelatin in citrus juice (usually lemon or lime juice) instead of water, which adds a nice sour punch that makes them more similar to a store-bought candy.
Second (and most importantly), we let our gummies cure (dry out) overnight, which concentrates the flavor and makes them chewy. If you skip this step, your gummies will basically just taste like jello, and the fruit flavor won't be nearly as strong.
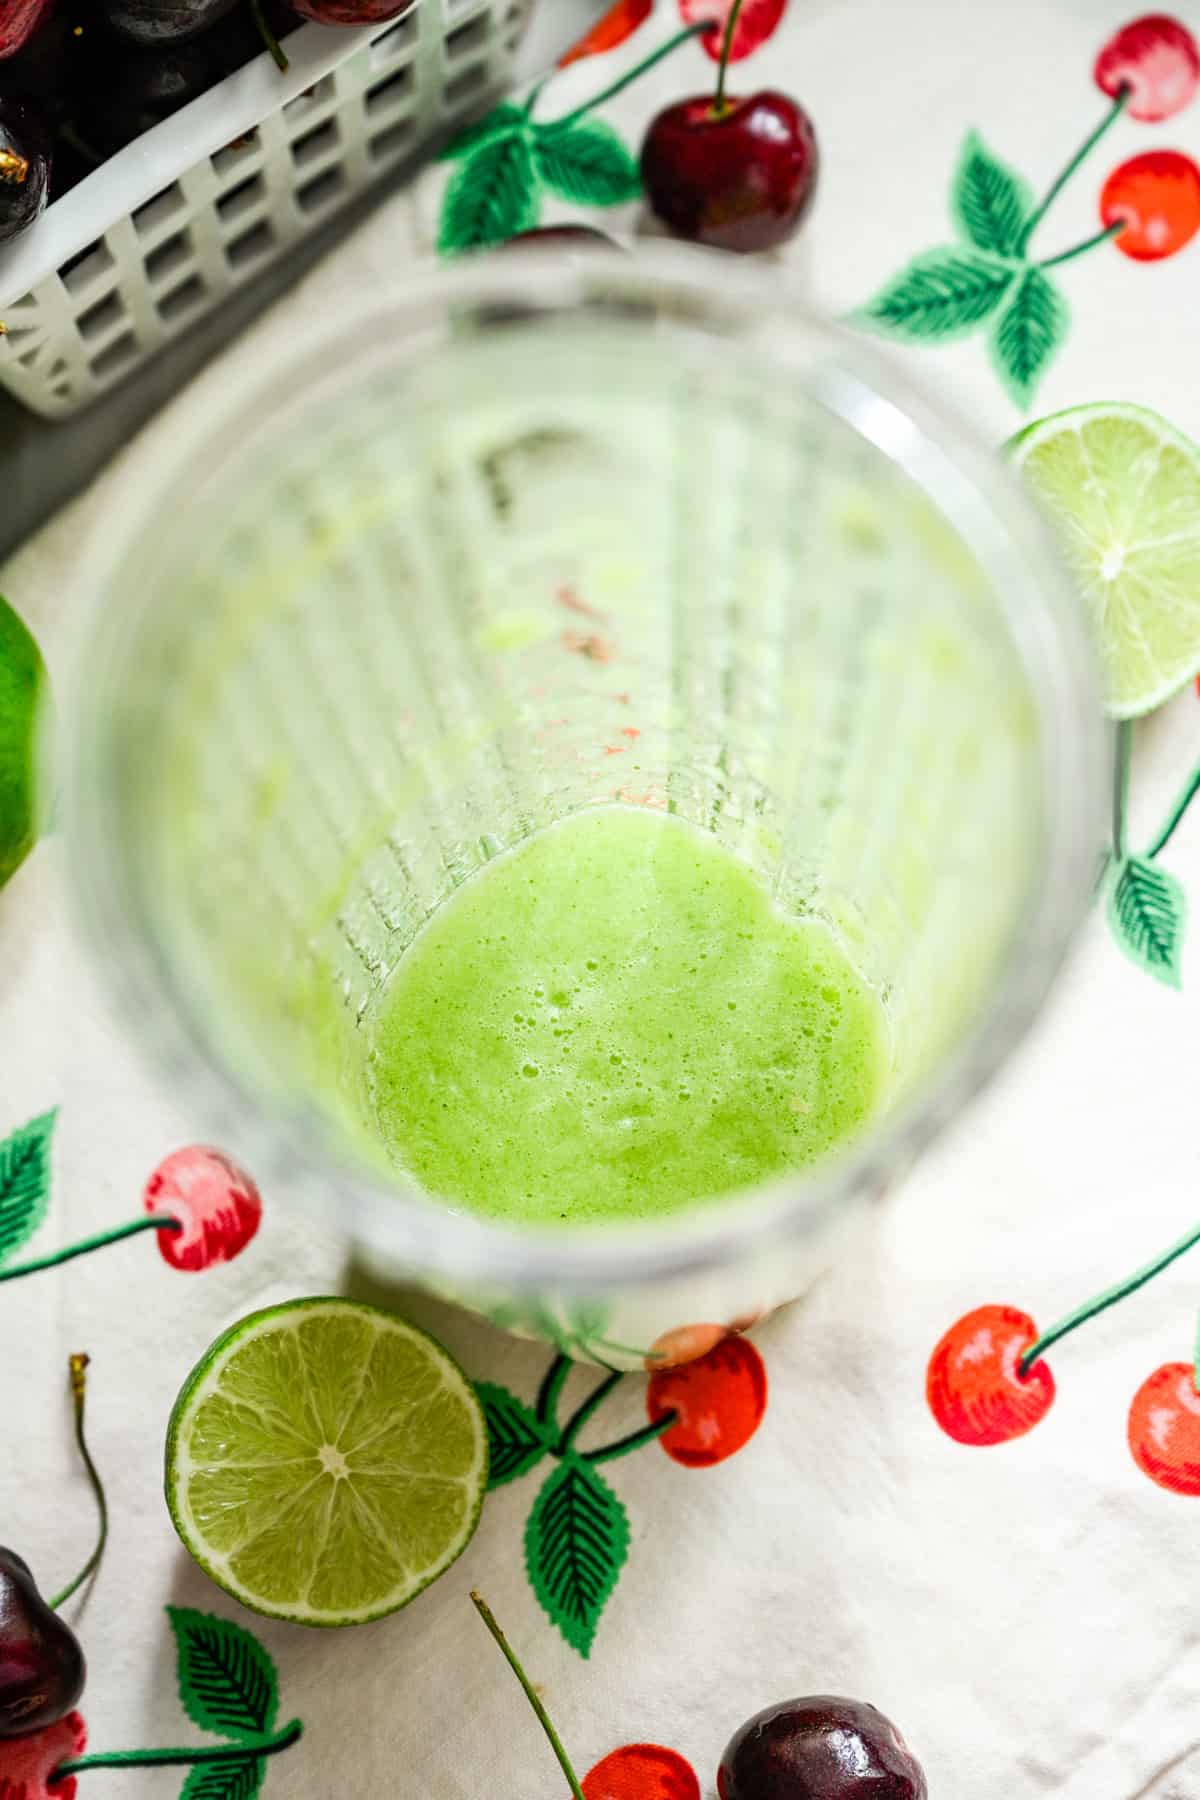
Because we're a little extra, we also made a green apple, mint and lime batch for the green stems, but that's totally optional. You can just do cherry all the way through.
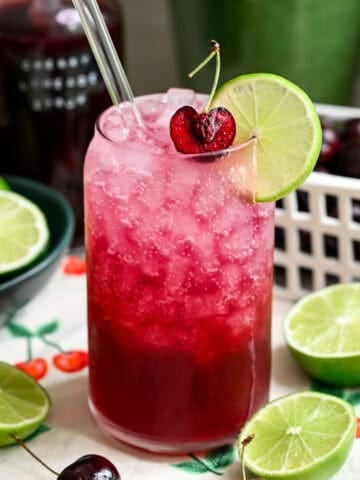
If you're looking for some more ways to use summer cherries, check out our fan favorite Cherry Limeade, or these wasy-easier-than-pie-but-just-as-delicious Cherry Pie Bars.
Jump to:
Key Ingredients and Tools Needed for Cherry Gummies
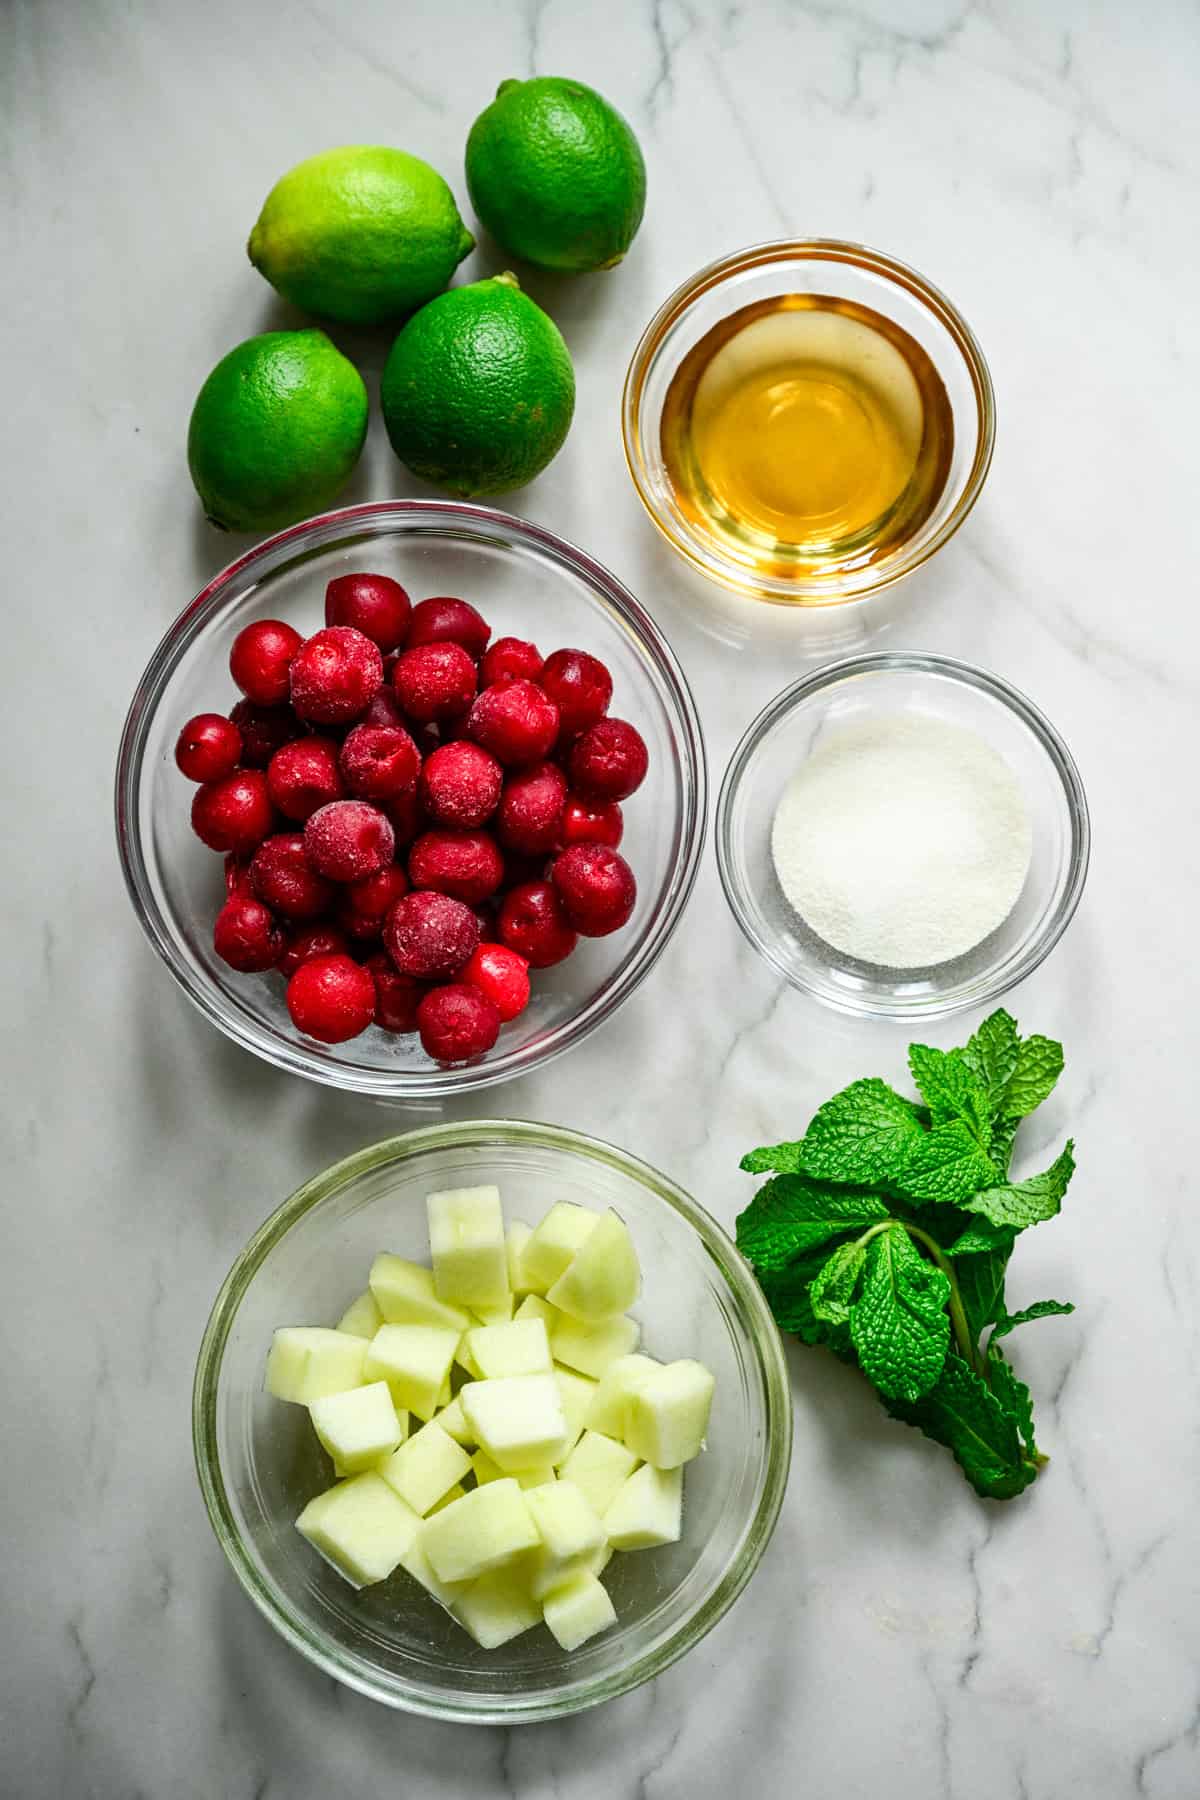
- Molds: We used these cherry shaped ones. Silicone works best for this, and is easy to clean and store. If you want a more versatile mold, try this gummy bear mold instead.
- Droppers: We used these droppers for this recipe. You would be surprised at how often they come in handy for other cooking projects!
- Tart Cherries: These are found in the freezer section of most grocery stores. Tart cherries have the best red color, and zingy flavor. You can absolutely substitute sweet cherries (frozen or fresh) for this recipe, but you may want to slightly reduce the amount of sweetener used to account for sweet cherries being sweeter than tart cherries.
How to Make These Cherry Gummies
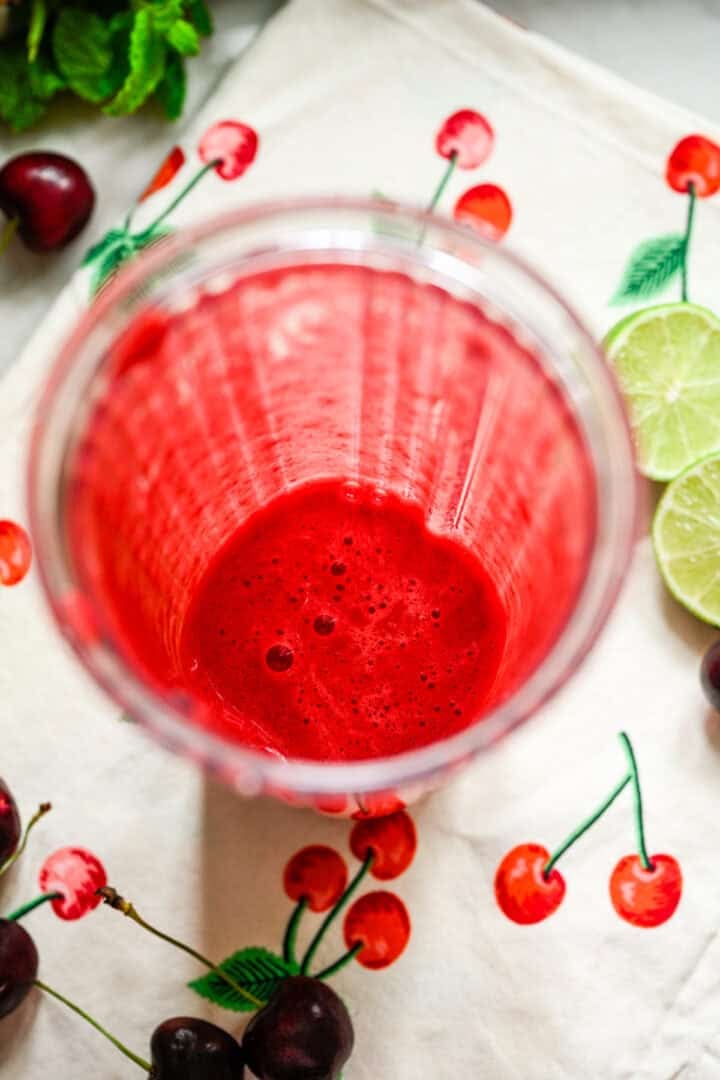
- If your cherries are frozen, defrost in the microwave for 45-60 seconds. Add cherries to blender and blend until completely smooth.
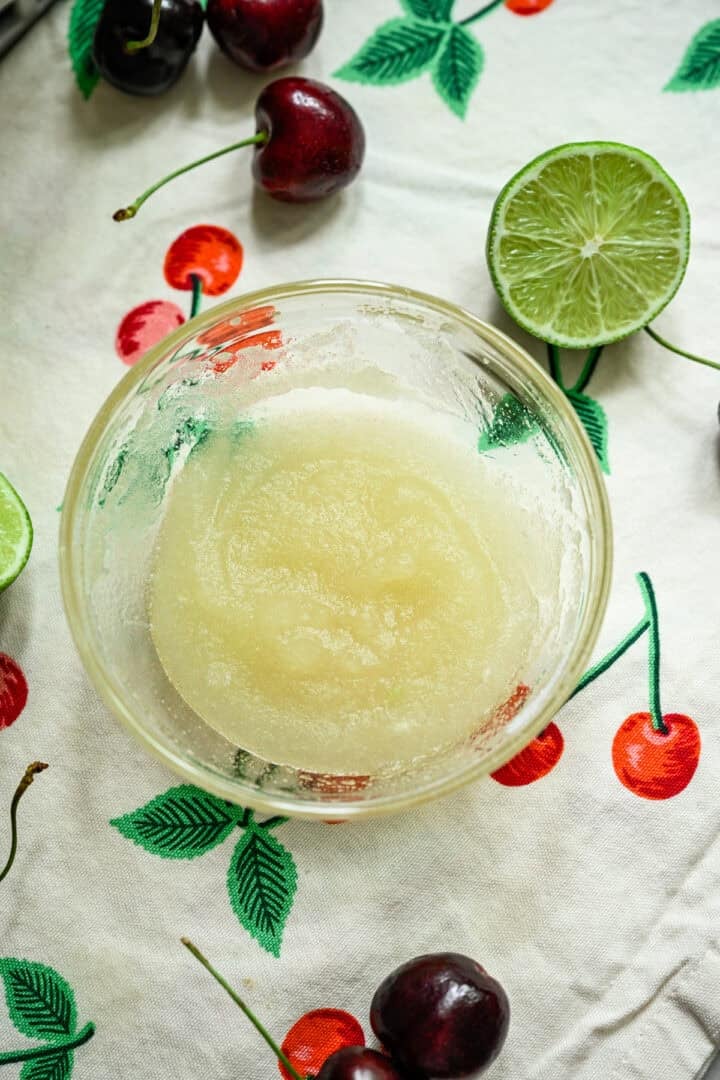
- In a small bowl, sprinkle gelatin evenly over lime juice, then stir thoroughly until there are no dry grains visible. Let sit for 5 minutes.
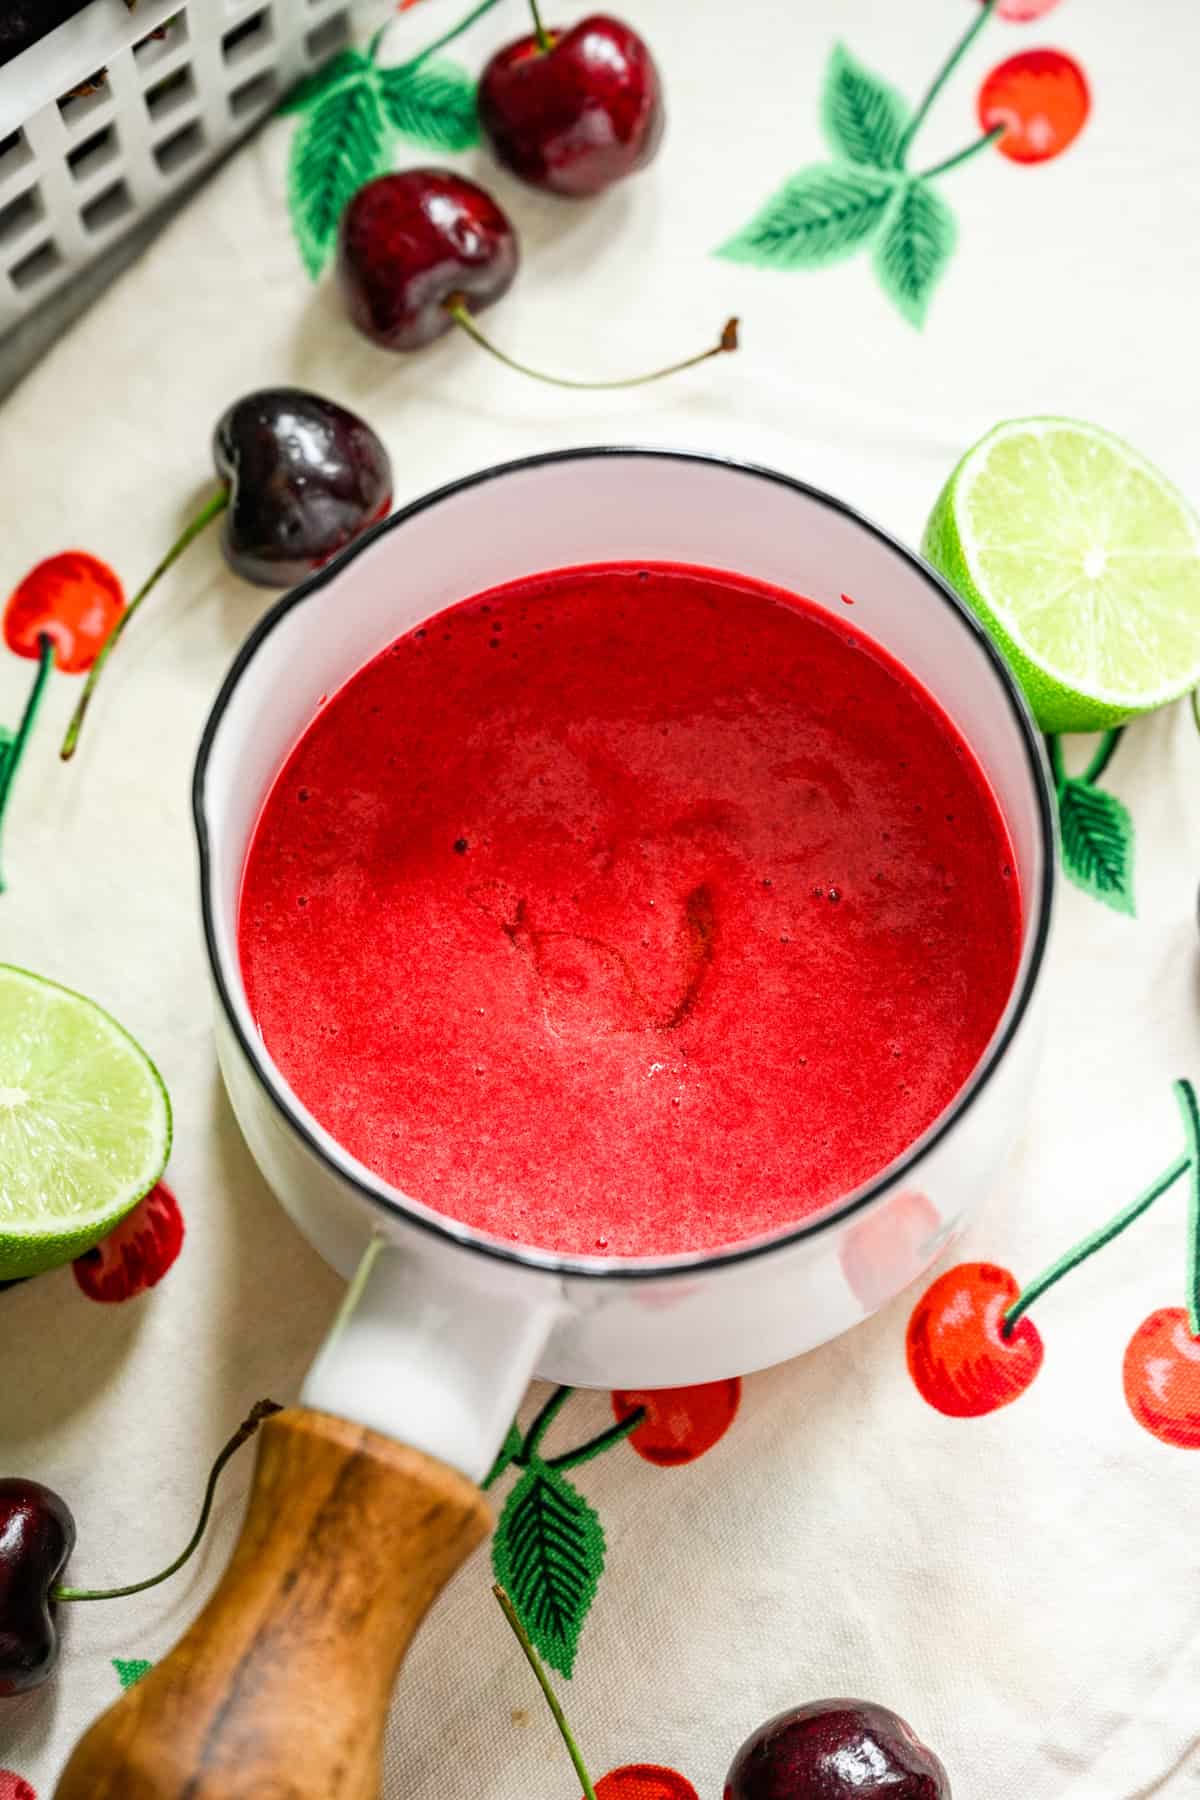
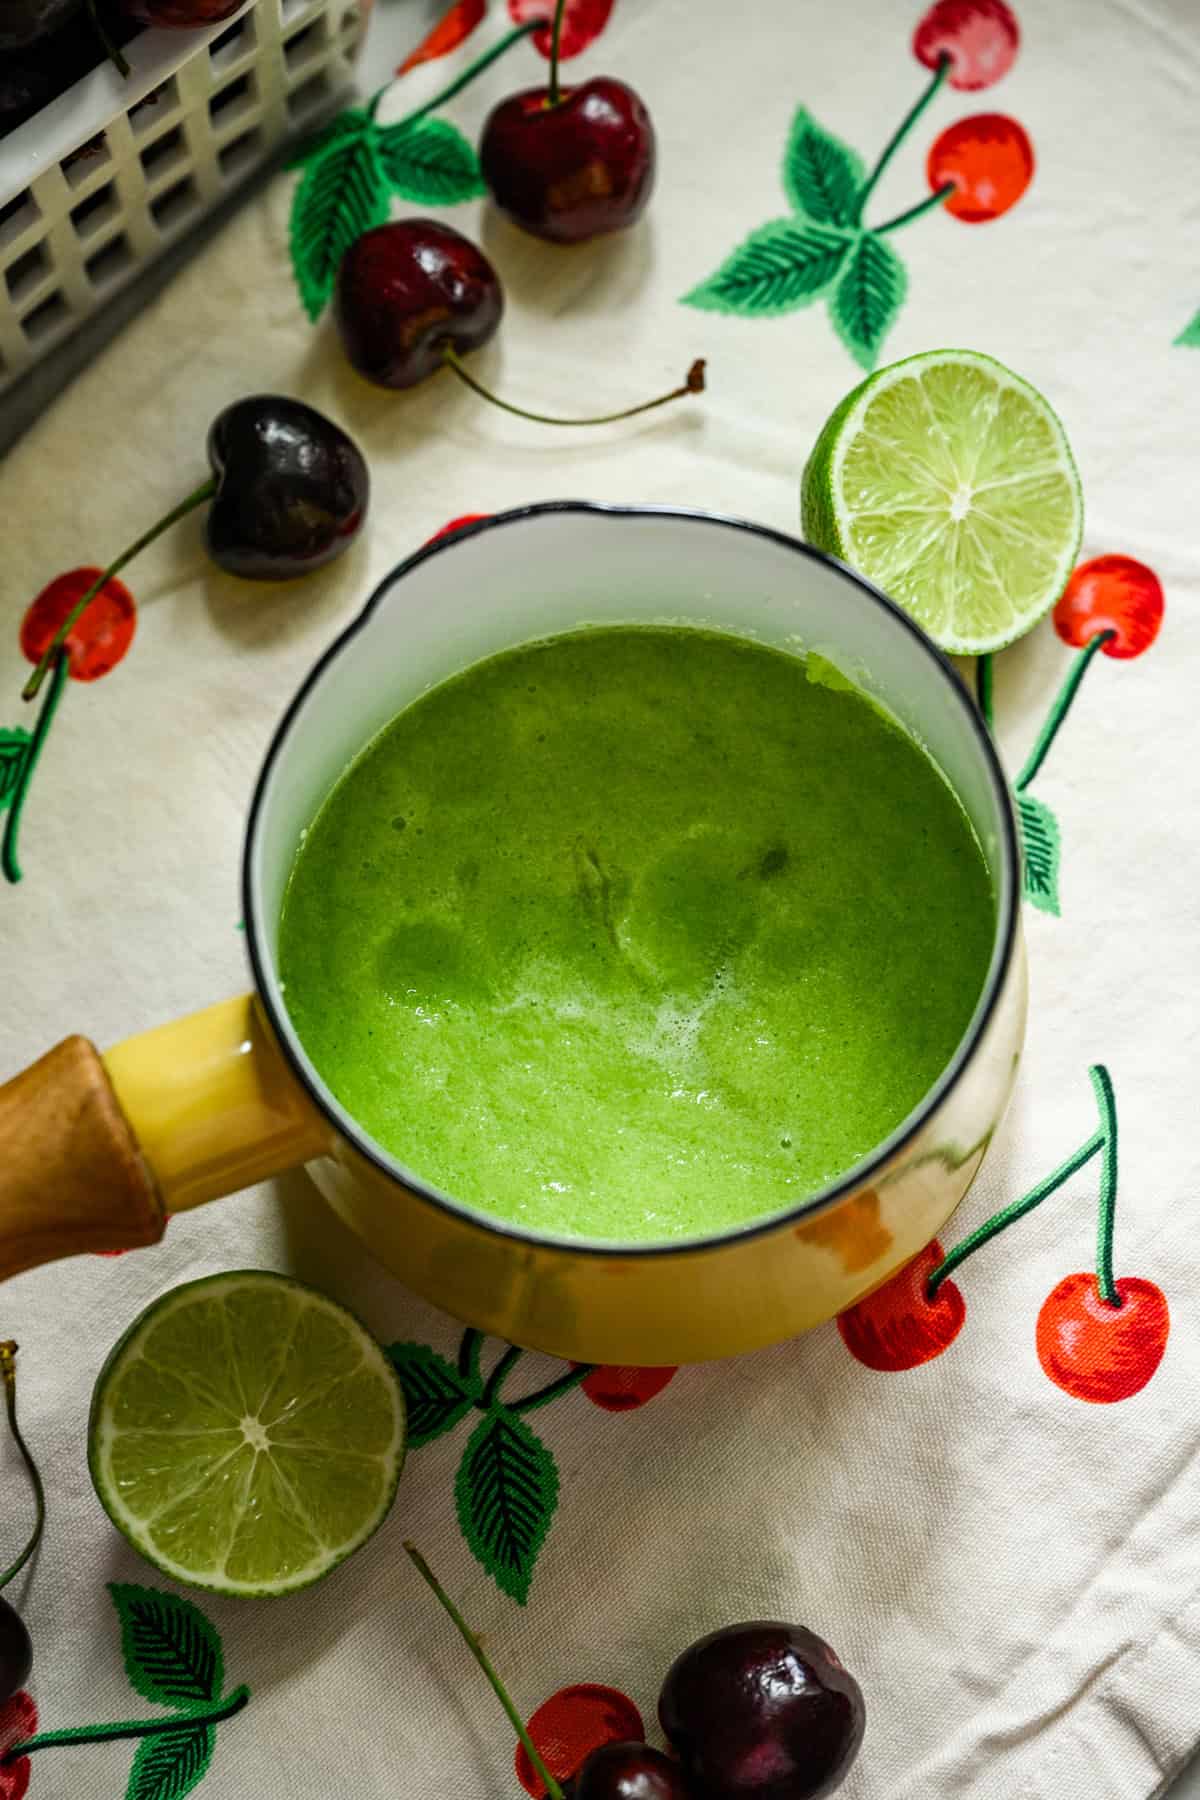
- While the gelatin blooms, combine cherry purée with honey in a small saucepan over low heat, and stir until combined. You want to heat the purée enough to melt the gelatin (>~120˚F), but you don't want to bring it to a boil, which will denature the gelatin. If the mixture is too hot when you add the gelatin, your gummies will not set properly. A thermometer is essential for getting this step right!
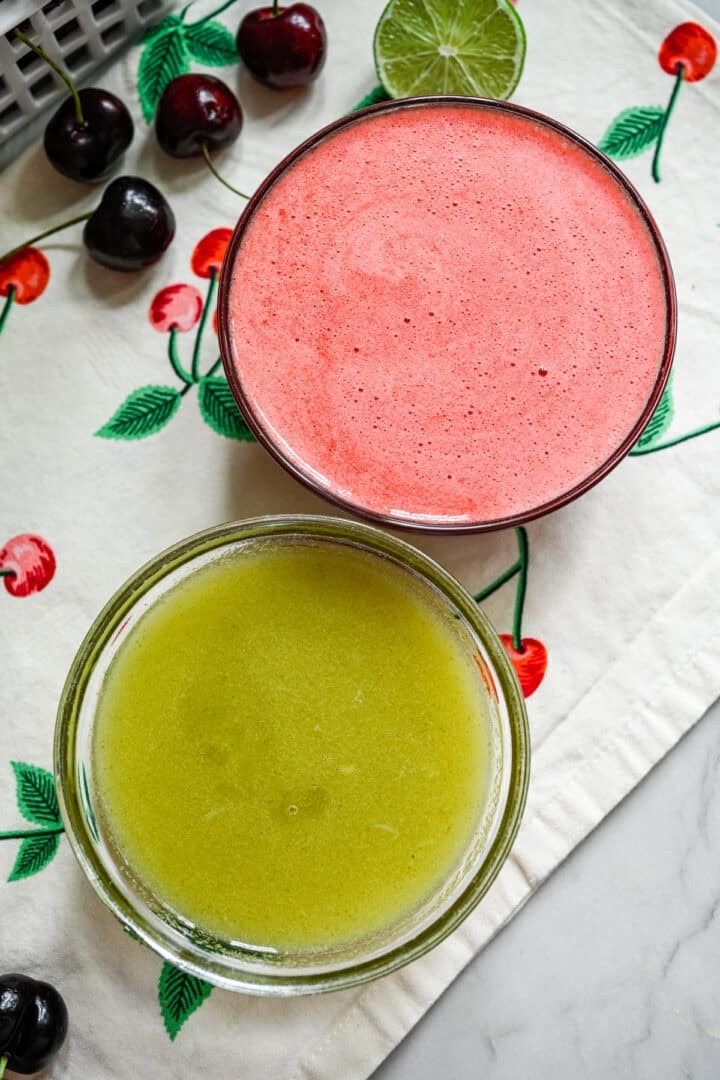
- Add gelatin and lime juice mixture to the fruit puree, and stir until it's completely dissolved. Remove pan from heat and let cool for about 5 minutes.
- Add apple, mint, and the 2 tablespoons of lime juice to blender and blend until completely smooth.
- In a small container, sprinkle gelatin evenly over lime juice, then stir thoroughly until there are no dry grains visible. Let sit for 5 minutes.
- While the gelatin blooms, combine apple and mint purée with honey in a small saucepan over low heat, and stir until combined. You want to heat the purée enough to melt the gelatin (>~120˚F), but you don't want to bring it to a boil, which will denature the gelatin.
- Add gelatin and lime juice mixture to the fruit puree, and stir until it's completely dissolved. Remove pan from heat and let cool for about 5 minutes.
- Give your silicone molds a light spray with avocado oil or cooking spray.
- Use a dropper to fill up the fruit molds. Fill two droppers, one with cherry and one with apple, and at the same time fill the mold - red in the cherry shape and green in the stem/leaf shape. Filling them at the same time will help the colors from running together too much.
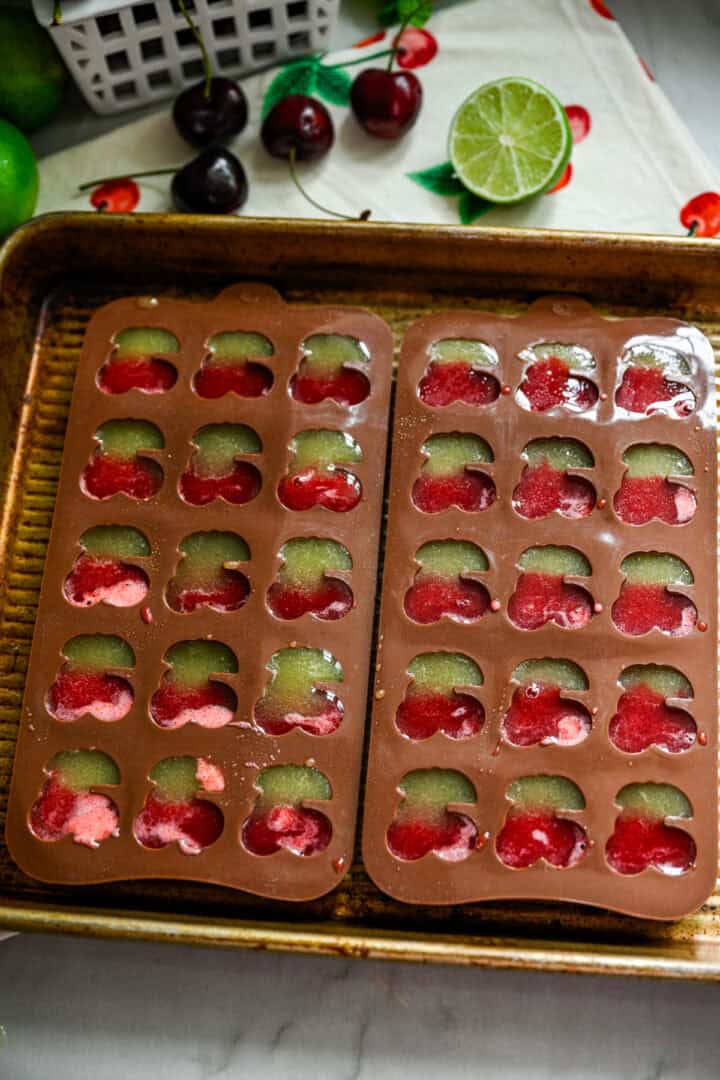
- Move the molds to your refrigerator. Refrigerate for an hour and a half to two hours to let them set up.
- Remove from the molds and place on a wire rack, and let sit for 8 hours or overnight. The gummies will shrink significantly and achieve a more intense flavor and a chewy, gummy texture.
Top Tips from the CK Test Kitchen!
- When filling the molds with the droppers, use both at the same time to keep the two colors from running together too much. This takes a little practice, but it's easy once you've got the hang of it.
- If you don't care about the green leaves, you can make your gummies completely out of cherry and skip making the green mixture.
- CURE THE GUMMIES! A lot of other gummy recipes skip this step, and to get that chewy store-bought gummy texture, you'll need to let the gummies dry out and cure. To do this, set the gummies on a wire rack overnight. We like to place a small fan in front of the rack to speed up the drying process. It also helps to intensify and concentrate the cherry flavor, so you don't want to skip this step.
- Make them sour: Once you dry out your gummies, you can toss them in a 4:1 mixture of sugar to citric acid. It's essential that the gummies are dried out before doing this, otherwise the sugar will melt.
More Fruity Snack Recipes You'll Love

We can't wait for you to make these cherry gummies in your own home! If you do, be sure to let us know! Leave a comment with a star rating below. You can also snap a photo and tag @crowded_kitchen on Instagram. We can't wait to see what you're cooking!
Print📖 Recipe
Cherry Gummies
- Total Time: 9 hours 50 minutes
- Yield: ~50 gummies
- Diet: Dairy-Free, Gluten-Free
Description
These homemade cherry gummies are sweet, tart, chewy, and super cute! With only 6 ingredients, these taste like real fruit and are so much better than store bought!
Ingredients
Cherry Layer (red portion)
- 180g tart cherries (~1 cup blended)
- 2 envelopes (14g or ~5 teaspoons) powdered gelatin
- 3 tablespoons lime juice
- 3 tablespoons honey
Optional: Lime Layer (green portion)
- 90g green apple
- 1 tablespoon mint
- 2 tablespoons lime juice (goes in blender)
- 1 envelope (7g or ~2 ½ teaspoons) powdered gelatin
- 1 ½ tablespoon lime juice (goes in gelatin)
- 1 ½ tablespoon honey
Instructions
Make the Cherry Layer:
- If your cherries are frozen, defrost in the microwave for 45-60 seconds. Add cherries to blender and blend until completely smooth.
- In a small bowl, sprinkle gelatin evenly over lime juice, then stir thoroughly until there are no dry grains visible. Let sit for 5 minutes.
- While the gelatin blooms, combine cherry purée with honey in a small saucepan over low heat, and stir until combined. You want to heat the purée enough to melt the gelatin (>~120˚F), but you don't want to bring it to a boil, which will denature the gelatin. If the mixture is too hot when you add the gelatin, your gummies will not set properly. A thermometer is essential for getting this step right!
- Add gelatin and lime juice mixture to the fruit puree, and stir until it's completely dissolved. Remove pan from heat and let cool for about 5 minutes.
Make the Lime Layer (optional):
- Add apple, mint, and 2 tablespoons of lime juice to a blender and blend until completely smooth.
- In a small container, sprinkle gelatin evenly over lime juice, then stir thoroughly until there are no dry grains visible. Let sit for 5 minutes.
- While the gelatin blooms, combine apple and mint purée with honey in a small saucepan over low heat, and stir until combined. You want to heat the purée enough to melt the gelatin (>~120˚F), but you don't want to bring it to a boil, which will denature the gelatin.
- Add gelatin and lime juice mixture to the fruit puree, and stir until it's completely dissolved. Remove pan from heat and let cool for about 5 minutes.
Make the Gummies:
- Give your silicone molds a light spray with avocado oil or cooking spray.
- Use a dropper to fill up the fruit molds. Fill two droppers, one with cherry and one with apple, and at the same time fill the mold - red in the cherry shape and green in the stem/leaf shape. Filling them at the same time will help the colors from running together too much.
- Move the molds to your refrigerator. Refrigerate for an hour and a half to let them set up.
- Remove from the molds and place on a wire rack, and let sit for 8 hours or overnight. The gummies will shrink significantly and achieve a more intense flavor and a chewy, gummy texture. Ideally, place them in front of a fan or an area with good air flow to help them dry out faster. If your kitchen is very warm and/or humid, this may take quite a while or they may not set. If needed, you can let them dry out in the refrigerator.
Notes
Storage: Once the gummies have dried out overnight, move them to an airtight container and store in the refrigerator for up to 2 weeks.
Gummy Molds: We used these cherry shaped ones. Silicone works best for this, and is easy to clean and store. If you want a more versatile mold, try this gummy bear mold instead.
Droppers: We used these droppers for this recipe.
- Prep Time: 10 minutes
- Passive Time: 9 hours 30 minutes
- Cook Time: 10 minutes
- Category: Snacks
- Method: Stovetop
- Cuisine: American
Nutrition
- Serving Size: 3 gummies
- Calories: 32
- Sugar: 6.4 g
- Sodium: 2.9 mg
- Fat: 0 g
- Carbohydrates: 7.4 g
- Fiber: 0.4 g
- Protein: 1.2 g
Comments
No Comments