
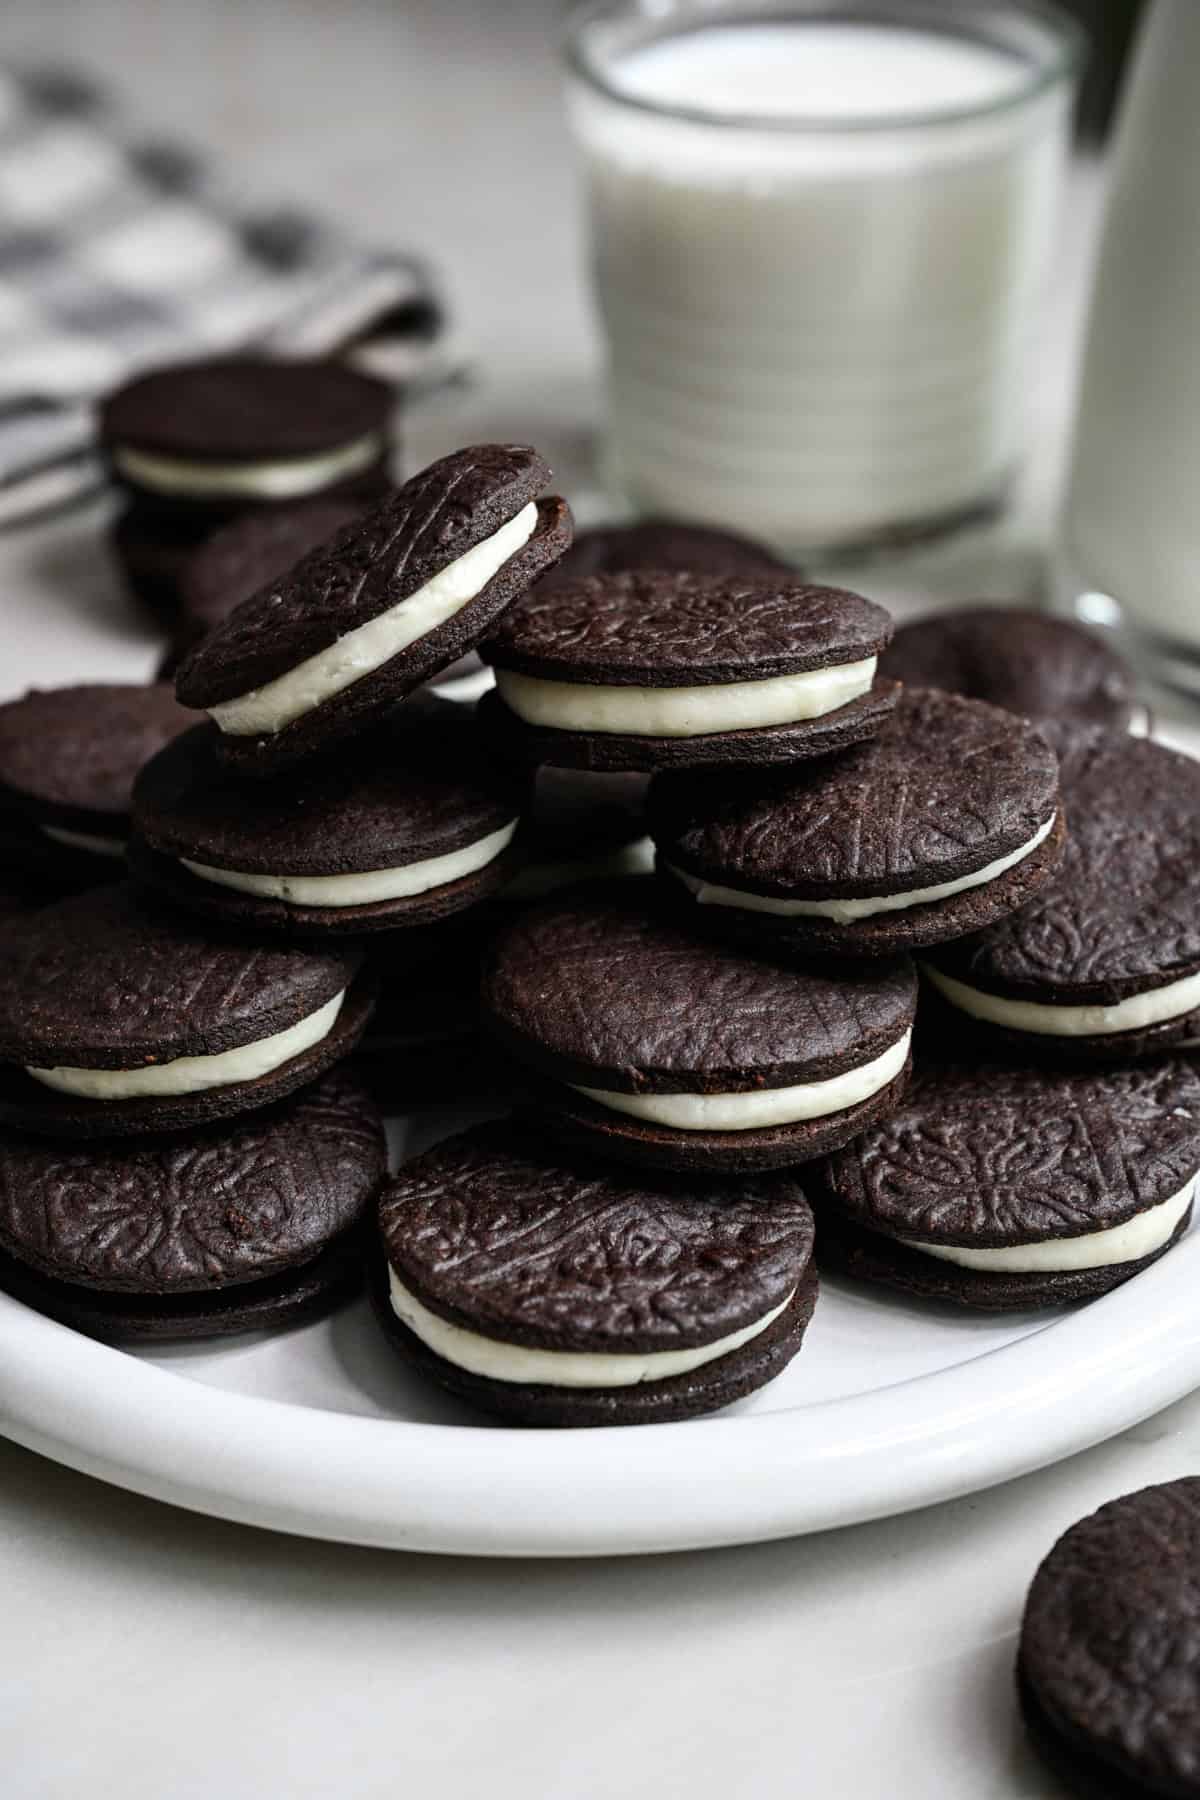
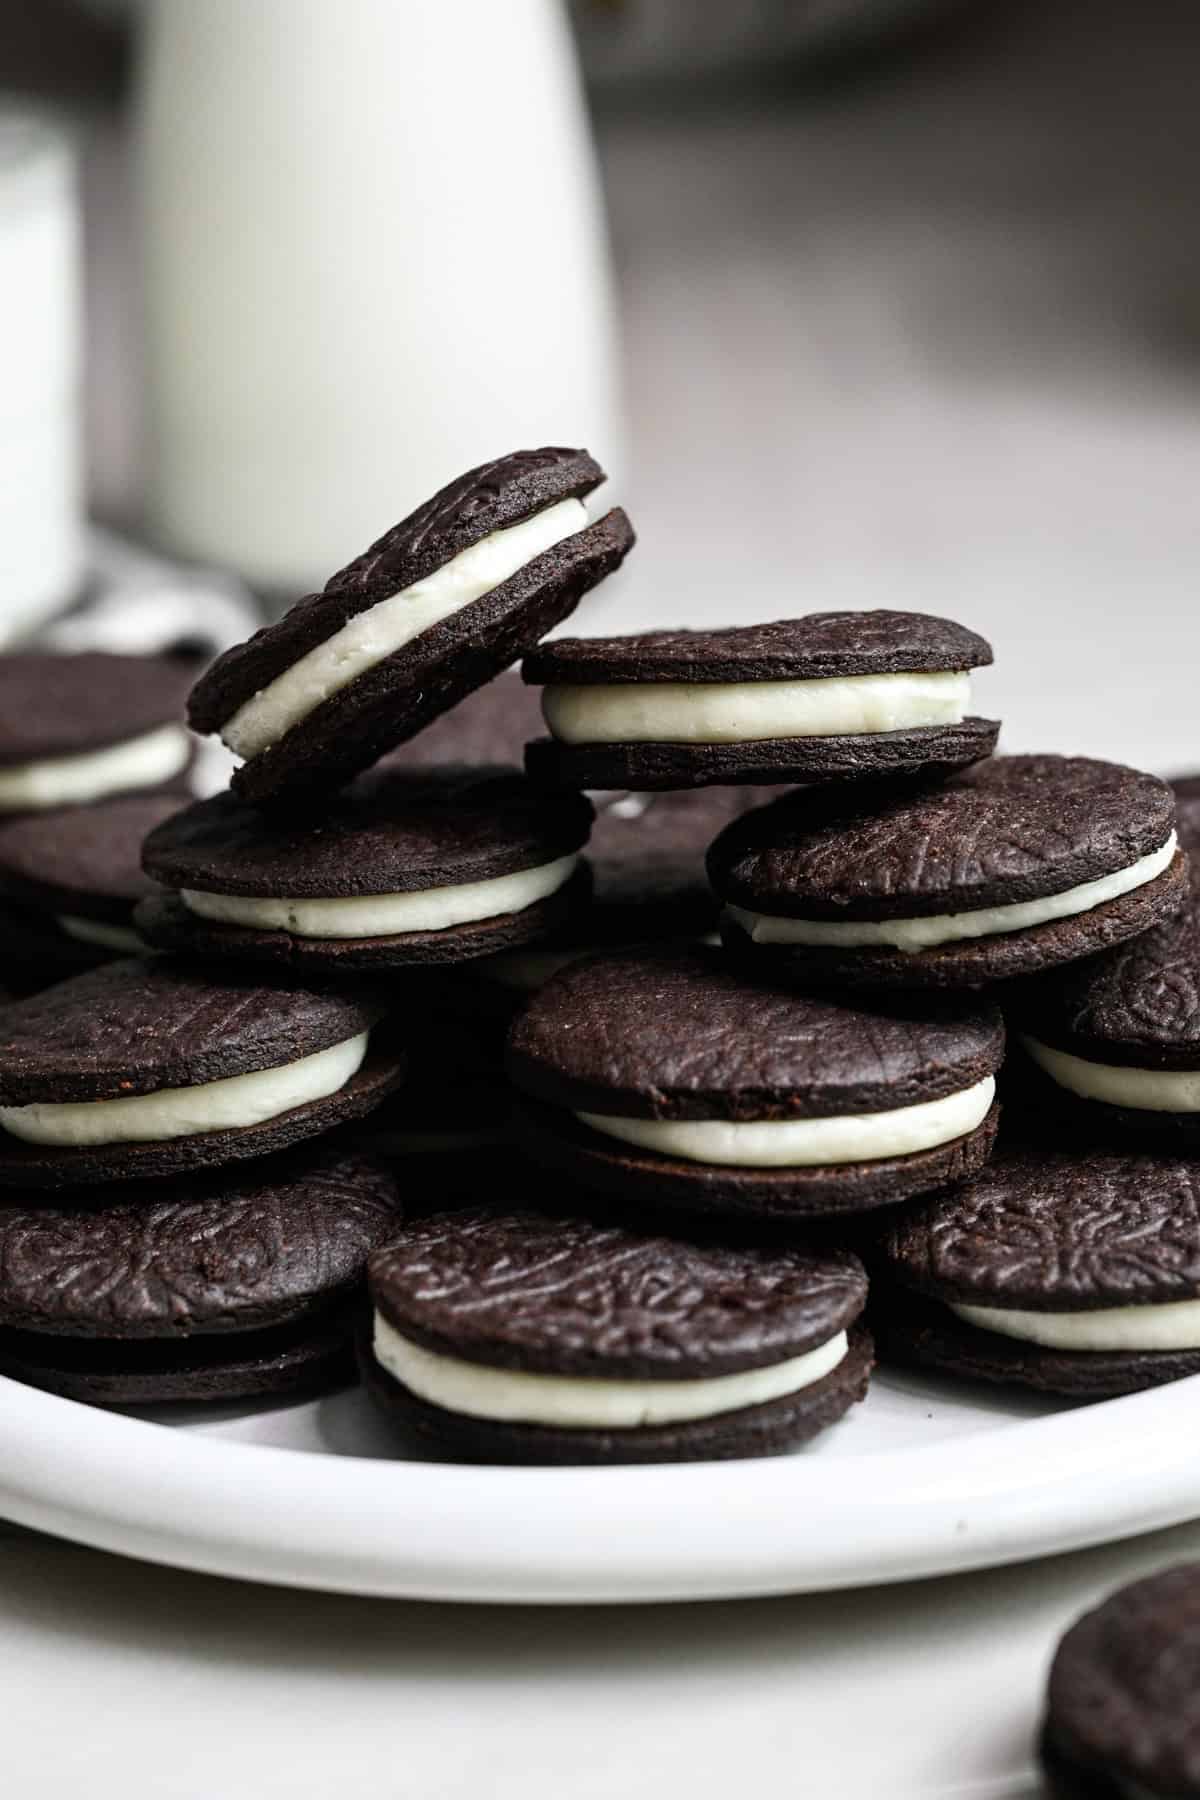
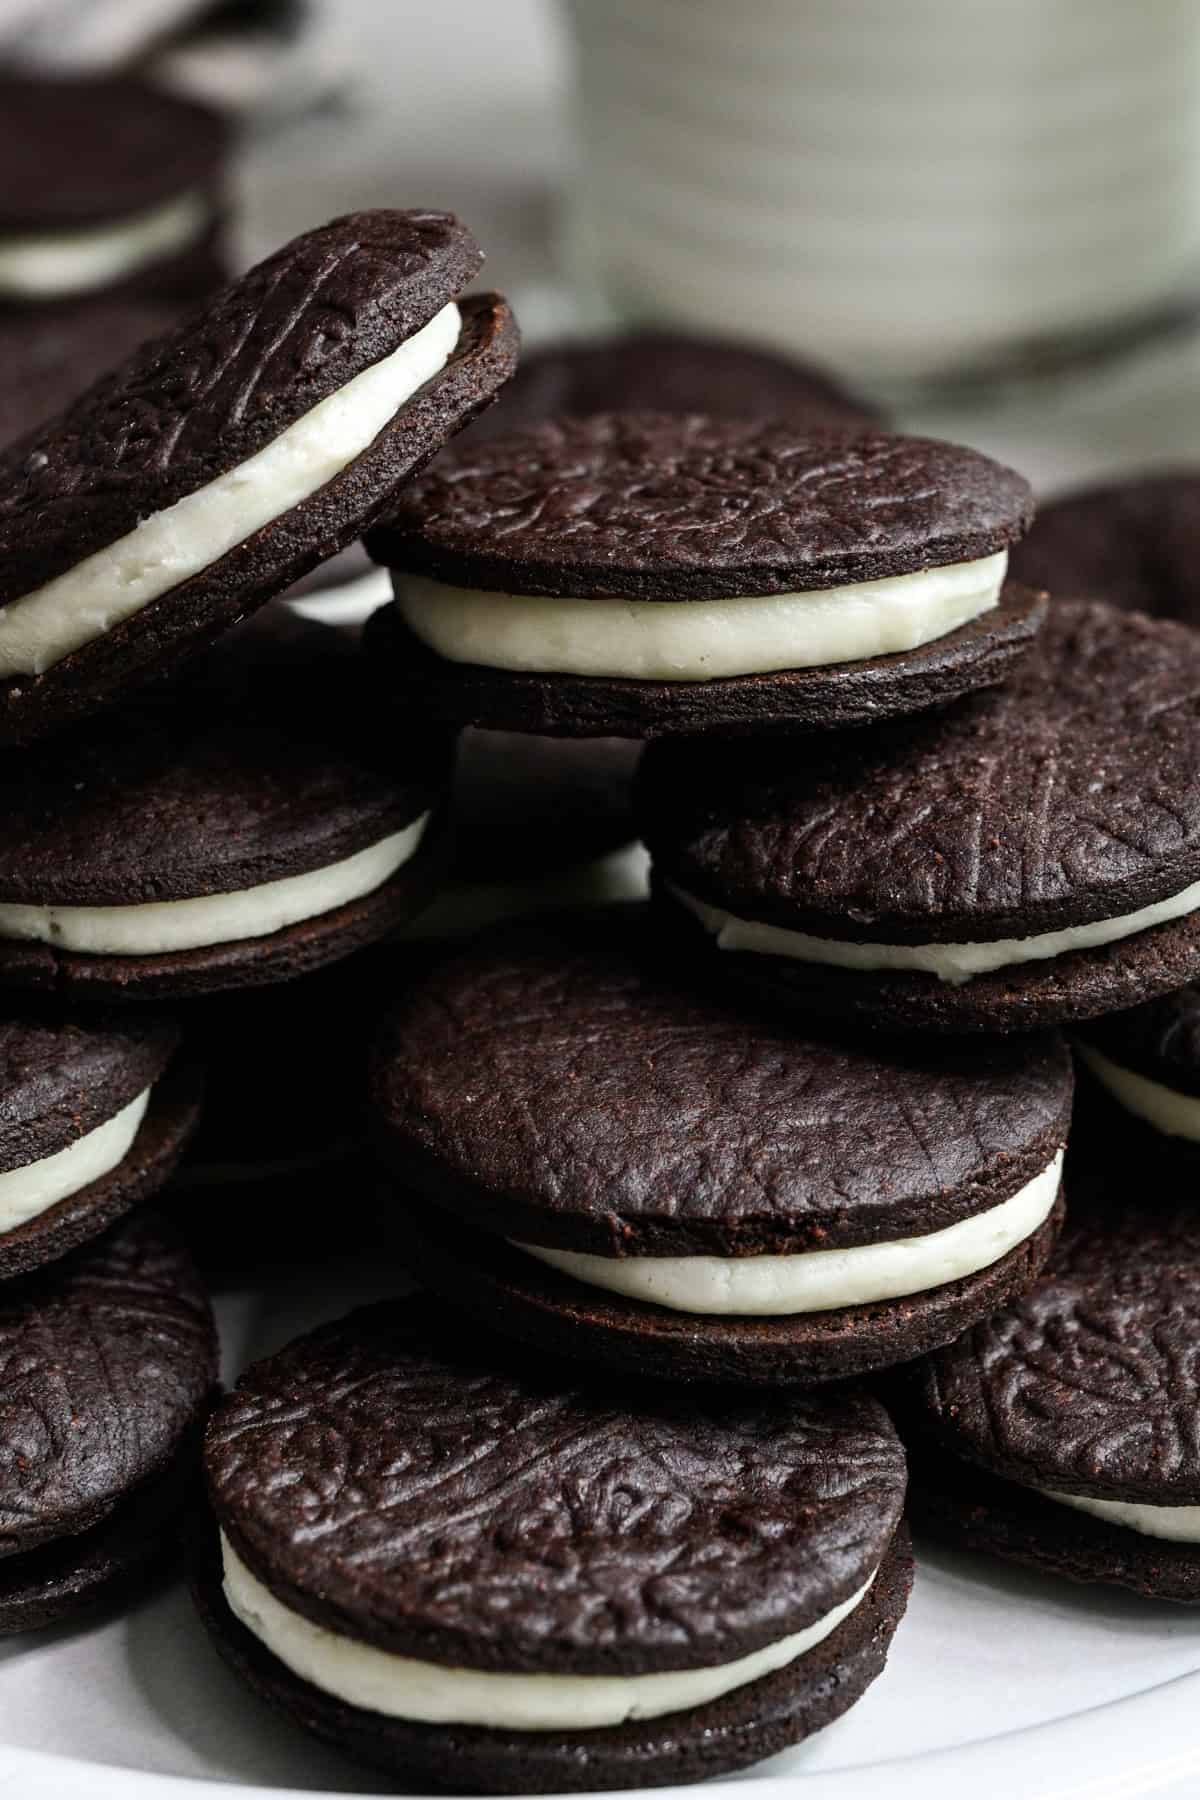
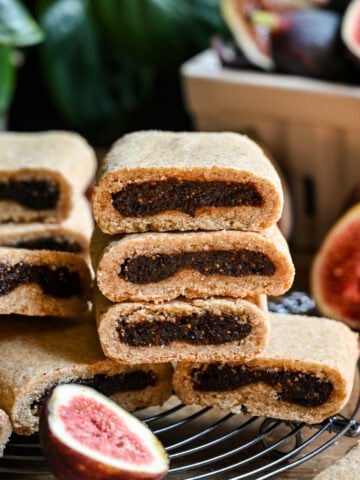
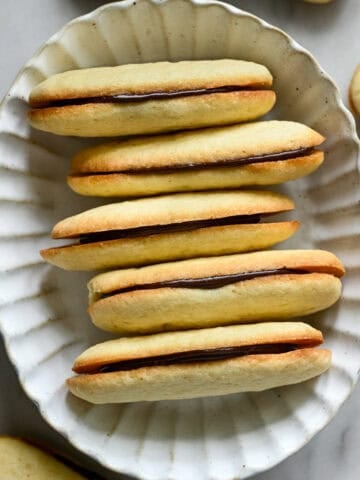
We've made pop tarts, cheez-its, and even choco tacos, but the number one most requested for our Better Than Store-Bought series is finally here: Homemade Oreos! Just like the authentic version you know and love, these are made with two crisp, chocolatey cookies and a rich, vanilla-flavored cream center. The recipe is fairly easy to make and it's absolutely worth the effort! They really do taste better than store-bought (and yes, we did a taste comparison!).
You asked, we delivered!
We've had so many requests for a homemade oreo cookie recipe over the years. For some reason, it just seemed a bit daunting, so we've been putting it off. But now that we're finally settled in our new house and have an (almost) one year old, we're doing our best to tackle some of the big recipes we've been procrastinating!
Our baking specialist, Sarah, took on this project and absolutely nailed it. The cookie is super crisp (and even has a textured top, made with an embossed rolling pin!). The cream is delicious enough to eat by the spoonful.
These have a super similar texture to store-bought oreos, but they taste even better. To be totally honest, I wasn't sure if we could top regular oreos (I love them!). But after a side-by-side comparison, these homemade ones truly came out on top!
This chocolate wafer cookie dough is also so versatile. Bake it in a pie plate and fill with our no-bake chocolate raspberry tart filling, or our peanut butter mousse pie.
You could also bake it in one big rectangle on a cookie sheet and make ice-cream sandwiches with no churn vanilla ice cream.
But the best way to enjoy these? Dipped in a glass of milk, of course! (Or peanut butter, if you're a fan of The Parent Trap.)
Key Ingredients Needed for Oreos

- Black cocoa powder: Black cocoa powder gives the wafers the recognizable black Oreo color, and also has a earthy and smooth cocoa flavor. You can find it in specialty grocery stores and online.
- Dutch-process cocoa powder: The combination of both cocoa powders in the cookies helps enhance the chocolate flavor, and gives a richer depth than only using one type.
- Corn starch: Adding corn starch to the dough makes the cookies extra snappy and tender. Adding it to the cream filling helps stabilize it so you can do the classic Oreo cookie twist when eating!
- Round cookie cutters: We use this circular cookie cutter set for so many recipes, including the 1.9-inch size for this recipe. We love the idea of using different sizes and trying mini or GIANT Oreos!
- Embossed rolling pin: This is completely optional, and we only took the extra step because we always like to make our Better Than Store-Bought Recipes as authentic as possible. Feel free to skip this, or use a cookie stamp if you happen to have one.
How to Make Homemade Oreos
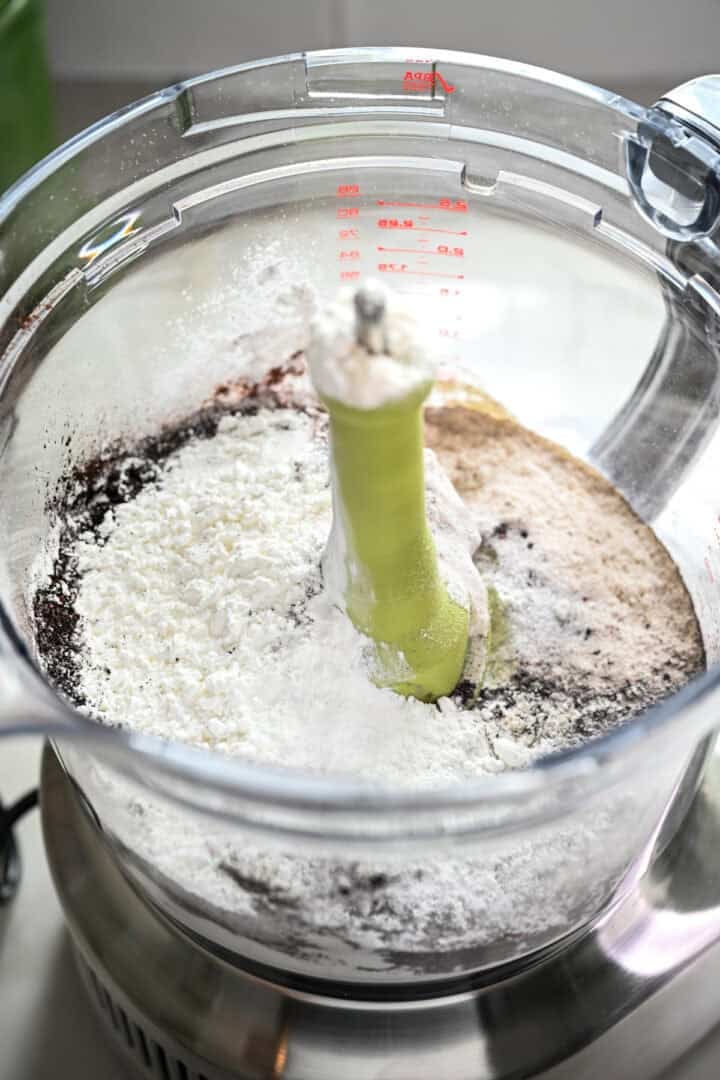
- Add all the flour, both types of cocoa powder, corn starch, sugar, baking soda and salt to a food processor and pulse a few times to combine.
- Add in the softened butter, vanilla, and one tablespoon of honey and continue pulsing until a dough forms. If the dough is too dry (it should stick together when pinched between two fingers), add another ½-1 tablespoon of honey, until the dough comes together.
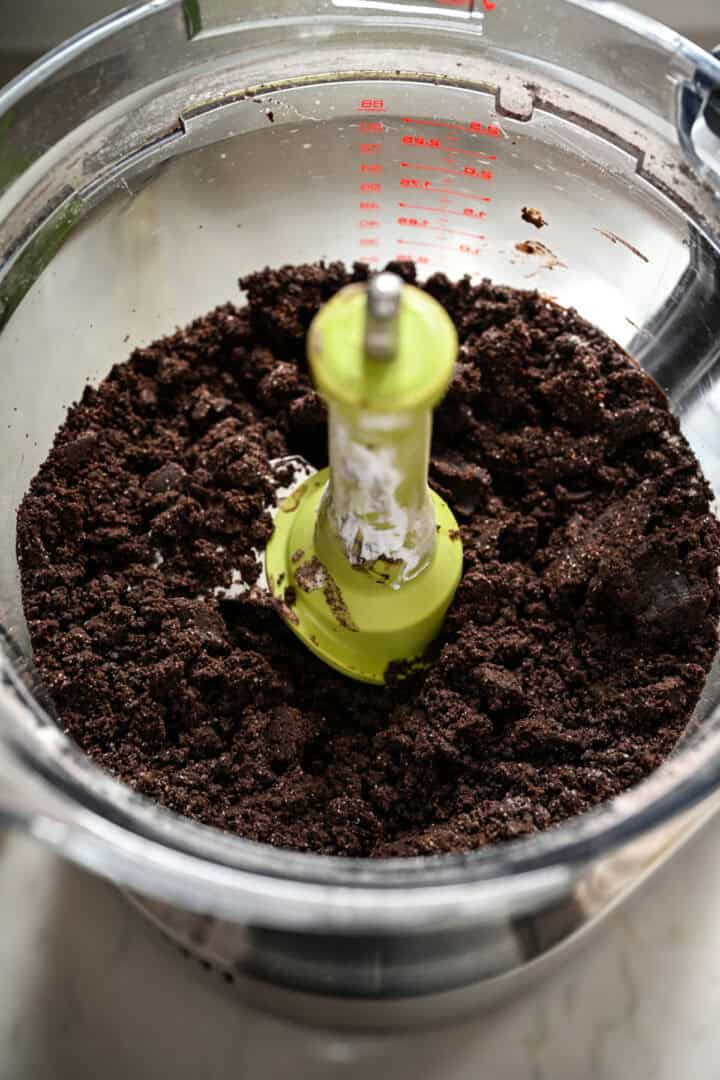
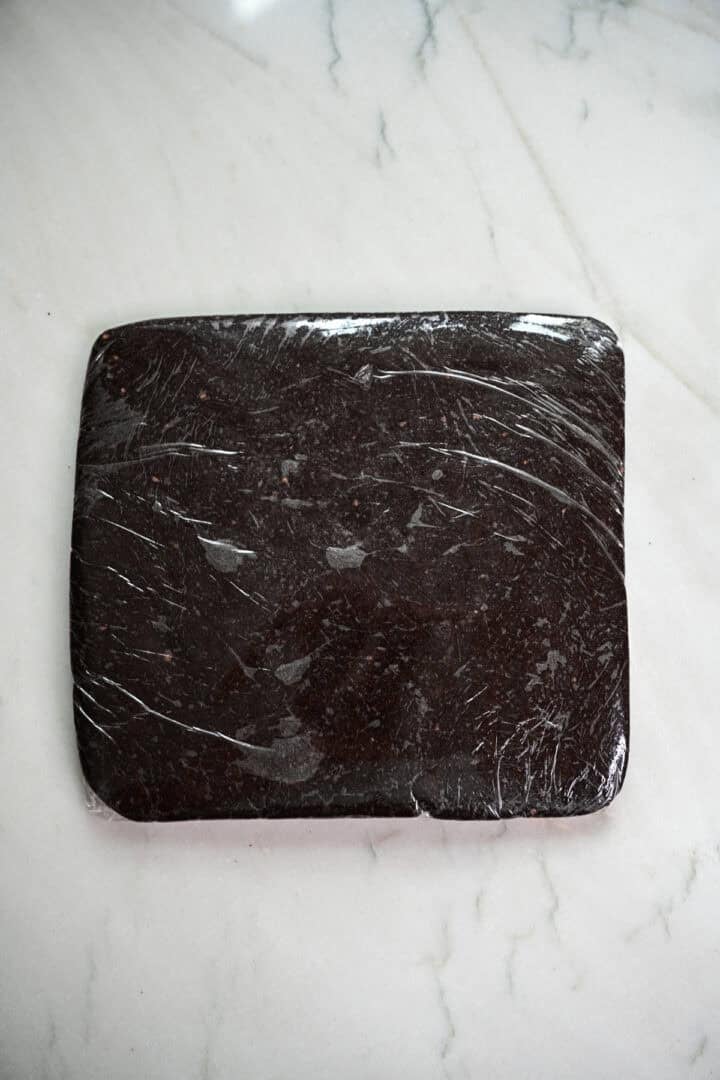
- Transfer the dough to plastic wrap, and press it into a rectangle. Chill in the refrigerator for 30-60 minutes before rolling it out.
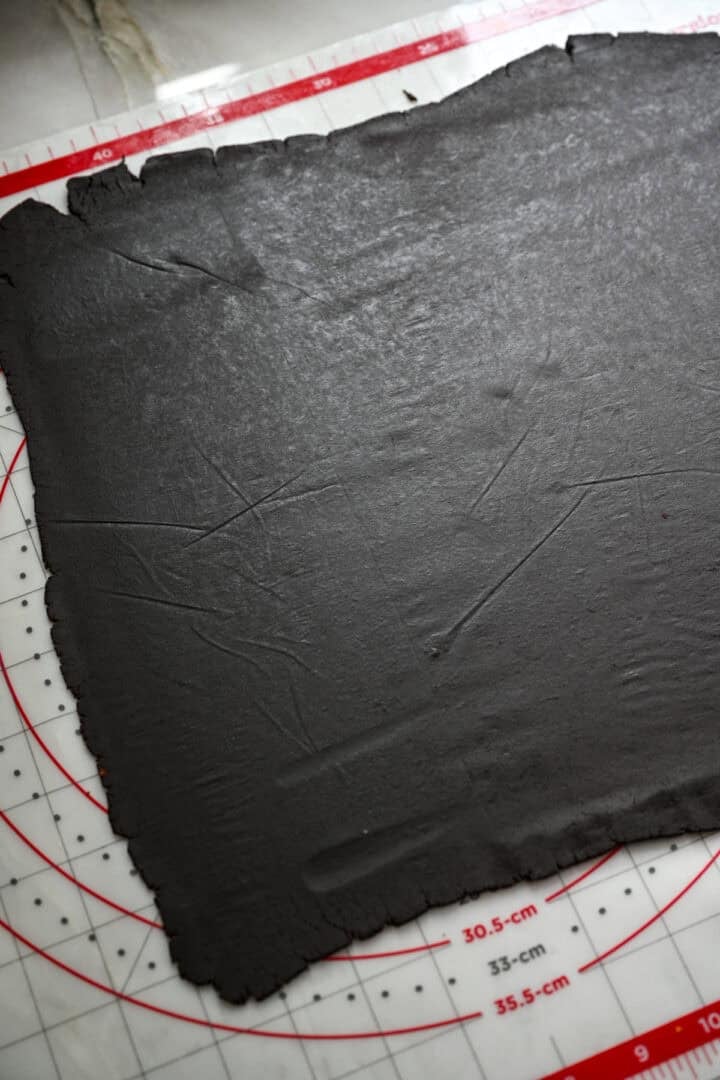
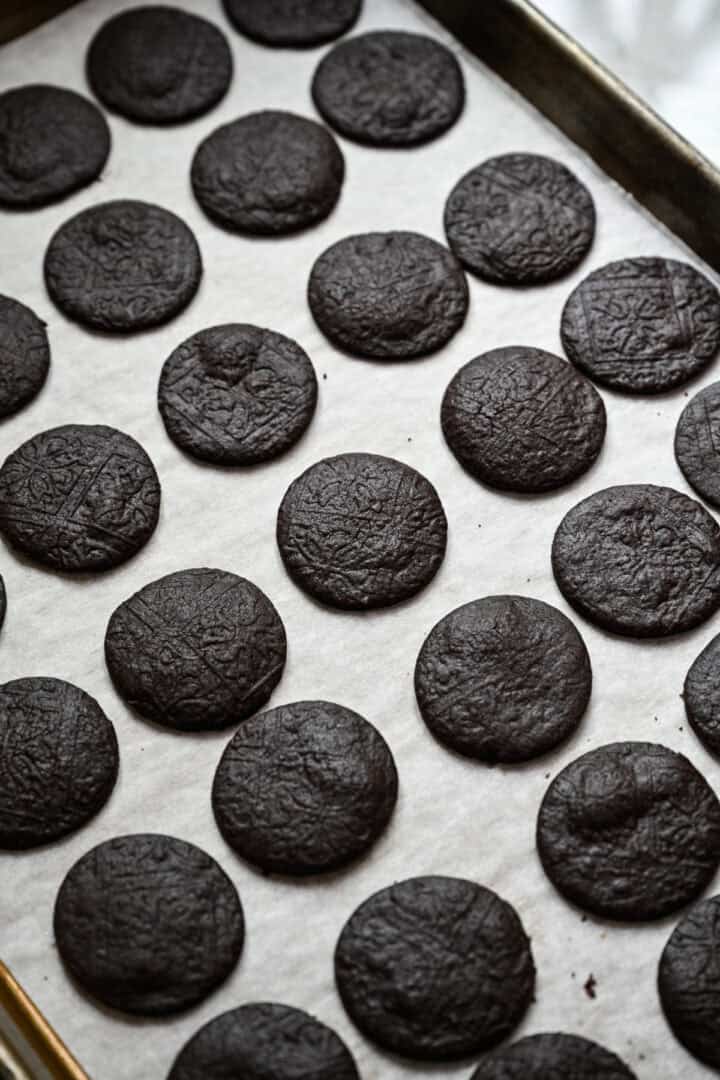
- Preheat the oven to 350˚F/175˚C. Roll the dough out between two pieces of parchment paper to prevent sticking. Roll to about ⅛ inch thick. OPTIONAL: use an embossed rolling pin to create a textured design on top. Firmly press the rolling pin down, but go slowly so you don't make the dough too thin.
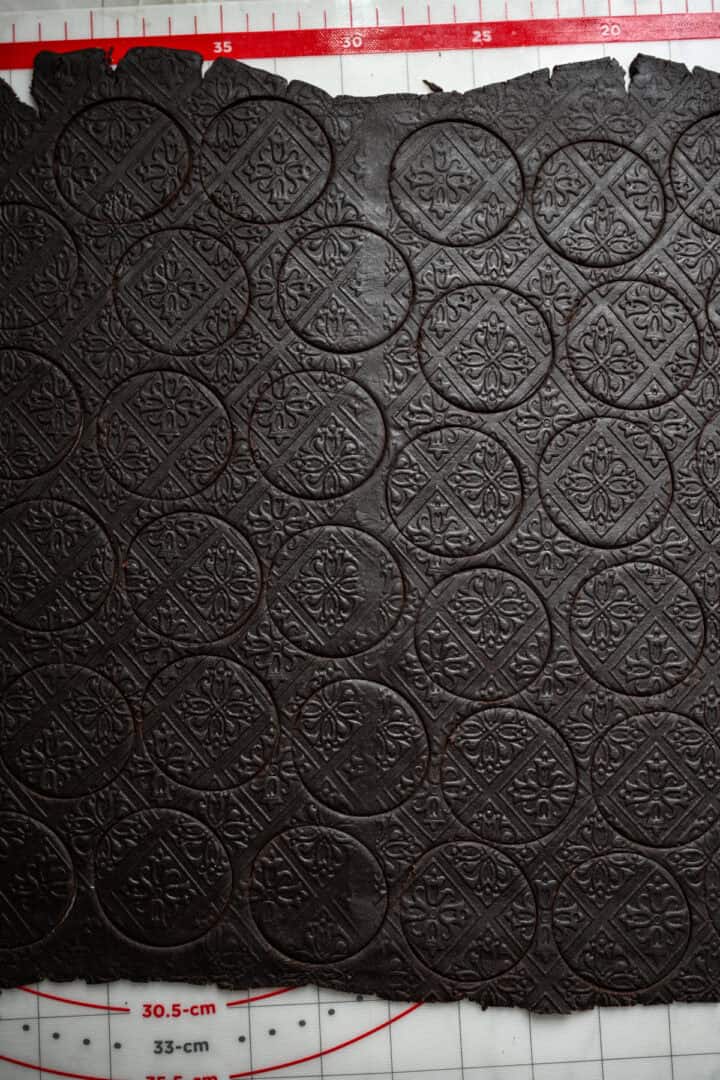
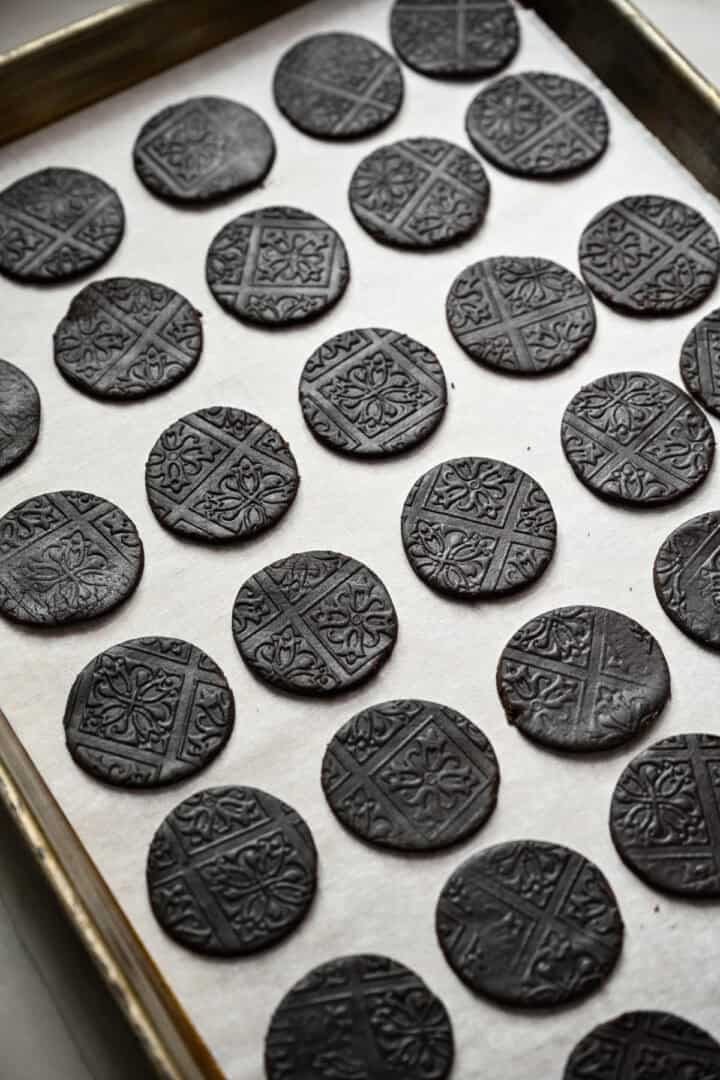
- Cut with 1.75-2-inch diameter circle cookie cutters, and transfer the cookies to a parchment paper-lined baking sheet. Re-roll the scraps to make as many cookies as possible.
- Bake for 10-12 minutes, until the cookie edges feel dry to the touch. Let the cookies cool on the pan for a few minutes before moving to a cooling rack. The cookies will crisp up as they cool. Assemble when cookies are cooled to room temperature.
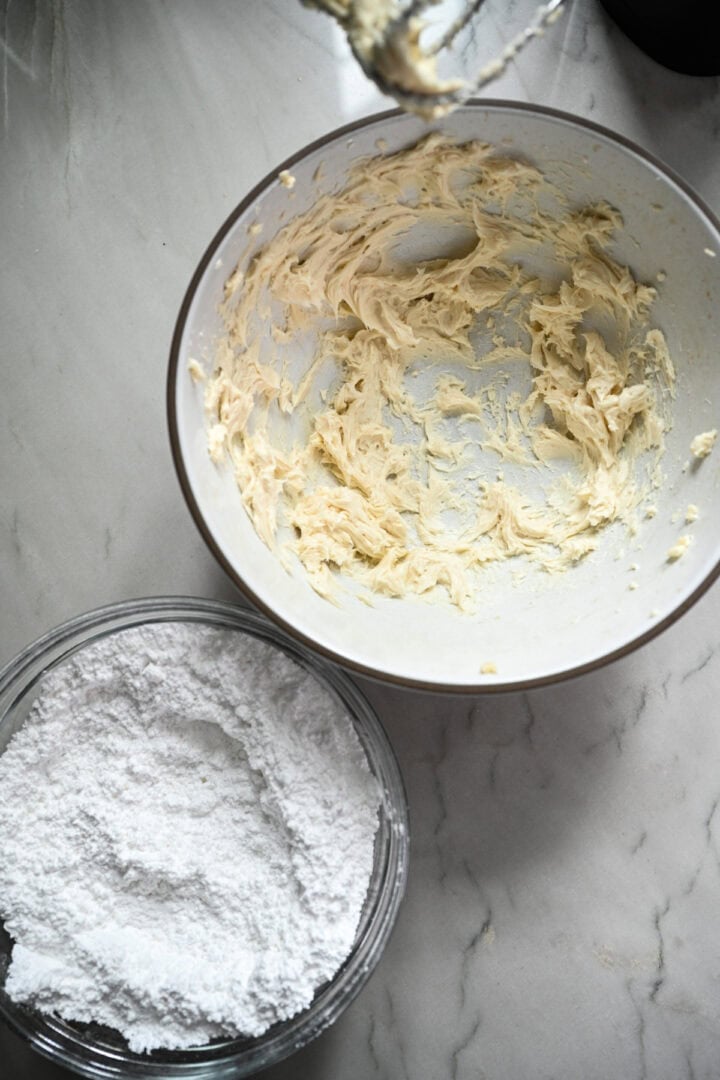
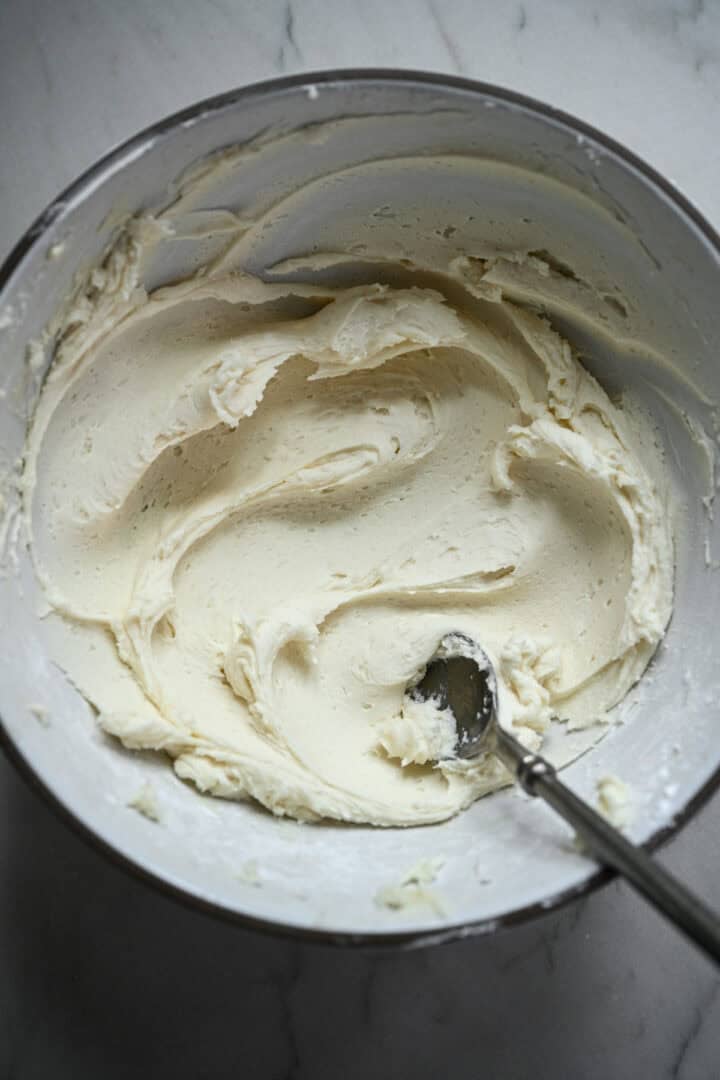
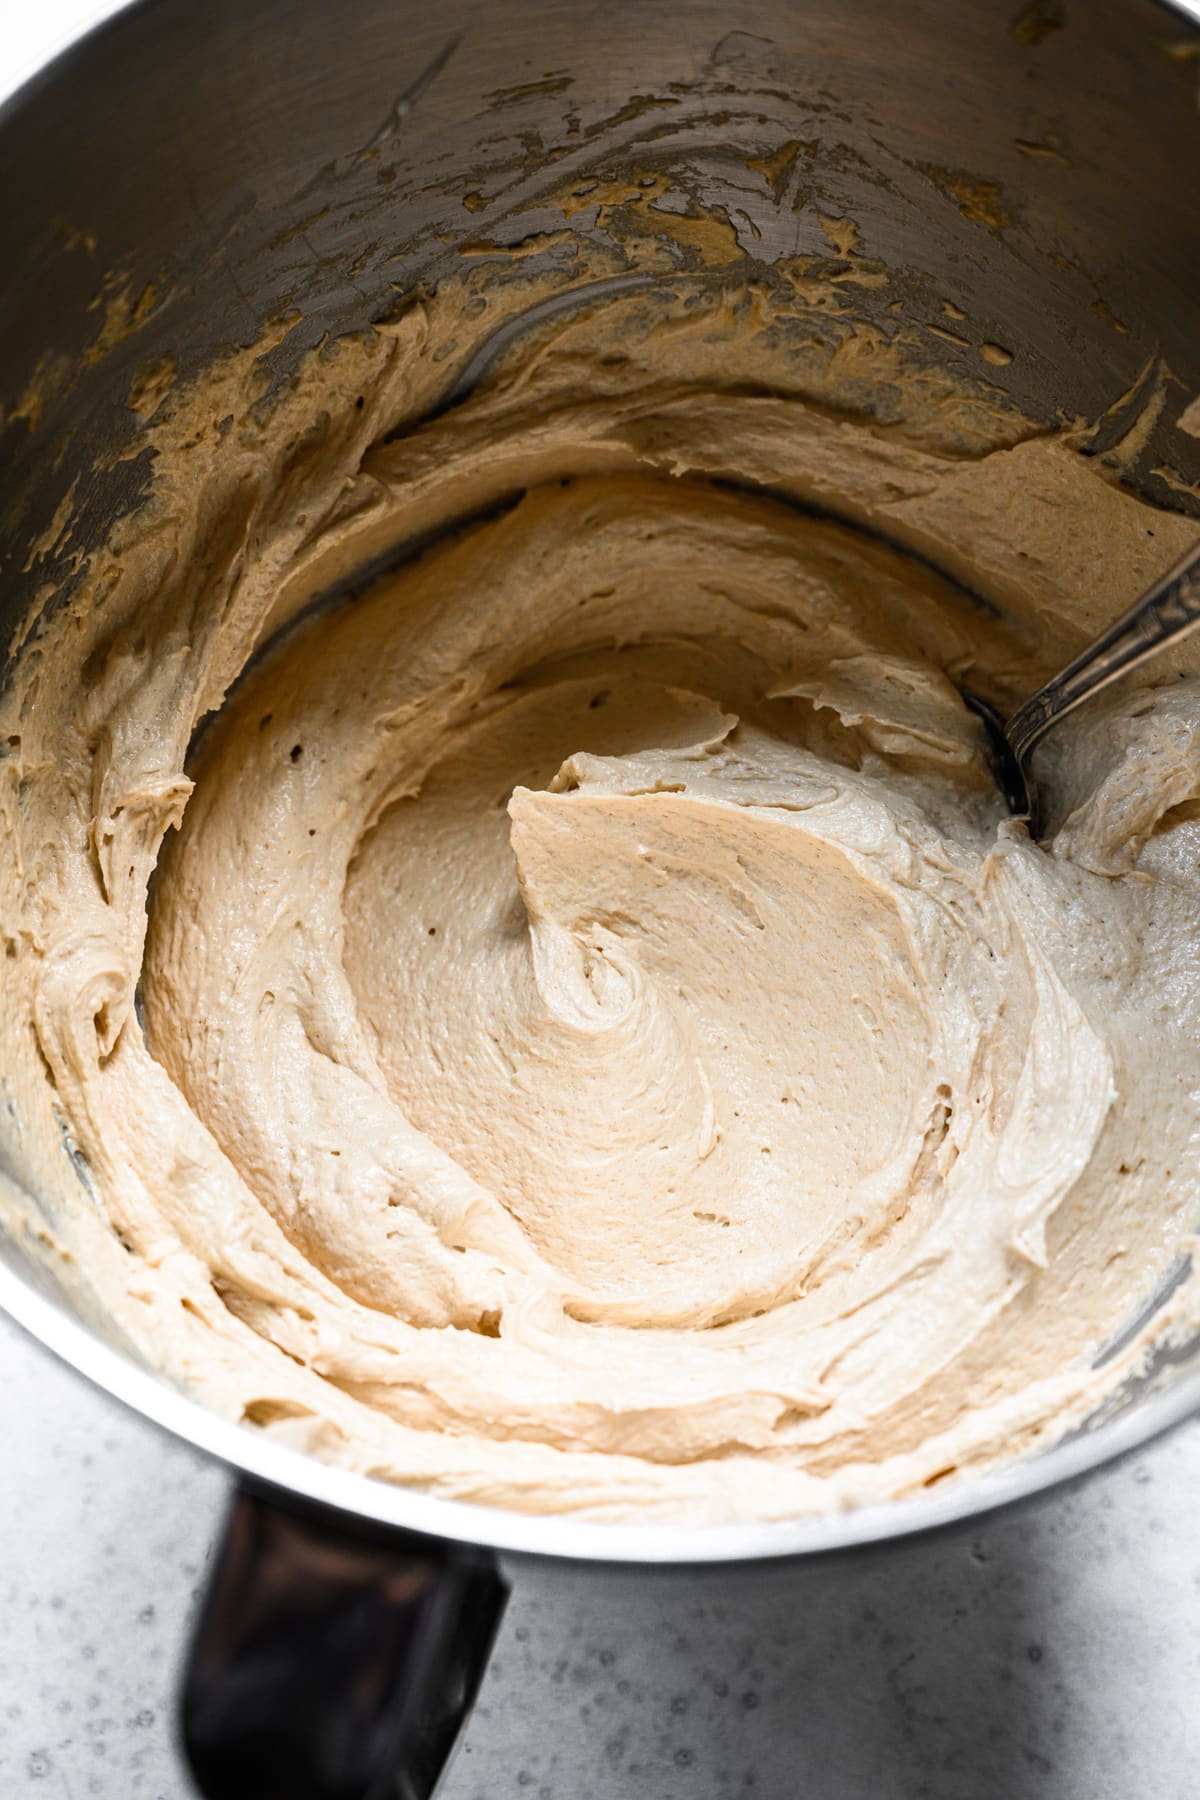
- In a large bowl, whip the butter and vanilla with a hand mixer until light and fluffy (1-2 minutes). In a medium bowl, combine powdered sugar, cornstarch, and salt. Add dry ingredients to the butter mixture in batches, fully combining between additions. Place cream in the fridge for at least 30 minutes to set.
- Scoop 1 teaspoon of cream filling and roll it into a ball.
- Sandwich the cream between two cookies. Press them together gently so that the cookies don't crack. You don't have to roll the cream filling into a ball (you can spread it), but it will look much neater this way!
Top Tips from the CK Test Kitchen!
- Storage: Keep these homemade oreos stored in the refrigerator for up to a week. We don't recommend keeping these stored at room temp, as the cream will soften and the cookies won't be as crisp.
- We roll out the dough between two pieces of parchment rather than a floured surface to keep the color of the cookies dark, and not coated in flour. This also helps keep the dough the correct texture without adding extra flour.
- The trick to using an embossed rolling pin is to oil it well before using. We used cooking spray and made sure it was in all the nooks and crannies before imprinting the dough.
- Oreos are naturally vegan, and this recipe is easily made vegan but using dairy-free butter and substituting maple syrup for the honey.

More Homemade Sweet Treats You'll Love

We can't wait for you to make homemade Oreos in your own home! If you do, be sure to let us know! Leave a comment with a star rating below. You can also snap a photo and tag @crowded_kitchen on Instagram. We can't wait to see what you're cooking!
Print📖 Recipe

Homemade Oreos
- Total Time: 1 hour 12 minutes
- Yield: 26 sandwich cookies 1x
- Diet: Vegetarian
Description
We've made pop tarts, cheez-its, and even choco tacos, but the number one most requested for our Better Than Store-Bought series is finally here: Homemade Oreos! Just like the authentic version you know and love, these are made with two crisp, chocolatey cookies and a rich, vanilla-flavored cream center. The recipe is fairly easy to make and it's absolutely worth the effort! They really do taste better than store-bought (and yes, we did a taste comparison!).
Ingredients
Cookies:
- 1 cup all-purpose flour
- 3 tablespoons dutch-process cocoa powder
- 2 tablespoons black cocoa powder
- ⅓ cup corn starch
- ⅓ cup granulated sugar
- ½ teaspoon baking soda
- ¼ teaspoon salt
- 8 tablespoons (1 stick) unsalted butter, cut into smaller pieces and softened to room temperature
- 1 teaspoon vanilla extract
- 1-2 tablespoons honey
Cream Filling:
- 6 tablespoons unsalted butter, softened to room temperature
- 1 teaspoon vanilla extract
- 1 ½ cups powdered sugar
- 2 teaspoons corn starch
- Pinch of salt
Instructions
Cookies:
- Add all the flour, both types of cocoa powder, corn starch, sugar, baking soda and salt to a food processor and pulse a few times to combine.
- Add in the softened butter, vanilla, and one tablespoon of honey and continue pulsing until a dough forms. If the dough is too dry (it should stick together when pinched between two fingers), add another ½-1 tablespoon of honey, until the dough comes together.
- Transfer the dough to plastic wrap, and press it into a rectangle. Chill in the refrigerator for 30-60 minutes before rolling it out.
- Preheat the oven to 350˚F/175˚C.
- Roll the dough out between two pieces of parchment paper to prevent sticking. Roll to about ⅛ inch thick. OPTIONAL: use an lightly oiled embossed rolling pin to create a textured design on top. Firmly press the rolling pin down, but go slowly so you don't make the dough too thin.
- Cut with 1.75-2-inch diameter circle cookie cutters, and transfer the cookies to a parchment paper-lined baking sheet. Re-roll the scraps to make as many cookies as possible.
- Bake for 10-12 minutes, until the cookie edges feel dry to the touch.
- Let the cookies cool on the pan for a few minutes before moving to a cooling rack. The cookies will crisp up as they cool. Assemble when cookies are cooled to room temperature.
Cream:
- In a large bowl, whip the butter and vanilla with a hand mixer until light and fluffy (1-2 minutes).
- In a medium bowl, combine powdered sugar, cornstarch, and salt.
- Add dry ingredients to the butter mixture in batches, fully combining between additions.
- Place cream in the fridge for at least 30 minutes to set.
Assemble:
- Scoop 1 teaspoon of cream filling and roll it into a ball.
- Sandwich the cream between two cookies. Press them together gently so that the cookies don't crack. You don't have to roll the cream filling into a ball (you can spread it), but it will look much neater this way!
- Keep these homemade oreos stored in the refrigerator for up to a week. We don't recommend keeping these stored at room temp, as the cream will soften and the cookies won't be as crisp.
Notes
Make it vegan: this recipe is easily made vegan but using dairy-free butter and substituting maple syrup for the honey.
Lightly oil the embossed rolling pin to prevent sticking, making sure to get the oil into all of the nooks and crannies.
- Prep Time: 60 minutes
- Cook Time: 12 minutes
- Category: Dessert
- Method: Baking
- Cuisine: American
Nutrition
- Serving Size:
- Calories: 110
- Sugar: 5 g
- Sodium: 44.9 mg
- Fat: 7.7 g
- Carbohydrates: 9.9 g
- Fiber: 2.4 g
- Protein: 2.2 g
- Cholesterol: 0 mg


Mari says
These were the BEST “Oreos” I’ve ever had! So good and so simple to make! Everyone I shared them with loved them!!!
Lexi says
Yay, thank you so much!
NG says
I really like this recipe and wanted to share some adjustments I made to the process which I think have been very helpful.
1) I baked the cookies at 300 degrees for 12 minutes. This allowed them to get a tru Oreo crispiness without puffing up or burning on the bottom.
2) I rolled them out with a regular pin then after they came out of the oven, I let them sit for 1-2 minutes and then pressed them down with (of all things) a patterned low ball glass I use for vodka sodas. This not only made sure there was a nice, detailed pattern pressed into the cookie but it also made them more Oreo-like by flattening them making them less puffy.
Thank you for the recipe.
Lexi says
Thank you for sharing your feedback and really glad you enjoyeed!
Mariana says
Oh no I just commented and forgot to rate, 5 stars!!
Lexi says
Thank you so much! So glad you enjoyed!!
Michelle Johnson says
Hello. Can you use sugar instead of honey??
Lexi says
Hi! The stickiness of the honey helps bring the dough together. You can definitely substitute with another liquid sweetener.
Mariana says
This recipe is AMAZING!!! I made the cookies yesterday swapping the ap flour for king Arthur’s measure for measure gluten free flour and they turned out perfect! Thank you!!
Sarah says
Can you use just plain cacao pr cocoa powder?
Emily says
Such a fun recipe! What is the serving size?
Orit says
It was so good! I’m trying to get my family to cut out on processed food so I made this. I’ll tell ya… this Oreo recipe is 10X better than the store bought. I’ll definitely be making this again.