
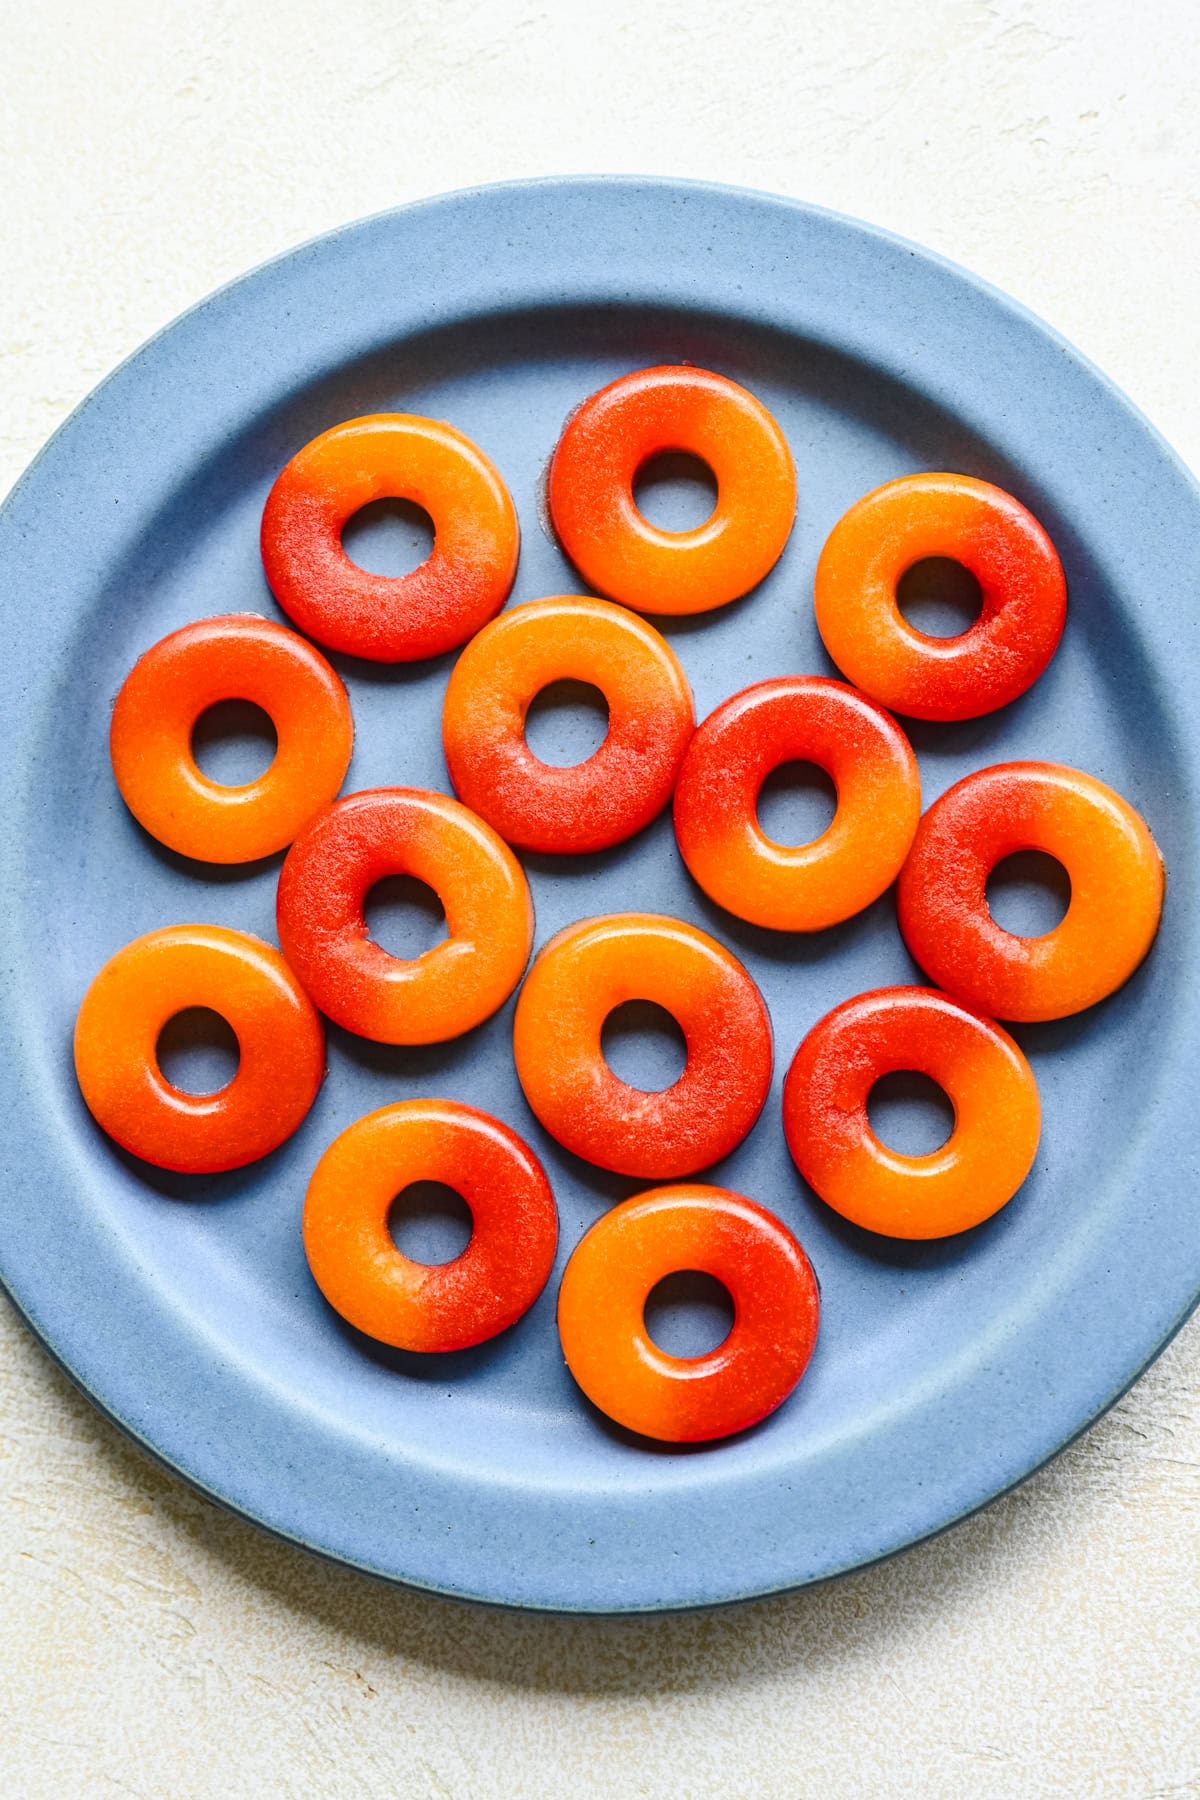
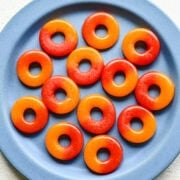
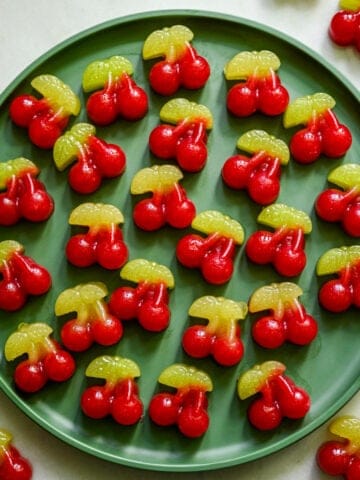
With fresh peaches and just 4 other ingredients, you can make homemade gummy peach rings that are chewy, delicious, and packed with real peach flavor.
Gummy peach rings are one of our favorite snacks. They look and taste amazing, but are usually made with artificial flavors, colors, and corn syrup. So why not make them at home? It's way easier than you think!
Disclosure: Some of the links below are affiliate links. This means that, at zero cost to you, I may earn an affiliate commission if you click through the link and finalize a purchase. Read our full affiliate disclosure here.
This recipe is part of our Better Than Store-Bought series, where we cook up homemade versions of your favorite store bought snacks. These gummies look and taste amazing, and they're really not that hard to make. The end result is so rewarding, and the process is super easy, so it's a great activity to do with your kids.
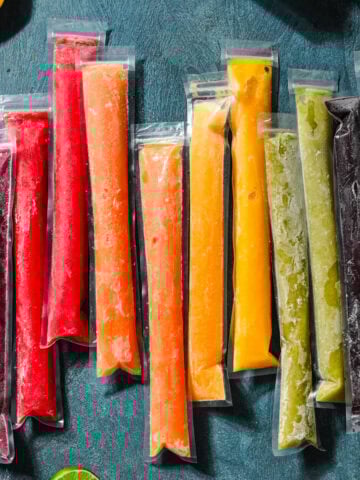
If you're looking for more delicious homemade snacks that you and your kids will love, check out our Homemade Freeze Pops or these Homemade Fruit Snacks.
Jump to:
Homemade Gummy Peach Rings Ingredients
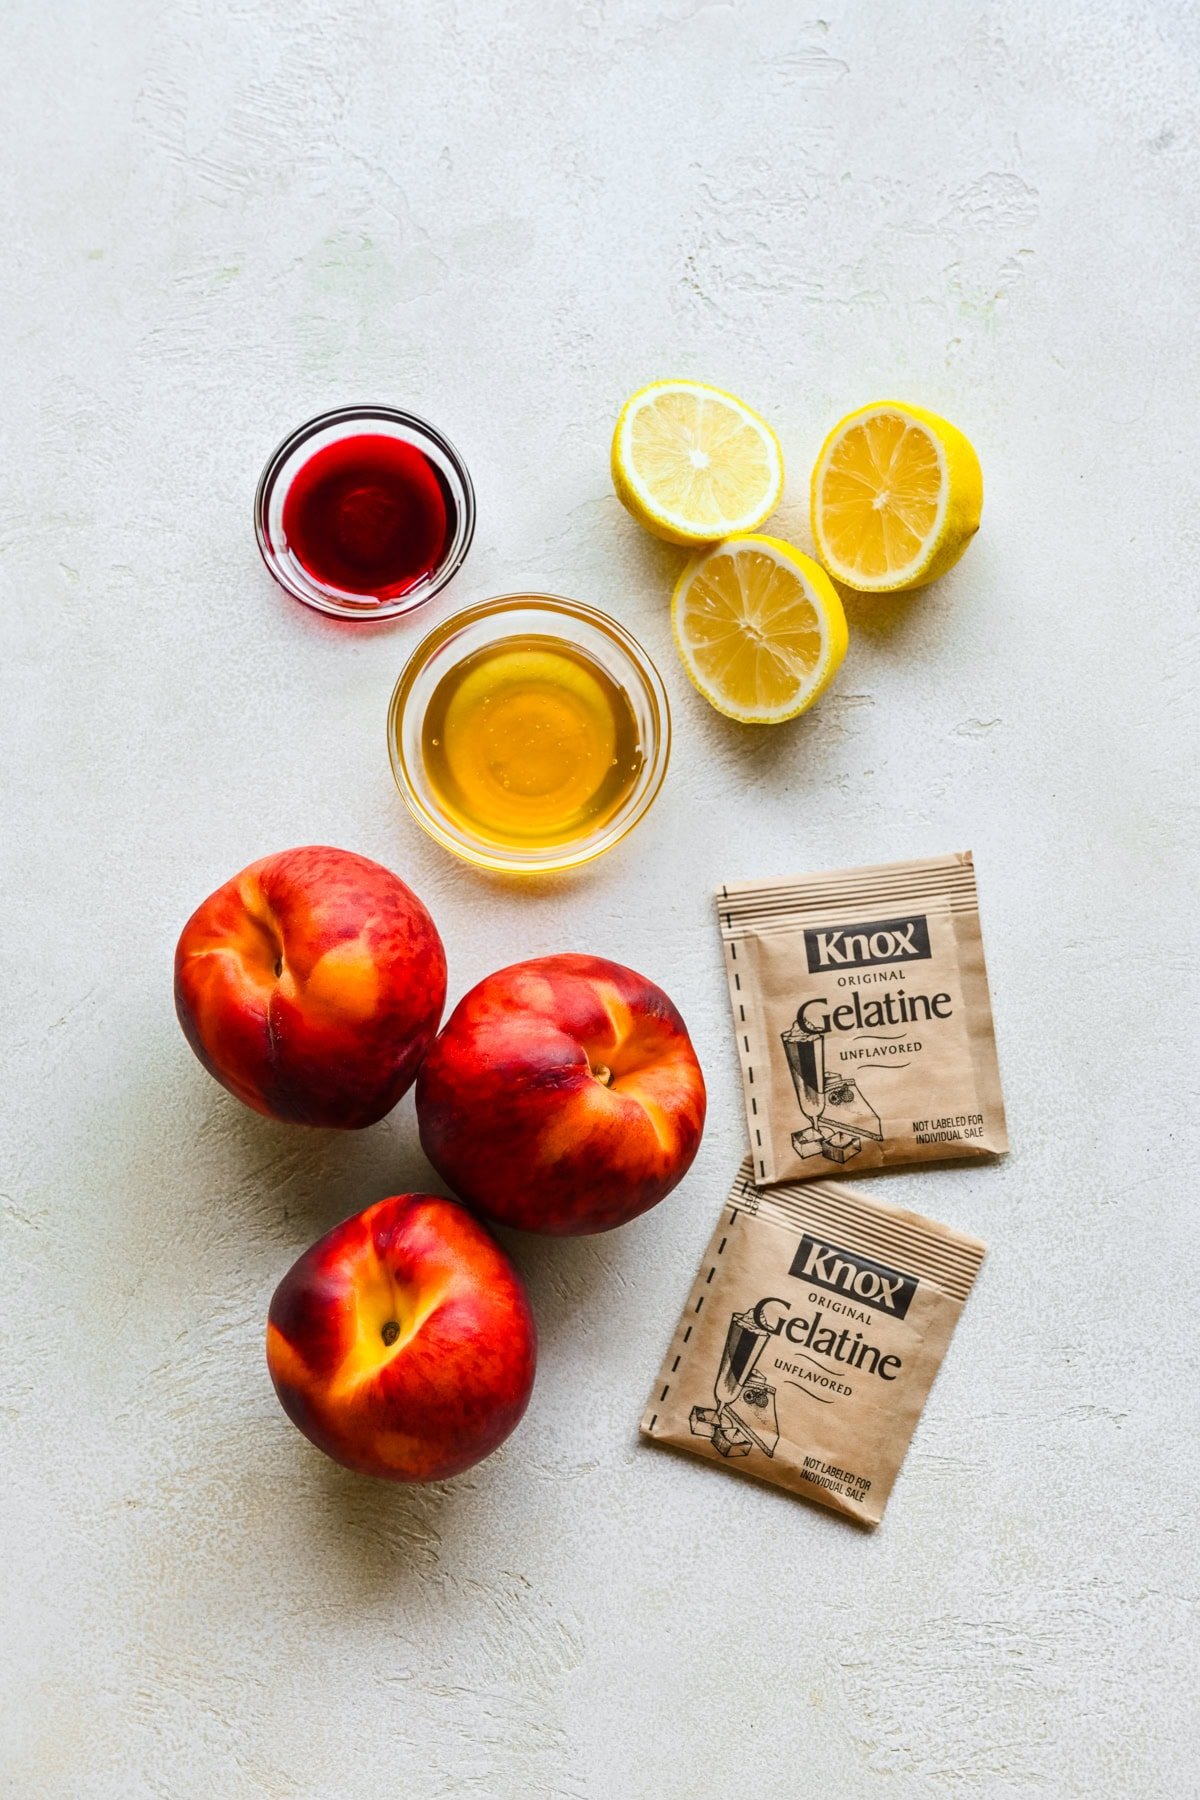
- Peaches: We used fresh yellow peaches (PLU: 4404), but frozen peaches will definitely work as well, just make sure to thaw them a bit to ensure smooth blending.
- Lemon juice: freshly squeezed lemon juice really helps to bring out the peach flavor, and it also helps to prevent oxidation and discoloration. We choose to bloom our gelatin in lemon juice instead of water to prevent diluting the flavor and color of our gummies.
- Honey or agave: we prefer the flavor of honey, but it is harder to work with, and more expensive than agave. You could also get away with using simple syrup in a pinch.
- Gelatin: we used the Knox brand unflavored gelatin packets. Though they are unflavored, they do have a bit of an odor and flavor, which dissipates the longer the gummies sit. If you're a vegan or vegetarian, you can substitute gelatin for agar agar, which uses a different process entirely.
- Tart cherry concentrate: Since this is a concentrate, it's much thicker than juice, so when you fill the molds they fill at an even rate so you can get both distinct colors. You can also use natural food coloring, or just add in red fruit puree (cherries, strawberries or raspberries).
How to Make this Homemade Gummy Peach Rings Recipe
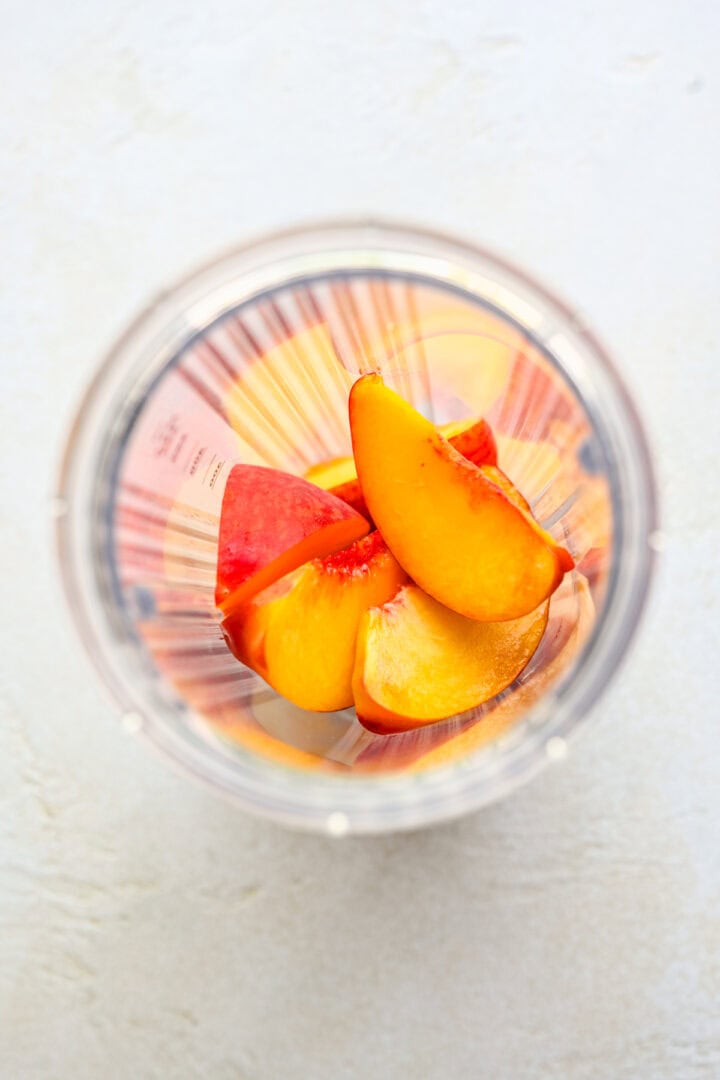
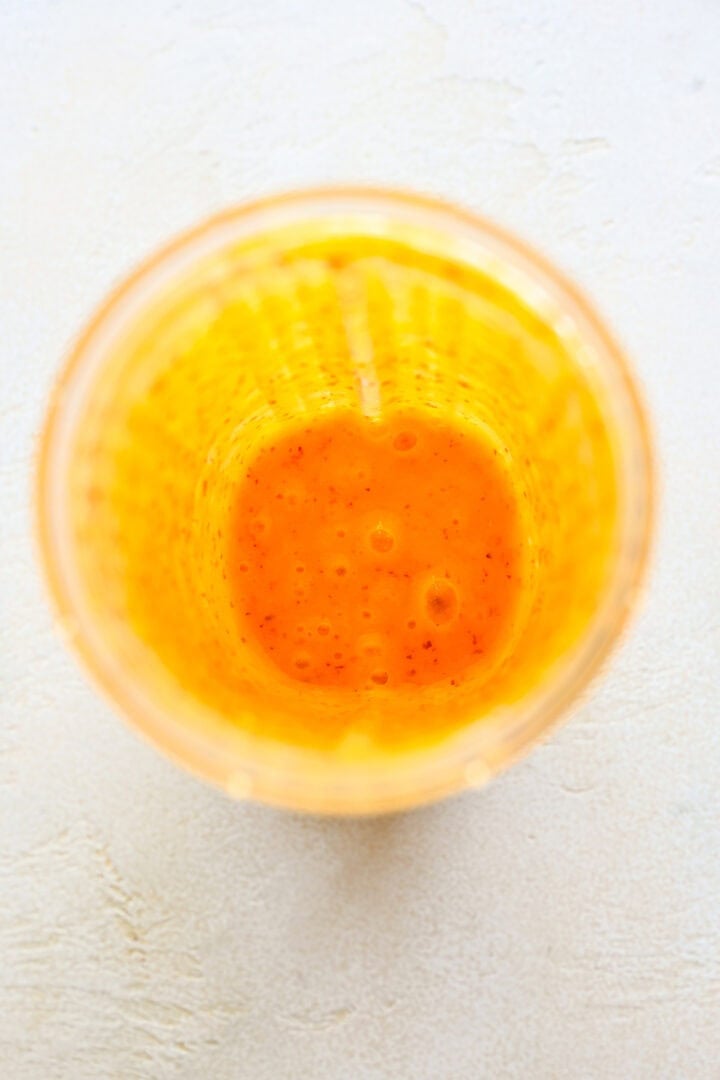
STEP 1: Blend the fruit. Add fruit to blender and blend until completely smooth. We also passed the fruit through a fine mesh strainer to remove some of the skin, but this is totally optional.
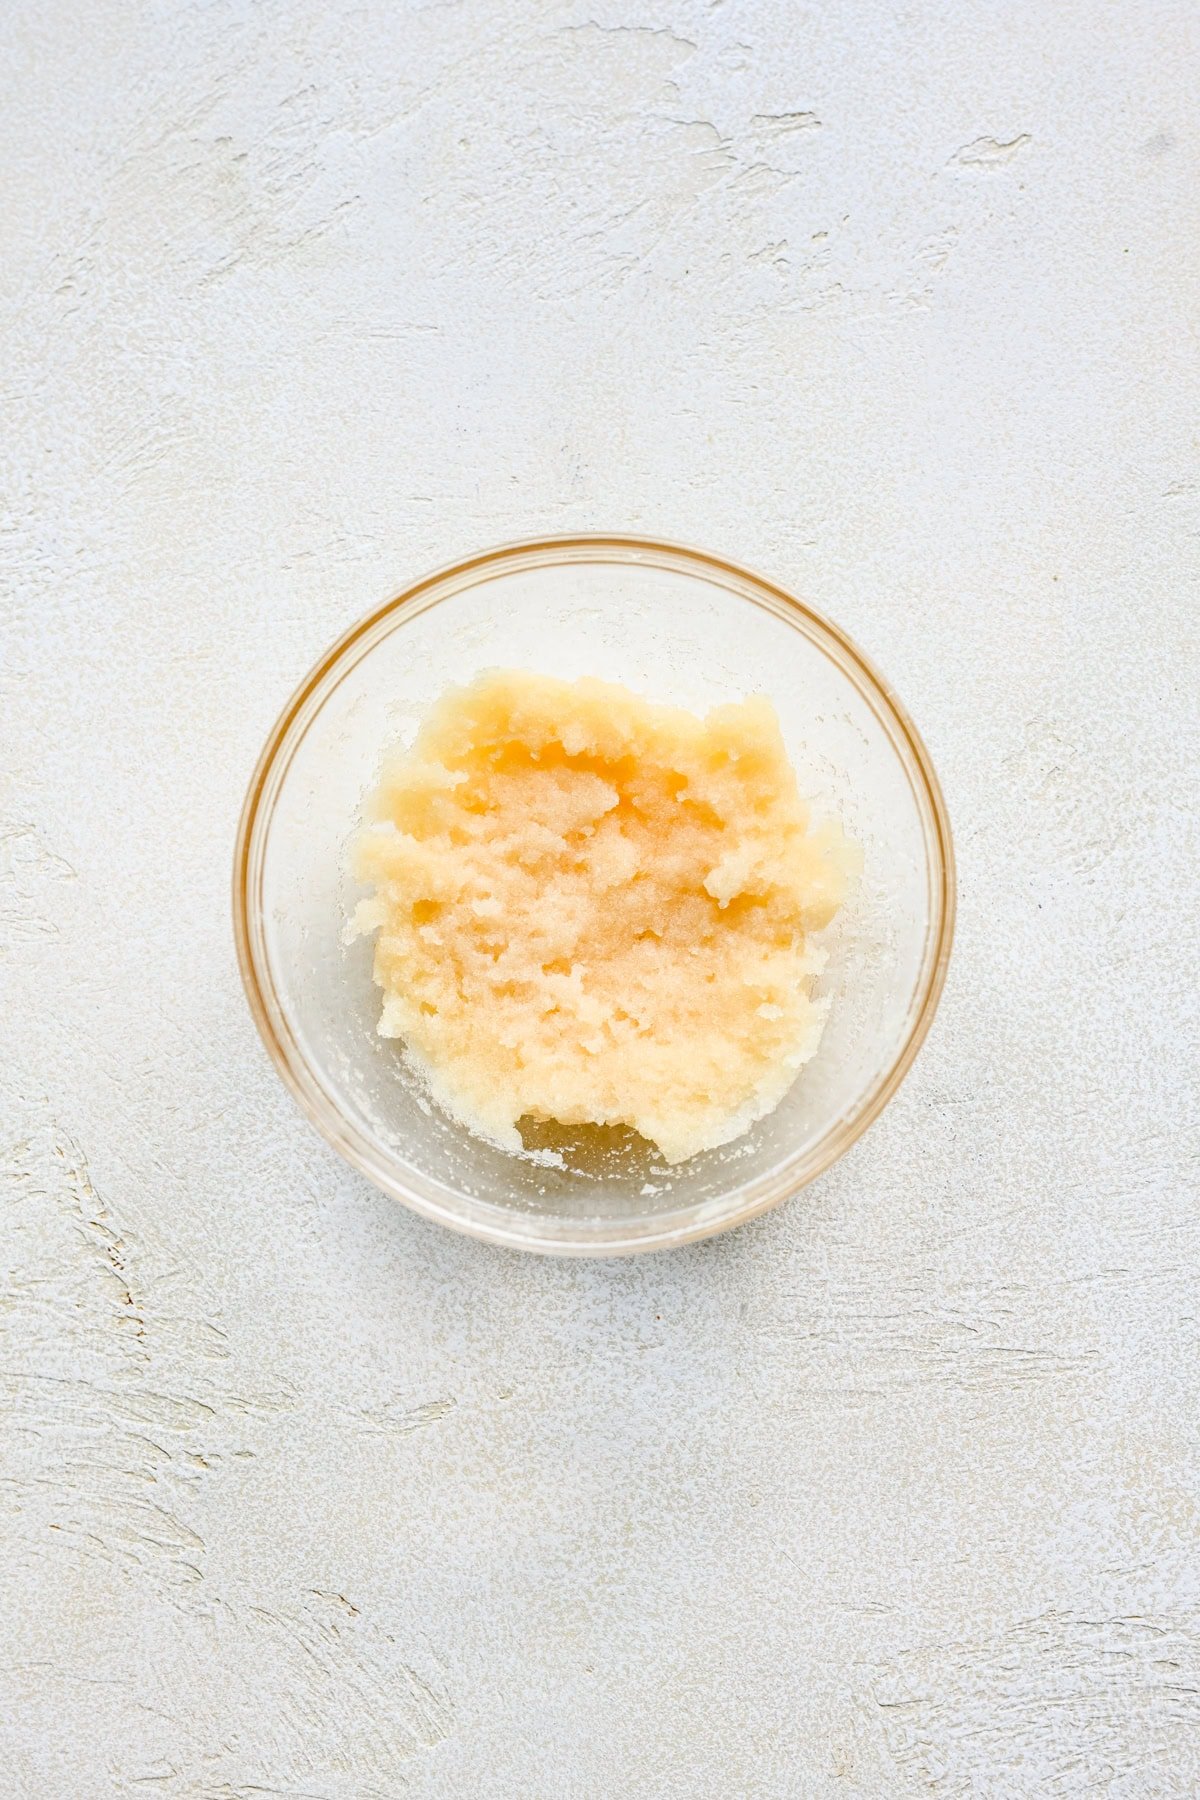
STEP 2: Bloom the gelatin. In a small container, sprinkle gelatin evenly over lemon juice, then stir thoroughly until there are no dry grains visible. Let sit for 5 minutes.
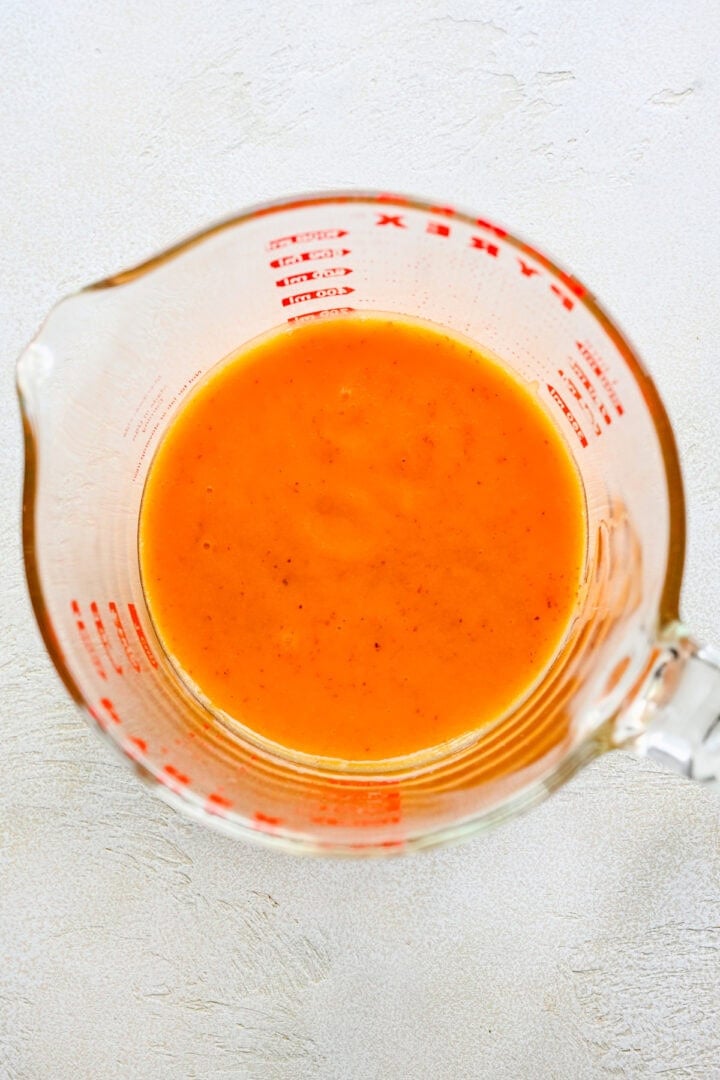
STEP 3: Heat up the fruit purée. While the gelatin blooms, combine fruit purée with honey or agave in a small saucepan over low heat, and stir until combined. You want to heat the purée enough to melt the gelatin (>~120˚F), but you don't want to bring it to a boil, which will denature the gelatin.
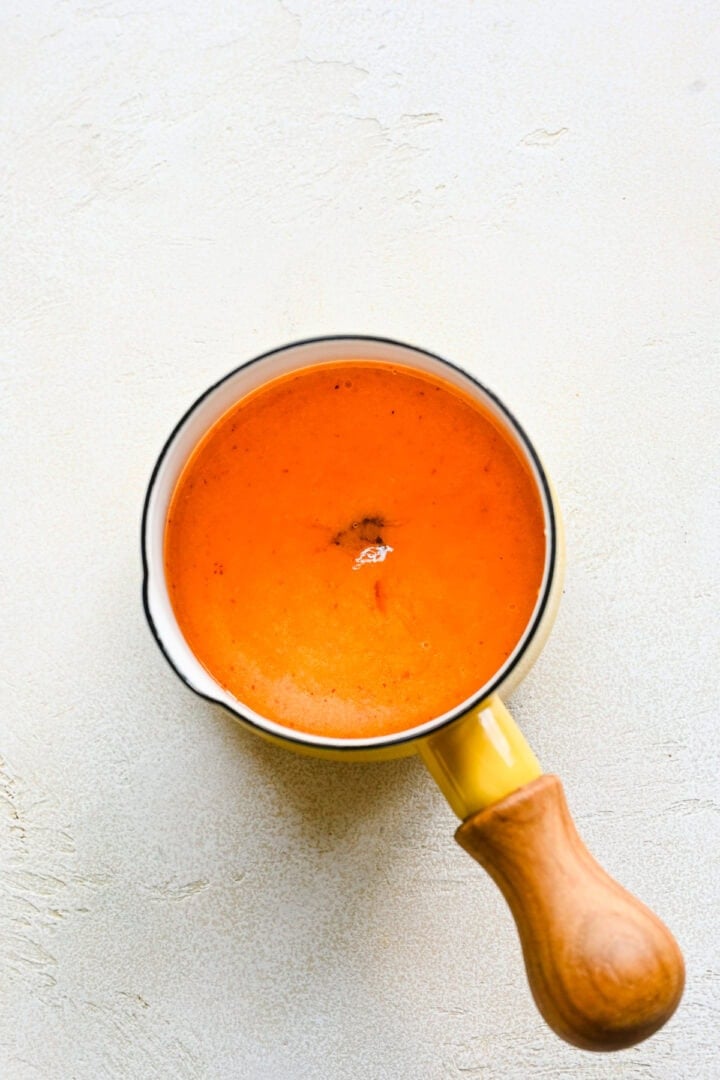
STEP 4: Combine fruit purée with gelatin. Add gelatin and lemon juice mixture to the fruit puree, and stir until it's completely dissolved. Remove pan from heat and let cool for about 5 minutes.
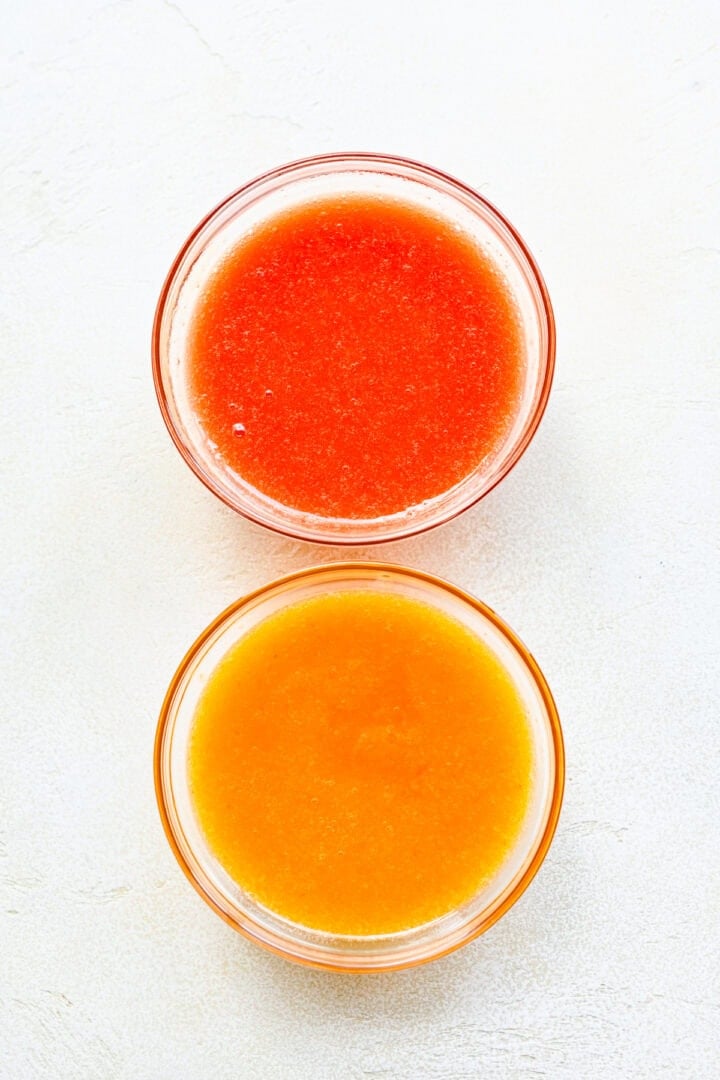
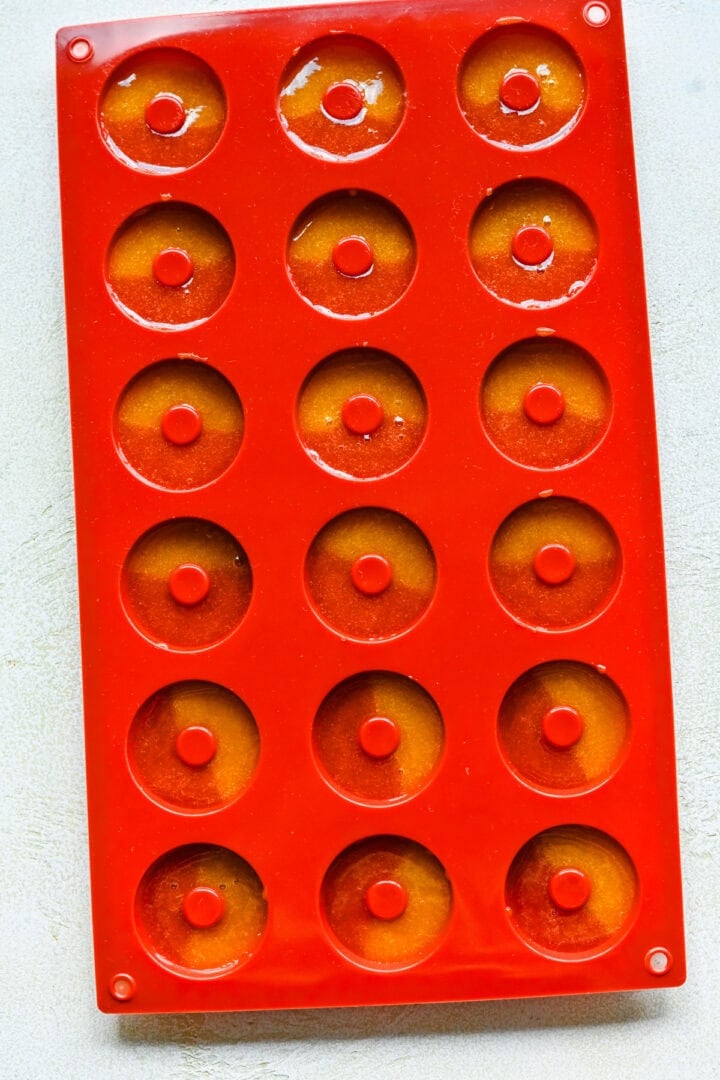
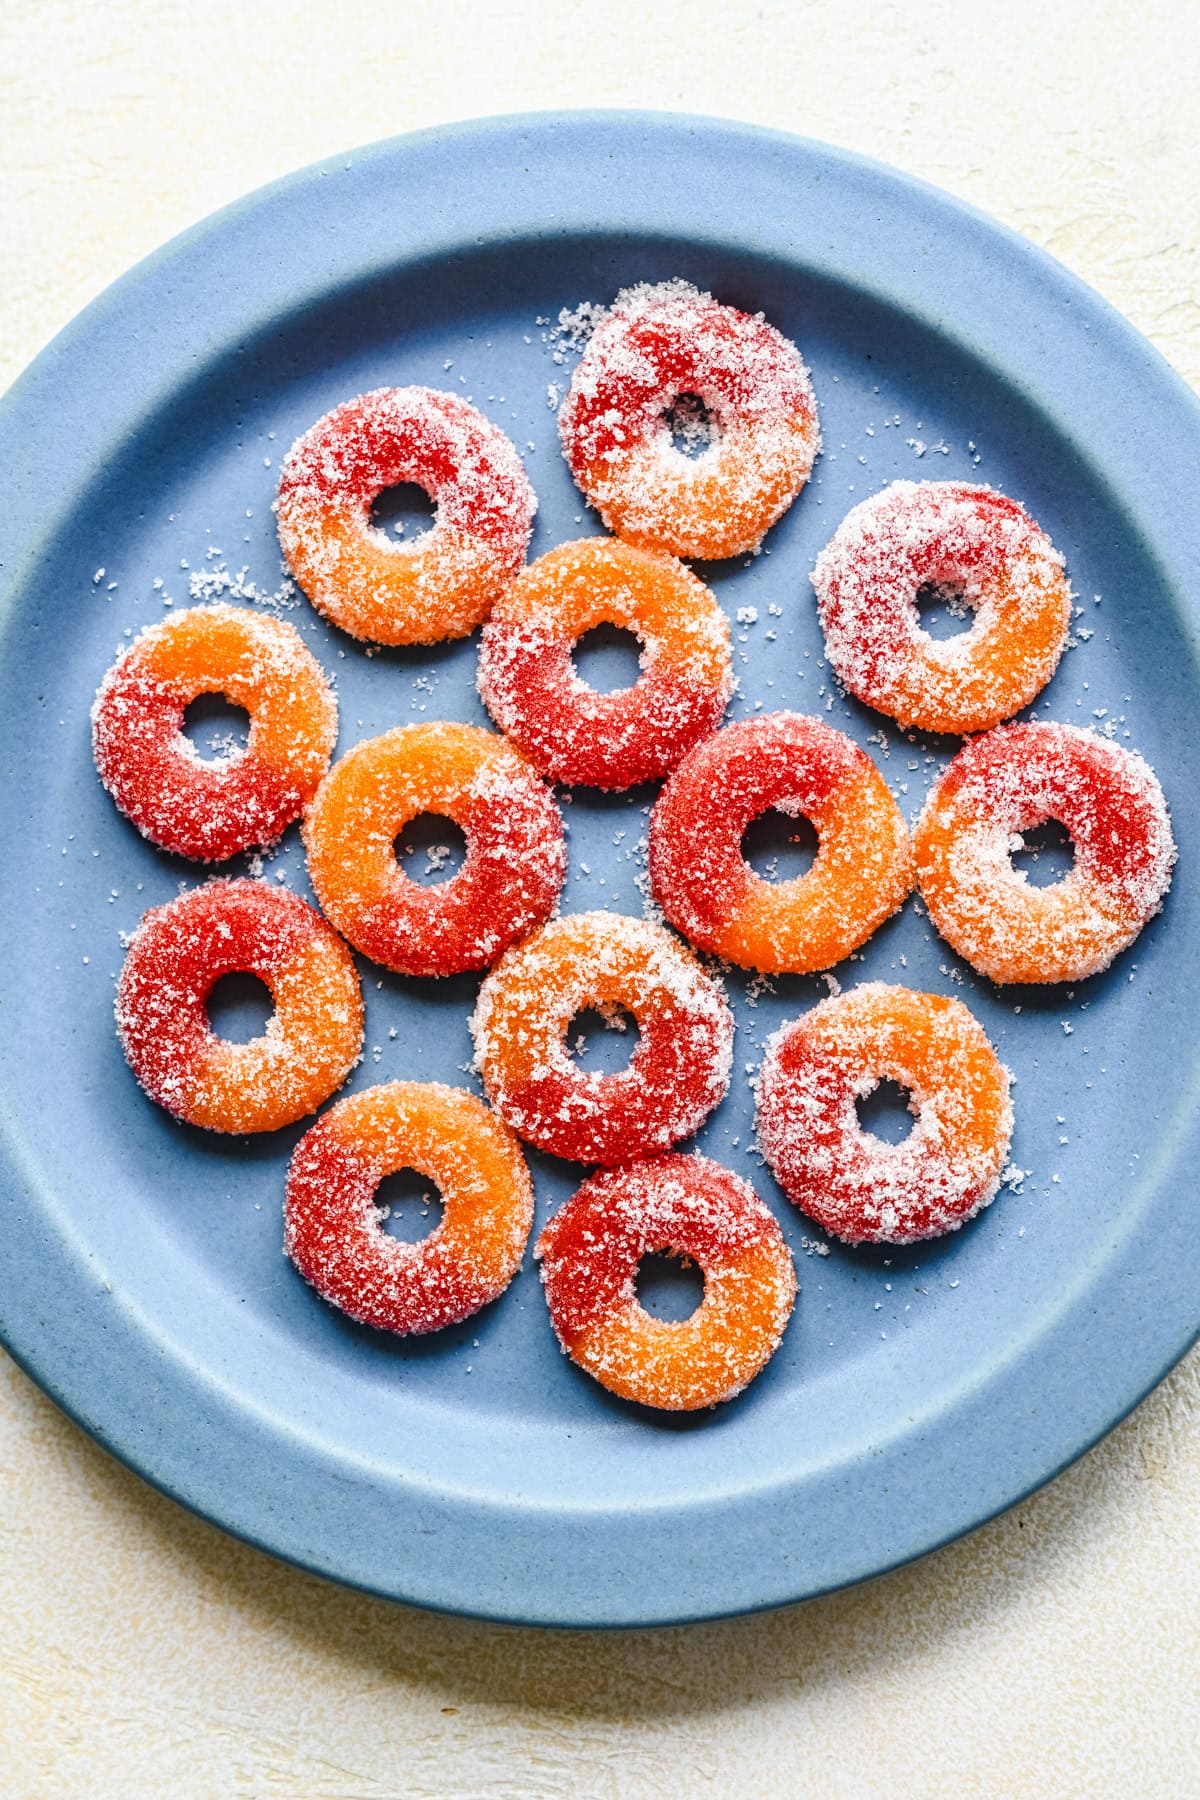
STEP 5: Fill up your molds. Pour half of the mixture into one small mixing bowl, and half into another. Add tart cherry concentrate to one of the bowls and mix to create your two different colors. Give your silicone molds a light spray with avocado oil or cooking spray. Use two spoons or droppers simultaneously to fill up each ring, then move to your refrigerator. Refrigerate for an hour and a half to let them set up.
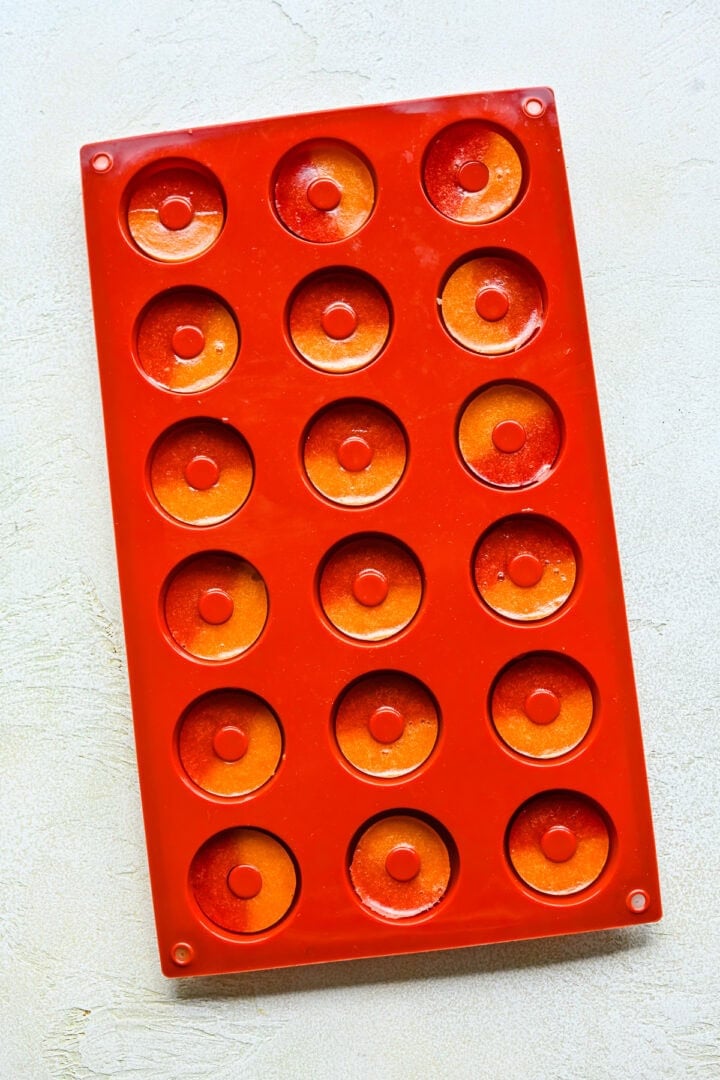
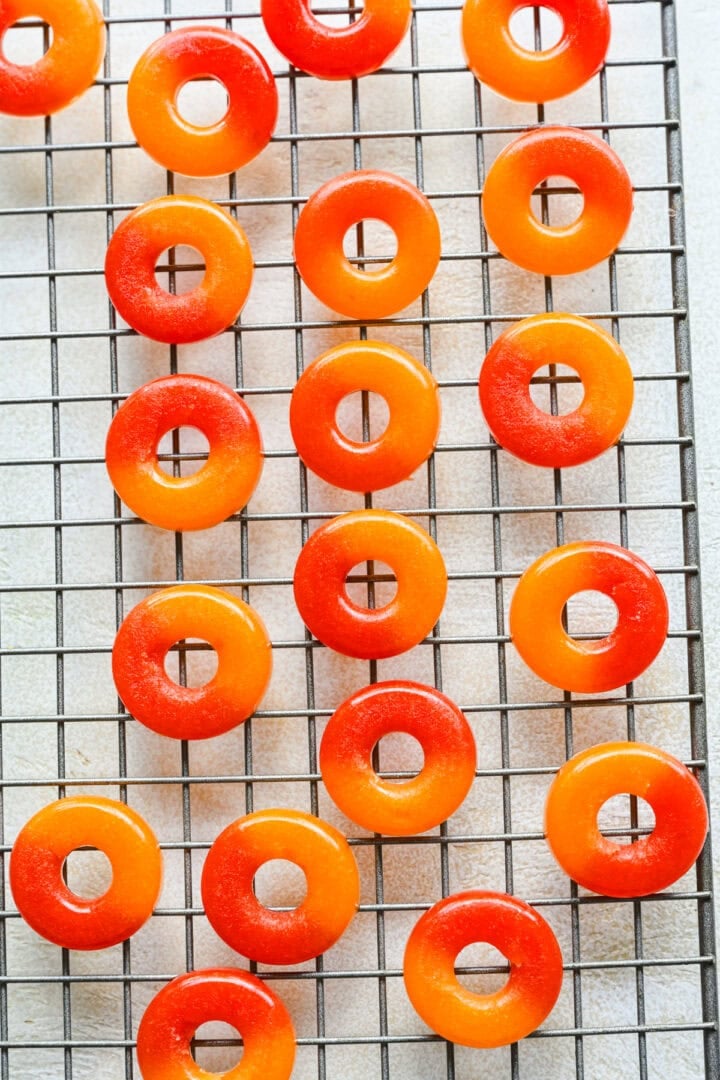
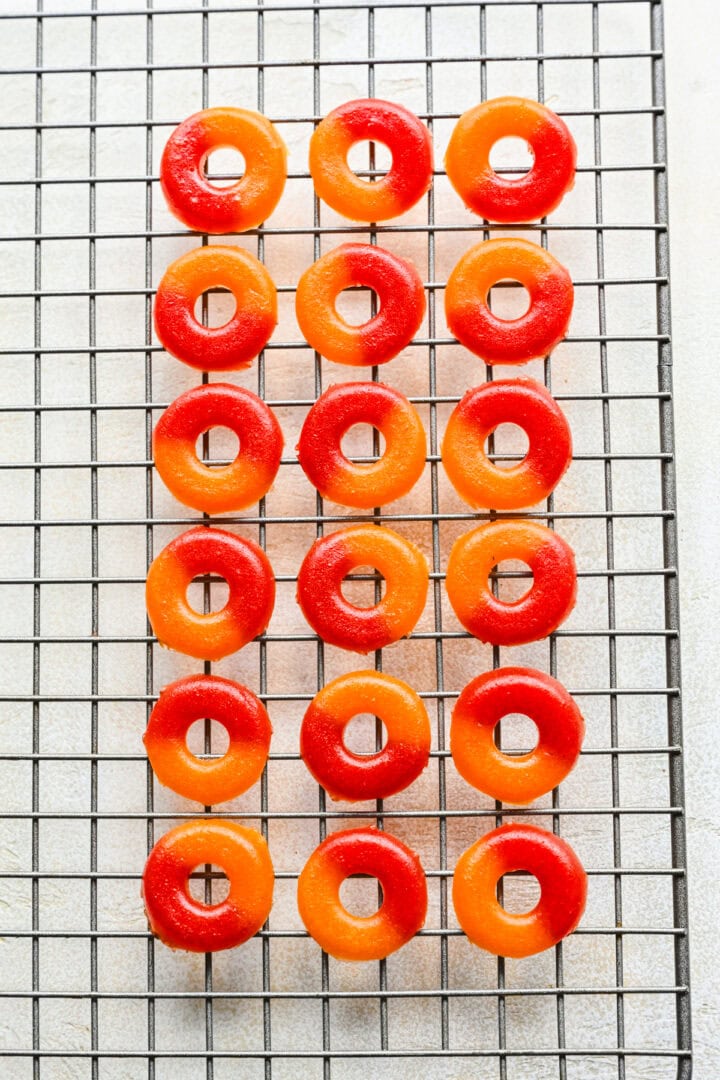
STEP 6: Air dry your gummies. Remove from the molds and place on a wire rack, and let sit for 8 hours or overnight. The gummies will shrink significantly and achieve a more intense flavor and a chewy, gummy texture.
Substitutions and Variations
- Use any fruit - You can use any fruit you want in these gummies, like apple, cherry, mango, kiwi, or even pear or pomegranate. Just be sure to check if your fruit contains enzymes that make it harder for gelatin to set, which will necessitate heating the fruit purée to 176˚F for at least 8 minutes.
- Agar agar instead of gelatin - If you're vegan or vegetarian, you can use agar agar or a combination of agar agar and sea moss. There are lots of resources online about using agar agar instead of gelatin.
- Sugar coating: We mixed a small amount of citric acid with sugar and tossed the gummies in the mixture. Because these are natural gummies and have a good amount of water content, the sugar and citric acid will absorb excess moisture in the gummies and create a "wet appearance", so you'll have to eat them pretty quickly if you want to coat them. You can also try drying out the gummies for 48 hours to rid them of most of their moisture, and then toss in the sugar mixture.
- Red coloring: We used tart cherry concentrate to make the red part red, but you can use food dye if you're comfortable with it. This brand uses naturally derived colors for food dye and we highly recommend!
Equipment
You will need silicone molds and droppers to make these gummies. Here's the exact mold we used. You can also get the droppers here.
Storage
Once the gummies have dried out overnight, move them to an airtight container and store in the refrigerator for up to 2 weeks. They should keep just fine at room temperature, but will continue to shrink and may develop a skin on the outside. The refrigerator helps keeps them slightly moist.
Tips and FAQ
Don't skip drying out your gummies.
Seriously, this is the most important step to make gummies that actually taste store bought. Manufactured gummies all undergo a drying process, which helps to intensify the fruit flavor, and make the gummies chewier. If you skip this step, your gummies will still be good, but they'll be halfway between gummies and jell-o. We set ours atop a wire rack and placed a fan on low behind them to ensure adequate air flow.
More tips
- NOTE: The citric acid/sugar mixture will eventually draw out moisture from the gummies, so they will start to melt/disintegrate. We suggest waiting to coat them until just before eating. You can keep the sugar/citric acid mixture in a little container and just coat a few when you want to eat them, versus coating them all at once and then storing (this will not work).
- Lightly spray your molds with cooking spray to ensure the gummies pop out easily.
- Sprinkle the gelatin over the top of the lemon juice evenly. This will help to prevent clumping by ensuring that each grain of gelatin is saturated with water. Let the gelatin "bloom" for a few minutes before adding it to the fruit purée. It will come out of your container in one solid hockey-puck like piece.
- It may be difficult to blend your fruit in a large blender. If this is the case, you can up the quantity of the recipe, or add a tablespoon or so of water to the blender to get things going.
- Straining your fruit puree is totally optional, but we wanted a clear gummy with a consistent color, so we removed the skins.
- Let the fruit purée cool a bit before adding to the molds. This will make the mixture easier to pipe.
- To transfer the mixture into the molds, we used a dropper, but a food grade syringe, a small measuring cup with a pour spout, or even a small spoon would all work. You will need to pour simultaneously to achieve the two-colored ring look.

More homemade snack recipes
Looking for other recipes like this? Try these:


Tried this recipe?
Please leave a star ⭐️⭐️⭐️⭐️⭐️ rating below and/or a review in the comments section further down the page. You can also stay in touch with us through social media by following us on Instagram, Pinterest, TikTok, Facebook or by subscribing to our newsletter.
📖 Recipe
Homemade Gummy Peach Rings
- Total Time: 9 hours 50 minutes
- Yield: 18-24 peach rings 1x
- Diet: Gluten Free
Description
With fresh peaches and just 4 other ingredients, you can make homemade gummy peach rings that are chewy, delicious, and packed with real peach flavor.
Gummy peach rings are one of our favorite snacks. They look and taste amazing, but are usually made with artificial flavors, colorings, and corn syrup. So why not make them at home? It's way easier than you think!
Ingredients
- 180g fresh or frozen yellow peaches (about ⅔ cup blended)
- 2 envelopes (~7g each, ~14g total) unflavored powdered gelatin
- 2 tablespoons freshly squeezed lemon juice
- 2 tablespoons honey or agave
- Optional: 1 ½ teaspoons tart cherry concentrate (or natural red food coloring)
- Optional: ¼ cup sugar + 1 tablespoon (or less) citric acid for coating
Instructions
- Blend the fruit. Add fruit to blender and blend until completely smooth. We also passed the fruit through a fine mesh strainer to remove some of the skin, but this is totally optional.
- Bloom the gelatin. In a small container, sprinkle gelatin evenly over lemon juice, then stir thoroughly until there are no dry grains visible. Let sit for 5 minutes.
- Heat up the fruit purée. While the gelatin blooms, combine fruit purée with honey or agave in a small saucepan over low heat, and stir until combined. You want to heat the purée enough to melt the gelatin (>~120˚F), but you don't want to bring it to a boil, which will denature the gelatin.
- Combine fruit purée with gelatin. Add gelatin and lemon juice mixture to the fruit puree, and stir until it's completely dissolved. Remove pan from heat and let cool for about 5 minutes.
- Fill up your molds. Pour half of the mixture into one small mixing bowl, and half into another. Add tart cherry concentrate to one of the bowls and mix to create your two different colors. Give your silicone molds a light spray with avocado oil or cooking spray. Use two spoons or droppers simultaneously to fill up each ring, then move to your refrigerator. Refrigerate for an hour and a half to let them set up.
- Air dry your gummies. Remove from the molds and place on a wire rack, and let sit for 8 hours or overnight. The gummies will shrink significantly and achieve a more intense flavor and a chewy, gummy texture.
- Optional: Coat them in the sugar/citric acid mixture just before eating. NOTE: The citric acid/sugar mixture will eventually draw out moisture from the gummies, so they will start to melt/disintegrate. We suggest waiting to coat them until just before eating. You can keep the sugar/citric acid mixture in a little container and just coat a few when you want to eat them, versus coating them all at once and then storing (this will not work).
Notes
EQUIPMENT LINKS: These are the molds we used and these are the droppers. If you want to use food coloring instead of tart cherry concentrate, this is the brand we recommend (no artificial dyes).
Lightly spray your molds with cooking spray to ensure the gummies pop out easily.
Sprinkle the gelatin over the top of the lemon juice evenly. This will help to prevent clumping by ensuring that each grain of gelatin is saturated with water. Let the gelatin "bloom" for a few minutes before adding it to the fruit purée. It will come out of your container in one solid hockey-puck like piece.
It may be difficult to blend your fruit in a large blender. If this is the case, you can up the quantity of the recipe, or add a tablespoon or so of water to the blender to get things going.
Straining your fruit puree is totally optional, but we wanted a clear gummy with a consistent color, so we removed the skins.
Let the fruit purée cool a bit before adding to the molds. This will make the mixture easier to pipe.
To transfer the mixture into the molds, we used a dropper, but a food grade syringe, a small measuring cup with a pour spout, or even a small spoon would all work. You will need to pour simultaneously to achieve the two-colored ring look.
- Prep Time: 10 minutes
- Rest Time: 9 hours 30 minutes
- Cook Time: 10 minutes
- Category: Snacks
- Method: Stovetop
- Cuisine: American
Nutrition
- Serving Size: 10 peach rings
- Calories: 126
- Sugar: 25.3 g
- Sodium: 14.7 mg
- Fat: 0.3 g
- Carbohydrates: 27.1 g
- Fiber: 1.4 g
- Protein: 6.9 g
Dawn says
Can you please tell me the droppers you use? The droppers' link above goes to citric acid. Thank you.
Lexi says
anything like this will work! https://amzn.to/4rHVpT2
ANDREA ARMSTRONG says
Just wondering before I make these peach rings; does the tart cherry concentrate add to the flavouring of these rings at all?
Norma Robertson says
I was wondering how to store the gummy peach rings.
Lexi says
Once the gummies have dried out overnight, move them to an airtight container and store in the refrigerator for up to 2 weeks. They should keep just fine at room temperature, but will continue to shrink and may develop a skin on the outside. The refrigerator helps keeps them slightly moist.
Kelly says
Can I throw them in a dehydrator or is air drying better?
Thank you! This looks amazing!
Lexi says
Air drying is essential! The heat from a dehydrator may cause them to melt.
Jamon says
I followed this recipe exactly and everything went well except that the gummies are not chewy. They've been sitting by a good airflow for 19 hours now and they are still jelly like. So do you know what I did wrong?
harbqll says
The link provided for the "droopers" instead links to citric acid.