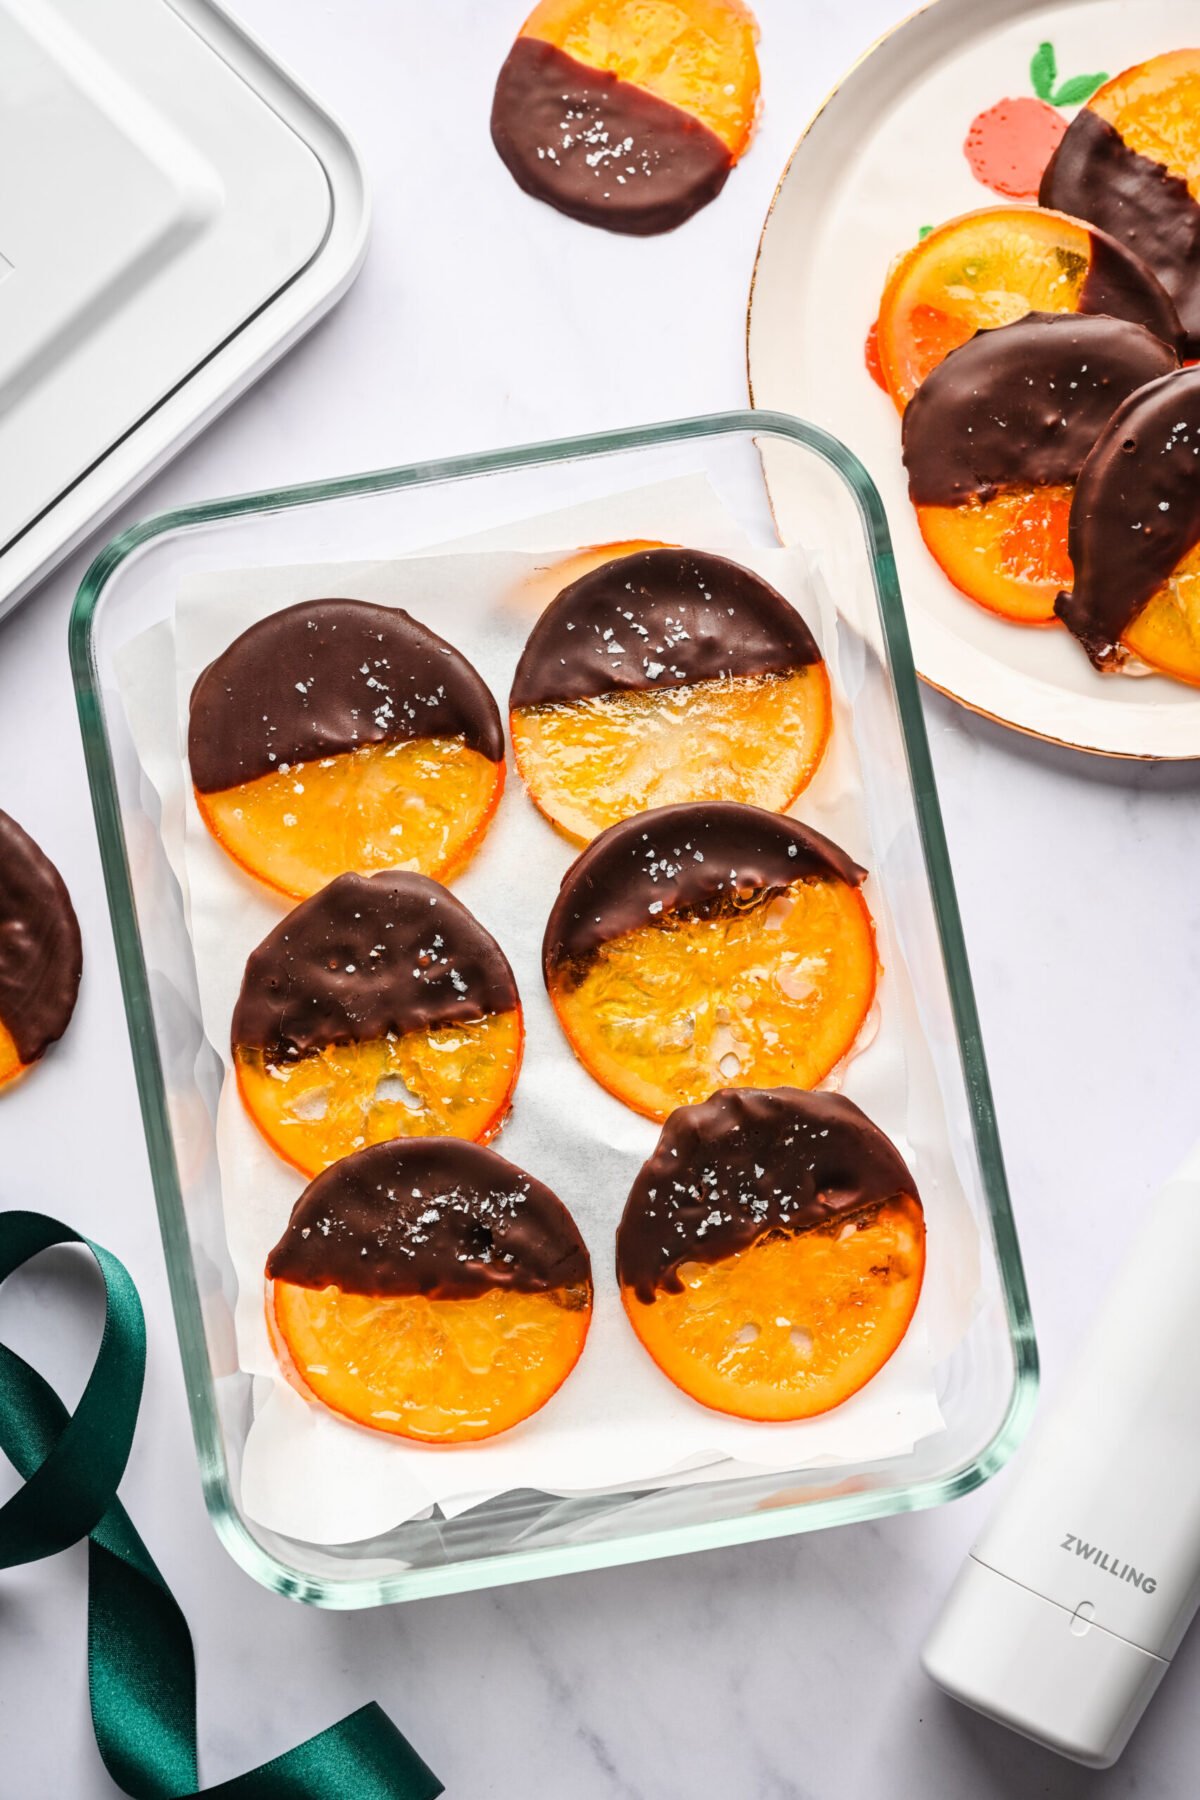
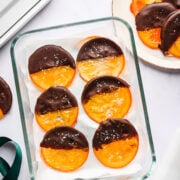
These beautiful candied oranges are dipped in dark chocolate for a delicious holiday treat. These are perfect for a DIY holiday gift, garnishing cakes, cocktails, as a snack, or for making festive tablescapes.
This post is sponsored by Zwilling. All opinions are our own. This post contains affiliate links, and I may receive commissions for purchases made through links on this post.

Jump to:
Why We Love This Recipe
- Just 2 ingredients: With just oranges and sugar, you can make candied oranges that look and taste amazing.
- Chewy and delicious: If you're a citrus lover, this is a great way to enjoy oranges in a new way: they're soft, chewy, and have a ton of orange flavor. Best of all, they can be safely stored for up to a month in an airtight container.
- Easy process: All you need is a pot and a thermometer to make this recipe. We tested it several times, and it turned out well each time!
Ingredients and Notes
- Oranges: We used navel oranges and sliced them into ⅛" rounds with a mandoline.
- Sugar: We used plain white granulated sugar in this recipe.
- Chocolate: This is optional, but we dipped these in dark chocolate and sprinkled some salt on top.
Equipment
If you want to enjoy the flavor and texture of these candied oranges for as long as possible, then you absolutely need excellent storage containers. The good news is Zwilling's Fresh & Save containers are the absolute best.
These containers can be vacuum sealed to keep food fresh for up to five times longer than regular containers. We've been using Zwilling's Fresh & Save line for years now, and they're the only storage containers we use - there's a drawer in our house that's filled with them, and our fridge is packed with Fresh & Save containers.
Best of all, they're dishwasher safe, microwave safe, freezer safe and they come in plenty of sizes. The glass ones that we show here are also oven safe! So go ahead, try them out!
We also love that the Fresh & Save line has vacuum seal bags – they're ideal for long term freezer storage.
If you're looking to store dried foods in your pantry, Zwilling also has you covered with their CUBE container sets. It's the same vacuum seal technology as the Fresh & Save containers, but made for dry ingredients!
They also come with reusable labels, measuring and prep tools and more for optimal organization. I'm moving into my new house in a few months and can't WAIT to organize my pantry with these Cube containers!
Step-by-step Instructions
PREP: Bring a pot of water to a boil. Prep a separate bowl with ice water and set aside.
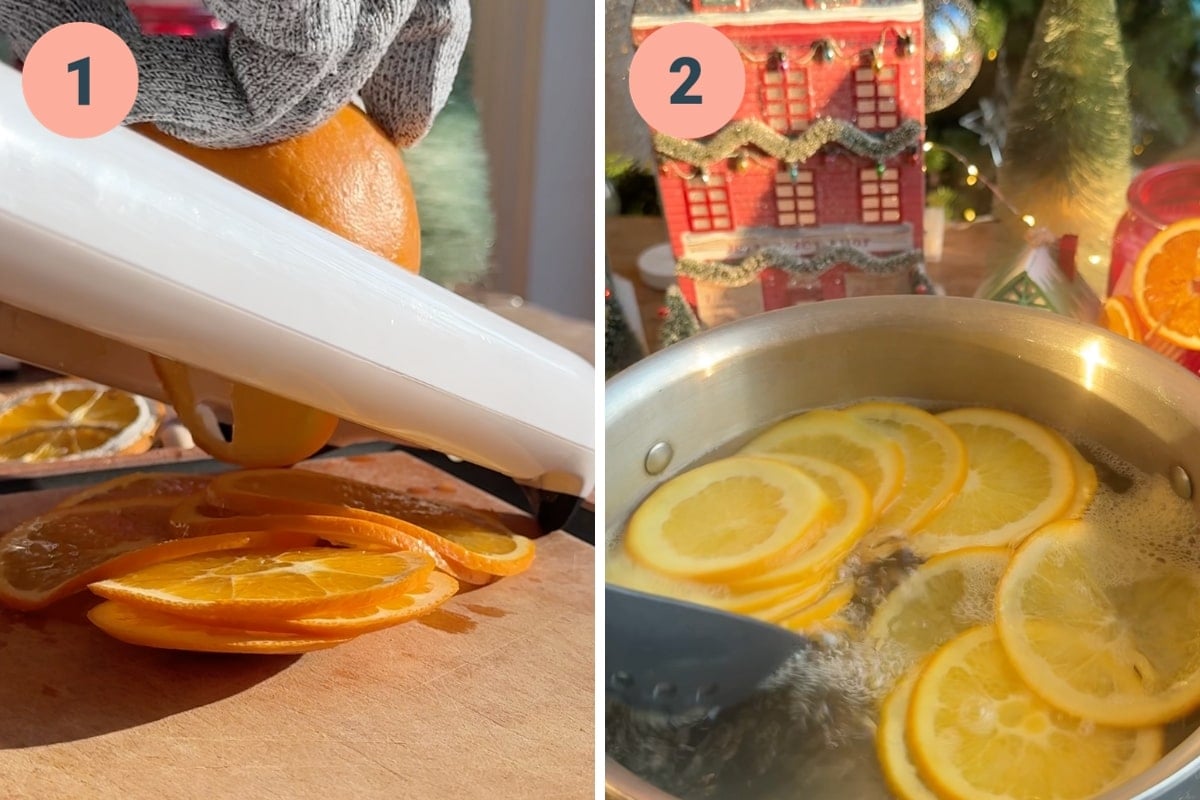
STEP 1: Slice the orange into ⅛” thick slices. A mandoline will help you keep the slices even.
STEP 2: Boil the oranges slices for 2 minutes, then immediately transfer them to the ice water. Once cooled, remove from water and pat dry.
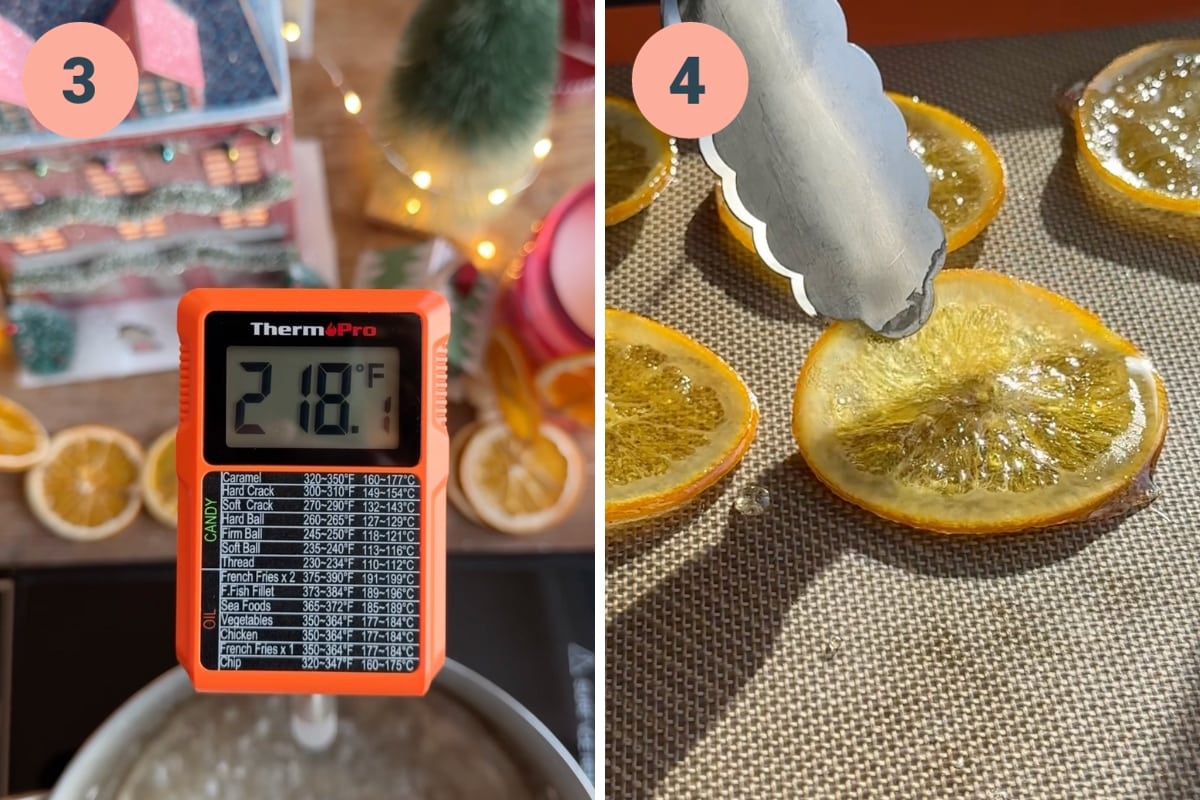
STEP 3: Return the pot to the heat (heavy stainless steel works best here). Add the sugar and water to the pot over medium heat and attach a thermometer to the pot. Stir until the sugar is dissolved, and bring the mixture up to about 220˚F. Add in the orange slices and stir gently, making sure they are all submerged in the syrup.
STEP 4: Bring the syrup up to 250˚F, stirring occasionally. This will take longer than you think – it takes us an average of 20-30 minutes. Once they reach 250˚F, remove from heat and immediately transfer to a silicone baking mat. Parchment paper is fine too, but they may stick slightly. Let cool completely (you can speed this up by moving them to the fridge). For best results, let them dry out at room temperature overnight.
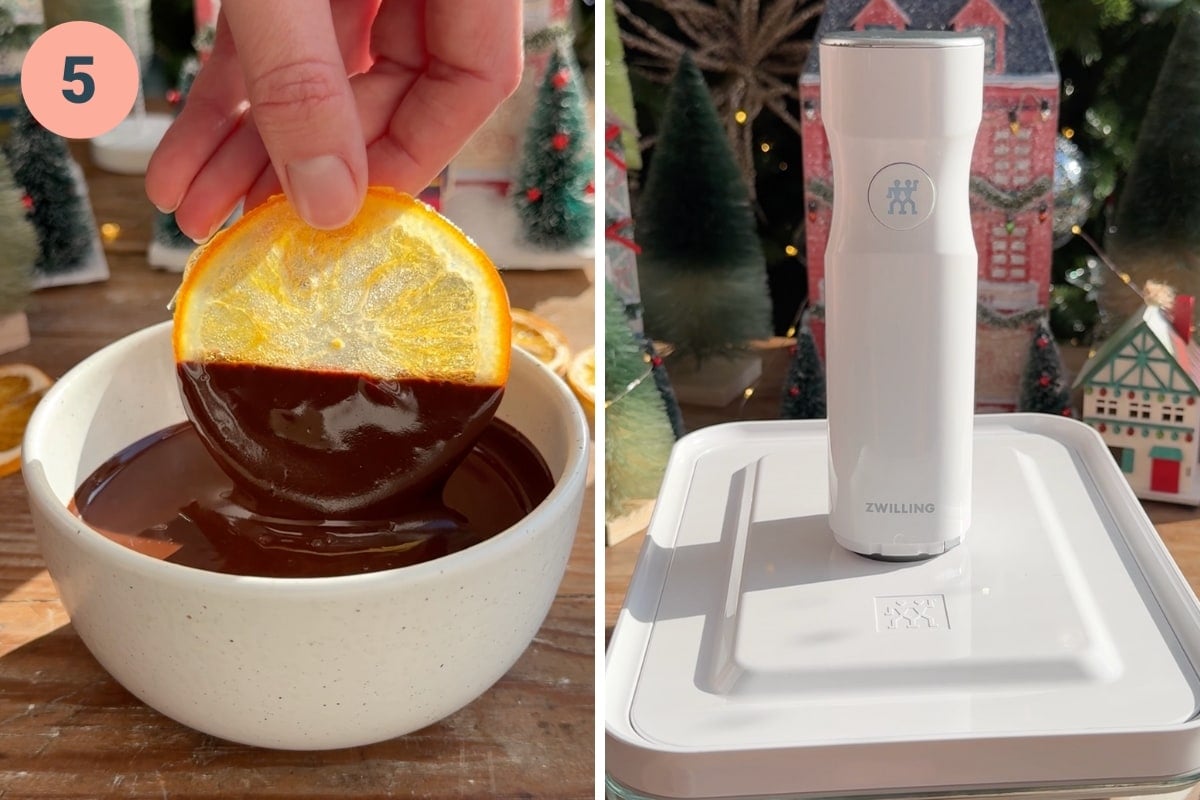
STEP 5: Melt chocolate in a double boiler or in the microwave. Dip each slice in chocolate, then sprinkle with a bit of flaky salt (optional) and let set. If stored properly (like in our Zwilling Fresh & Save containers), they can last for a month at room temperature, or several months in the fridge or freezer.
Expert Tips and FAQs
- Troubleshooting: If your slices are still sticky after 24 hours, try coating them in granulated sugar. The sugar coating will help absorb excess moisture. You can also turn the oven to a very low temperature (200˚F) and place the coated slices in the oven to further dry them out. Keep an eye on them until they reach desired texture.
- Use a mandoline to create even slices.
- Make sure to use a candy thermometer to ensure you're hitting the right temperatures with the sugar.
- Manage your sugar: In our experience, sugar can stay the same temperature for a while and then accelerate in temperature quickly. Be sure to use an accurate instant-read thermometer, and to stir your oranges and sugar frequently (but gently).
- If stored properly (especially if you're using Zwilling Fresh & Save containers), they can last for a month at room temperature, or several months in the fridge or freezer.

Related Recipes


Tried this recipe? Please leave a star ⭐️⭐️⭐️⭐️⭐️ rating below and/or a review in the comments section further down the page. You can also stay in touch with us through social media by following us on Instagram, Pinterest, and Facebook or by subscribing to our newsletter.
Print📖 Recipe

Candied Oranges
- Total Time: 40 minutes
- Yield: 10-15 slices
- Diet: Vegan
Description
These beautiful candied oranges are dipped in dark chocolate for a delicious holiday treat. These are perfect for a DIY holiday gift, garnishing cakes, cocktails, as a snack, or for making festive tablescapes.
Ingredients
- 1 large orange, sliced into ⅛” thick slices
- 2 cups granulated sugar
- 1 ½ cups water
- Dark chocolate, for dipping
- Optional: flaky salt for topping
Instructions
- Bring a pot of water to a boil. Prep a separate bowl with ice water and set aside.
- Slice the orange into ⅛” thick slices. A mandoline will help you keep the slices even.
- Boil the oranges slices for 2 minutes, then immediately transfer them to the ice water. Once cooled, remove from water and pat dry.
- Return the pot to the heat (heavy stainless steel works best here). Add the sugar and water to the pot over medium heat and attach a thermometer to the pot. Stir until the sugar is dissolved, and bring the mixture up to about 220˚F. Add in the orange slices and stir gently, making sure they are all submerged in the syrup.
- Bring the syrup up to 250˚F, stirring occasionally. This will take longer than you think – it takes us an average of 20-30 minutes. Once they reach 250˚F, remove from heat and immediately transfer to a silicone baking mat. Parchment paper is fine too, but they may stick slightly. Let cool completely (you can speed this up by moving them to the fridge). For best results, let them dry out at room temperature overnight.
- Melt chocolate in a double boiler or in the microwave. Dip each slice in chocolate, then sprinkle with a bit of flaky salt (optional) and let set. If stored properly, they can last for a month at room temperature, or several months in the fridge or freezer.
Notes
Troubleshooting: If your slices are still sticky after 24 hours, try coating them in granulated sugar. The sugar coating will help absorb excess moisture. You can also turn the oven to a very low temperature (200˚F) and place the coated slices in the oven to further dry them out. Keep an eye on them until they reach desired texture.
Use a mandoline to create even slices.
Make sure to use a candy thermometer to ensure you're hitting the right temperatures with the sugar.
Manage your sugar: In our experience, sugar can stay the same temperature for a while and then accelerate in temperature quickly. Keep an eye on your thermometer, and stir the sugar frequently.
- Prep Time: 10 minutes
- Cook Time: 30 minutes
- Category: Snacks
- Method: Stovetop
- Cuisine: American
Nutrition
- Serving Size: 3 orange slices
- Calories: 297
- Sugar: 70.3 g
- Sodium: 3.7 mg
- Fat: 1.8 g
- Carbohydrates: 72.1 g
- Fiber: 0.9 g
- Protein: 0.5 g


Nora Miller says
Just a reminder to thoroughly wash the oranges first. This will remove anything sprayed on them.
Sherri says
This recipe worked out great for me! Not sure why everyone was having so much trouble with it.
Vickie says
Where is the simple syrup ratio? I see no amounts of ingredients listed?
Lexi says
Hi! The quantities are in the recipe card above – 2 cups of sugar and 1 1/2 cups of water.
Loretta Erdmann says
Could i use honey instead of sugar and water?
Nan says
This is the 2nd time I’m trying. I love candied oranges and lemons. They were very sticky the first time, so I dried them a bit more in the oven. This time, I am drying them in the dehydrator. Will be trying again, until I get them right! lol
Lexi says
Another tip for if they turn out too sticky is to toss them in some granulated sugar - this helps soak up excess moisture!
Mara says
Thanks for this recipe, looks so delicious! I’ve just finished boiling the oranges, had them on for 40 minutes and could not get past 215F (temp dropped slightly after adding oranges)… any suggestions????
I’m at slight altitude here in Nairobi and our sugar is - different 🤣- I guess maybe a bit less refined. Could that be the issue?
I’ve taken them out to dry and we’ll see what happens.
Brent Harrison says
Ahh sorry to hear that, elevation and type of sugar can definitely effect the final result. It takes quite a bit of time to get the sugar to the right temperature, and you'll need your heat on high for sure.
Dan says
How much chocolate would you recommend using?
Lexi says
We used about 4 oz